Christie CP4440-RGB Installation And Setup Manual
Hide thumbs
Also See for CP4440-RGB:
- User manual (112 pages) ,
- Installation and setup manual (77 pages) ,
- User manual (104 pages)
Table of Contents
Advertisement
Quick Links
Advertisement
Table of Contents

Subscribe to Our Youtube Channel
Related Manuals for Christie CP4440-RGB


Summary of Contents for Christie CP4440-RGB
- Page 1 Installation and Setup Guide 020-103072-05 CP4440-RGB and CP4450-...
- Page 2 Christie's control such as maintenance of the product in proper working conditions. Performance specifications are based on information available at the time of printing. Christie makes no warranty of any kind with regard to this material, including, but not limited to, implied warranties of fitness for a particular purpose.
-
Page 3: Table Of Contents
Connecting the chiller communication cable....... . 35 CP4440-RGB and CP4450-RGB Installation and Setup Guide 020-103072-05 Rev. 1 (01-2023) Copyright © 2023 Christie Digital Systems USA, Inc. All rights reserved. If printed, please recycle this document after use. - Page 4 Maintaining the chiller..........44 System operation for CP4440-RGB and CP4450-RGB projectors..... . 44 Turning on or off the projector.
- Page 5 Environmental........... . 86 CP4440-RGB and CP4450-RGB Installation and Setup Guide 020-103072-05 Rev. 1 (01-2023) Copyright © 2023 Christie Digital Systems USA, Inc. All rights reserved. If printed, please recycle this document after use.
-
Page 6: Safety Precautions
Safety precautions Learn about the safety precautions related to the Christie CP4440-RGB and CP4450-RGB projector. This projector is intended for use in a cinema environment. General safety precautions Read all safety and warning guidelines before installing or operating the projector. -
Page 7: Ac Power Precautions
The following show the zones for ocular and skin hazard distances. CP4440-RGB and CP4450-RGB Installation and Setup Guide 020-103072-05 Rev. 1 (01-2023) Copyright © 2023 Christie Digital Systems USA, Inc. All rights reserved. If printed, please recycle this document after use. - Page 8 • F—Represents the side view of the projector. The following table lists the hazard distance for the Christie projector lens with the zoom adjusted to its most hazardous position. For US and international hazard distances based upon IEC 62471-5:2015, Photobiological safety of lamps and lamp systems –...
- Page 9 163-108100-XX The following give the hazard distance for the projector lens with the zoom adjusted to its most hazardous position. CP4440-RGB/CP4450-RGB hazard distance for HB and UHC lenses CP4440-RGB and CP4450-RGB Installation and Setup Guide 020-103072-05 Rev. 1 (01-2023) Copyright ©...
- Page 10 "No direct exposure to beam shall be permitted". • The Christie Laser Projection System Installation Checklist must be fully completed after the installation and sent to lasercompliance@christiedigital.com. A copy can remain on-site. This checklist can be found as a separate document in the accessory box with the manual.
-
Page 11: Product Labels
Learn about the labels that may be used on the product. Labels on your product may be yellow or black and white. General hazards Hazard warnings also apply to accessories once they are installed in a Christie product that is connected to power. Fire and Shock Hazard To prevent fire or shock hazards, do not expose this product to rain or moisture. -
Page 12: Mandatory Action
Variance Number 2019-V-3343 effective on August 16, 2019. CP4440-RGB and CP4450-RGB Installation and Setup Guide 020-103072-05 Rev. 1 (01-2023) Copyright © 2023 Christie Digital Systems USA, Inc. All rights reserved. If printed, please recycle this document after use. - Page 13 To avoid personal injury, keep hands clear and clothing tied back. CP4440-RGB and CP4450-RGB Installation and Setup Guide 020-103072-05 Rev. 1 (01-2023) Copyright © 2023 Christie Digital Systems USA, Inc. All rights reserved. If printed, please recycle this document after use.
-
Page 14: Introduction
For complete product documentation and technical support, go to www.christiedigital.com. Product documentation For installation, setup, and user information, see the product documentation available on the Christie Digital Systems USA Inc. website. Read all instructions before using or servicing this product. -
Page 15: Related Documentation
CP4440-RGB and CP4450-RGB Service Guide (P/N: 020-103076-XX) • CineLife+ Serial Commands Guide (P/N: 020-103075-XX) CP4440-RGB and CP4450-RGB Installation and Setup Guide 020-103072-05 Rev. 1 (01-2023) Copyright © 2023 Christie Digital Systems USA, Inc. All rights reserved. If printed, please recycle this document after use. -
Page 16: Projector Components
Introduction Projector components Learn about the components of the projector. CP4440-RGB and CP4450-RGB Installation and Setup Guide 020-103072-05 Rev. 1 (01-2023) Copyright © 2023 Christie Digital Systems USA, Inc. All rights reserved. If printed, please recycle this document after use. -
Page 17: Chiller Components
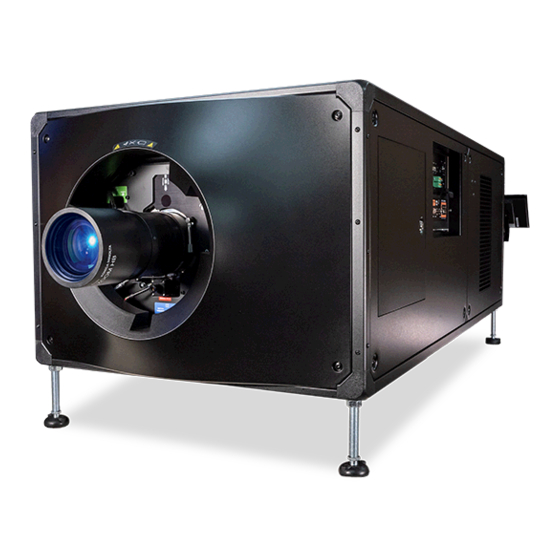
Communication connection for the chiller Adjustable feet—Turn the adjustable feet to increase or decrease the projector height. Chiller components Learn about the components of the chiller, which is used with CP4440-RGB and CP4450-RGB projectors. CP4440-RGB and CP4450-RGB Installation and Setup Guide 020-103072-05 Rev. -
Page 18: List Of Components
™ • Solid-state Christie RealLaser RGB laser illumination CP4440-RGB and CP4450-RGB Installation and Setup Guide 020-103072-05 Rev. 1 (01-2023) Copyright © 2023 Christie Digital Systems USA, Inc. All rights reserved. If printed, please recycle this document after use. -
Page 19: Cinemaster Cinema Calculator Tool
• External chiller unit with exhaust adapter (CP4440-RGB and CP4450-RGB projectors only) CineMaster cinema calculator tool The CineMaster cinema calculator tool helps you calculate and configure the optimal cinema set up. -
Page 20: Installing And Setting Up
Installing and setting up Learn how to position and install the projector. Site requirements To safely install and operate CP4440-RGB and CP4450-RGB projectors, the installation location must meet these minimum requirements. Physical operating environment • Ambient temperature (operating) 10 to 35°C (50 to 95°F ) •... -
Page 21: Power Specifications
This product must be installed in a landscape orientation, with all four feet supported on a level surface. Do not install or operate the projector in an inverted position. If your site has any installation requirements other than a typical theater projection booth, contact Christie for assistance. CP4440-RGB and CP4450-RGB Installation and Setup Guide 020-103072-05 Rev. - Page 22 The following illustrations show the structural frame members of the projector: Lower projector frame Right side projector frame CP4440-RGB and CP4450-RGB Installation and Setup Guide 020-103072-05 Rev. 1 (01-2023) Copyright © 2023 Christie Digital Systems USA, Inc. All rights reserved. If printed, please recycle this document after use.
- Page 23 Related information Light intensity hazard distance (on page 7) CP4440-RGB and CP4450-RGB Installation and Setup Guide 020-103072-05 Rev. 1 (01-2023) Copyright © 2023 Christie Digital Systems USA, Inc. All rights reserved. If printed, please recycle this document after use.
-
Page 24: Connecting To Power
• SHOCK HAZARD! A dedicated, protected ground or earth wire must be installed on the product by Christie qualified technicians or electricians before it can be connected to power. • A certified electrician must be present during installation to make sure the installation meets the local electrical code. - Page 25 1. Remove the rear cover of the projector by unscrewing the six screws. CP4440-RGB and CP4450-RGB Installation and Setup Guide 020-103072-05 Rev. 1 (01-2023) Copyright © 2023 Christie Digital Systems USA, Inc. All rights reserved. If printed, please recycle this document after use.
- Page 26 The AC supplies are routed to each terminal block through an appropriate strain relief mounted on the knockout plates. CP4440-RGB and CP4450-RGB Installation and Setup Guide 020-103072-05 Rev. 1 (01-2023) Copyright © 2023 Christie Digital Systems USA, Inc. All rights reserved. If printed, please recycle this document after use.
- Page 27 Line (black or brown) and Neutral (white or blue) connections. CP4440-RGB and CP4450-RGB Installation and Setup Guide 020-103072-05 Rev. 1 (01-2023) Copyright © 2023 Christie Digital Systems USA, Inc. All rights reserved. If printed, please recycle this document after use.
-
Page 28: Connecting To An Uninterruptible Power Supply
North America 250V/20A 108-386108-XX Japan 250V/20A 108-370101-XX China 250V/16A 108-372103-XX CP4440-RGB and CP4450-RGB Installation and Setup Guide 020-103072-05 Rev. 1 (01-2023) Copyright © 2023 Christie Digital Systems USA, Inc. All rights reserved. If printed, please recycle this document after use. - Page 29 12V power supply A 12V power supply B UPS B plug CP4440-RGB and CP4450-RGB Installation and Setup Guide 020-103072-05 Rev. 1 (01-2023) Copyright © 2023 Christie Digital Systems USA, Inc. All rights reserved. If printed, please recycle this document after use.
- Page 30 UPS circuit breaker UPS inlet (200 - 240 VAC, 10 A) CP4440-RGB and CP4450-RGB Installation and Setup Guide 020-103072-05 Rev. 1 (01-2023) Copyright © 2023 Christie Digital Systems USA, Inc. All rights reserved. If printed, please recycle this document after use.
-
Page 31: Installing The Lens
4. Turn the clamp on the lens mount to the open position. CP4440-RGB and CP4450-RGB Installation and Setup Guide 020-103072-05 Rev. 1 (01-2023) Copyright © 2023 Christie Digital Systems USA, Inc. All rights reserved. If printed, please recycle this document after use. -
Page 32: Installing The Touch Panel
2. Attach one end of the touch panel mounting arm over the ball joint on the rear of the touch panel. CP4440-RGB and CP4450-RGB Installation and Setup Guide 020-103072-05 Rev. 1 (01-2023) Copyright © 2023 Christie Digital Systems USA, Inc. All rights reserved. If printed, please recycle this document after use. - Page 33 7. To install the touch panel on either side of the projector, uninstall the four screws securing the ball mount and remove it. CP4440-RGB and CP4450-RGB Installation and Setup Guide 020-103072-05 Rev. 1 (01-2023) Copyright © 2023 Christie Digital Systems USA, Inc. All rights reserved. If printed, please recycle this document after use.
-
Page 34: Projector Power Modes
Projector power modes The CP4440-RGB and CP4450-RGB projectors track laser operation hours for the laser optical sub- systems (LOS) and the lamp operation hours for xenon lamps. The projector operates with the following power modes:... -
Page 35: Setting Up The Chiller Unit
The chiller communication cable includes an RS-485 connector, attached cable with rubber grommet, and three terminal connectors. The installation of the chiller communication cable must be performed by a Christie qualified technician. 1. Remove the cover for the signal terminal by unscrewing the two cover screws. - Page 36 5. Connect the RS-485 connector to a serial cable and into the RS-485 communication port on the projector. CP4440-RGB and CP4450-RGB Installation and Setup Guide 020-103072-05 Rev. 1 (01-2023) Copyright © 2023 Christie Digital Systems USA, Inc. All rights reserved. If printed, please recycle this document after use.
-
Page 37: Connecting The Chiller Power Cable
The grommet provides strain relief protection for the power cable. CP4440-RGB and CP4450-RGB Installation and Setup Guide 020-103072-05 Rev. 1 (01-2023) Copyright © 2023 Christie Digital Systems USA, Inc. All rights reserved. If printed, please recycle this document after use. - Page 38 To avoid pinching the power cable, make sure the cable and rubber grommet are placed inside the cover cutout. CP4440-RGB and CP4450-RGB Installation and Setup Guide 020-103072-05 Rev. 1 (01-2023) Copyright © 2023 Christie Digital Systems USA, Inc. All rights reserved. If printed, please recycle this document after use.
-
Page 39: Connecting The Coolant Lines
6. Re-attach the terminal block cover using the two cover screws. 7. Plug the power cable into an appropriately rated AC power outlet. Connecting the coolant lines The required coolant lines and hose accessories are available in the Christie Chiller Setup Kit Plumbing (P/N: 163-149105-XX). •... - Page 40 Attach the Chiller Inlet quick connector (female) to the projector outlet port (male). CP4440-RGB and CP4450-RGB Installation and Setup Guide 020-103072-05 Rev. 1 (01-2023) Copyright © 2023 Christie Digital Systems USA, Inc. All rights reserved. If printed, please recycle this document after use.
-
Page 41: Installing The Chiller Duct
1. Attach the duct over the exhaust fan on the top of the chiller unit. The duct is available in the Christie Chiller Setup Kit Air Ducts (P/N: 163-150107-XX). For detailed information on connecting the chiller duct, refer to the Christie Chiller Setup Kit Instruction Sheet P/N: 020-103145-XX. -
Page 42: Setting The Chiller Setpoint
6. Make sure the chiller communication cable between the projector and the chiller is connected correctly. To avoid thermal shutdown conditions in dual projector installations, Christie recommends running each chiller and its attached projector separately, with light on, to confirm chiller communication cables are not cross-connected relative to the coolant lines. - Page 43 Creating a new laser file for external chiller-based projectors (on page 71) CP4440-RGB and CP4450-RGB Installation and Setup Guide 020-103072-05 Rev. 1 (01-2023) Copyright © 2023 Christie Digital Systems USA, Inc. All rights reserved. If printed, please recycle this document after use.
-
Page 44: Maintaining The Chiller
Dispose of coolant in accordance with local regulations. System operation for CP4440-RGB and CP4450- RGB projectors Understand the correct sequence for powering up and operating CP4440-RGB and CP4450-RGB systems. The connected chiller must always be turned on first and turned off only after the projector is turned off. -
Page 45: Logging Into The Projector
4. Verify the marriage ring is installed correctly and an anti-tamper alarm does not appear on the touch panel. Disposing of the product packaging Once the product has been installed and set up, Christie recommends reusing or recycling the product packaging according to your local regulations. Completing the installation checklist Complete the provided installation checklist (P/N: 020-103137-XX) and return it to Christie. -
Page 46: Video Input Panel
Not used. (SDVoE) port USB-C port Connects the projector touch panel. CP4440-RGB and CP4450-RGB Installation and Setup Guide 020-103072-05 Rev. 1 (01-2023) Copyright © 2023 Christie Digital Systems USA, Inc. All rights reserved. If printed, please recycle this document after use. -
Page 47: Hdmi Video Source
Fractional 1/1.001 frame rates, 1920 x 1080 (HD), and 3840 x 2160 (UHD) formats are also supported. CP4440-RGB and CP4450-RGB Installation and Setup Guide 020-103072-05 Rev. 1 (01-2023) Copyright © 2023 Christie Digital Systems USA, Inc. All rights reserved. If printed, please recycle this document after use. - Page 48 24, 25, 30, 50, 60 Y'C' /RGB/ 8/10/12 bpc Frame-packing 4:4:4 /4:2:2 CP4440-RGB and CP4450-RGB Installation and Setup Guide 020-103072-05 Rev. 1 (01-2023) Copyright © 2023 Christie Digital Systems USA, Inc. All rights reserved. If printed, please recycle this document after use.
-
Page 49: Sdi Video Source
Single-link 2D image formats The following single-link 2D SDI image formats are supported. CP4440-RGB and CP4450-RGB Installation and Setup Guide 020-103072-05 Rev. 1 (01-2023) Copyright © 2023 Christie Digital Systems USA, Inc. All rights reserved. If printed, please recycle this document after use. - Page 50 /RGB component at 12.0 Gb/s (ST 2082-10) mode 1 structure CP4440-RGB and CP4450-RGB Installation and Setup Guide 020-103072-05 Rev. 1 (01-2023) Copyright © 2023 Christie Digital Systems USA, Inc. All rights reserved. If printed, please recycle this document after use.
- Page 51 24, 25, 30, 50, Y'C' /4:4:4(4) 10 bpc HD 720p Y'C' /RGB CP4440-RGB and CP4450-RGB Installation and Setup Guide 020-103072-05 Rev. 1 (01-2023) Copyright © 2023 Christie Digital Systems USA, Inc. All rights reserved. If printed, please recycle this document after use.
- Page 52 Y'C' component at 12.0 Gb/s (ST 2082-10) mode 2 structure CP4440-RGB and CP4450-RGB Installation and Setup Guide 020-103072-05 Rev. 1 (01-2023) Copyright © 2023 Christie Digital Systems USA, Inc. All rights reserved. If printed, please recycle this document after use.
- Page 53 24, 25, 30 Y'C' /RGB/ 10 bpc 2160p 4:4:4:(4) Y'C' /RGB CP4440-RGB and CP4450-RGB Installation and Setup Guide 020-103072-05 Rev. 1 (01-2023) Copyright © 2023 Christie Digital Systems USA, Inc. All rights reserved. If printed, please recycle this document after use.
- Page 54 Y'C' /4:2:2 12 bpc Y'C' component at dual-link 3 Gb/s CP4440-RGB and CP4450-RGB Installation and Setup Guide 020-103072-05 Rev. 1 (01-2023) Copyright © 2023 Christie Digital Systems USA, Inc. All rights reserved. If printed, please recycle this document after use.
- Page 55 Input 1 = SDI 1 and SDI 2 • Input 2 = SDI 3 and SDI 4 CP4440-RGB and CP4450-RGB Installation and Setup Guide 020-103072-05 Rev. 1 (01-2023) Copyright © 2023 Christie Digital Systems USA, Inc. All rights reserved. If printed, please recycle this document after use.
- Page 56 4:4:4:(4) component at dual-link 6 Gb/s (ST 2081-11) mode 1 CP4440-RGB and CP4450-RGB Installation and Setup Guide 020-103072-05 Rev. 1 (01-2023) Copyright © 2023 Christie Digital Systems USA, Inc. All rights reserved. If printed, please recycle this document after use.
- Page 57 3 Gb/s (ST 425-5) structure 4 level CP4440-RGB and CP4450-RGB Installation and Setup Guide 020-103072-05 Rev. 1 (01-2023) Copyright © 2023 Christie Digital Systems USA, Inc. All rights reserved. If printed, please recycle this document after use.
- Page 58 12 Gb/s (ST 2082-12) mode 2 structure CP4440-RGB and CP4450-RGB Installation and Setup Guide 020-103072-05 Rev. 1 (01-2023) Copyright © 2023 Christie Digital Systems USA, Inc. All rights reserved. If printed, please recycle this document after use.
- Page 59 Y'C' /4:2:2 12 bpc Y'C' component at quad-link 3 Gb/s CP4440-RGB and CP4450-RGB Installation and Setup Guide 020-103072-05 Rev. 1 (01-2023) Copyright © 2023 Christie Digital Systems USA, Inc. All rights reserved. If printed, please recycle this document after use.
- Page 60 4:4:4 component at 12.0 Gb/s (ST 2082-10) mode 2 structure CP4440-RGB and CP4450-RGB Installation and Setup Guide 020-103072-05 Rev. 1 (01-2023) Copyright © 2023 Christie Digital Systems USA, Inc. All rights reserved. If printed, please recycle this document after use.
- Page 61 96, 100, 120 Y'C' /4:2:2 10 bpc HD 1080p Y'C' CP4440-RGB and CP4450-RGB Installation and Setup Guide 020-103072-05 Rev. 1 (01-2023) Copyright © 2023 Christie Digital Systems USA, Inc. All rights reserved. If printed, please recycle this document after use.
-
Page 62: Displayport Video Source
The following image formats are supported by the DisplayPort inputs. Frame rates also include fractional 1/1.001 frame rates. CP4440-RGB and CP4450-RGB Installation and Setup Guide 020-103072-05 Rev. 1 (01-2023) Copyright © 2023 Christie Digital Systems USA, Inc. All rights reserved. If printed, please recycle this document after use. - Page 63 The following single-link DisplayPort PC image formats are supported. Format Cables Frame rate Sampling Bit-depth (Hz) 1280x800 8bpc CP4440-RGB and CP4450-RGB Installation and Setup Guide 020-103072-05 Rev. 1 (01-2023) Copyright © 2023 Christie Digital Systems USA, Inc. All rights reserved. If printed, please recycle this document after use.
-
Page 64: Integrated Media Block (Imb) Video Source
Enables connection of MPEG-2 video formats. Enables connection of MPEG-2 MXF interop video formats. Enables connection of SMPTE-compatible 2D and 3D video formats Contact Christie Technical Support to learn which S2 and S4 IMB devices are compatible with Christie projectors. Series 2 IMB video formats S2 IMB video format support is determined by the IMB make and model. - Page 65 X’Y’Z’ (4:4:4) 12-bits SMPTE 428-11-2013 2048x1080 50.0 X’Y’Z’ (4:4:4) 12-bits CP4440-RGB and CP4450-RGB Installation and Setup Guide 020-103072-05 Rev. 1 (01-2023) Copyright © 2023 Christie Digital Systems USA, Inc. All rights reserved. If printed, please recycle this document after use.
- Page 66 48.0 x 2 Am1:2016 SMPTE 2048-1-2011 50.0 x 2 Am1:2016 CP4440-RGB and CP4450-RGB Installation and Setup Guide 020-103072-05 Rev. 1 (01-2023) Copyright © 2023 Christie Digital Systems USA, Inc. All rights reserved. If printed, please recycle this document after use.
-
Page 67: Series 4 Imb Video Formats
8-bits 625 SD 800 x 600 120.0 120.0 23.0 8-bits CP4440-RGB and CP4450-RGB Installation and Setup Guide 020-103072-05 Rev. 1 (01-2023) Copyright © 2023 Christie Digital Systems USA, Inc. All rights reserved. If printed, please recycle this document after use. - Page 68 12-bits 2048 x 1080 48.0 x 2 X’Y’Z’ (4:4:4) 12-bits CP4440-RGB and CP4450-RGB Installation and Setup Guide 020-103072-05 Rev. 1 (01-2023) Copyright © 2023 Christie Digital Systems USA, Inc. All rights reserved. If printed, please recycle this document after use.
-
Page 69: Hdmi Video Source Connection From An Imb
The projector can accept digital video data from HDMI sources connected to applicable IMB devices. The input configurations supported are determined by the IMB device directly. Contact Christie Technical Support to learn which IMB devices provide HDMI source selection from the projector user interface. - Page 70 GP13_POS Pin 18 GPI3_NEG Pin 19 — Pin 20 — CP4440-RGB and CP4450-RGB Installation and Setup Guide 020-103072-05 Rev. 1 (01-2023) Copyright © 2023 Christie Digital Systems USA, Inc. All rights reserved. If printed, please recycle this document after use.
-
Page 71: Managing The Light Source
13. Adjust the brightness level until you achieve the required brightness at the specified white point. CP4440-RGB and CP4450-RGB Installation and Setup Guide 020-103072-05 Rev. 1 (01-2023) Copyright © 2023 Christie Digital Systems USA, Inc. All rights reserved. If printed, please recycle this document after use. -
Page 72: Modifying An Existing Laser File
12. To save the new settings, select Save. CP4440-RGB and CP4450-RGB Installation and Setup Guide 020-103072-05 Rev. 1 (01-2023) Copyright © 2023 Christie Digital Systems USA, Inc. All rights reserved. If printed, please recycle this document after use. -
Page 73: Copying Existing Laser Settings To A New File
4. Select Delete. 5. To confirm the deletion, select Delete. CP4440-RGB and CP4450-RGB Installation and Setup Guide 020-103072-05 Rev. 1 (01-2023) Copyright © 2023 Christie Digital Systems USA, Inc. All rights reserved. If printed, please recycle this document after use. -
Page 74: Adjusting The Image
Learn how to adjust image geometry so it displays correctly. Calibrating the Intelligent Lens System On CP4440-RGB and CP4450-RGB projectors, the Intelligent Lens System (ILS) is activated by default. Use the Auto Calibrate feature of the ILS to find and compensate for motor backlash, and to determine the movement range for the currently installed lens. -
Page 75: Correcting Keystone Effect
2. If the keystone effect is severe, unevenly adjust the feet to compensate for projector tilt. CP4440-RGB and CP4450-RGB Installation and Setup Guide 020-103072-05 Rev. 1 (01-2023) Copyright © 2023 Christie Digital Systems USA, Inc. All rights reserved. If printed, please recycle this document after use. -
Page 76: Displaying A Test Pattern
Adjusting the image Christie recommends using the lens offset to align the center of the image to the center of the screen before correcting the keystone effect. 3. If one side of the image is longer than another, adjust the tilt and level of the projector. - Page 77 6. Loosen the lock screw for the Zoom and Focus paddles. CP4440-RGB and CP4450-RGB Installation and Setup Guide 020-103072-05 Rev. 1 (01-2023) Copyright © 2023 Christie Digital Systems USA, Inc. All rights reserved. If printed, please recycle this document after use.
- Page 78 To make vertical adjustments on the fold mirror, use the purple adjustment knob. CP4440-RGB and CP4450-RGB Installation and Setup Guide 020-103072-05 Rev. 1 (01-2023) Copyright © 2023 Christie Digital Systems USA, Inc. All rights reserved. If printed, please recycle this document after use.
-
Page 79: Adjusting Boresight
Caution! If not avoided, the following could result in minor or moderate injury. • This procedure must be performed by Christie qualified technicians. When making the adjustments, set the light source to minimum power. To following steps are intended to achieve the highest quality image distributed across the full screen. - Page 80 5. Select the RGB-4K-Boresight pattern and display it full screen. Make sure the Uncorrected Color Box option is selected. CP4440-RGB and CP4450-RGB Installation and Setup Guide 020-103072-05 Rev. 1 (01-2023) Copyright © 2023 Christie Digital Systems USA, Inc. All rights reserved. If printed, please recycle this document after use.
- Page 81 2) and turn them until they just touch the base. CP4440-RGB and CP4450-RGB Installation and Setup Guide 020-103072-05 Rev. 1 (01-2023) Copyright © 2023 Christie Digital Systems USA, Inc. All rights reserved. If printed, please recycle this document after use.
-
Page 82: Mechanically Adjusting Dmd Convergence
4. Select the RGB-4K-Convergence test pattern and display it full screen. Make sure the Uncorrected Color Box option is selected. CP4440-RGB and CP4450-RGB Installation and Setup Guide 020-103072-05 Rev. 1 (01-2023) Copyright © 2023 Christie Digital Systems USA, Inc. All rights reserved. If printed, please recycle this document after use. - Page 83 7. Use the Convergence test pattern to assist with adjusting the horizontal and vertical lines. CP4440-RGB and CP4450-RGB Installation and Setup Guide 020-103072-05 Rev. 1 (01-2023) Copyright © 2023 Christie Digital Systems USA, Inc. All rights reserved. If printed, please recycle this document after use.
-
Page 84: Correcting On-Screen Color
For the best stability, Christie recommends setting convergence while rotating the knobs in a clockwise direction. This may require first adjusting convergence by turning the knobs counter- clockwise and finalizing the convergence with a clockwise approach. -
Page 85: Regulatory
Immunity • CISPR 24/EN55024 EMC Requirements – Information Technology Equipment CP4440-RGB and CP4450-RGB Installation and Setup Guide 020-103072-05 Rev. 1 (01-2023) Copyright © 2023 Christie Digital Systems USA, Inc. All rights reserved. If printed, please recycle this document after use. -
Page 86: Environmental
Regulation (EC) No. 1907/2006 on the registration, evaluation, authorization and restriction of chemicals (REACH) and the applicable official amendment(s). CP4440-RGB and CP4450-RGB Installation and Setup Guide 020-103072-05 Rev. 1 (01-2023) Copyright © 2023 Christie Digital Systems USA, Inc. All rights reserved. If printed, please recycle this document after use.
Need help?
Do you have a question about the CP4440-RGB and is the answer not in the manual?
Questions and answers