Christie CineLife+ RGB PLF CP4450-RGB Installation And Setup Manual
Hide thumbs
Also See for CineLife+ RGB PLF CP4450-RGB:
- User manual (112 pages) ,
- Installation and setup manual (87 pages) ,
- User manual (82 pages)
Table of Contents
Advertisement
Quick Links
Advertisement
Table of Contents

Related Manuals for Christie CineLife+ RGB PLF CP4450-RGB


Summary of Contents for Christie CineLife+ RGB PLF CP4450-RGB
- Page 1 Installation and Setup Guide 020-103072-02 CineLife+ RGB PLF CP4450-RGB...
- Page 2 The warranty does not apply to any product where the serial number has been removed or obliterated. The warranty also does not apply to any product sold by a reseller to an end user outside of the country where the reseller is located unless (i) Christie has an office in the country where the end user is located or (ii) the required international warranty fee has been paid.
-
Page 3: Table Of Contents
Connecting the chiller power cable........32 CineLife+ RGB PLF Installation and Setup Guide–CP4450-RGB 020-103072-02 Rev. 1 (09-2019) Copyright 2019 Christie Digital Systems USA, Inc. All rights reserved. ©... - Page 4 Emissions........... . . 58 CineLife+ RGB PLF Installation and Setup Guide–CP4450-RGB 020-103072-02 Rev. 1 (09-2019) Copyright 2019 Christie Digital Systems USA, Inc. All rights reserved. ©...
- Page 5 Environmental........... . 59 CineLife+ RGB PLF Installation and Setup Guide–CP4450-RGB 020-103072-02 Rev. 1 (09-2019) Copyright 2019 Christie Digital Systems USA, Inc. All rights reserved. ©...
-
Page 6: Safety Precautions
Safety precautions Learn about the safety precautions related to the Christie CineLife+ RGB PLF projector. This projector is intended for use in a cinema environment. General safety precautions Read all safety and warning guidelines before installing or operating the projector. -
Page 7: Ac Power Precautions
EXTREME BRIGHTNESS! Do not place reflective objects in the product light path. The following diagram and table show the zones for ocular and skin hazard distances: CineLife+ RGB PLF Installation and Setup Guide–CP4450-RGB 020-103072-02 Rev. 1 (09-2019) Copyright 2019 Christie Digital Systems USA, Inc. All rights reserved. ©... - Page 8 E—Represents the top view of the projector. • F—Represents the side view of the projector. The following table lists the hazard distance for the Christie projector lens with the zoom adjusted to its most hazardous position. CP4450-RGB For US and international hazard distances based upon IEC 62471-5:2015, Photobiological safety of lamps and lamp systems –...
-
Page 9: Product Labels
Learn about the labels that may be used on the product. Labels on your product may be yellow or black and white. General hazards Hazard warnings also apply to accessories once they are installed in a Christie product that is connected to power. Fire and Shock Hazard To prevent fire or shock hazards, do not expose this product to rain or moisture. -
Page 10: Mandatory Action
21 CFR 1040, except with respect to those characteristics authorized by Variance Number 2019-V-3343 effective on August 16, 2019. CineLife+ RGB PLF Installation and Setup Guide–CP4450-RGB 020-103072-02 Rev. 1 (09-2019) Copyright 2019 Christie Digital Systems USA, Inc. All rights reserved. ©... - Page 11 Indicates moving parts hazard for the motorized lens mount. To avoid personal injury, keep hands clear and clothing tied back. CineLife+ RGB PLF Installation and Setup Guide–CP4450-RGB 020-103072-02 Rev. 1 (09-2019) Copyright 2019 Christie Digital Systems USA, Inc. All rights reserved. ©...
-
Page 12: Introduction
For complete production documentation and technical support, go to www.christiedigital.com. Product documentation For installation, setup, and user information, see the product documentation available on the Christie Digital Systems USA Inc. website. Read all instructions before using or servicing this product. -
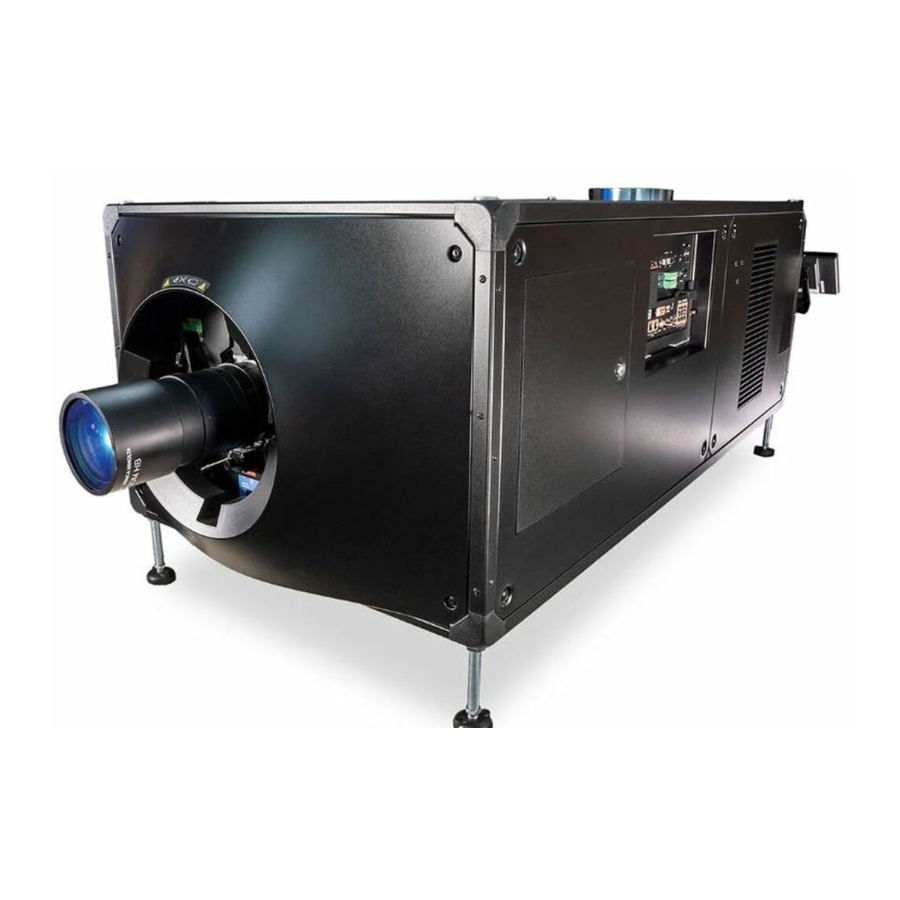
Page 13: Projector Components
Introduction Projector components Learn about the components of the projector. CineLife+ RGB PLF Installation and Setup Guide–CP4450-RGB 020-103072-02 Rev. 1 (09-2019) Copyright 2019 Christie Digital Systems USA, Inc. All rights reserved. ©... - Page 14 Communication connection for the chiller Adjustable feet Turn the adjustable feet to increase or decrease the projector height. CineLife+ RGB PLF Installation and Setup Guide–CP4450-RGB 020-103072-02 Rev. 1 (09-2019) Copyright 2019 Christie Digital Systems USA, Inc. All rights reserved. ©...
-
Page 15: Chiller Components
Verify that all components were received with the projector. • Touch panel, touch panel harness, and panel mounting arm CineLife+ RGB PLF Installation and Setup Guide–CP4450-RGB 020-103072-02 Rev. 1 (09-2019) Copyright 2019 Christie Digital Systems USA, Inc. All rights reserved. ©... -
Page 16: Key Features
Technical support Technical support for Christie products is available at: • North and South America: +1-800-221-8025 or Support.Americas@christiedigital.com CineLife+ RGB PLF Installation and Setup Guide–CP4450-RGB 020-103072-02 Rev. 1 (09-2019) Copyright 2019 Christie Digital Systems USA, Inc. All rights reserved. ©... - Page 17 Europe, Middle East, and Africa: +44 (0) 1189 778111 or Support.EMEA@christiedigital.com • Asia Pacific: +65 6877-8737 or Support.APAC@christiedigital.com • Christie Managed Services: +1-800-550-3061 or NOC@christiedigital.com CineLife+ RGB PLF Installation and Setup Guide–CP4450-RGB 020-103072-02 Rev. 1 (09-2019) Copyright 2019 Christie Digital Systems USA, Inc. All rights reserved. ©...
-
Page 18: Installing And Setting Up
The chiller is connected to AC power through a power supply terminal located at the front of the chiller unit. CineLife+ RGB PLF Installation and Setup Guide–CP4450-RGB 020-103072-02 Rev. 1 (09-2019) Copyright 2019 Christie Digital Systems USA, Inc. All rights reserved. ©... -
Page 19: Power Specifications
Do not install or operate the projector in an inverted position. If your site has any installation requirements other than a typical theater projection booth, contact Christie for assistance. Before lifting and positioning the projector, refer to the light intensity hazard distances. -
Page 20: Connecting To Power
• SHOCK HAZARD! A dedicated, protected ground or earth wire must be installed on the product by Christie qualified technicians or electricians before it can be connected to power. • A certified electrician must be present during installation to ensure the installation meets the local electrical code. - Page 21 Main input circuit breakers (A and B) 1. Remove the rear cover of the projector by unscrewing the six captive screws. CineLife+ RGB PLF Installation and Setup Guide–CP4450-RGB 020-103072-02 Rev. 1 (09-2019) Copyright 2019 Christie Digital Systems USA, Inc. All rights reserved. ©...
- Page 22 The AC supplies are routed to each terminal block through an appropriate strain relief mounted on the knockout plates. CineLife+ RGB PLF Installation and Setup Guide–CP4450-RGB 020-103072-02 Rev. 1 (09-2019) Copyright 2019 Christie Digital Systems USA, Inc. All rights reserved. ©...
- Page 23 Neutral (N) terminal connectors, starting first with the Ground (green) connection, followed by the Line (black or brown) and Neutral (white or blue) connections. CineLife+ RGB PLF Installation and Setup Guide–CP4450-RGB 020-103072-02 Rev. 1 (09-2019) Copyright 2019 Christie Digital Systems USA, Inc. All rights reserved. ©...
-
Page 24: Connecting To An Uninterruptible Power Supply
The following table lists the part numbers for the optional UPS power cords for each region. Description Part Number North America 250V/20A 108-386108-XX Japan 250V/20A 108-370101-XX China 250V/16A 108-372103-XX CineLife+ RGB PLF Installation and Setup Guide–CP4450-RGB 020-103072-02 Rev. 1 (09-2019) Copyright 2019 Christie Digital Systems USA, Inc. All rights reserved. ©... - Page 25 The UPS is connected through two 12V power supplies on the projector. The following illustration shows the power supplies and connections. 12V power supply A 12V power supply B UPS B plug CineLife+ RGB PLF Installation and Setup Guide–CP4450-RGB 020-103072-02 Rev. 1 (09-2019) Copyright 2019 Christie Digital Systems USA, Inc. All rights reserved. ©...
-
Page 26: Installing The Lens
The lens seals the projection head, preventing contaminants from entering the main electronics area. Before installing the lens, ensure that you turn off the projector and the circuit breaker switches. CineLife+ RGB PLF Installation and Setup Guide–CP4450-RGB 020-103072-02 Rev. 1 (09-2019) Copyright 2019 Christie Digital Systems USA, Inc. All rights reserved. ©... - Page 27 5. Connect the lens zoom motor to the two zoom motor harness connectors. 6. Lock the lens assembly in place by rotating the lens clamp downward. CineLife+ RGB PLF Installation and Setup Guide–CP4450-RGB 020-103072-02 Rev. 1 (09-2019) Copyright 2019 Christie Digital Systems USA, Inc. All rights reserved. ©...
-
Page 28: Installing The Touch Panel
3. While supporting the touch panel, fit the other end of the touch panel mounting arm over the ball joint on the rear panel of the projector. CineLife+ RGB PLF Installation and Setup Guide–CP4450-RGB 020-103072-02 Rev. 1 (09-2019) Copyright 2019 Christie Digital Systems USA, Inc. All rights reserved. ©... -
Page 29: Projector Power Modes
The CineLife+ RGB PLF projectors track laser operation hours for the laser optical sub-systems (LOS). The projector operates with the following power modes: CineLife+ RGB PLF Installation and Setup Guide–CP4450-RGB 020-103072-02 Rev. 1 (09-2019) Copyright 2019 Christie Digital Systems USA, Inc. All rights reserved. ©... -
Page 30: Setting Up The Chiller Unit
The chiller communication cable includes an RS-232 connector, attached cable with rubber grommet, and three terminal connectors. The installation of the chiller communication cable must be performed by a Christie qualified technician. 1. Remove the cover for the signal terminal by unscrewing the two cover screws. - Page 31 5. Connect the RS-232 connector to a serial cable and into the RS-232 communication port on the projector. CineLife+ RGB PLF Installation and Setup Guide–CP4450-RGB 020-103072-02 Rev. 1 (09-2019) Copyright 2019 Christie Digital Systems USA, Inc. All rights reserved. ©...
-
Page 32: Connecting The Chiller Power Cable
2. Ensure the rubber grommet is installed on the cable at the connector end. The grommet provides strain relief protection for the power cable. CineLife+ RGB PLF Installation and Setup Guide–CP4450-RGB 020-103072-02 Rev. 1 (09-2019) Copyright 2019 Christie Digital Systems USA, Inc. All rights reserved. ©... - Page 33 5. Route the power cable through the slot provided on the terminal block cover. To avoid pinching the power cable, ensure the cable and rubber grommet are placed inside the cover cutout. CineLife+ RGB PLF Installation and Setup Guide–CP4450-RGB 020-103072-02 Rev. 1 (09-2019) Copyright 2019 Christie Digital Systems USA, Inc. All rights reserved. ©...
-
Page 34: Connecting The Coolant Lines
6. Re-attach the terminal block cover using the two cover screws. 7. Plug the power cable into an appropriately rated AC power outlet. Connecting the coolant lines The required coolant lines and hose accessories are available in the Christie Chiller Setup Kit (P/N: 163-127101-XX). •... - Page 35 Attach the Chiller Inlet quick connector (female) to the projector outlet port (male). CineLife+ RGB PLF Installation and Setup Guide–CP4450-RGB 020-103072-02 Rev. 1 (09-2019) Copyright 2019 Christie Digital Systems USA, Inc. All rights reserved. ©...
-
Page 36: Installing The Chiller Duct
1. Attach the duct over the exhaust fan on the top of the chiller unit. The duct is available in the Christie chiller setup kit (P/N: 163-127101-XX). For detailed information on connecting the chiller duct, refer to the Christie Chiller Setup Kit Instruction Sheet P/N: 020-103145-XX. - Page 37 7. Ensure the chiller communication cable between the projector and the chiller is connected correctly. To avoid thermal shutdown conditions in dual projector installations, Christie recommends running each chiller and its attached projector separately, with light on, to confirm that chiller communication cables are not cross-connected relative to the coolant lines.
-
Page 38: Setting The Chiller Setpoint
Related information Creating a new laser file (on page 44) CineLife+ RGB PLF Installation and Setup Guide–CP4450-RGB 020-103072-02 Rev. 1 (09-2019) Copyright 2019 Christie Digital Systems USA, Inc. All rights reserved. ©... -
Page 39: Maintaining The Chiller
If the light source is on when turning off the projector, the light source enters a ten-minute cool-down period automatically. CineLife+ RGB PLF Installation and Setup Guide–CP4450-RGB 020-103072-02 Rev. 1 (09-2019) Copyright 2019 Christie Digital Systems USA, Inc. All rights reserved. ©... -
Page 40: Logging On To The Projector
4. Verify that the marriage ring is installed correctly and an anti-tamper alarm does not appear on the touch panel. Completing the installation checklist Complete the provided installation checklist (P/N: 020-103137-XX) and return it to Christie. CineLife+ RGB PLF Installation and Setup Guide–CP4450-RGB 020-103072-02 Rev. 1 (09-2019) Copyright 2019 Christie Digital Systems USA, Inc. -
Page 41: Connecting Devices To The Projector And Establishing Communication
Understand the inputs on the projector. Serial Digital Interface (SDI) ports (SDI 1, SDI 2, SDI 3, and SDI 4) for 12G input. CineLife+ RGB PLF Installation and Setup Guide–CP4450-RGB 020-103072-02 Rev. 1 (09-2019) Copyright 2019 Christie Digital Systems USA, Inc. All rights reserved. ©... -
Page 42: Projector Led Status Indicators
Unacknowledged critical error Yellow: Off Red: Flashes three times per second Green: Off Acknowledged critical error Yellow: Off Red: Solid CineLife+ RGB PLF Installation and Setup Guide–CP4450-RGB 020-103072-02 Rev. 1 (09-2019) Copyright 2019 Christie Digital Systems USA, Inc. All rights reserved. ©... -
Page 43: Connecting The Projector To A Network
For information on connecting devices to the 3D port on the projector, refer to the product documentation for the device you are using. CineLife+ RGB PLF Installation and Setup Guide–CP4450-RGB 020-103072-02 Rev. 1 (09-2019) Copyright 2019 Christie Digital Systems USA, Inc. All rights reserved. ©... -
Page 44: Managing The Light Source
For Red, Green, and Blue power levels, system stability may be affected if levels are set below the minimum (MIN) power limit shown. To ensure color and brightness are held at the required levels for your installation, Christie ™... -
Page 45: Modifying An Existing Laser File
System stability may be affected if you set a power level below the minimum power level recommended. When setting the Red or Green power level, Christie recommends setting a level below the maximum (MAX) limit shown. A value below the maximum limit ensures an optimal brightness that can be maintained over time. -
Page 46: Copying Existing Laser Settings To A New File
3. In the Laser File list, select the file to delete. 4. Tap Delete. 5. To confirm the deletion, tap Delete. CineLife+ RGB PLF Installation and Setup Guide–CP4450-RGB 020-103072-02 Rev. 1 (09-2019) Copyright 2019 Christie Digital Systems USA, Inc. All rights reserved. ©... -
Page 47: Adjusting The Image
Do not install or operate the projector in an inverted position. If your site has any installation requirements other than a typical theater projection booth, contact Christie for assistance. The front-to-back tilt of the projector must not exceed 15° in a downward direction. The side-to-side tilt must be within +5°... -
Page 48: Correcting Keystone Effect
Projector tilted vertically to the screen 1. If the image suffers from slight keystone effect, it can be corrected with electronic cropping. CineLife+ RGB PLF Installation and Setup Guide–CP4450-RGB 020-103072-02 Rev. 1 (09-2019) Copyright 2019 Christie Digital Systems USA, Inc. All rights reserved. ©... -
Page 49: Displaying A Test Pattern
Extreme misalignment of projection optics can cause permanent damage to critical optical components. Only Christie qualified technicians can perform internal optical adjustments. The integrator rod and fold mirror adjustments are set by Christie. Make adjustments only if screen shadows are visible. - Page 50 4. To use the integrator rod optical controls, open the access door for the Zoom and Focus paddles. 5. Loosen the lock screw for the Zoom and Focus paddles. CineLife+ RGB PLF Installation and Setup Guide–CP4450-RGB 020-103072-02 Rev. 1 (09-2019) Copyright 2019 Christie Digital Systems USA, Inc. All rights reserved. ©...
- Page 51 8. To make horizontal adjustments on the fold mirror, use the orange adjustment knob. To make vertical adjustments on the fold mirror, use the purple adjustment knob. CineLife+ RGB PLF Installation and Setup Guide–CP4450-RGB 020-103072-02 Rev. 1 (09-2019) Copyright 2019 Christie Digital Systems USA, Inc. All rights reserved. ©...
- Page 52 13. Once the adjustments are complete, tighten the lock screw for the Zoom and Focus paddles, and the two fold mirror screws. 14. Close the access door for the Zoom and Focus paddles. CineLife+ RGB PLF Installation and Setup Guide–CP4450-RGB 020-103072-02 Rev. 1 (09-2019) Copyright 2019 Christie Digital Systems USA, Inc. All rights reserved. ©...
-
Page 53: Adjusting Boresight
Caution! If not avoided, the following could result in minor or moderate injury. • This procedure must be performed by Christie qualified technicians. When making the adjustments, set the light source to minimum power. To following steps are intended to achieve the highest quality image distributed across the full screen. - Page 54 11. Use the ILS controls or turn the focus knob (F) clockwise to begin focusing the image. Watch for either the top or bottom cross-hair patterns (+) to come into focus. CineLife+ RGB PLF Installation and Setup Guide–CP4450-RGB 020-103072-02 Rev. 1 (09-2019) Copyright 2019 Christie Digital Systems USA, Inc. All rights reserved. ©...
-
Page 55: Adjusting Dmd Convergence
2. In the right toolbar, tap Test Patterns. 3. Select the RGB-4K-Convergence test pattern and display it full screen. CineLife+ RGB PLF Installation and Setup Guide–CP4450-RGB 020-103072-02 Rev. 1 (09-2019) Copyright 2019 Christie Digital Systems USA, Inc. All rights reserved. ©... - Page 56 If adjusting by hand without using the tool, pull out the convergence adjustment knobs to engage them. 6. Use the Convergence test pattern to assist with adjusting the horizontal and vertical lines. CineLife+ RGB PLF Installation and Setup Guide–CP4450-RGB 020-103072-02 Rev. 1 (09-2019) Copyright 2019 Christie Digital Systems USA, Inc. All rights reserved. ©...
-
Page 57: Correcting On-Screen Color
For the best stability, Christie recommends setting convergence while rotating the knobs in a clockwise direction. This may require first adjusting convergence by turning the knobs counter- clockwise, and finalizing the convergence with a clockwise approach. -
Page 58: Regulatory
> 16 A and ≤ 75 A per phase Immunity • CISPR 24/EN55024 EMC Requirements – Information Technology Equipment CineLife+ RGB PLF Installation and Setup Guide–CP4450-RGB 020-103072-02 Rev. 1 (09-2019) Copyright 2019 Christie Digital Systems USA, Inc. All rights reserved. ©... - Page 59 Regulation (EC) No. 1907/2006 on the registration, evaluation, authorization and restriction of chemicals (REACH) and the applicable official amendment(s). CineLife+ RGB PLF Installation and Setup Guide–CP4450-RGB 020-103072-02 Rev. 1 (09-2019) Copyright 2019 Christie Digital Systems USA, Inc. All rights reserved. ©...
- Page 60 Corporate offi ces Worldwide offi ces Christie Digital Systems USA, Inc. Africa United Kingdom Columbia Korea (Seoul) ph: 714 236 8610 ph: +27 (0)11 510 0094 ph: +44 (0) 118 977 8000 ph: +57 (318) 447 3179 ph: +82 2 702 1601 Christie Digital Systems Canada Inc.
Need help?
Do you have a question about the CineLife+ RGB PLF CP4450-RGB and is the answer not in the manual?
Questions and answers