Table of Contents
Advertisement
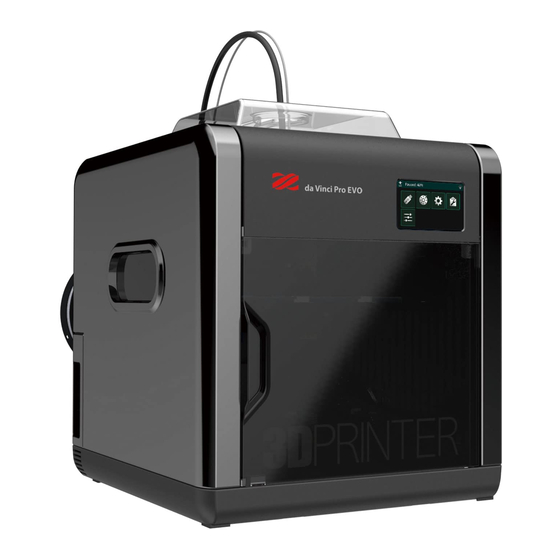
da Vinci Pro EVO User Manual
Important Safety Precautions (P.2)
- Safety and Regulation (P.2)
- Safety Instructions (P.2)
- Note on Power Supply (P.3)
- Safety Notice and label (P.3)
About da Vinci Pro EVO (P.4)
- Introduction (P.4)
- Specifications (P.5)
- Accessory Checklist (P.6)
- Precautions and Instructions of Maintenance Tools (P.6)
- Maintenance and Service (P.7)
Unpacking and Installation (P.7)
- Unpacking (P.7)
- Hardware Installation (P.9)
- Software Installation (P.12)
Feed Module Adjustment (P.14)
Operating The Printer (P.16)
- Main Screen Function Introduction (P.17)
- Function and Description (P.17)
- Printing (P.34)
Operating The Software (P.36)
- Software Interface (P.36)
- Connecting to the Printer (P.37)
Laser Engraver Module (Optional) (P.38)
Support Information (P.39)
1
Advertisement
Table of Contents

Related Manuals for XYZ Printing da Vinci Pro EVO


Summary of Contents for XYZ Printing da Vinci Pro EVO
- Page 1 Vinci Pro EVO User Manual Important Safety Precautions (P.2) - Safety and Regulation (P.2) - Safety Instructions (P.2) - Note on Power Supply (P.3) - Safety Notice and label (P.3) About da Vinci Pro EVO (P.4) - Introduction (P.4) - Specifications (P.5)
-
Page 2: Limitation Of Warranty And Liability
Please read the product User Manual carefully before using this product. This user manual is mainly intended for users to understand how to use the da Vinci Pro EVO 3D printer (“Pro EVO”) correctly. In the user manual, users can learn more about the operating tips, application skills and maintenance of the Pro EVO 3D printer. -
Page 3: Note On Power Supply
Do not place the printer in a dusty, humid or outdoor environment. Weak odors may be generated during the printing process. We recommend working in a well-ventilated. Do not leave the product or power cord to unattended children. Otherwise, personal injury ... - Page 4 About da Vinci Pro EVO Introduction 1. Extruder module 2. Print bed and removable metal print bed 3. 5 inch touch screen 4. USB socket/USB Port 5. USB socket/USB Port 6. USB cable port 7. Power switch 8. Power inlet 9.
-
Page 5: Specifications
Specifications Print technology Fused Filament Fabrication( FFF ) Max. build area (WxDxH) 220 x 200 x 200 mm Material compatibility TPU / Nylon / Premium Metallic PLA / Carbon Fiber / PP GF30 / Tough PLA / PETG / ABS / PLA / PC / *PC/ *Carbon PET(PET CF15) / *Carbon Nylon(PAHT CF15) *Optional High Temp extruder module Filament diameter... -
Page 6: Accessory Checklist
Accessory checklist ※ The company reserves the rights at any time under the specific circumstances of accessory to improve the right of specific style and size to actual supply prevail. Maintenance Tools The following tools are intended for use under the guidance or guardianship of an adult ... -
Page 7: Maintenance And Service
the steel wires or that remained in the feed hole with the Nozzle in order to remove the residual debris. * Filament should be unloaded from the extruder module before cleaning the feeding path. * Care should be taken during the operation to avoid potential burn injuries. Filament scraps generated during printing may remain on the feeding motor and gear, ... - Page 8 3. Remove the cushions and accessories above the machine. 4. Remove the packaging bags and take out the printer, then remove all fixing tapes on the printer and take off the top cover. 5. Open the front cover and remove the tapes and cardboard above the front of the printer and the tape below.
-
Page 9: Hardware Installation
9. Take out the filament box and extruder module accessory box. 10. Please remove the two clips from both sides of the belt before using. Hardware Installation Print Bed Installation Tear off the tape affixed to the backside of the Rubber Magnet (Accessory 10) and then align the magnet with the corner of the print bed. -
Page 10: Installation
Extruder Module Removement Filament should be unloaded from the extruder module before module removement. Loosen the screws at the three holes (loosening instead of taking down the screws, and keep the screws on the holes), support the extruder module by hand, then press both ends of the heating cable to pull it out. -
Page 11: Filament Installation
The recommended installation position is as follows: * The top cover buckle file can be downloaded from the website. It is recommended to print the top cover buckle in ABS material. Filament Installation The feeding module is located at the back of the printer. Put down the filament holder first, and place the filament on the spool holder. -
Page 12: System Requirement
System requirement Operating Systems Windows Microsoft® Windows® 8, 10, 11 (64 bit) Mac OS® X 10.15, 11, 12 Minimum Hardware Requirements CPU : 4th Generation Intel® Core™ i5 Processor or above RAM: 8GB Hard disk space: 20GB or more Storage : 1GB above ( Recommended 20GB) 1GB free storage for installation. - Page 13 Start XYZmaker Suite, select and start "XYZprint3" to perform printing. XYZprint 3 Interface...
- Page 14 Feed module adjustment Before loading the filament, please set the middle value of the temperature on the operation panel according to the recommended printing temperature range of the filament you are using, as the temperature of the loaded filament, and then observe the feeding condition to make adjustments.
- Page 15 When loading the filament, the material used for presetting the printer will be located at the center position of the nut in the feed module. You may adjust the gear tightness according to the clamping force indicated in the following filament characteristics. During the printing process, you may also execute fine-tuning of the gear for the feed module in order to achieve the desired tightness.
-
Page 16: Operating The Printer
Hard material If there is no flow or abnormal sound, try If there is abnormal sound, Middle left or middle right to loosen or tighten until the abnormal turn the nut leftward until sound is eliminated and the filament flows tight (adjust in a out stably. -
Page 17: Function And Description
Main Screen Function Introduction Users may get the printing status and use information through the display panel, and carry out function operation by pressing keys. Function and description USB drive: Users may browse the 3D model stored in the USB drive, or directly select the.3cp file, import it into the printer and carry out printing without importing the file by the computer. - Page 18 Check if the USB drive is plugged to the printer. Tap the USB Printing Menu in the main screen. Browse the file information from the USB or select the file (.3w file) to print. Filament: You can see filament information on this page. Including the ”Load”, ”Unload”...
- Page 19 Wait for the extruder module to be heated to the working temperature after confirming that the filament is loaded, which will be driven by the feeding system to push the extruder module along the filament tube; or directly press and hold the "up" key to speed up the feeding. Press "DONE"...
- Page 20 2-3 Nozzle temp setting: Filament > Temperature Auto detect The printer will automatically detect the filament reel data when XYZprinting filament is used, and automatically adjust the temperature of loaded and unloaded filament. Preset temperature value will be imported regardless of the filament system. Users may set the temperature values of loaded and unloaded filament by manual according to the characteristics of the filament used.
- Page 21 3-1. Print-Bed: It is recommended to perform "Calibration" before printing, and then complete "Z-Offset" to ensure the level of the print bed and the optimum printing distance between the print head and the print bed. Please make sure the print bed is clear. (1) Z-Offset When the printing bed is calibrated, perform the vertical calibration of Z-offset to ensure the print head can eject onto the printing bed smoothly.
- Page 22 (2) Jog Mode The Jog Mode is for manual control of the positions of X, Y and Z axes. Test the smoothness of movement. The system will automatically reset the extruder module (home axes) when users enter the Jog Mode. Select the moving direction and distance of extruder module or print bed: Select "Move print head module left and right "(direction of X axis).
- Page 23 When calibration fails, please check the installation of print head to confirm whether the flat cable is installed stably and whether the print head touches the print bed when the bed drops to the low point. 3-2. Print Head: (1) Cleaning the print head * Please upload the filament before cleaning the feed path.
- Page 24 3-3. Network Please make sure that the Wi-Fi d ongle has been plugged into the US B port on the top of the printer Click “FIND”, the printer will search for available access points. Click the Access Point you want to connect to and enter the access password. Wait for the connection, and confirm that the connection is complete.
- Page 25 When connection failed Please confirm whether the printer is connected to the WiFi dongle Please confirm whether the password entered is correct. Please confirm whether the network to be accessed to is stable. The name of access point will be displayed when connection succeeded. 3-4.
- Page 26 3-6. Display Users may set the touch screen to turn off the display during the time when it is not in use. There are five different settings: one minute, three minutes, five minutes, ten minutes and never. 3-7. Language A total of seven languages are supported. You can select Settings >...
- Page 27 3-9. Advanced (1) Axis Step Calibration Enter this page to display the current values of X, Y, Z and E axes. Users may make advanced adjustment of X, Y, Z and E axis values under non printing state to correct inaccurate moving distances.
- Page 28 In case of the following situations, judge the printing of filament before improving the drying. • Abnormal popping sound are heard when loading filament, and bubbles are found on the filament. • Abnormal popping sound are heard during printing. • Uneven discharging with viscosity decreased. •...
-
Page 29: Maintenance
3-11. Legal Info Maintenance 4-1. Calibration When the calibration starts, the print bed rises and the nozzle moves to the test point in sequence for measurement. After measurement, the screw will be driven to adjust and complete the levelness adjustment of the print bed. 4-2. - Page 30 4-3. Clean Nozzle Be sure to unloaded the filament and unplug the guide tube before cleaning the nozzle. The print bed will move down when cleaning the nozzle, and the extruder module will move to the cleaning position. Start cleaning the nozzle after it is heated up to the working temperature. Or adjust the heating temperature according to the filament used, and wait for the print head to be heated to the cleaning temperature before cleaning.
- Page 31 Printer Status The function setting, adjustment, number of pages and the current state of the printer will be displayed on the screen for quickly check of the printer; or users may enter the message / function operation interface by clicking the icons (shortcut keys). WiFi Click the WiFi icon on the upper right to quickly enter the wireless transmission settings.
- Page 32 Click "ADD", the printer will search for available Wait for the Access Point scanning. Access Point. Click the Access Point you want to connect to. Enter the access (Access Point) password. Wait for the connection. Confirm that the connection is complete.
- Page 33 The name of access point will be displayed when connection succeeded. Invalid connection Please confirm that the "WiFi Dongle" is plugged into the printer. Please make sure your passwords match. Please confirm that the network is stable. Disconnect...
- Page 34 Printing After loading the filament, you may start the printing process with the following method. • Start the software printing using the USB cable. Use the USB cable to connect the printer to the computer, and open the software XYZprint 3. "Ready"...
-
Page 35: Operating The Software
Operating the Software Please install XYZmaker Suite before printing, and start XYZprint 3. Insert the attached USB drive into the computer or download the latest version of "XYZmaker Suite" from the official website of XYZprinting, and install it on the computer. Software Interface The main window includes: 1)Print, 2)... -
Page 36: Connect To Printer
Function Description PRINT Select print parameters and print parameter settings, including print speed, support, retraction, output ratio, and other settings. DASHBOARD Check the printer status, and renew anysoftware version. Tool bar 3D cache drawing gallery, click and immediately using; language setting. Login Sign in your register account. - Page 37 Laser Engraver Module (Optional) For this model, engraving function can be achieved by the "laser engraving module", which can only be installed on this model. The laser engraving function can be started after the laser engraving module is installed. To ensure safety, do not open the front cover during the whole process of laser engraving;...
-
Page 38: Support Information
Support information When the problem occurs with the printer, please refer to the following troubleshooting instructions. If the problem persists, please contact the Customer Service Center. Problem code and handling When a problem occurs with the printer, the service code will be displayed on the printer screen or the software interface. - Page 39 Federal Communications Commission (FCC) Statement You are cautioned that changes or modifications not expressly approved by the part responsible for compliance could void the user’s authority to operate the equipment. This equipment has been tested and found to comply with the limits for a Class B digital device, pursuant to part 15 of the FCC rules.
Need help?
Do you have a question about the da Vinci Pro EVO and is the answer not in the manual?
Questions and answers