
Related Manuals for XYZ Printing da Vinci Jr. WiFi Pro


Summary of Contents for XYZ Printing da Vinci Jr. WiFi Pro
- Page 1 Vinci Jr. WiFi Pro Product Overview Functions Unboxing Selective Module Software Introduction Product Specification Accessories Installation Maintenance and Support Details da Vinci Jr. WiFi Pro User Manual...
- Page 2 It contains the operating instructions, maintenance information and application skills of the da Vinci Jr. WiFi Pro 3D printer. To learn more about the latest news of the da Vinci Jr. WiFi Pro 3D printer, please contact local dealers or visit the official website of XYZprinting: http://www.xyzprinting.com...
-
Page 3: Accessory Checklist
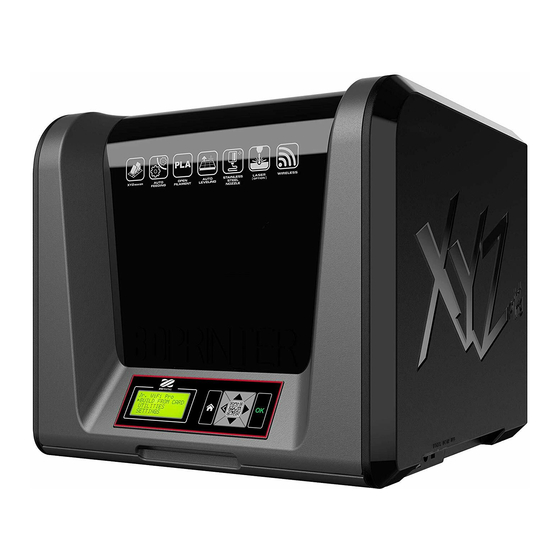
da Vinci Jr. WiFi Pro Product Overview A: Filament movement area B: Feed module C: Detector D: Extruder E: Filament F: Print bed G: SD card port (Storage format: FAT32) H: Control and display panel I: Front cover USB Port Power Connector Accessory Checklist Power Switch... -
Page 4: Unpacking The Product
da Vinci Jr. WiFi Pro Unpacking the Product da Vinci Open the box and then remove Remove the plastic bag and the tape. the accessories and cushions. Remove the securing styrofoam Remove all fixing tapes and the Be sure to remove the fixing and fixing tapes on the print bed. -
Page 5: Software Introduction
da Vinci Jr. WiFi Pro Software Introduction XYZmaker Suite is an all-in-one 3D design software application that provides a comprehensive range of 3D tools for XYZprinting's 3D printers. XYZmaker is a 3D modeling application that comes with an intuitive user interface and a wide range of interesting 3D modeling tools and 3D model templates. - Page 6 da Vinci Jr. WiFi Pro XYZprint is a 3D printing application with fast slicing capability. It lets you preview your 3D models in full color and monitor printing progress in real time. 1. Open the XYZprint software and choose 2. Import your favorite 3D files. DASHBOARD and select the 3D printer that is connected.
-
Page 7: Accessories Installation
da Vinci Jr. WiFi Pro Guide Tube Installation Please push the tube remover into the extruder Put a guide tube though the guide tube movement area module port then ensure that the guide tube has and then insert it into the extruder module. To finish the been tightly inserted into the extruder module port. -
Page 8: Filament Installation
da Vinci Jr. WiFi Pro Filament Spool Ring Installation Note: Please refer to this step if the axle ring is not installed on the spool. Insert the spool ring from Loosen the spool ring mounting Remove the genuine filament and chip, both sides of the new filament screw from the used filament spool and then install the sensor chip. -
Page 9: Button Instructions
da Vinci Jr. WiFi Pro Button Instructions After switching on the printer's power, the user may use the display panel at the front of the printer to understand its status and usage data. The functional buttons on the right allow the user to perform the relevant operations. Button Functions Direction Up... - Page 10 da Vinci Jr. WiFi Pro Home Menu Top Menu Sub Menu Page BUILD FROM CARD UTILITIES CHANGE SPOOL LOAD FILAMENT UNLOAD FILAMENT HOME AXES Z OFFSET JOG MODE CALIBRATE CHANGE NOZZLE CLEAN NOZZLE SETTING USER FILAMENT BUZZER LANGUAGE ENERGY SAVE AUTO LEVEL RESTORE DEFAULT INFO...
- Page 11 da Vinci Jr. WiFi Pro BUILD FROM CARD 1 sample models are built into the printer. You may begin your first 3D prints with the samples. To print a sample : BUILD (SD CARD) START BUILDING SAMPLE SAMPLE Remove the printed object when Select a sample Put the bed tape Select "YES"...
- Page 12 da Vinci Jr. WiFi Pro HOME AXES “HOME AXES” moves the extruder to the lower left corner. To home axes: HOME AXES HOME AXES ARE YOU SURE? COMPLETED [ OK ] TO RETURN Select “YES” to proceed. Z OFFSET The user may use the Z OFFSET function to adjust the gap between the printing nozzle and the printing bed. When adjusting the gap, use keys to increase or decrease it (the minimum adjustment scale is 0.05mm).
- Page 13 da Vinci Jr. WiFi Pro CALIBRATE Note: Please remove print bed tape before you activate the calibration function on your printer. Calibration is enabled for this new extruder module. Please update printer firmware via XYZmaker Suite before using the new extruder. Press the detection head on the right side of the print head according to the instruction of screen message, followed by pressing OK.
- Page 14 da Vinci Jr. WiFi Pro CHANGE NOZZLE Carry out the CHANGE NOZZLE function before changing modules. Once the extruder module has moved to the operating position, you can turn off the power and change the module. CHANGE NOZZLE REPOSITION NOW YOU CAN TURN OFF MODULE NOW ? POWER &...
- Page 15 da Vinci Jr. WiFi Pro CLEAN NOZZLE Tools Preparation ● Carbon deposits and dirt accumulated in the nozzle will increase with the printing times and impact the printing quality. We suggest that you clean the nozzle after every 25 hours of printing. A.
- Page 16 da Vinci Jr. WiFi Pro BUZZER When the buzzer is turned on, the printer will output an audible signal when a button is pressed, print job is finished, or issue is detected. Buzzer is turned on by default. To switch off the buzzer: BUZZER [ ON ] Select “OFF”...
- Page 17 da Vinci Jr. WiFi Pro SYSTEM VERSION Firmware version is shown here. For stable printing performance, it is advised to keep the firmware up to date. To check for firmware updates, please go to XYZmaker Suite. SYSTEM VERSION 0.1.3 [ OK ] TO RETURN SPOOL STATS “SPOOL INFO”...
- Page 18 da Vinci Jr. WiFi Pro Note: The machine can be turned off only when the cooling fan of the print head stops running after the print is completed. Turning off the power directly may clog the print head. References: Please refer to CLEAN NOZZLE to remove the blocks out of the print head.
- Page 19 da Vinci Jr. WiFi Pro Laser Engraving Module Laser engraver module must be purchased separately.Please read through this manual and all safety reminders carefully before using, operating, dismantling,replacing, or removing this product. Please also comply with relevant safety reminders and instructions. Product Overview ●...
-
Page 20: Software Functions
da Vinci Jr. WiFi Pro CHANGE NOZZLE Please operate the “UNLOAD FILAMENT” function and Please remove extruder model and guide tube. remove filament spool in the printer. (Please refer to“Guide Tube and Extruder Module Removement” section in the “Accessories Installation” chapter.) Please select “CHANGE NOZZLE ”and smart extruder will reposition to working position. - Page 21 da Vinci Jr. WiFi Pro ● Function Description : Select “Import” on the device to select the graphic file you wish to engrave. Once basic editing has been completed, select this "Engrave" icon. The setting of "Language" and "Automatic Feedback" (sending the set value of the engraving to XYZprinting).
-
Page 22: Wireless Printing
This chapter introduces how to carry out the setting correctly and to operate the wireless printing function. To understand if your product is designed with wireless printing function, please refer to the table below. ●da Vinci 1.1 Plus ●da Vinci Jr 1.0w ●da Vinci Jr. WiFi Pro Before setting up The network printing function is only available when the printer and the computer are both connected to the same wireless network. - Page 23 da Vinci Jr. WiFi Pro Once the connection method has been changed from USB If you need to stop or change the wireless setting, please to WiFi, you can unplug the USB cable and continue with click [Connect to new network / Disconnect]. the printing process.
- Page 24 da Vinci Jr. WiFi Pro Open Filament In the printer, insert the filament into the Load the filament from the back If you’re using third party filaments, feed port. Open the release arm so that of the printer. please secure the filament using the front tip of the filament can be the holder.
-
Page 25: Specifications
Vinci Jr. WiFi Pro da Vinci Junior Wifi Pro 3D Printer Model Name da Vinci Jr. WiFi Pro 3D Printer Dimensions 16.54 x 16.93 x 14.96 inches ( 420 x 430 x 380 mm ) Weight 26.46 lbs (12kg) Display 2.6”... -
Page 26: Support Details
da Vinci Jr. WiFi Pro The troubleshooting instruction may guide you to fix the problem. If any error persists, please contact customer service. When an error occurs, please refer to the service code shown on the printer and/or in the software, and check the suggestions below for troubleshooting. -
Page 27: Other Information
1. This product is guaranteed for specific period from the purchase date against any breakdown within the scope of proper and reasonable usage of their product as defined by XYZ printing. Presentation of warranty card with the product will ensure free service and repair of inherent faults in the product within the warranty period. - Page 28 da Vinci Jr. WiFi Pro Other Information Federal Communications Commission (FCC) Statement You are cautioned that changes or modifications not expressly approved by the part responsible for compliance could void the user’s authority to operate the equipment. This equipment has been tested and found to comply with the limits for a Class B digital device, pursuant to part 15 of the FCC rules. These limits are designed to provide reasonable protection against harmful interference in a residential installation.
Need help?
Do you have a question about the da Vinci Jr. WiFi Pro and is the answer not in the manual?
Questions and answers