Table of Contents
Advertisement
Quick Links
Advertisement
Table of Contents

Related Manuals for IBM 7133 D40


Summary of Contents for IBM 7133 D40
- Page 1 7133 Models D40 and T40 Serial Disk Systems Service Guide GY33-0192-07...
- Page 3 7133 Models D40 and T40 Serial Disk Systems Service Guide GY33-0192-07...
- Page 4 Eighth Edition (October 2002) This revision supersedes GY33-0192-06. Technical changes are shown by a vertical line to the left of each change. The following paragraph does not apply to any country where such provisions are inconsistent with local law: THIS PUBLICATION IS PRINTED “AS IS” WITHOUT WARRANTY OF ANY KIND, EITHER EXPRESS OR IMPLIED, INCLUDING, BUT NOT LIMITED TO, THE IMPLIED WARRANTIES OF MERCHANTABILITY OR FITNESS FOR A PARTICULAR PURPOSE.
-
Page 5: Table Of Contents
Contents Communications Statements. . ix Federal Communications Commission (FCC) Statement . ix Japanese Voluntary Control Council for Interference (VCCI) Statement . ix Korean Government Ministry of Communication (MOC) Statement . . ix New Zealand Compliance Statement . . ix International Electrotechnical Commission (IEC) Statement Avis de conformité... - Page 6 Connectors . . 27 Back Connectors (Model D40). . 27 Internal Connections (Model D40) . 28 Back Connectors (Model T40) . . 29 Internal Connections (Model T40) . 30 SSA Connectors . . 31 Mainline-Power Connector (Model D40, 220 V ac/dc) . .
- Page 7 Grounding Check (Model T40). . 69 Chapter 2. Problem Determination Procedures . . 73 Disk Drive Module Power-On Self-Tests (POSTs) . 73 Controller Card Power-On Self-Tests (POSTs) . 74 Service Request Numbers (SRNs) . . 75 The SRN Table. . 75 Using the SRN Table .
- Page 8 Disk Drive Status Lights Assembly (Model T40) . 189 Power Switch and Cable Assembly (Model T40) . . 190 Early-Type Power Switch and Cable Assembly . . 191 Later-Type Power Switch and Cable Assembly . . 193 Converting from Early- to Later-Type Bezel Assembly and Power Switch and Cable Assembly .
- Page 9 Configuring a Disk Drive Module to the Using System . 271 Configuring a 7133 to the Using System . . 272 Unconfiguring a 7133 from the Using System . . 272 MAP Extension . . 273 Appendix B. Additional Information for PC Servers . .
- Page 10 viii 7133 Models D40 and T40 Service Guide...
-
Page 11: Communications Statements
Communications Statements The following statements apply to this product. The statements for other products intended for use with this product appear in their accompanying manuals. Federal Communications Commission (FCC) Statement This equipment has been tested and found to comply with the limits for a Class A digital device, pursuant to Part 15 of the FCC Rules. -
Page 12: International Electrotechnical Commission (Iec) Statement
Dieses Gerät ist berechtigt in Übereinstimmung mit dem deutschen EMVG das EG–Konformitätszeichen zu führen. Der Aussteller der Konformitätserklärung ist die IBM Deutschland. Informationen in Hinsicht EMVG Paragraph 3 Abs. (2): Das Gerät erfüllt die Schutzanforderungen nach EN 50082-1 und EN 55022 Klasse A. -
Page 13: Taiwan Class A Compliance Statement
Nach dem EMVG: “Geräte dürfen an Orten, für die sie nicht ausreichend entstört sind, nur mit besonderer Genehmigung des Bundesministeriums für Post und Telekommunikation oder des Bundesamtes für Post und Telekommunikation betrieben werden. Die Genehmigung wird erteilt, wenn keine elektromagnetischen Störungen zu erwarten sind.”... - Page 14 7133 Models D40 and T40 Service Guide...
-
Page 15: Safety Notices
Safety Notices For a translation of the danger and caution notices contained in this book, see the 7133 Serial Disk Systems and SSA Adapters: Translated Safety Notices manual, SA33-3274. Definitions of Safety Notices A danger notice indicates the presence of a hazard that has the potential of causing death or serious personal injury. -
Page 16: Laser Safety Information
Laser Safety Information Notes: 1. The information given here applies only to 7133s that have the Advanced SSA Optical Extender (Pair) feature. 2. The Advanced SSA Optical Extender, referred to in this information as an optical extender, is part of the serial optic channel converter assembly. This system contains a laser product called the optical extender. -
Page 17: About This Book
About This Book This book provides service information for service representatives who service 7133 Models D40 and T40 Serial Disk Systems. This information is organized as follows: v Chapter 1, “Reference Information” briefly introduces the 7133 Models D40 and T40, and gives useful reference information. -
Page 18: Related Publications
For other publications, see Related Publications in the “Additional Information” appendix (in this book) for your using system. For the latest information about SSA, SSA microcode levels, and SSA publications, see the web support page: http://www.hursley.ibm.com/ssa/ 7133 Models D40 and T40 Service Guide... -
Page 19: Chapter 1. Reference Information
Chapter 1. Reference Information Are You Using the Correct Book? Do not use this book if you are servicing a 7133 Model 010, 020, 500, or 600 SSA Disk Subsystem. For the correct book, see Related Publications in the “Additional Information” appendix (in this book) for your using system. - Page 20 The 7133 can be disconnected from its related SSA attachments while the using system is running. Also, most of the field-replaceable units (FRUs) of the 7133 can be removed and replaced while the 7133 and the using system are running. For a list of those FRUs, see “Concurrent Maintenance”...
-
Page 21: Controller Card
Controller Card The controller card of the 7133 Model D40 or Model T40: v Monitors itself. If it detects a problem, the controller card can generate an SSA error message through the disk drive modules. v Monitors the ambient air temperature. If the temperature is too high, the controller card can: –... -
Page 22: Advanced Ssa Optical Extender (Pair) Feature
Advanced SSA Optical Extender (Pair) Feature The Advanced SSA Optical Extender (Pair) feature permits 7133 Models D40 and T40 to be connected to SSA attachments or other devices (for example, other 7133s) through pairs of fibre optic cables. Each end of a pair of fibre optic cables is connected to a Advanced SSA Optical Extender. -
Page 23: Lights And Controls
Lights and Controls The lights and controls of the 7133 Models D40 and T40 consist of: v Operator panel lights and controls v Disk drive status lights v Controller card light v Fan assembly lights v Power supply assembly lights and controls v Bypass card lights v Disk drive module lights The operator panel of the 7133 is located behind a flap to prevent accidental operation... - Page 24 Figure 3. Lights and Controls of Model D40 7133 Models D40 and T40 Service Guide...
- Page 25 Figure 4. Lights and Controls of Model T40 Chapter 1. Reference Information...
-
Page 26: Operator Panel Lights And Controls
Operator Panel Lights and Controls To identify the lights and ID display that are described here, see Figures 3 and 4. Power switch 3 : v On Model D40, this switch controls the internal dc power that is supplied to the 7133 by its power supply assemblies. - Page 27 The display can show characters and symbols from a 40–character font that consists of: A through Z 0 through 9 ? ! & . blank You can set the ID display by using: v The three ID push buttons 5 that are on the operator panel. The ID that you set is used in the location information that is provided to the using system for each device.
- Page 28 Table 1. Error IDs and Their Related SRNs Error ID See SRN 80241 BP16 80242 80243 80244 80245 80246 BP12 80247 BP13 80248 CODE 80210 COLD 80253 COOL 80254 CTRL 80210 FAN1 80231 FAN2 80232 FAN3 80233 80251 OPNL 80211 POST-FAIL-XXXX 80210 Where XXXX=...
- Page 29 ID push buttons 5 : These three push buttons set the Subsystem ID that is shown on the ID display 6 . You need a ball-point pen or similar instrument to press these push buttons. v Press the left button to step one position through the four character positions of the alphanumeric display.
-
Page 30: Disk Drive Status Lights
Disk Drive Status Lights To identify the lights that are described here, see Figures 3 and 4. These 16 green status lights 4 are related to the disk drive modules that are contained in the 7133. The upper row of eight lights represents, from left to right, the front disk drive modules, 1 through 8. -
Page 31: Power Supply Assembly Lights And Controls
Power Supply Assembly Lights and Controls To identify the lights and controls that are described here, see Figures 3 and 4. PWR/FAULT RESET switch 13 : This switch switches off the dc output voltage from the power supply assembly. To switch off the dc voltage, push the switch downward (Model D40) or rightward (Model T40). - Page 32 Mode light 11 : This light has two colors that show in which mode the bypass card is operating. Status of Light Meaning Permanently on (Amber) The bypass card is switched to Bypass state. Permanently on (Green) The bypass card is jumpered for Forced Inline mode. The bypass card is switched to Inline state.
-
Page 33: Disk Drive Module Lights
Disk Drive Module Lights Figure 5. Disk Drive Module Lights 1 Ready light: This green light shows the following conditions: Status of Light Meaning Both SSA links are inactive because one of the following conditions exists: v The disk drive modules, dummy disk drive modules, or module and SSA attachment that are logically next to this module are not connected or are missing. -
Page 34: Other 7133 Settings
2 Check light: This amber light shows the following conditions: Status of Light Meaning Normal operating condition. Permanently on One of the following conditions exists: v An unrecoverable error that prevents the normal operation of the SSA link has been detected. v The power-on self-tests (POSTs) are running or have failed. -
Page 35: Parts Locations
Parts Locations This section has two subsections; one is for Model D40, the other is for Model T40. Go to the appropriate subsection. Chapter 1. Reference Information... -
Page 36: Parts Locations (Model D40)
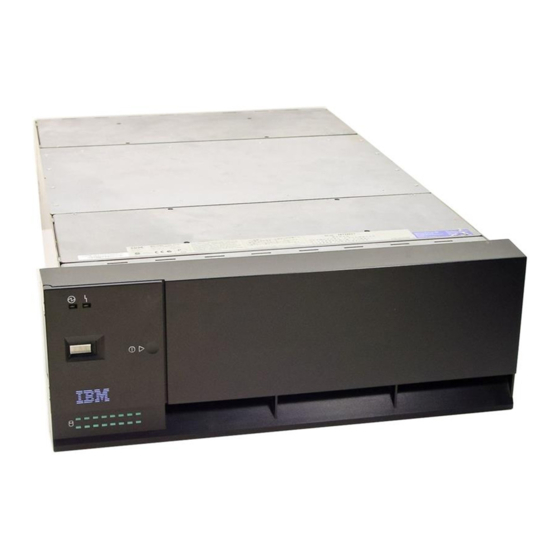
Parts Locations (Model D40) This subsection shows the locations of various parts of the 7133 Model D40. Front cover Power supply assembly (position 2) Operator panel assembly Power supply assembly (position 1) Disk drive status lights assembly Bypass card 1 (ports 4 and 5) Controller card assembly Bypass card 2 (ports 8 and 9) Disk drive modules... - Page 37 Note: The front disk drive modules are numbered 1 through 8 from left to right (viewed from the front of the 7133). The back disk drive modules are numbered 9 through 16 from left to right (viewed from the back of the 7133). Chapter 1.
-
Page 38: Parts Locations (Model T40)
Parts Locations (Model T40) This subsection shows the locations of various parts of the 7133 Model T40. Front cover Power supply assembly (position 1) Operator panel assembly Back cover Disk drive status lights assembly Bypass card 1 (ports 4 and 5) Controller card assembly Bypass card 2 (ports 8 and 9) Power switch and cable assembly... -
Page 39: Remote-Power-On Control Unit And Cables
Remote-Power-On Control Unit and Cables Remote-power-on control unit 7133 power-control cable Using-system power-control cables Figure 8. Remote-Power-On Control Unit and Cables Chapter 1. Reference Information... -
Page 40: Advanced Ssa Optical Extenders And Fibre Optic Cables
Advanced SSA Optical Extenders and Fibre Optic Cables The Advanced SSA Optical Extender (Pair) feature can be configured for single-mode operations or for multi-mode operations. The two configurations are show here. Single-Mode Configuration Advanced SSA Optical Extender (Pair) Fibre optic cable Power light Wrap cable and adapter assembly Receive light... - Page 41 Note: In the remainder of this book, the term “optical extender” is generally used for the Advanced SSA Optical Extender. A wrap cable and adapter assembly 7 is provided with each optical extender. This assembly consists of a fibre optic wrap cable 8 and a fibre optic wrap adapter 9 . The two parts of the assembly are used during diagnostic procedures.
-
Page 42: Multi-Mode Configuration
Multi-Mode Configuration Advanced SSA Optical Extender (Pair) Advanced Multi-Mode Conditioner (Pair) Receive light Uniter Receive symbol Multi-mode fibre optic cable Transmit symbol Wrap cable and adapter assembly Power light Fibre optic wrap cable Yellow fibre Fibre optic wrap adapter Orange fibre Equipment Cable Plant... - Page 43 must be connected, via the two Advanced Multi-Mode Conditioners, between the Receive connector of one Advanced SSA Optical Extender and the Transmit connector of the other Advanced SSA Optical Extender. At the Receive connector, the Advanced SSA Optical Extender receives data from a using system or device via the fibre optic cable and the Advanced Multi-Mode Conditioner.
-
Page 44: Specifications For Fibre Optic Cables And Connectors
Specifications for Fibre Optic Cables and Connectors The Advanced SSA Optical Extenders can drive single-mode operations and multi-mode operations. Fibre optic cables and connectors must be to the following specifications: Fibre optic cables for 9/125 microns single-mode operations Fibre optic cables for 50/125 microns or 62.5/125 microns multi-mode operations Note: Each type of cable needs a particular type... -
Page 45: Connectors
Connectors This section shows the locations of the external connectors of the 7133 Models D40 and T40. Back Connectors (Model D40) SSA connectors Reserved Mainline power connectors Power control connector Figure 11. Back Connectors of Model D40 Table 3. Relationship between Strings and Connectors of Model Connectors Disk Drive Modules 1 and 4... -
Page 46: Internal Connections (Model D40)
Internal Connections (Model D40) Inside the 7133, the disk drive modules are connected in strings of four modules. These strings are connected to the external SSA connectors at the back of the 7133. Figure 12 shows the relationships between the disk drive module strings and the external SSA connectors at the back of the 7133 Model D40. -
Page 47: Back Connectors (Model T40)
Back Connectors (Model T40) Mainline power connectors Reserved Power control connector SSA connectors Figure 13. Back Connectors of Model T40 Table 4. Relationship between Strings and Connectors of Model Connectors Disk Drive Modules 1 and 4 Front disk drive modules 1 through 4 5 and 8 Front disk drive modules 5 through 8 9 and 12... -
Page 48: Internal Connections (Model T40)
Internal Connections (Model T40) Inside the 7133, the disk drive modules are connected in strings of four modules. These strings are connected to the external SSA connectors at the back of the 7133. Figure 14 show the relationships between the disk drive module strings and the external SSA connectors at the back of the 7133 Model T40. -
Page 49: Ssa Connectors
SSA Connectors The SSA connectors are 9-pin high-density, shielded ITT-Canon Micro MDSM connectors. Figure 15. SSA Connectors The pin assignments are: Assignment Assignment Cable type Line Out + Line Out − Advanced SSA Optical Extender Ground +5 V Line In − Line In + Ground Because SSA systems are always cabled in loops, no terminators are required. -
Page 50: Mainline-Power Connector (Model D40, 220 V Ac/Dc)
Mainline-Power Connector (Model D40, 220 V ac/dc) This type of connector is on each power supply assembly. It permits the 7133 to be connected to the mainline power source inside the rack. Ground Live Neutral Figure 16. Mainline-Power Connector (220 V ac/dc, Model D40) Attention: Never use power cables from a 7133 Model 010, 020, 500, or 600 to connect a 7133 Model D40 to the mainline power outlet. -
Page 51: Mainline-Power Connector (Model T40)
Mainline-Power Connector (Model T40) This type is of connector is used in the power switch and cable assembly. It permits the 7133 to be connected to a mainline power source. Ground Live Neutral Figure 18. Mainline-Power Connector (220 V ac, Model T40) Internal Power Connector (Model T40) This type of connector is on each power supply assembly. -
Page 52: Remote-Power-On Control Unit Connectors And Switch
Remote-Power-On Control Unit Connectors and Switch 7133 power control connector 7133 power control connector Using-system main (MAIN) power-control connectors Using-system auxiliary (AUX) power-control connectors Remote-Power-On Control Unit On/Off switch Pin 4 Pin 3 Pin 1 Pin 2 Figure 20. Remote-Power-On Control Unit Connectors and Switch Main (MAIN) Connector Pin Assignments Assignment Main power control +... -
Page 53: Power Distribution Schematic
Power Distribution Schematic Power Light Operator Panel Disk Drive Controller Card Module Front Backplane Power Backbus Back Backplane Disk Drive Module Power Light Power Light Power Light Fan Assembly 1 Fan Assembly 2 Fan Assembly 3 Power Supply Assembly 1 Power Supply Assembly 2 Power Light Power Light... -
Page 54: Labels
Labels Serial number (7133 Model D40) Serial number (disk drive module) Serial number (7133 Model T40) Last 8 digits of the SSA UID SSA 16-digit unique ID (UID) nnnnnn ASM P/N REGISTERED TRADEMARK OF nnnn nnnnnn INTERNATIONAL BUSINESS UNIQUE ID MACHINES CORP. - Page 55 Always refer to this label. Ignore the label that is on the frame assembly; it might not be correct. The frame assembly might have been exchanged during a repair operation. Chapter 1. Reference Information...
-
Page 56: Product Characteristics
Product Characteristics Dimensions and Weight (Model D40) Height Width Depth Approximate Approximate Minimum Maximum Weight Weight 171 mm 444 mm 737 mm 37.6 kg 55 kg (6.7 in.) (17.5 in.) (29 in.) (83 lb) (121 lb) Dimensions and Weight (Model T40) Height Width Depth... - Page 57 Full information about cooling requirements for the 7133 Model D40 is given in the 7133 Models D40 and T40 Serial Disk Systems: Hardware Technical Information. A summary of that information is given here. v The recommended operating temperature is 22°C (72°F) or lower. At lower temperatures, the risk of failure in the 7133 is reduced.
-
Page 58: Altitude
Altitude Operating Nonoperating Storing Shipping Environment Environment Environment Environment Altitude 0 to 2133 m –305 to 12 192 m –305 to 12 192 m –305 to 12 192 m (from sea level) (0 to 7000 ft) (–1000 to 40 000 ft) (–1000 to 40 000 ft) (–1000 to 40 000 ft) Heat Output (Maximum) -
Page 59: Power Sequencing
Power Sequencing The 7133 Models D40 and T40 have no power sequencing. All the disk drive modules start their power sequence when the input voltages are inside the specified limits. Their motors are started under control of the SSA attachments in the using system. To prevent the need for excessive electrical current, the disk drive module motors are not all started together. -
Page 60: Automatic Mode
Automatic Mode When a bypass card is jumpered to operate in Automatic mode, it monitors both of its external connectors. If it detects that at least one of its connectors is connected to a powered-on SSA attachment or device, it switches to Inline state; that is, it connects the internal SSA links to the external connector. -
Page 61: Forced Inline Mode
If power is switched off to adapter 2, the loop is broken. The 7133 bypass card detects the loss of voltage, goes into bypass state, and reconnects the loop. Adapter 2 is bypassed as shown in Figure 24. Adapter 1 Adapter 2 Disk Disk... -
Page 62: Forced Bypass Mode
Forced Inline mode can be set by: v A command from the subsystem service aids v A command from the command line tool v Jumpers on the bypass card If Forced Inline mode is set by the jumpers, the mode cannot be changed by the subsystem service aids or by the command line tool. -
Page 63: Bypass Card Jumpers
Bypass Card Jumpers Attention: The bypass cards are electrostatic-discharge (ESD) sensitive. Use the tools and procedures defined by your organization to protect such parts. The base mode in which the bypass card operates is set by two jumpers. The default setting is for Automatic mode. - Page 64 Jumpers Set for Forced Inline Mode SSA connectors Jumpers 1 2 3 1 2 3 Figure 26. Bypass Card Jumpers Set for Forced Inline Mode 7133 Models D40 and T40 Service Guide...
-
Page 65: Ssa Subsystem Configurations
SSA Subsystem Configurations The diagrams in this section show some sample configurations for the 7133. All the configurations that are shown here are the simplest and provide the best ease of use. If performance or availability are particularly important to the customer, however, more complex cabling might provide a better solution;... - Page 66 Simplest Configuration A 7133 that is in base configuration includes four disk drive modules. These modules are installed in slots 1 through 4 at the front of the 7133. The other 12 disk drive slots contain dummy disk drive modules. The disk drive modules are linked in groups of four. Each group of four modules is linked to two external SSA connectors.
-
Page 67: Larger Configurations
Larger Configurations Four more disk drive modules can be added to the base configuration in one loop. For a balanced subsystem, however, it is recommended that the two groups of disk drive modules be connected in two separate loops, each of which is connected to a separate pair of connectors on the SSA attachment (see Figure 28). - Page 68 Largest Configurations with One 7133 All 16 disk drive modules in a full 7133 can be connected in one loop. For a balanced subsystem, however, it is recommended that two groups of eight disk drive modules be connected in two separate loops, each of which is connected to a separate pair of connectors on the SSA attachment (see Figure 29).
- Page 69 Multiple-Unit Configurations An SSA subsystem can include disk drive modules that are installed in more than one 7133. You can connect up to 48 disk drive modules in one loop, and up to 96 disk drive modules to one SSA attachment. In larger subsystems, unless the work load of the system has special requirements, best performance is obtained if you connect equal numbers of disk drive modules to the loops that are available.
- Page 70 The cables are described in “SSA Cables for 7133 Models D40 and T40” on page 56. The internal connections of the 7133 shown in “Internal Connections (Model D40)” on page 28 and “Internal Connections (Model T40)” on page 30. For information about the rules for SSA loops, see the “Rules for SSA Loops” on page 47.
- Page 71 Figure 31 shows 96 disk drive modules, in six 7133s, connected to one SSA attachment. Using system A1 A2 B1 B2 7133 unit 1 7133 unit 4 4 3 2 1 4 3 2 1 9 10 11 12 13 14 15 16 9 10 11 12 13 14 15 16 7133 unit 2...
- Page 72 Higher-Availability Configurations For higher availability, you can connect more than one SSA attachment in an SSA loop, if the attachments allow such a configuration. In loops that have multiple SSA attachments, you can often get best performance if you connect the attachments as equally as possible between the disk drive modules. Figure 32 shows one 7133 connected in one loop with two SSA attachments.
- Page 73 7133 unit 1 4 3 2 1 9 10 11 12 13 14 15 16 7133 unit 2 4 3 2 1 9 10 11 12 13 14 15 16 7133 unit 3 4 3 2 1 9 10 11 12 13 14 15 16 Figure 33.
-
Page 74: Ssa Cables For 7133 Models D40 And T40
SSA Cables for 7133 Models D40 and T40 Table 5 shows the part numbers of the cables that are shown in the sample configurations. Table 5. SSA Cables Item Part Description – Using-system SSA attachment hardware For information about the various types of SSA attachment hardware, see the user or maintenance information for your using-system SSA attachment hardware. -
Page 75: Preventing The Isolation Of Disk Drives In Higher-Availability Configurations
Preventing the Isolation of Disk Drives in Higher-Availability Configurations If a loop contains four SSA attachments, with two attachments in each of two using systems, disk drive modules become isolated if they are connected between the two SSA attachments of one using system, and both those attachments fail, or are held reset, but remain powered on. - Page 76 If, however, disk drive modules are connected into the link between two SSA attachments that are in the same using system, those disk drive modules become isolated if both SSA attachments fail, or are held reset, but remain powered on (see also “Bypass Note”...
-
Page 77: Physical Location Of A Device
Physical Location of a Device The SSA address of a device is related to the position of that device on the SSA loop. The address can, therefore, change if the configuration is changed. You can determine the physical location of a particular disk drive module that is present in a 7133 Model D40 or Model T40 if you use: v The system service aids (see Service Aids in the additional information appendix (in this book) for your using system) -
Page 78: Controller Card Microcode Maintenance
The first device that you reach (possibly a device in a 7133) represents SSA-address count 0. Continue to follow the SSA loop from device to device, increasing the SSA-address count by 1 for each device, until you reach the device that is indicated in the SRN. -
Page 79: Vital Product Data (Vpd)
Vital Product Data (VPD) You can display the vital product data (VPD) for 7133 Models D40 and T40 by using the service aids. This section shows the types of information that are contained in the VPD. Abbreviations used in this section are: Field-replaceable unit Random-access memory Read-only memory... -
Page 80: Service Functions
You can use the command line tools to display the VPD for each FRU. Each FRU has the following VPD available: Part Number FRU part number Assembly Number Card level assembly part number Serial Number Card assembly serial number EC Number Card assembly engineering change level Product ID Subsystem product ID... - Page 81 Enclosure Environment Information For a selected 7133 Model D40 or Model T40, the service aids display the status of: v Power supply assemblies v Fan assemblies v Operator panel v Remote-Power-On control unit v Controller card assembly v Ambient temperature Change Enclosure Settings Information For a selected 7133 Model D40 or Model T40, the service aids allow you to change the following settings:...
-
Page 82: Service Inspection Guide
Service Inspection Guide This inspection guide helps you to identify possible unsafe conditions on 7133 Models D40 and T40. Each 7133 has the necessary safety items installed to protect users and service personnel from injury. This guide addresses only those items. You should use your good judgment, however, to identify possible safety hazards that are not covered by this guide. -
Page 83: Checking The Grounding Of The 7133
Checking the Grounding of the 7133 This section has two subsections: v “Grounding Check (Model D40)” v “Grounding Check (Model T40)” on page 69. Go to the appropriate subsection for the 7133 that you are servicing. Grounding Check (Model D40) 1. - Page 84 6. Refer to Figure 37. Figure 37. Remote-Power-On Control Unit 7. If the 7133 has a Remote Power On Control feature, ensure that no using system power-control cables are present at the MAIN and AUX connectors 1 . 8. Follow your local procedures and check the grounding of the 7133. Any test equipment must be connected to the frame of the 7133 ( 3 in Figure 36 on page 65).
- Page 85 9. Refer to Figure 38. Figure 38. Ground Pin (Model D40: 220 V) 10. Check for continuity between the frame of the 7133 and the ground pin 1 of each mainline-power connector. 11. Go to step 15. 12. Refer to Figure 39. Pin 6 Pin 1 Pin 7...
- Page 86 If the power cable does not have continuity, exchange it for a new one, then do the complete grounding check again. If the power cable does have continuity, see the rack, or using-system, Installation and Service Guide, or equivalent, to isolate the fault. 7133 Models D40 and T40 Service Guide...
-
Page 87: Grounding Check (Model T40)
Grounding Check (Model T40) 1. Refer to Figure 40. Figure 40. Power Cables and SSA Sockets (Model T40) 2. At the back of the 7133, ensure that the short cables 3 and 4 are plugged into the power supply assemblies, and that a power cable is plugged into each of the power sockets 1 and 2 . - Page 88 6. Refer to Figure 41. Figure 41. Remote-Power-On Control Unit 7. If the 7133 has a Remote Power On Control feature, ensure that no using system power-control cables are present at the MAIN and AUX connectors 1 . 8. Check for continuity between the frame of the 7133 ( 6 in Figure 40 on page 69) and the ground pin of each power cable.
- Page 89 11. Refer to Figure 42. Figure 42. Ground Pin (Model T40) 12. Check for continuity between the frame of the 7133 and the ground pin 1 of each mainline power connector at the top of the 7133. 13. If both mainline power connectors have continuity, go to step 14. If one or both mainline power connectors do not have continuity, go to step 16.
- Page 90 7133 Models D40 and T40 Service Guide...
-
Page 91: Chapter 2. Problem Determination Procedures
Chapter 2. Problem Determination Procedures Are You Using the Correct Book? Do not use this book if you are servicing a 7133 Model 010, 020, 500, or 600 SSA Disk Subsystem. For the correct book, see Related Publications in the “Additional Information” appendix (in this book) for your using system. -
Page 92: Controller Card Power-On Self-Tests (Posts)
Controller Card Power-On Self-Tests (POSTs) The controller card POSTs start each time power is switched on, or when a Reset command is sent from the using-system SSA attachment. They check only the internal components of the controller card; they do not check any interfaces to other FRUs. If the POSTs complete successfully, control passes to the functional microcode of the controller card. -
Page 93: Service Request Numbers (Srns)
Service Request Numbers (SRNs) Service request numbers (SRNs) are generated for the 7133 Models D40 and T40 by the system error-log analysis, system configuration code, diagnostics, and customer problem-determination procedures. SRNs help you to identify the cause of a problem, the failing field-replaceable units (FRUs), and the service actions that might be needed to solve the problem. -
Page 94: Fru Names Used In The Srn Table
FRU Names Used in the SRN Table This section provides a glossary of the FRU names used. FRU Name in Table Definition Frame assembly The frame of the 7133 and the backplanes and cables that it contains. Disk drive module A disk drive attached to a carrier that plugs into one of the backplanes of the 7133. -
Page 95: The Srns
The SRNs FRU List Problem 10104 None Description: Format in progress. Action: Wait for the formatting operation to end, then run concurrent diagnostics to ensure that no more problems exist. For information about how to run concurrent diagnostics, see Concurrent Diagnostics in the “Additional Information”... - Page 96 FRU List Problem 21PAA Disk-drive module (45%) (“Disk Drive Description: An SSA ‘Threshold exceeded’ link error has Modules and Dummy Disk Drive been detected. 29PAA Modules” on page 150). Action: Go to the Intermittent Link Error MAP in the user or SSA attachment (45%) (using-system maintenance information for your using-system SSA Installation and Service Guide).
- Page 97 FRU List Problem 2A206 Disk drive module (100%) (“Disk Drive Description: A disk drive module has detected that one of its Modules and Dummy Disk Drive SSA links has failed the POSTs. Modules” on page 150). Action: Use a link verification, or physical view, service aid to determine where the SSA link is broken (see the user or maintenance information for your using-system SSA attachment).
- Page 98 FRU List Problem 33PAA Not applicable Description: SRNs in this range are not enclosure (subsystem) SRNs. 4252C Action: For SRNs in this range, see the documentation for your SSA attachment. 43PAA Disk drive module (90%) (“Disk Drive Description: An SSA device on the loop is preventing the Modules and Dummy Disk Drive completion of the loop configuration.
- Page 99 FRU List Problem 46000 Not applicable Description: SRNs in this range are not enclosure (subsystem) SRNs. 6FFFF Action: For SRNs in this range, see the documentation for your SSA attachment. 7XXXX None Description: An SSA disk drive is missing from the expected configuration of the SSA loop.
- Page 100 FRU List Problem 8023X Fan assembly (95%) (“Fan Assemblies” Description: The fan assembly in position X has failed. on page 173). v 80231 means the fan assembly in position 1. v 80232 means the fan assembly in position 2. Controller card asm (3%) (“Controller v 80233 means the fan assembly in position 3.
- Page 101 FRU List Problem 80254 None Description: Under-Temperature Warning level has been exceeded. Action: Take actions to increase the ambient temperature. 80260 None Description: An empty disk drive module slot has been reported. The slot has been empty for longer than one minute.
- Page 102 FRU List Problem D0102 None Description: The command line diagnostics have detected that the device is reserved or fenced out. Action: Use the -u flag to break the reservation or fence. Warning: If another using system is using this device, unpredictable results might occur if you break the reservation or fence.
- Page 103 FRU List Problem D8000 Controller card asm (99%) (“Controller Description: The diagnostics cannot get access to the Card Assembly” on page 199). controller. Frame assembly (1%) (“Frame Action: Exchange the FRUs for new FRUs. Assembly” on page 208). D8300 Controller card asm (100%) Description: The diagnostics have detected a controller (“Controller Card Assembly”...
-
Page 104: Maintenance Analysis Procedures (Maps)
Maintenance Analysis Procedures (MAPs) Are You Using the Correct Book? Do not use this book if you are servicing a 7133 Model 010, 020, 500, or 600 SSA Disk Subsystem. For the correct book, see Related Publications in the “Additional Information” appendix (in this book) for your using system. -
Page 105: Map 2010: 7133 Models D40 And T40 - Start
MAP 2010: 7133 Models D40 and T40 – START This MAP is the entry point to the MAPs for the 7133 Models D40 and T40. If you are not familiar with these MAPs, read “How to Use these MAPs” on page 86 first. You might have been sent here because: v The system problem determination procedures sent you here. - Page 106 Step 2. (from step 1) Are you at this MAP because power is not removed completely from the 7133 when the using system is switched off? Go to step 3. a. Check whether the 7133 has a Remote Power On Control feature installed (see “Remote-Power-On Control Unit and Cables”...
- Page 107 Step 5. (from step 4) Are the four disk drive modules of a particular internal string affected? (For information about internal strings, see “Internal Connections (Model D40)” on page 28 or “Internal Connections (Model T40)” on page 30.) a. Exchange the controller card assembly for a new one (see “Controller Card Assembly”...
- Page 108 Step 7. (from step 3) Have you been sent to this MAP from a service aid or service function? Go to step 8. Go to MAP Extension in the “Additional Information” appendix (in this book) for your using system. If the MAP extension is not applicable to your using system, go to step 8.
- Page 109 Step 13. (from step 12) Does any 7133 Model D40 or Model T40 have its Power light off or flashing? Go to step 14. v If the Power light is off, go to “MAP 2020: 7133 Models D40 and T40 – Power” on page 95. v If the Power light is flashing, go to step 16 on page 92.
- Page 110 Step 16. (from step 13) Are you servicing a 7133 Model T40 (deskside unit)? Go to step 17. Go to step 18. Step 17. (from step 16) The 7133 is in Standby mode. Press and release the 7133 Power switch. Does the 7133 Power light come on, and stay on continuously? Go to step 18.
- Page 111 Step 20. (from step 19) Is the display showing the 7133 ID and an error ID alternately? Go to step 21 on page 94. In Table 6, find the error ID that is being displayed, and note its related SRN. Then, go to the table in “Service Request Numbers (SRNs)”...
- Page 112 If the error ID is COLD, the internal dc power switches on automatically after the temperature has increased and has remained more than 5°C above the critical temperature for 15 minutes. If the error ID is WARM, the error is not reset until the ambient temperature has fallen at least 2°C below the warning level.
-
Page 113: Map 2020: 7133 Models D40 And T40 - Power
MAP 2020: 7133 Models D40 and T40 – Power This MAP helps you to isolate FRUs that are causing a power problem on a 7133 Model D40 or Model T40. Attention: Unless the using system needs to be switched off for some other reason, do not switch off the using system when servicing the 7133 or an SSA link. - Page 114 Step 5. (from step 4) Is the CHK/PWR-GOOD light of this power supply assembly showing green? Go to “MAP 2022: 7133 Models D40 and T40 – Power-On” on page 99. a. Exchange, for a new one, the power supply assembly whose CHK/PWR-GOOD light was showing amber in step 3 (see “Power Supply Assemblies”...
- Page 115 Step 8. (from step 7) Does each power supply assembly have its PWR light on? Go to step 9. Go to step 3 on page 95. a. Exchange the operator panel assembly for a new one (see “Operator Panel and Disk Drive Status Light Assemblies, Flexible Circuits, and Front Bezel Assembly”...
- Page 116 Step 11. (from steps 9 and 10) Check the electrical power source. Is the electrical power source providing power correctly? Repair the electrical power source if you are qualified to do so. Otherwise, request assistance from a qualified electrician. v If you are servicing a 7133 Model D40: a.
-
Page 117: Map 2022: 7133 Models D40 And T40 - Power-On
MAP 2022: 7133 Models D40 and T40 – Power-On This MAP helps you to isolate FRUs that are causing a power problem on a 7133 Model D40 or Model T40. Attention: Unless the using system needs to be switched off for some other reason, do not switch off the using system when servicing the 7133 or an SSA link. - Page 118 Step 2. (from step 1) a. Reinstall one of the power supply assemblies. b. Connect a power cable to the power supply assembly. c. If you are servicing a Model T40, press and release the power switch. d. Switch on the power supply assembly. The 7133 switches on automatically.
- Page 119 Step 4. (from steps 3 and 5) Reinstall a fan assembly. Does the 7133 emit smoke or a smell of burning? Go to step 5. a. Exchange, for a new one, the fan assembly that you have just reinstalled. b. Go to step 5. Step 5.
- Page 120 Step 9. (from step 8) Reconnect a disk drive module by closing its handle (see “Installing a Module” on page 156). Does the 7133 emit smoke or a smell of burning? Go to step 10. a. Exchange, for a new one, the disk drive module that you have just reconnected.
-
Page 121: Map 2030: 7133 Models D40 And T40 - Remote Power On Control Feature
MAP 2030: 7133 Models D40 and T40 – Remote Power On Control Feature This MAP helps you to isolate FRUs that are causing a power problem when a Remote Power On Control feature is installed on a 7133 Model D40 or Model T40. See the using-system Installation and Service Guide, or equivalent, for information about how the using-system power-control cables are connected. - Page 122 Step 3. (from step 2) a. Disconnect both MAIN using-system power-control cables from connectors J3 and J4 of the remote-power-on control unit. b. Observe the power supply assemblies in the 7133. Does at least one CHK/PWR-GOOD light show green? a. Reconnect the MAIN using-system power-control cables to the remote-power-on control unit.
- Page 123 Step 4. (from step 3) a. Identify the short 7133 power-control cable that connects the power supply assembly in position 1 to the remote-power-on control unit. Disconnect that cable from the power supply assembly. b. Observe the power supply assemblies. Does at least one CHK/PWR-GOOD light show green? a.
- Page 124 Step 5. (from step 3) Observe the remote-power-on control unit. Are the MAIN connectors (J3 and J4) and the AUX connectors (J1 and J2) all connected to a using system? a. In the sequence shown, exchange the following FRUs for new FRUs.
- Page 125 Step 6. (from MAP 2010: 7133 Models D40 and T40 – START step 2 on page 88) You have arrived at this step because the MAIN and AUX using systems are switched off, but power is still present at the 7133; that is, the 7133 Power light is on continuously.
- Page 126 Step 8. (from step 7) a. Set the remote-power-on control unit switch to | (on). b. Remove the using-system power-control cables (if present) from the AUX connectors (J1 and J2) of the remote-power-on control unit. c. Observe the power supply assemblies. Does the CHK/PWR-GOOD light of each power supply assembly show green? a.
-
Page 127: Map 2330: 7133 Models D40 And T40 - Optical Extender
MAP 2330: 7133 Models D40 and T40 – Optical Extender This maintenance analysis procedure (MAP) describes how to analyze a failure that has occurred in the optical link. Diagnostic aid is provided by two lights on each optical extender: a Power light 1 and a Receive light 2 . - Page 128 v If the wrap cable is 150 mm (6 in.) long, one end of the cable is connected to the wrap adapter, and protective covers are placed over each end of the complete wrap cable and adapter assembly. The wrap cable and adapter assembly must be kept in its plastic bag in a safe place that is as close to the optical extender as possible.
- Page 129 Step 1. You are here because the optical link might not be working correctly. Ensure that: v The optical extender at each end of the optical link is correctly plugged in. v The main fibre optic cables are correctly connected to the optical extenders. v The using system and the 7133 (or any other device into which optical extenders are plugged) are switched on.
- Page 130 Step 4. (from step 3) Is the Receive light off at each end of the optical link? Go to step 6 on page 115. Check whether the fibre optic cables are crossed over; that is, one cable is connected to a Receive connector at each end, and the other cable is connected to a Transmit connector at each end.
- Page 131 Step 5. (from step 2) a. Unplug from the 7133, SSA attachment, or other device, the optical extender whose Power light is off. b. Refer to Figure 44. Ground +5 Volts Figure 44. SSA Connector Pins c. At the connector from which you have unplugged the optical extender, check the voltage between pins 5 and 8;...
- Page 132 a. Exchange, for new FRUs, the appropriate FRUs of the device (see the service information for the device). b. Check the power source of the device. c. Go to “MAP 2410: 7133 Models D40 and T40 – Repair Verification” on page 131 to verify the repair. a.
- Page 133 Step 6. (from step 4) a. In the next step, you are going to disconnect the fibre optic cables. Before you do so, note the identifications of the fibre optic cables to ensure that you reconnect them correctly later. b. Refer to Figure 45. Figure 45.
- Page 134 i. Refer to Figure 47. Figure 47. Wrapped Optical Extender j. Connect the wrap cable 1 to the connectors of the optical extender. Does the Receive light of the optical extender come on? a. Remove the wrap cable from the optical extender, and do whichever of the two following actions is appropriate: v If the wrap cable is 400 mm (15 in.) long, connect each of its ends to the wrap adapter to make a closed loop.
- Page 135 a. Remove the wrap cable from the optical extender, and do whichever of the two following actions is appropriate: v If the wrap cable is 400 mm (15 in.) long, connect each of its ends to the wrap adapter to make a closed loop. v If the wrap cable is 150 mm (6 in.) long, connect one end to the wrap adapter, then install a protective cover at each end of the complete wrap cable and adapter assembly.
- Page 136 g. Refer to Figure 49. Figure 49. Wrap Cable and Wrap Adapter h. Disconnect the wrap cable 1 from the wrap adapter 2 . i. Refer to Figure 50. Equipment Cable Plant Figure 50. Wrapped Multi-Mode Conditioner j. Connect the wrap cable 1 to the connectors of the multi-mode conditioner.
- Page 137 Note: If the problem remains, find another wrap cable and adapter assembly, and repeat this step. The original wrap cable might have failed. a. Remove the wrap cable from the multi-mode conditioner, and do whichever of the two following actions is appropriate: v If the wrap cable is 400 mm (15 in.) long, connect each of its ends to the wrap adapter to make a closed loop.
- Page 138 Step 9. (from steps 7 and 8) a. Find the optical extender at the other end of the link. b. In the next step, you are going to disconnect the fibre optic cables. Before you do so, note the identifications of the fibre optic cables to ensure that you reconnect them correctly later.
- Page 139 k. Connect the wrap cable 1 to the connectors of the optical extender. Does the Receive light of the optical extender come on? a. Remove the wrap cable from the optical extender, and do whichever of the two following actions is appropriate: v If the wrap cable is 400 mm (15 in.) long, connect each of its ends to the wrap adapter to make a closed loop.
- Page 140 Step 10. (from step 9) Is a multi-mode conditioner present in the optical link? Go to step 12. a. In the next step, you are going to disconnect the main fibre optic cables. Before you do so, note the identifications of the main fibre optic cables to ensure that you reconnect them correctly later.
- Page 141 i. Refer to Figure 56. Equipment Cable Plant Figure 56. Wrapped Multi-Mode Conditioner j. Connect the wrap cable 1 to the connectors of the multi-mode conditioner. k. Go to step 11. Step 11. (from step 10) Does the Receive light of the optical extender come on? a.
- Page 142 b. Place the wrap cable and adapter assembly into its plastic bag, and return it to the place where it is normally kept. c. Go to step 12. Step 12. (from step 9) One of the following conditions exists: v The light output from this optical extender is low. v The main fibre optic cables are failing.
- Page 143 Step 13. (from step 3) v If the optical extender is plugged into an SSA attachment, observe the green light (if present) that is next to the connector on the attachment. v If the optical extender is not plugged into an SSA attachment, or is plugged into an SSA attachment that has no green light, observe the Ready light of the first disk drive module on the string to which the optical extender is connected.
- Page 144 Step 15. (from step 13) a. In the next step, you are going to disconnect the fibre optic cables. Before you do so, note the identifications of the fibre optic cables to ensure that you reconnect them correctly later. b. Refer to Figure 58. Figure 58.
- Page 145 i. Refer to Figure 60. Figure 60. Wrapped Optical Extender j. Connect the wrap cable 1 to the connectors of the optical extender. Does the Receive light of the optical extender come on? a. Remove the wrap cable from the optical extender, and do whichever of the two following actions is appropriate: v If the wrap cable is 400 mm (15 in.) long, connect each of its ends to the wrap adapter to make a closed loop.
- Page 146 Step 16. (from step 15) v If the optical extender is plugged into an SSA attachment, observe the green light (if present) that is next to the connector on the adapter. v If the optical extender is not plugged into an SSA attachment, or is plugged into an SSA attachment that has no green light, observe the Ready light of the first disk drive module on the string to which the optical extender is connected.
- Page 147 Step 18. (from step 17) a. Remove the wrap cable from the optical extender, and do whichever of the two following actions is appropriate: v If the wrap cable is 400 mm (15 in.) long, connect each of its ends to the wrap adapter to make a closed loop.
- Page 148 Step 19. (from step 16) The disk drive module is receiving SSA signals correctly. Have you checked both ends of the optical link? a. Remove the wrap cable from the optical extender, and do whichever of the two following actions is appropriate: v If the wrap cable is 400 mm (15 in.) long, connect each of its ends to the wrap adapter to make a closed loop.
-
Page 149: Map 2410: 7133 Models D40 And T40 - Repair Verification
MAP 2410: 7133 Models D40 and T40 – Repair Verification This MAP helps you to verify a repair after a FRU has been exchanged for a new one. Attention: Unless the using system needs to be switched off for some other reason, do not switch off the using system when servicing the 7133 or an SSA link. -
Page 150: Ssa Link Errors
SSA Link Errors SSA link errors can be caused if: v Power is removed from an SSA device. v An SSA device is failing. v An SSA device is removed. v A cable is disconnected. v Bypass card modes have been set incorrectly. Such errors might be indicated by: v SRN 45PAA v A flashing link status (or Ready) light on the SSA device at each end of the failing... - Page 151 Here are some examples of SSA links. Each link contains more than one part. Example 1 In Figure 61, the SSA link is between two disk drive modules that are in the same SSA subsystem or 7133. It has three parts. SSA Subsystem Internal Disk...
- Page 152 Example 3 In Figure 63, the SSA link is between two disk drive modules that are not in the same SSA subsystem or 7133. It has seven parts. SSA Subsystem SSA Subsystem Cable Disk Internal Internal Disk Connector Connector Connection Drive Connection Drive...
-
Page 153: Link Status (Ready) Lights
Link Status (Ready) Lights If a fault occurs that prevents the operation of a particular link, the link status lights of the various parts of the complete link show that the error has occurred. You can find the failing link by looking for the flashing green status light at each end of the affected link. -
Page 154: Optical Extender Lights
Summary of Bypass Card Lights For a description of the functions of the bypass card, see “SSA Bypass Cards” on page 41. Link Status (Ready) Light (one for each port): Status of Light Meaning One of the following: v The path through this port is not operational. v The card is switched into Bypass state (mode light shows amber). -
Page 155: Chapter 3. Removal And Replacement Procedures
Chapter 3. Removal and Replacement Procedures Are You Using the Correct Book? Do not use this book if you are servicing a 7133 Model 010, 020, 500, or 600 SSA Disk Subsystem. For the correct book, see Related Publications in the “Additional Information” appendix (in this book) for your using system. -
Page 156: Covers
Covers This section describes how to: v Open the operator panel flap v Open or remove the front cover of a Model D40 v Open the front cover of a Model T40 v Open the back cover of a Model T40 (Model D40 has no back cover). Note: Unless you have a particular reason to do so, do not switch off the using system or the 7133 when removing, opening, installing, or closing the covers of the 7133. -
Page 157: Front Cover (Model D40)
Front Cover (Model D40) Step 1. Refer to Figure 67. Figure 67. Opening the Front Cover of Model D40 Step 2. To open the front cover, hold it at the sides, and pivot it downward. Chapter 3. Removal and Replacement Procedures... - Page 158 Step 3. To remove the front cover assembly: a. Refer to Figure 68. Figure 68. Removing the Latch Retainer b. If a latch retainer 1 is present, remove the two screws 2 and the latch retainer. 7133 Models D40 and T40 Service Guide...
- Page 159 c. Refer to Figure 69. Figure 69. Removing the Front Cover d. Move the latch 2 to your left, then pull it forward to unplug the operator-panel flexible circuit from the controller card assembly. Note: If mainline electrical power is present in the 7133, and the 7133 power switch is set to Standby, the internal dc power switches on when the operator panel flexible circuit is disconnected from the controller card assembly.
- Page 160 e. Do the same actions with the latch 1 to unplug the disk-drive-status-light flexible circuit from the controller card assembly. f. Disconnect the support strap 3 from the front cover. g. Remove the two locknuts 4 and, if present, the plastic cable shield 5 . Do not lose the plastic cable shield.
-
Page 161: Front Cover (Model T40)
Front Cover (Model T40) Step 1. Ask the customer for the key to the covers. Step 2. Refer to Figure 70. Figure 70. Opening the Front Cover of a Model T40 Step 3. Insert the key into the lock 1 , and turn the key counterclockwise. Step 4. -
Page 162: Back Cover (Model T40)
Back Cover (Model T40) Step 1. Ask the customer for the key to the covers. Step 2. Refer to Figure 71. Figure 71. Opening the Back Cover of a Model T40 Step 3. Insert the key into the lock 1 , and turn the key counterclockwise. Step 4. -
Page 163: All Power
All Power Note: Unless you have a particular reason to do so, or the instructions that you are following tell you to do so, do not remove power from the using system or from the 7133. This section has two parts: v “Power (Model D40)”... -
Page 164: Power (Model D40)
Power (Model D40) Step 1. Verify with the customer that all operations between the 7133 and the using system have been stopped. Step 2. Refer to Figure 72. Figure 72. Removing the Power from a Model D40 Step 3. Observe the 7133 Power light 1 . If the light is on, open the operator panel flap 3 (see “Operator Panel Flap”... - Page 165 Note: For a translation of the following notice, see the 7133 Serial Disk Systems and SSA Adapters: Translated Safety Notices manual. DANGER In the following step you are going to remove the power cable. This cable is live if the rack power distribution unit or battery-backup unit is still switched Step 6.
-
Page 166: Power (Model T40)
Power (Model T40) Step 1. Verify with the customer that all operations between the 7133 and the using system have been stopped. Step 2. Refer to Figure 73. Figure 73. Removing Power from a Model T40 Step 3. Observe the 7133 Power light 2 . If the light is on, open the operator panel flap 1 (see “Operator Panel Flap”... - Page 167 Step 7. To return power to the 7133: a. Reinstall the power cables 4 . b. Ensure that both power supply assemblies are switched on (that is, the PWR/FAULT RESET switch 5 of each power supply assembly is pointing to the left). To switch on a power supply assembly, push the PWR/FAULT RESET switch leftward.
-
Page 168: Disk Drive Modules And Dummy Disk Drive Modules
Disk Drive Modules and Dummy Disk Drive Modules Note: A disk drive module is one FRU. Always exchange it as a complete FRU. Removing a Module Attention: v Disk drive modules are fragile. Handle them with care, and keep them well away from strong magnetic fields. - Page 169 Step 8. Use the Set Service Mode service aid to put into Service mode the disk drive module that you are removing (see the chapter about SSA service aids in the user or maintenance information for your using-system SSA attachment hardware).
- Page 170 Step 10. If the module has a lock 1 , go to step 11. If the module does not have a lock, go to step 14 on page 153. Step 11. Ask the customer for the key. Insert the key 2 into the lock, the turn the key counterclockwise.
- Page 171 Step 14. Refer to Figure 76. Figure 76. Opening the Handle of a Module Step 15. Press the blue latch 1 , and pull down the handle 2 fully. This action pulls the module partially out of its slot. Chapter 3. Removal and Replacement Procedures...
- Page 172 Step 16. Refer to Figure 77. Figure 77. Removing a Module Step 17. Grip the handle, and carefully pull out the module. As the module comes out, put one hand under its base to prevent it from falling. 7133 Models D40 and T40 Service Guide...
- Page 173 Step 18. Refer to Figure 78. Figure 78. Placing a Module into a Safe Position Step 19. Lay down the module so that it rests on the supports 1 . Step 20. Attention: All slots must contain either a disk drive module or a dummy disk drive module.
-
Page 174: Installing A Module
Installing a Module Attention: v Disk drive modules are fragile. Handle them with care, and keep them well away from strong magnetic fields. v Any slot that has no disk drive module installed must contain a dummy disk drive module. The dummy module provides continuity of the SSA string, and ensures that the correct airflow is maintained around the disk drive modules in the other slots. - Page 175 Step 3. Refer to Figure 79. Figure 79. Installing a Module Step 4. Ensure that the handle 1 is fully open on the module that you are going to install. Step 5. With one hand giving support to the base of the module, insert the module, and push it into the slot.
- Page 176 Step 6. Refer to Figure 80 Figure 80. Closing the Handle of a Module Step 7. Close the handle 1 . Press it in until you hear a click. This action pushes the module fully home. Step 8. If you are installing a dummy disk drive module, go to step 10 on page 159. If you are installing a disk drive module, go to step 9.
- Page 177 c. Check whether the Ready light 2 comes on. v If the Ready light comes on and remains on continuously, or flashes quickly (five times per second), go to step 10. v If the Ready light does not come on, or flashes slowly (two seconds on, two seconds off), go to “MAP 2010: 7133 Models D40 and T40 –...
- Page 178 Step 13. Refer to Figure 82. Figure 82. Installing the Lock onto a Module (2) Step 14. Push the lock 1 over the handle of the disk drive module. Step 15. Insert the key 2 into the lock, then turn the key clockwise. Return the key to the customer.
- Page 179 download the latest microcode, see Downloading Disk Drive Microcode“Disk Drive Microcode Maintenance” in the “Additional Information” appendix (in this book) for your using system. Step 20. If the 7133 is attached to a RISC system, go to step 21. Otherwise, go to step 22.
-
Page 180: Power Supply Assemblies
Power Supply Assemblies Notes: 1. Unless you have a particular reason to do so, do not switch off the using system or the 7133 when removing or installing power supply assemblies. 2. The diagrams in these instructions show a 7133 Model D40. The procedure for a 7133 Model T40 is the same, except that everything is turned through 90 degrees. -
Page 181: Removing A Power Supply Assembly
Removing a Power Supply Assembly Step 1. Refer to Figure 83. Figure 83. Switching Off a Power Supply Assembly Step 2. Switch off the power supply assembly that you are removing. To do this, push the PWR/FAULT RESET switch 1 downward. Notes: a. - Page 182 Step 3. Refer to Figure 84. Figure 84. Removing the Power Cable and 7133 Power-Control Cable Step 4. At the back of the 7133, unplug the power cable 1 from the power supply assembly that you are going to remove. Step 5.
- Page 183 Step 6. Refer to Figure 85. Figure 85. Unscrewing the Thumbscrews Step 7. Unscrew the two thumbscrews 1 on the power supply assembly. Chapter 3. Removal and Replacement Procedures...
- Page 184 Step 8. Refer to Figure 86. Figure 86. Using the Lever to Release the Power Supply Assembly Step 9. Press the latch 1 , and pull the lever 2 fully upward. These actions pull the power supply assembly partially out of its housing. 7133 Models D40 and T40 Service Guide...
- Page 185 Step 10. Refer to Figure 87. Figure 87. Removing the Power Supply Assembly Step 11. Remove the power supply assembly. The power supply assembly is a complete FRU. Do not try to repair or exchange any part of it. Note: For a translation of the following notice, see the 7133 Serial Disk Systems and SSA Adapters: Translated Safety Notices manual.
-
Page 186: Installing A Power Supply Assembly
Installing a Power Supply Assembly Step 1. Attention: Both power supply assemblies in a 7133 must be of the same voltage rating. Do not mix power supply assemblies of different voltage ratings. Ensure that you are installing a power supply assembly of the correct voltage rating. - Page 187 Step 4. Refer to Figure 89. Figure 89. Pushing the Power Supply Assembly Fully Home Step 5. Push the lever 1 fully downward. This action pushes the power supply assembly home Chapter 3. Removal and Replacement Procedures...
- Page 188 Step 6. Refer to Figure 90. Figure 90. Tightening the Thumbscrews Step 7. Tighten the thumbscrews 1 . 7133 Models D40 and T40 Service Guide...
- Page 189 Step 8. Refer to Figure 91. Figure 91. Installing the Cables Step 9. Install the power cable 1 and, if present, the 7133 power-control cable 2 . Notes: a. When present, the 7133 power-control cable is plugged into the power supply assembly that is in position 1 (see “Parts Locations”...
- Page 190 Step 10. Refer to Figure 92. Figure 92. Switching On the Power Supply Assembly Step 11. Switch on the power supply assembly. To do this, push PWR/FAULT RESET switch 1 upward. Notes: a. On early power supply assemblies, pull the switch outward, then push it upward.
-
Page 191: Fan Assemblies
Fan Assemblies Attention: If you are servicing the 7133 under concurrent maintenance (see “Concurrent Maintenance” on page 137), ensure that you have only one fan assembly removed from the 7133 at any time. Notes: 1. Unless you have a particular reason to do so, do not switch off the using system or the 7133 when removing or installing fan assemblies. - Page 192 Step 4. Replace parts in the reverse sequence. Note: When you insert the fan assembly, you might hear the speed of the other fans decrease. 7133 Models D40 and T40 Service Guide...
-
Page 193: Operator Panel And Disk Drive Status Light Assemblies, Flexible Circuits, And Front Bezel Assembly
Operator Panel and Disk Drive Status Light Assemblies, Flexible Circuits, and Front Bezel Assembly The subsections in this section describe removal and replacement procedures for: v ESD cover (Model D40). You must remove the ESD cover to gain access to: –... -
Page 194: Esd Cover (Model D40)
ESD Cover (Model D40) Note: Unless you have a particular reason to do so, do not switch off the using system or the 7133 when removing or installing the operator panel assembly. Step 1. If not already done, open the front cover (see “Covers” on page 138). Step 2. -
Page 195: Operator Panel Assembly (Model D40)
Note: Engage the two flexible circuits into the slots of the ESD cover before you lower the cover into position. Operator Panel Assembly (Model D40) Note: Unless you have a particular reason to do so, do not switch off the using system or the 7133 when removing or installing the operator panel assembly. - Page 196 Step 4. Unplug the flexible circuit 3 from the operator panel. Note: If mainline electrical power is present in the 7133, and the 7133 power is set to Standby by the power switch or by the remote-power-control unit, the internal dc power switches on when the flexible circuit is disconnected from the operator panel.
-
Page 197: Operator Panel Flexible Circuit (Model D40)
Operator Panel Flexible Circuit (Model D40) Note: Unless you have a particular reason to do so, do not switch off the using system or the 7133 when removing or installing the operator panel flexible circuit. Step 1. If not already done, open the front cover (see “Covers” on page 138). Step 2. - Page 198 Step 5. If a latch retainer 2 is present, remove the two screws 3 and the latch retainer. Step 6. Move the latch 4 to your left, then pull it forward to unplug the operator panel flexible circuit from the controller card assembly. Step 7.
-
Page 199: Disk Drive Status Lights Assembly (Model D40)
Disk Drive Status Lights Assembly (Model D40) Note: Unless you have a particular reason to do so, do not switch off the using system or the 7133 when removing or installing the disk drive status lights assembly or the flexible circuit. Step 1. - Page 200 circuit is disconnected from the controller card assembly. The dc power remains switched on when the circuit is reconnected. Step 6. Do the same actions with the latch 1 to unplug the disk drive status lights flexible circuit from the controller card assembly. Step 7.
-
Page 201: Front Bezel Assembly (Model T40)
Front Bezel Assembly (Model T40) Step 1. Verify with the customer that all operations between the 7133 and the using system have been stopped. Step 2. If not already done, open the front cover (see “Covers” on page 138). Step 3. Refer to Figure 98. Figure 98. - Page 202 Step 7. Refer to Figure 99. Figure 99. Checking the Front Bezel Assembly Step 8. Open the operator panel flap 1 . Step 9. Holding the bezel assembly 3 with both hands, press its bottom surface upward to release its clips. Step 10.
- Page 203 you must install the later type. You must also exchange the power switch and cable assembly for the later type. Ensure that you have the correct power switch and cable assembly available. v If the switch remains in position (that is, the power switch is not attached to the bezel assembly), you have a later-type bezel assembly.
- Page 204 Step 18. Go to the front of the 7133. Step 19. If not already done, open the front cover (see “Covers” on page 138). Step 20. Refer to Figure 101. Figure 101. Removing an Early-Type Front Bezel Assembly Step 21. Close the operator panel flap (if open) to prevent it from becoming damaged. Step 22.
- Page 205 Step 26. If you are exchanging the bezel assembly, you must install the later-type bezel and the later-type power switch and cable assembly. Go to “Converting from Early- to Later-Type Bezel Assembly and Power Switch and Cable Assembly” on page 195. If you are reinstalling the original bezel, replace parts in the reverse sequence.
-
Page 206: Operator Panel Assembly And Operator Panel Flexible Circuit (Model T40)
Operator Panel Assembly and Operator Panel Flexible Circuit (Model T40) Step 1. If not already done, open the front cover (see “Covers” on page 138). Step 2. Remove the front bezel assembly (see “Front Bezel Assembly (Model T40)” on page 183). Step 3. -
Page 207: Disk Drive Status Lights Assembly (Model T40)
Disk Drive Status Lights Assembly (Model T40) Step 1. If not already done, open the front cover (see “Covers” on page 138). Step 2. Remove the front bezel assembly (see “Front Bezel Assembly (Model T40)” on page 183). Step 3. Refer to Figure 103. Figure 103. -
Page 208: Power Switch And Cable Assembly (Model T40)
Power Switch and Cable Assembly (Model T40) Attention: The power switch and cable assembly FRU consists of a power switch and a cable assembly. If you are exchanging the FRU, ensure that you exchange both parts of the FRU. Step 1. If not already done, open the front cover (see “Covers” on page 138). Step 2. -
Page 209: Early-Type Power Switch And Cable Assembly
Early-Type Power Switch and Cable Assembly Step 1. Refer to Figure 104. Figure 104. Removing an Early-Type Power Switch and Cable Assembly Step 2. Remove the two nuts 5 to release the grounding wires. Step 3. Release the cable from the clip 4 . Step 4. - Page 210 b. Ensure that the latches of the operator panel flexible circuit and the disk drive status lights flexible circuit engage fully in the slots of the 7133 frame assembly. 7133 Models D40 and T40 Service Guide...
-
Page 211: Later-Type Power Switch And Cable Assembly
Later-Type Power Switch and Cable Assembly Step 1. If not already done, open the back cover (see “Covers” on page 138). Step 2. Remove all power from the 7133 (see “Power (Model T40)” on page 148). Step 3. Refer to Figure 105. Figure 105. - Page 212 Step 11. Refer to Figure 106. Figure 106. Removing a Later-Type Power Switch and Cable Assembly Step 12. Remove the two nuts 2 to release the grounding wires. Step 13. Release the cable from the clip 3 . Step 14. Remove the nut 1 . Step 15.
-
Page 213: Converting From Early- To Later-Type Bezel Assembly And Power Switch And Cable Assembly
Converting from Early- to Later-Type Bezel Assembly and Power Switch and Cable Assembly Step 1. If not already removed, remove the early-type bezel assembly (see “Front Bezel Assembly (Model T40)” on page 183) and power switch and cable assembly (see “Power Switch and Cable Assembly (Model T40)” on page 190). - Page 214 Step 7. Refer to Figure 108. Figure 108. Installing the Later-Type Bezel Step 8. Holding the bezel assembly 1 with both hands, engage the hooks 2 under the front edge of the 7133. Step 9. Press the bottom surface of the bezel assembly upward to lift the latches 3 , then push the assembly into the 7133.
- Page 215 Step 11. Refer to Figure 109. Figure 109. Reconnecting the Flexible Circuits and RFI Bracket Step 12. Reconnect the operator panel flexible circuit 3 and the disk drive status lights flexible circuit 4 . Step 13. Ensure that the latches of the two flexible circuits engage fully in the slots of the 7133 frame assembly.
- Page 216 Step 16. Refer to Figure 110. Figure 110. Reinstalling the AC Connector Block and Power Cables Step 17. Place the AC connector block into position on its mounting lug. Step 18. Install the screw 1 . Step 19. Plug the two power cables 2 into the power supply assemblies. 7133 Models D40 and T40 Service Guide...
-
Page 217: Controller Card Assembly
Controller Card Assembly Attention: The controller card is electrostatic-discharge (ESD) sensitive. Use the tools and procedures defined by your organization to protect such parts. Notes: 1. Unless you have a particular reason to do so, do not switch off the using system or the 7133 when removing or installing the controller card assembly. - Page 218 Note: If mainline electrical power is present in the 7133, and the 7133 power is set to Standby by the power switch (Model D40 only) or by the remote-power-control unit (both models), the internal dc power switches on when the operator panel flexible circuit is disconnected from the controller card assembly.
-
Page 219: Bypass (Snbc) Cards
Bypass (SNBC) Cards Attention: v The bypass cards are electrostatic-discharge (ESD) sensitive. Use the tools and procedures defined by your organization to protect such parts. v Before you remove a bypass card, check the configuration of the 7133 to find out which disk drive modules are affected by the removal of this particular bypass card. - Page 220 ensure that you use the special screwdriver (SSA tool, part 32H7059) to unscrew them. The screwdriver is supplied with the 7133. Step 4. Unscrew the thumbscrews 1 , 2 , 3 , or 4 on the card, or cards, that you are going to remove.
- Page 221 1 2 3 1 2 3 Figure 114. Jumpers Set for Forced Inline Mode Step 11. If you are installing a new bypass card, go to step 12. If you are changing the jumper settings of a card that has been operational, go to step 13.
-
Page 222: Remote-Power-On Control Unit
Remote-Power-On Control Unit This section has two subsections; one is for Model D40, the other is for Model T40. Go to the appropriate subsection. Remote-Power-On Control Unit (Model D40) Note: Unless you have a particular reason to do so, do not switch off the using system or the 7133 when removing or installing the remote-power-on control unit. - Page 223 Step 6. Replace parts in the reverse sequence. Note: If the 7133 remained operational while you removed the remote-power-on control unit, ensure that the power switch of the remote-power-on control unit that you are going to install is set to | (on) before you reinstall any power-control cables.
-
Page 224: Remote-Power-On Control Unit (Model T40)
Remote-Power-On Control Unit (Model T40) Step 1. Open the back cover (see “Back Cover (Model T40)” on page 144). Step 2. Refer to Figure 116. Figure 116. Removing the Remote-Power-On Control Unit from Model T40 Step 3. At the back of the 7133, note the positions of all the cables that are connected to the remote-power-on control unit. - Page 225 Step 6. Refer to Figure 117. Figure 117. Removing the Remote-Power-On Control Unit from its Bracket Step 7. Remove the two nuts 1 and their lock washers. Step 8. Remove the remote-power-on control unit 2 from the bracket. Step 9. Replace parts in the reverse sequence. Note: If the 7133 remained operational while you removed the remote-power-on control unit, ensure that the power switch of the remote-power-on control unit that you are going to install is set to | (on)
-
Page 226: Frame Assembly
Frame Assembly Notes: 1. Use this procedure only if you are exchanging the frame of the 7133. If you are removing a complete Model D40 from the rack (for example, to locate it elsewhere), go to “Removing a 7133 Model D40 from a Rack” on page 221. 2. - Page 227 Step 12. Disconnect the external SSA cables (if present) from all four bypass cards. To prevent damage to the SSA connector screws, ensure that you use the special screwdriver (SSA tool, part 32H7059) to unscrew them. The screwdriver is supplied with the 7133. Step 13.
-
Page 228: Model D40 In An Rs/6000 Rack
7133 frame. You can find the safety notices in the System Installation chapter of the 7014 Model T00 and T42 Rack Installation and Service Guide, SA33-0577, or at web page: http://www.rs6000.ibm.com/resource/hardware_docs/sa38-0577/a4aw9bas.html Refer to Figure 118. Figure 118. Clamp Plates and Brackets Step 2. - Page 229 Step 3. Refer to Figure 119. Figure 119. Moving the Clamp Plates Step 4. Loosen the two screws 1 , and pivot the two clamp plates 2 away from the slots in the frame assembly. Step 5. Go to step 10 on page 213. Chapter 3.
- Page 230 Step 6. Refer to Figure 120. Figure 120. Loosening the Back Brackets (RS/6000) Step 7. Loosen the screws 1 and 2 . Step 8. Lift the brackets 3 upward as far as the holes in the rack allow, then tighten the screws 1 finger tight.
- Page 231 Step 10. Refer to Figure 121. Figure 121. Removing the Frame Assembly from the RS/6000 Rack Step 11. Remove the four front mounting screws 1 . Step 12. Note: For a translation of the following notice, see the 7133 Serial Disk Systems and SSA Adapters: Translated Safety Notices manual.
- Page 232 c. Refer to Figure 122. Figure 122. Fastening the Back of the Frame Assembly d. If you have clamp plates 2 , pivot them inward so that they engage the slots in the sides of the 7133. Tighten their screws 1 . If you have brackets 5 , fully tighten the two screws 4 , then fully tighten the four screws 3 .
-
Page 233: Model D40 In A Netfinity Rack
Model D40 in a Netfinity Rack Step 1. Note: For a translation of the following notice, see the 7133 Serial Disk Systems and SSA Adapters: Translated Safety Notices manual. CAUTION: The stabilizer must be correctly attached to the bottom front of the rack, or the rack must be firmly fastened to the floor, to prevent the rack from tipping forward while the 7133 is being installed into the rack. - Page 234 Step 4. Refer to Figure 124. Figure 124. Removing the Front Screws Step 5. Remove the four front mounting screws 1 . Step 6. Note: For a translation of the following notice, see the 7133 Serial Disk Systems and SSA Adapters: Translated Safety Notices manual. CAUTION: Do not attempt to lift the 7133 by yourself.
- Page 235 h. If you have installed a replacement frame assembly, attach the blank self-adhesive serial-number label that is supplied with the frame assembly. The new label must cover the original label (see “Labels” on page 36). i. Write the serial number of the original frame assembly onto the blank label.
-
Page 236: Model T40
Model T40 Step 1. Remove the front bezel assembly (see “Front Bezel Assembly (Model T40)” on page 183). Step 2. Remove the power switch and cable assembly (see “Power Switch and Cable Assembly (Model T40)” on page 190). Step 3. Remove the remote-power-on control unit if present (see “Remote-Power-On Control Unit (Model T40)”... - Page 237 Step 6. Refer to Figure 126. Figure 126. Removing the Frame from a Model T40 (2) Step 7. At the back of the 7133, remove the two screws 1 . Step 8. Remove the equivalent two screws from the bottom of the frame assembly. Step 9.
- Page 238 frequency interference. Install the RFI bracket after you have reconnected the flexible cables (see “Front Bezel Assembly (Model T40)” on page 183). 2) Ensure that you reinstall the shim. This shim ensures that the covers to not become distorted when all the screws are tightened. At the back of the 7133: a) Install the two screws ( 1 in Figure 126), but do not fully tighten them yet.
-
Page 239: Removing A 7133 Model D40 From A Rack
Removing a 7133 Model D40 from a Rack Notes: 1. Use this procedure only if you are removing a complete Model D40 from the rack (for example, to locate it elsewhere). If you are exchanging the frame of the 7133, go to “Frame Assembly” on page 208. 2. - Page 240 Step 3. Note: For a translation of the following notice, see the 7133 Serial Disk Systems and SSA Adapters: Translated Safety Notices manual. CAUTION: A 7133 Model D40 weighs up to 55 kg (121 lb) with disk drive modules installed. Do not attempt to remove the 7133 from the rack unless all the disk drive modules have been removed.
-
Page 241: Model D40 In An Rs/6000 Rack
7133. You can find the safety notices in the System Installation chapter of the 7014 Model T00 and T42 Rack Installation and Service Guide, SA33-0577, or at web page: http://www.rs6000.ibm.com/resource/hardware_docs/sa38-0577/a4aw9bas.html Refer to Figure 127. Figure 127. Clamp Plates and Brackets Step 2. - Page 242 Step 3. Refer to Figure 128. Figure 128. Moving the Clamp Plates Step 4. Loosen the two screws 1 , and pivot the two clamp plates 2 away from the slots in the 7133. Step 5. Go to step 10 on page 226. 7133 Models D40 and T40 Service Guide...
- Page 243 Step 6. Refer to Figure 129. Figure 129. Loosening the Back Brackets (RS/6000) Step 7. Loosen the screws 1 and 2 . Step 8. Lift the brackets 3 upward as far as the holes in the rack allow, then tighten the screws 1 finger tight.
- Page 244 Step 10. Go to the front of the rack. Step 11. Refer to Figure 130. Figure 130. Removing a Model D40 from an RS/6000 Rack Step 12. Attention: To prevent damage to the flexible circuits, disconnect them before you remove the front mounting screws. If a latch retainer 3 is present, remove the two screws 4 and the latch retainer.
- Page 245 Step 13. Do the same actions with the latch 1 to unplug the disk drive status lights flexible circuit from the controller card assembly. Step 14. Remove the front mounting screws 5 . Step 15. Note: For a translation of the following notice, see the 7133 Serial Disk Systems and SSA Adapters: Translated Safety Notices manual.
- Page 246 c. Refer to Figure 131. Figure 131. Fastening the Back of the Frame Assembly d. If you have clamp plates 2 , pivot them inward so that they engage the slots in the sides of the 7133. Tighten their screws 1 . If you have brackets 5 , fully tighten the two screws 4 , then fully tighten the four screws 3 .
-
Page 247: Model D40 In A Netfinity Rack
Model D40 in a Netfinity Rack Step 1. Note: For a translation of the following notice, see the 7133 Serial Disk Systems and SSA Adapters: Translated Safety Notices manual. CAUTION: The stabilizer must be correctly attached to the bottom front of the rack, or the rack must be firmly fastened to the floor, to prevent the rack from tipping forward while the 7133 is being installed into the rack. - Page 248 Step 4. Refer to Figure 133. Figure 133. Removing the Front Screws Step 5. Attention: To prevent damage to the flexible circuits, disconnect them before you remove the front mounting screws. If a latch retainer 3 is present, remove the two screws 4 and the latch retainer.
- Page 249 Step 7. Remove the four front mounting screws 5 . Step 8. Note: For a translation of the following notice, see the 7133 Serial Disk Systems and SSA Adapters: Translated Safety Notices manual. CAUTION: Do not attempt to lift the 7133 by yourself. Ask another service representative for aid.
-
Page 250: Support Rails
Support Rails If you are removing the support rails from an RS/6000 rack, go to “RS/6000 Support Rails”. If you are removing the support rails from a Netfinity rack, go to “Netfinity Support Rails” on page 237. RS/6000 Support Rails Step 1. - Page 251 Step 6. The 7133 Model D40 is four EIA units high. Using the preinstallation planning information, or other information supplied by the customer, determine where you are going to locate the 7133 in the rack. Step 7. Refer to the EIA markings on the rack and decide where you are going to install the support rails.
- Page 252 Step 8. For each support rail: a. Refer to Figure 135. Figure 135. Installing the Support Rails into an RS/6000 Rack b. Attach a nut clip 4 at the selected hole in the back of the rack. c. Insert the two studs 2 of the support rail into the back of the rack. Hold the support rail so that it is horizontal, and push it forward so that the stud 1 enters the matching hole in the front of the rack.
- Page 253 Step 9. Refer to Figure 136. Figure 136. Installing the Nut Clips Step 10. At the front of the rack, observe the threaded hole 1 in each of the support rails that you have just installed. Step 11. Count seven holes upward from each threaded hole, and install a nut clip Step 12.
- Page 254 Step 13. Refer to Figure 137. Figure 137. Installing the Back Brackets onto an RS/6000 Rack Step 14. Place the right-hand back bracket 1 (now on your left) into position, so that its small flange 4 touches the support rail. Step 15.
-
Page 255: Netfinity Support Rails
Netfinity Support Rails Step 1. Refer to Figure 138. Figure 138. Removing Support Rails from a Netfinity Rack Step 2. Go to the left-hand support rail 1 . Step 3. Loosen the eight adjustment screws 3 . Step 4. Remove the pan head M4 screw 5 and the lock washer 6 . Step 5. - Page 256 Step 12. Refer to Figure 139. Back Front Figure 139. Installing Support Rails into a Netfinity Rack Step 13. Observe the EIA positions on the rack, and determine where you are going to install the 7133. If appropriate, allow for possible future installation of other subsystems.
- Page 257 Step 17. Extend the support rail toward the front of the rack. Note: Hold the support rail in position until you have completed step 21. Step 18. Ensure that the support rail is horizontal (a spirit level might be useful here). Step 19.
- Page 258 Step 26. Refer to Figure 140. 6 holes Figure 140. Installing the Nut Clips Step 27. At the front of the rack, on the left-hand side, count six holes up from the retainer screw 1 . Step 28. At the sixth hole, install a nut clip 2 . Step 29.
-
Page 259: Chapter 4. Parts Catalog
Chapter 4. Parts Catalog Are You Using the Correct Book? Do not use this book if you are servicing a 7133 Model 010, 020, 500, or 600 SSA Disk Subsystem. For the correct book, see Related Publications in the “Additional Information” appendix (in this book) for your using system. -
Page 260: Assembly 1: 7133 Model D40
Assembly 1: 7133 Model D40 7133 Models D40 and T40 Service Guide... - Page 261 Assembly 1: (continued) Asm– Part Index Number Units Description 1–1 09L1686 1 Front cover assembly without operator panel and cables (white) –1 09L1687 1 Front cover assembly without operator panel and cables (black) –1A 08L7946 1 Strap –1B 08L7785 2 Ball stud –2 08L7924 1 Operator panel assembly...
- Page 262 Assembly 1: (continued) 7133 Models D40 and T40 Service Guide...
- Page 263 Assembly 1: (continued) Asm– Part Index Number Units Description 1–7 18P2200 AR Optional alternative 36.4 GB, 3.5-inch, 10 000 rpm, SSA disk drive module (Name used by system: SSA160 Physical Disk Drive 36400 MB) –7 18P5163 AR 36.4 GB, 3.5-inch, 15 000 rpm, SSA disk drive module (Name used by system: SSA160 Physical Disk Drive 36400 MB) –7 18P4049...
- Page 264 Assembly 1: (continued) 7133 Models D40 and T40 Service Guide...
- Page 265 Assembly 1: (continued) Asm– Part Index Number Units Description 1–26 08L7908 AR External SSA copper cable, 1.0 m (3.3 ft) –26 08L7909 AR External SSA copper cable, 2.5 m (8.2 ft) –26 08L7910 AR External SSA copper cable, 5.0 m (16.4 ft) –26 08L7911 AR External SSA copper cable, 10.0 m (32.8 ft)
-
Page 266: Assembly 2: 7133 Model T40
Assembly 2: 7133 Model T40 7133 Models D40 and T40 Service Guide... - Page 267 Assembly 2: (continued) Asm– Part Index Number Units Description 2–1 18P3599 1 Complete set of covers, which consists of: vFront cover vBack cover vTop cover vLeft-hand side cover vRight-hand side cover vFoot Note: The top cover is available also as a separate item (see 1B) –1A 09L4377 1 Front bezel...
- Page 268 Assembly 2: (continued) 7133 Models D40 and T40 Service Guide...
- Page 269 Assembly 2: (continued) Asm– Part Index Number Units Description 2–19 18P4046 AR 9.1 GB, 3.5-inch, 10 000 rpm, SSA disk drive module (Name used by system: SSA160 Physical Disk Drive 9100 MB) –19 18P4050 AR Optional alternative 9.1 GB, 3.5-inch, 10 000 rpm, SSA disk drive module (Name used by system: SSA160 Physical Disk Drive 9100 MB) –19 18P2196...
-
Page 270: Country Power Cables
Country Power Cables Country Rating Length Part United States and 125 V 15 A 1.8 m (6 ft) 76H4865 Canada 125 V 15 A 4.3.m (14 ft) 12J5112 250 V 15 A 2.7 m (9 ft) 12J5120 Argentina 250 V 18 A 2.7 m (9 ft) 12J5118 Australia... -
Page 271: Appendix A. Additional Information For Risc Systems
Appendix A. Additional Information for RISC Systems Related Publications . 254 Web Support Pages. . 254 Addressing SSA Disk Drives . . 255 Location Code Format . . 255 Pdisks, Hdisks, and Disk Drive Module Identification . . 255 Software and Microcode Errors . . - Page 272 SSA devices. These web pages provide access to the latest SSA publications and support-microcode for the using system, SSA adapters, and SSA subsystem. http://www.hursley.ibm.com/ssa/ This web page provides links to SSA publications and other web pages, including the other web page in this list.
-
Page 273: Addressing Ssa Disk Drives
Addressing SSA Disk Drives This section describes how SSA devices and adapters are known to the using system programs. The AIX system uses this information to configure the 7133 to the system. Location Code Format Location codes identify the locations of adapters and devices in the using system and its attached subsystems and devices. -
Page 274: Software And Microcode Errors
The system software recognizes the disk drive module by a machine-readable number that is written on the electronics card of the disk drive module. This number is shown also on the label at the front of a disk drive module. The service aids show the number as the last eight digits of the IEEE 16-digit SSA unique identifier (UID). -
Page 275: Controller Card Microcode Maintenance
Controller Card Microcode Maintenance v To check the level of the controller microcode: 1. Ensure that the cfgmgr command has been used to configure the enclosure (7133) since the previous change of microcode. 2. Use the (AIX) Display Vital Product Data service aid to display the level of the controller microcode. -
Page 276: Downloading Disk Drive Microcode
Downloading Disk Drive Microcode To download disk drive microcode, use the Display/Download Disk Drive Microcode SSA service aid (see the chapter on SSA Service Aids in the User’s Guide and Maintenance Information manual for your SSA adapter). Information about the latest levels of disk drive microcode is given on the web support page (see “Web Support Pages”... -
Page 277: Displaying Link And Power Problems
Displaying Link and Power Problems Figure 141 shows an example screen that has been generated by the Link Verification SSA service aid. LINK VERIFICATION 802386 SSA Link Verification for: ssa0 00-04 SSA RAID Adapter To Set or Reset Identify, move cursor onto selection, then press <Enter> Physical Serial# Adapter Port... -
Page 278: Service Aids
Service Aids This section shows the screens for the service aids that are available when the 7133 is attached to a RISC system. Physical Link Configuration 01|PHYSICAL LINK CONFIGURATION xxxxx 03|SSA Link Configuration for: 04| severn:ssa0 00-05 SSA Network RAID Adapter 06| Link Port Device... - Page 279 Inline mode. |||| Forced Inline mode. >> Automatic mode. >>>> Forced Bypass mode. OOOO Forced Open mode. NONE No connection. 20-C 20 MB per second copper cable. 40-C 40 MB per second copper cable. 40-I 40 MB per second internal link. 40-O 40 MB per second optical link.
-
Page 280: Enclosure Configuration
Enclosure Configuration 01|ENCLOSURE CONFIGURATION XXXXXX 03|SSA Enclosure Configuration for: 04| R1E1 Enclosure 1 SSA Enclosure 06| Conn Port Link Device Location Exchanged 08| 20-C BYPASS severn:pdisk01 severn:pdisk02 severn:pdisk03 severn:pdisk04 >> BYPASS >> BYPASS severn:pdisk05 severn:pdisk06 DDDD severn:pdisk07 19| 40-C BYPASS OOOO BYPASS DDDD... - Page 281 BYPASS SSA node bypass card. Inline state. |||| Forced Inline state. >> Bypass state. >>>> Forced Bypass state. OOOO Forced Open state. 20-C 20 MB per second copper cable. 40-C 40 MB per second copper cable. 40-I 40 MB per second internal link. 40-O 40 MB per second optical link.
-
Page 282: Enclosure Environment
Enclosure Environment 01|ENCLOSURE ENVIRONMENT XXXXXX 03|SSA Enclosure Environment for: 04| R1E1 Enclosure 1 SSA Enclosure 06| Enclosure Element Status 08| Power Unit 1 Good 09| Power Unit 2 Fault (exchanged) 11| Fan Unit 1 Good 12| Fan Unit 2 Good 13| Fan Unit 3 Fault 15| Operator Panel... -
Page 283: Enclosure Settings
Enclosure Settings 2 01│ENCLOSURE SETTINGS 3 02│ 4 03│Move cursor onto selection, then press <Enter> 5 04│ 6 05│ ID DISPLAY 7 06│ BYPASS MODES 8 07│ TEMPERATURES WARNING 9 08│ COMPONENT EXCHANGED FLAGS 0 09│ DRIVE EXCHANGED FLAGS 1 10│ 2 11│... -
Page 284: Command Line Tools
Command Line Tools ssaencl Command Purpose To allow the monitoring and changing of the status for SSA SES disk enclosures (subsystems). Syntax To display enclosure component settings: ssaencl -l name [-s] [-v] [-i] [-r] [-b[card ...]] [-t[threshold ...]] [-a] [-f[fan ...]] [-d[drive_bay ...]] [-p[PSU ...]] [-o]... - Page 285 Displays also VPD information. Displays the enclosure identifier (as shown in the operator panel, if present). Displays “RPO present TRUE/FALSE” (RPO is the remote power-on control). -b [card] Displays the status of the bypass cards. If no parameters are given, the status for all the bypass cards is displayed.
-
Page 286: Examples
-B card=mode Modifies the specified bypass cards to be in the given modes. The valid values for the mode parameter are: v Automatic v Bypass v Inline v Open Valid values for the card parameter are 1, 4, 5, 8, 9, 12, 13, 16. Resets the “exchanged”... -
Page 287: Disk Drive Modules In Use
Disk Drive Modules in Use 1. If you are removing the disk drive module under concurrent maintenance (see “Concurrent Maintenance” on page 137), first ensure that no hdisk is using the pdisk (disk drive module) that you want to remove. Use the Configuration Verification service aid (see the chapter about service aids in the User’s Guide and Maintenance Information manual for your SSA adapter) to determine whether the pdisk is related to an hdisk. - Page 288 5. The following information is displayed: Remove a Disk from an SSA RAID Array Type or select values in entry fields. Press Enter AFTER making all desired changes. Entry Fields SSA RAID Manager ssa0 SSA RAID Array hdisk3 Connection Address / Array Name 095231779F0737K * Disk to Remove F1=Help...
-
Page 289: Configuring A Disk Drive Module To The Using System
Configuring a Disk Drive Module to the Using System 1. Use the cfgmgr command to configure all new devices. 2. The disk drive has been configured with new hdisk and pdisk numbers. You can change these numbers. For example, if the disk drive module is a replacement module, you might want to make its pdisk and hdisk numbers match those of the original module. -
Page 290: Configuring A 7133 To The Using System
6. The hdisk connection location number [connwhere] is displayed (for example, 0004AC5119E000D). Make a note of this number; you will need it later in this procedure. 7. Remove the new hdisk number by giving the command: rmdev -l [hdisknumber] -d where [hdisknumber] is the hdisk number that you want to remove (for example, hdisk12). -
Page 291: Map Extension
MAP Extension Step 1. (from MAP 2010: 7133 Models D40 and T40 – START step 7 on page 90) Have you been sent to this MAP from the Configuration Verification service aid? Go to step 2. Go to step 3. Step 2. - Page 292 7133 Models D40 and T40 Service Guide...
-
Page 293: Appendix B. Additional Information For Pc Servers
Are You Using the Correct Book? Do not use this book if you are servicing a 7133 Model 010, 020, 500, or 600 SSA Disk Subsystem. For those models, use the IBM 7133 SSA Disk Subsystem for PC Servers: Hardware Maintenance Manual... -
Page 294: Web Support Pages
SSA devices. These web pages provide access to the latest SSA publications and support-microcode for the using system, SSA adapters, and SSA subsystem. http://www.hursley.ibm.com/ssa/ This web page provides links to SSA publications and other web pages, including the other web page in this list. -
Page 295: Location Code Format
Location Code Format When disk drive errors are logged in the SSA error log, or displayed during error log analysis, they include a related location code. The format of the location code is NNNN-XX where NNNN is the enclosure ID; that is the four characters that appear in the display at the front of the 7133, and XX is the number of the disk drive module slot. -
Page 296: Diagnostics Information
Diagnostics Information Note: If you were sent here from other instructions, return to those instructions when you have finished running the diagnostics. Concurrent Diagnostics 1. Start the SSA Remote Systems Management function. 2. Select the device; that is, adapter, disk drive module, or enclosure (subsystem). 3. -
Page 297: Service Aids
Service Aids All service aids for PC servers are provided by the Remote Systems Management (RSM) configurator, which is supplied with the SSA adapter. The RSM configurator is a Web Browser utility. It contains online help, and gives access, locally and remotely, to the following subsystem functions: v Configuration functions that allow you to: –... -
Page 298: Disk Drive Modules In Use
Disk Drive Modules in Use 1. If the disk drive module that is to be removed is a member of an array, use the functions of the SSA Configurator and Service Aids Utility to remove the disk drive module from the array (see the service information for your SSA adapter). 2. -
Page 299: Index
Index Special characters −48 volt power supply 4 cable configurations 47 catalog of parts 241 Numerics Caution notices 7133 Check light 8 rack stabilizer 210, 215, 223, 229 7133 Power light 8 weight of 7133 213, 216, 219, 222, 227, 231 7133 serial number location 36 change enclosure settings information 63 changing disk drive numbers... - Page 300 controller card disk drive modules (continued) description 3 Model D40 POSTs (power-on self-tests) 74 location 18 controller card assembly locks 18 Model D40 Model T40 location 18 location 20 Model T40 locks 20 location 20 numbering removal and replacement 199 Model D40 18 Controller Card Check 12 Model T40 20...
- Page 301 IDs for disk drive module slots Model D40 18 fan assemblies Model T40 20 Fan Check light 12 indicators 5 Fan Power light 12 7133 Check 8 location 7133 Power 8 Model D40 18 CHK/PWR-GOOD 13 Model T40 20 Controller Card Check 12 removal and replacement 173 disk drive module Check light 16 Fan Check light 12...
- Page 302 lights (continued) nonconcurrent diagnostics (continued) Link Status (Ready) 13 RISC systems 258 Mode 14 numbering of disk drive modules Power (Advanced SSA Optical Extenders) Model D40 18 multi-mode configuration 24 Model T40 20 single-mode configuration 22 PWR 13 operator panel assembly Receive (Advanced SSA Optical Extenders) Model D40 multi-mode configuration 24...
- Page 303 parts locations (continued) publications, related Model T40 (continued) PC servers 275 front cover 20 RISC systems 254 operator panel assembly 20 push buttons, ID 11 power supply assemblies 20 PWR light 13 remote-power-on control unit 21 PWR/FAULT RESET switch 13 serial-number label 7133 36 Ready light...
- Page 304 removal and replacement procedures (continued) SSA loops and links 3 power supply assemblies SSA system configurations 47 installing 168 SSA unique ID (UID) location 36 removing 163 ssaencl command 266 power switch and cable assembly, Model T40 190 startup sequence for modules 41 remote-power-on control unit 204, 206 status lights, disk drive 12 Model D40 204...
- Page 306 Part Number: 18P6104 Printed in the U.S.A. GY33-0192-07...
Need help?
Do you have a question about the 7133 D40 and is the answer not in the manual?
Questions and answers