Sun Microsystems Netra 440 Service Manual
Hide thumbs
Also See for Netra 440:
- Diagnostics and troubleshooting manual (176 pages) ,
- Installation manual (136 pages) ,
- Product overview (62 pages)

Related Manuals for Sun Microsystems Netra 440


Summary of Contents for Sun Microsystems Netra 440
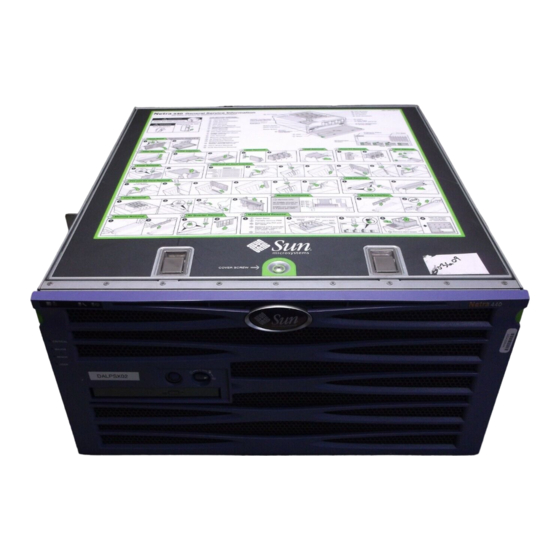
- Page 1 Netra 440 Server Service Manual ™ Sun Microsystems, Inc. www.sun.com Part No. 817-3883-11 August 2004, Revision A Submit comments about this document at: http://www.sun.com/hwdocs/feedback...
- Page 2 Copyright 2004 Sun Microsystems, Inc., 4150 Network Circle, Santa Clara, Californie 95054, Etats-Unis. Tous droits réservés. Sun Microsystems, Inc. a les droits de propriété intellectuels relatants à la technologie qui est décrit dans ce document. En particulier, et sans la limitation, ces droits de propriété...
-
Page 3: Table Of Contents
Contents Contents i Tables v Figures vii Identifying the Netra 440 Server FRUs and LEDs 1 Locating Front Panel Components and LEDs 2 Front Panel Components 2 Front Panel LEDs 3 Locating Back Panel Components and LEDs 12 Back Panel Components 12... - Page 4 Installing the DVD Drive 56 System Configuration Card (SCC) 57 Removing the System Configuration Card 58 Installing the System Configuration Card 59 System Configuration Card Reader 60 Removing the System Configuration Card Reader 60 Netra 440 Server Service Manual • August 2004...
- Page 5 Installing the System Configuration Card Reader 67 SCSI Backplane 68 Removing the SCSI Backplane 68 Installing the SCSI Backplane 73 Fan Tray 3 74 Removing Fan Tray 3 74 Installing Fan Tray 3 76 CPU/Memory Module 77 Removing a CPU/Memory Module 77 Installing a CPU/Memory Module 80 Memory Modules 81 Memory Interleaving 82...
- Page 6 AC Operating Power Limits and Ranges 134 DC Power Source Requirements 135 Environmental Specifications 136 Clearance and Service Access Specifications 136 Board Connector Locations 137 Motherboard Connectors 138 SCSI Backplane Connectors 139 ALOM System Controller Card Connectors 141 Netra 440 Server Service Manual • August 2004...
-
Page 7: Tables
TABLE 1-10 ALOM External Ports 18 TABLE 1-11 Internal Components 20 TABLE 1-12 Calculating Air Filter Replacement Schedules for the Netra 440 Server 51 TABLE 3-1 Front Panel Components and Fan Tray 3 Assembly 119 TABLE A-1 Miscellaneous Components 121... - Page 8 TABLE B-7 Physical Specifications, Netra 440 Server 133 TABLE C-1 AC Operating Power Limits and Ranges for Each Power Supply in the Netra 440 Server 134 TABLE C-2 AC Operating Power Limits and Ranges for the Netra 440 Server 134...
- Page 9 Figures Front Panel Components 2 FIGURE 1-1 Front Panel LEDs 4 FIGURE 1-2 Enclosure Status LEDs 5 FIGURE 1-3 Hard Drive Status LEDs 7 FIGURE 1-4 Fan Tray Status LEDs 8 FIGURE 1-5 Alarm LEDs 9 FIGURE 1-6 Back Panel Features 12 FIGURE 1-7 Back Panel LEDs 14 FIGURE 1-8...
- Page 10 Removing the Screw for a Long PCI Card 88 FIGURE 4-24 Lifting the Slotted PCI Card Retainer Flap 89 FIGURE 4-25 Removing a Regular PCI Card 90 FIGURE 4-26 Removing a Long PCI Card 91 FIGURE 4-27 viii Netra 440 Server Service Manual • August 2004...
- Page 11 Removing the ALOM System Controller Card 96 FIGURE 4-28 Removing the ALOM System Controller Card 97 FIGURE 4-29 Inserting the ALOM System Controller Card 99 FIGURE 4-30 Removing the Alarm Port Connector from the Rear of the System 101 FIGURE 4-31 Locating the Alarm Card 102 FIGURE 4-32 Removing a Power Supply Unit 105...
- Page 12 Netra 440 Server Service Manual • August 2004...
- Page 13 Netra 440 Server System Administration Guide (817-3884-xx). For information about diagnosing problems with the server, see the Netra 440 Server Diagnostics and Troubleshooting Guide (817-3886-xx). This book does not cover the initial installation of the server. For those instructions, see the Netra 440 Server Installation Guide (817-3882-xx).
- Page 14 See the following for this information: Software documentation that you received with your system ■ Solaris™ operating environment documentation, which is at ■ http://docs.sun.com xii Netra 440 Server Service Manual • August 2004...
- Page 15 Shell Prompts Shell Prompt C shell machine-name% C shell superuser machine-name# Bourne shell and Korn shell Bourne shell and Korn shell superuser Typographic Conventions Typeface Meaning Examples The names of commands, files, Edit your.login file. AaBbCc123 and directories; on-screen Use ls -a to list all files. computer output % You have mail.
- Page 16 Sun will not be responsible or liable for any actual or alleged damage or loss caused by or in connection with the use of or reliance on any such content, goods, or services that are available on or through such sites or resources. xiv Netra 440 Server Service Manual • August 2004...
- Page 17 Sun is interested in improving its documentation and welcomes your comments and suggestions. You can submit your comments by going to: http://www.sun.com/hwdocs/feedback Please include the title and part number of your document with your feedback: Netra 440 Server Service Manual, part number 817-3883-11 Preface...
- Page 18 Netra 440 Server Service Manual • August 2004...
-
Page 19: Identifying The Netra 440 Server Frus And Leds
“Locating Back Panel Components and LEDs” on page 12 ■ “Locating Internal Components” on page 19 ■ For background information about the Netra 440 server and detailed instructions for installing, configuring, and administering the server, see: Netra 440 Server Installation Guide ■... -
Page 20: Locating Front Panel Components And Leds
DVD drive Fan trays 0-2 Power distribution board Front Panel Components FIGURE 1-1 For more detailed information about each of the front panel components, refer to the Netra 440 Server Product Overview. Netra 440 Server Service Manual • August 2004... -
Page 21: Front Panel Leds
Service Required LED. Since all front panel status LEDs are powered by the system’s standby power source, fault LEDs remain lit for any fault condition that results in a system shutdown. Chapter 1 Identifying the Netra 440 Server FRUs and LEDs... -
Page 22: Figure 1-2 Front Panel Leds
LEDs that are accessible from the front. In the figure, the FIGURE 1-2 system door is opened. Enclosure status LEDs Hard drive LEDs Fan tray LEDs Alarm LEDs Front Panel LEDs FIGURE 1-2 Netra 440 Server Service Manual • August 2004... - Page 23 Locator LED is at the far left in the cluster, and is lit by command from the administrator. Locator LED Service Required LED System Activity LED Enclosure Status LEDs FIGURE 1-3 Each enclosure status LED has a corresponding LED on the back panel. Chapter 1 Identifying the Netra 440 Server FRUs and LEDs...
- Page 24 If the system Service Required LED is lit, check the status of other fault LEDs on the front panel to determine the nature of the fault. See the Netra 440 Server Diagnostics and Troubleshooting Guide for more information.
-
Page 25: Figure 1-4 Hard Drive Status Leds
This LED flashes slowly during the hard drive hot-swap procedure. It flashes rapidly when the hard drive is spinning up or down, or during read/write activity. Chapter 1 Identifying the Netra 440 Server FRUs and LEDs... -
Page 26: Table 1-4 Fan Tray Leds
Note that the Service Required LEDs on the front and back panels also light when this occurs. Activity This green LED lights when the fan tray is on and operating normally. Netra 440 Server Service Manual • August 2004... -
Page 27: Figure 1-6 Alarm Leds
. For more information about alarm indicators, refer to the Sun TABLE 1-5 Advanced Lights Out Manager Software User’s Guide for the Netra 440 Server (817-5481- xx). For more information about an API to control the alarm indicators, refer to the Netra 440 Server System Administration Guide (817-3884-xx). -
Page 28: Table 1-5 Alarm Indicators And Dry Contact Alarm States
Major Application User sets Major — Open Closed Major † state alarm on. fault (Alarm1) detected User sets Major — Closed Open Major † alarm off. fault cleared Netra 440 Server Service Manual • August 2004... - Page 29 † Based on a determination of the fault conditions, the user can turn the alarm on using the Solaris platform alarm API or ALOM CLI. For more information about the alarm API, see the Netra 440 Server System Administration Guide and for more information about ALOM CLI, see the Sun Advanced Lights Out Manager Software User’s Guide for the Netra 440 Server.
-
Page 30: Locating Back Panel Components And Leds
FIGURE 1-7 Ethernet ports System controller USB ports (NET0, NET1) and ports (USB0-3) Six PCI Serial port (TTYB) SCSI port card slots Alarm port Four power supplies Back Panel Features FIGURE 1-7 Netra 440 Server Service Manual • August 2004... -
Page 31: Table 1-6 Back Panel Components
Component Cold Rear • • Alarm card and port • • Motherboard with data ports • • ALOM system controller and ports • • PCI cards • • Power supplies Chapter 1 Identifying the Netra 440 Server FRUs and LEDs... -
Page 32: Back Panel Leds
Speed This amber LED lights when a Gigabit Ethernet connection is established, and is off when a 10/100-Mbps Ethernet connection is established. Netra 440 Server Service Manual • August 2004... -
Page 33: Table 1-8 Network Management Port Led
Power OK This green LED lights when the power supply is in standby mode or when it is on and outputting regulated power within specified limits. Chapter 1 Identifying the Netra 440 Server FRUs and LEDs... -
Page 34: Back Panel Slots And Ports
Out Manager (ALOM) card ports. PCI Slots The Netra 440 server has three 33-MHz PCI slots and three 66-MHz PCI slots. These are labeled on the back panel. The Advanced Lights Out Manager (ALOM) card is located to the left of the PCI slots. -
Page 35: Table 1-10 Back Panel External Ports
External Ports The Netra 440 server has eight external data ports on the back panel, which are described in TABLE 1-10 Ethernet ports USB ports (NET0, NET1) (USB0-3) Serial port (TTYB) SCSI port Alarm port Back Panel External Ports FIGURE 1-10... -
Page 36: Table 1-11 Alom External Ports
Serial (RJ-45) port. This is the default serial management connection for the system. Ethernet port. This port provides direct network access to the ALOM system controller card, when configured, and can access the ALOM prompt and system console output. Netra 440 Server Service Manual • August 2004... -
Page 37: Locating Internal Components
TABLE 1-12 or cold-swappable, and whether they can be removed from the rear of the system or through the top of the system. Chapter 1 Identifying the Netra 440 Server FRUs and LEDs... -
Page 38: Table 1-12 Internal Components
Netra 440 Server Product Overview. Internal Components TABLE 1-12 Hot- or Cold-Swappable Removal Point Component Cold Rear • • Fan tray 3 • • Motherboard • • SCSI backplane • • CPU modules Netra 440 Server Service Manual • August 2004... -
Page 39: Preparing To Service The System
C H A P T E R Preparing to Service the System This chapter contains the following sections: “Service Guidelines” on page 21 ■ “Tools Required for Installation and Service” on page 22 ■ “Controlling Server Power” on page 22 ■... -
Page 40: Tools Required For Installation And Service
To power on the system under those circumstances, you must initiate a reconfiguration boot. For those instructions, see “Initiating a Reconfiguration Boot” on page Netra 440 Server Service Manual • August 2004... -
Page 41: Figure 2-1 Opening The System Door
If you are powering on the system for the first time, connect a device to the serial management port using one of the methods described in the Netra 440 Server Installation Guide. Otherwise, use one of the methods for connecting to the system console, also described in the Netra 440 Server Installation Guide. -
Page 42: Figure 2-2 Locating The Rotary Switch And On/Standby Button
Solaris OS. 7. Turn the rotary switch to the Locked position ( FIGURE 2-2 This prevents anyone from accidentally powering off the system. 8. Close the system door. Netra 440 Server Service Manual • August 2004... - Page 43 Always power off the system before moving it. 1. Log in to the ALOM. Refer to the Advanced Lights Out Manager Software User’s Guide for the Netra 440 Server (817-5481-xx) for more information. 2. Type the following command: sc>...
-
Page 44: Powering Off The System
The Standby position is the only rotary switch position that prevents someone from using an ALOM session to restart the system remotely. 8. Close the system door. Netra 440 Server Service Manual • August 2004... - Page 45 2. Back up the system files and data, if necessary. 3. Log in to the ALOM. Refer to the Advanced Lights Out Manager Software User’s Guide for the Netra 440 Server (817-5481-xx) for more information. 4. Issue the following command: sc>...
-
Page 46: Initiating A Reconfiguration Boot
To issue software commands, you need to set up an alphanumeric terminal connection, a local graphics monitor connection, ALOM connection, or a TIP connection to the Netra 440 server. See the Netra 440 Server Installation Guide (817- 3882-xx) for more information about connecting the Netra 440 server to a terminal or similar device. - Page 47 5. If you are logged in to the sc> prompt, switch to the ok prompt and type: sc> console 6. When the system banner is displayed on the system console, immediately abort the boot process to access the system ok prompt. The system banner contains the Ethernet address and host ID.
-
Page 48: Accessing Internal Components
2. Remove the system from the rack. The procedures for removing the system from the rack will vary, depending on the type of rack mount kit that you are using. Refer to the Netra 440 Server Installation Guide (817-3882-xx) for more information. -
Page 49: Installing The Top Cover
4. Loosen the Phillips No. 2 captive lockdown screw securing the top cover to the chassis. The lockdown screw is located on the chassis face above the hard drives, between the two latches ( FIGURE 2-3 Captive lockdown screw Top cover latches Locating the Latches on the Top Cover FIGURE 2-3 5. -
Page 50: Avoiding Electrostatic Discharge
6. Install the system back into the rack. The procedures for installing the system back into the rack will vary, depending on the type of rack mount kit that you are using. Refer to the Netra 440 Server Installation Guide (817-3882-xx) for more information. - Page 51 5. Use an antistatic mat or similar surface. When performing any installation or service procedure, place static-sensitive parts, such as boards, cards, and hard drives, on an antistatic surface. The following items can be used as an antistatic surface: The bag used to wrap a Sun replacement part ■...
- Page 52 Netra 440 Server Service Manual • August 2004...
-
Page 53: Removing And Replacing Hot-Swappable Components
However, you might have to prepare the operating system prior to the hot-swap operation by performing certain system administration tasks. In a Netra 440 server, the following components are hot-swappable: “Fan Trays (0-2)” on page 36 ■... -
Page 54: Fan Trays (0-2)
Netra 440 Server Product Overview (817-3881-xx). Caution – The fan trays contain sharp moving parts. Use extreme caution when servicing the fan trays. The part number for fan trays 0-2 is F540-5855. Netra 440 Server Service Manual • August 2004... -
Page 55: Removing A Fan Tray (0-2)
2. Open the system door. 3. Identify the fan tray to be removed and note the bay in which it is installed. shows the location of the three fan trays. Refer to the Netra 440 Server FIGURE 3-1 Diagnostics and Troubleshooting Guide (817-3886-xx) for more information about isolating failed parts. -
Page 56: Figure 3-2 Removing A Fan Tray
6. If you are not replacing the fan tray right away, close the system door. Caution – Do not operate the system for longer than 15 minutes without the fan tray in place or the system may overheat. Netra 440 Server Service Manual • August 2004... -
Page 57: Installing A Fan Tray (0-2)
OK-to-Remove LED. You will use the Advanced Lights Out Manager (ALOM) software tool to initiate a hot-swap operation of the Netra 440 server’s power supply. Refer to the Sun Advanced Lights Out Manager User’s Guide (817-5481-xx) for additional information, if necessary. -
Page 58: Removing A Power Supply
You have 10 minutes at sea level and a maximum of 7 minutes at 10,000 feet (3048 meters) to ensure proper system cooling. Ensure that you have a replacement power supply ready before beginning this procedure. 1. Attach the antistatic wrist strap. “Avoiding Electrostatic Discharge” on page Netra 440 Server Service Manual • August 2004... -
Page 59: Figure 3-3 Locating The Power Supplies
2. At the rear of the system, locate the power supply that you want to remove. Check the power supply LEDs to determine which power supply is faulty. For more information, see “Power Supply LEDs” on page 15 and the Netra 440 Server System Administration Guide (817-3884-xx). Locating the Power Supplies FIGURE 3-3 3. -
Page 60: Figure 3-4 Removing A Power Supply
Caution – Never insert your hand into the power supply bay while the system is running or while the system is connected to power. Doing so could result in serious personal injury. The system console displays a message confirming the removal of the power supply. Netra 440 Server Service Manual • August 2004... -
Page 61: Installing A Power Supply
The following procedure assumes that you are accessing the system console by the default method of connecting to the serial management port (SERIAL MGT) of the Netra 440 server. Caution – You have limited time to perform a power supply hot-swap operation. -
Page 62: Hard Drives
Use the cfgadm command to remove a Netra 440 server’s internal hard drive using the hot-swap operation. The following procedure describes the general steps involved, but your specific device names might be different. -
Page 63: Removing A Hard Drive
If the system is configured with a boot drive and data drives, you can hot-swap the data drives, but not the boot drive. For more information on drive mirroring, refer to the Netra 440 Server System Administration Guide (817-3884-xx). - Page 64 30 seconds or so for the drive to spin down completely before removing it. Failing to let the drive spin down before removing it could damage the drive. 8. Open the system door. Netra 440 Server Service Manual • August 2004...
-
Page 65: Figure 3-5 Hard Drive Locations
9. Identify the hard drive (HDD) to be removed and note the bay in which it is installed. shows the location of the four hard drives. Refer to the Netra 440 Server FIGURE 3-5 Diagnostics and Troubleshooting Guide (817-3886-xx) for more information about isolating failed parts. -
Page 66: Figure 3-6 Removing A Hard Drive
13. If you are not replacing the hard drive right away, close the system door. Netra 440 Server Service Manual • August 2004... -
Page 67: Installing A Hard Drive
OS recognizes the hard drive. Finally, you configure your application (if necessary) to operate with this new drive. Use the cfgadm command to install a Netra 440 server’s internal hard drives using the hot-swap operation. The following procedure describes the general steps involved, but your specific device names might be different. -
Page 68: Air Filter
The time frame in which the air filter should be replaced varies depending on the environment where the Netra 440 is installed; if the air in the operating environment is especially dirty, you may have to replace the filter more frequently. Reliability may be reduced noticeably when 120 grams of dust has accumulated on the filter, so you should change the filter at that point. -
Page 69: Table
The following is an example that demonstrates how to calculate service times for the Netra 440 server, assuming that the Netra 440 server has an airflow of approximately 96 cubic feet per minute: Calculating Air Filter Replacement Schedules for the Netra 440 Server... -
Page 70: Installing The Air Filter
3. Remove the air filter assembly from the front door panel ( FIGURE 3-8 Removing the Air Filter FIGURE 3-8 Installing the Air Filter 1. Install the air filter assembly into the front door panel ( FIGURE 3-8 2. Close the system door. Netra 440 Server Service Manual • August 2004... -
Page 71: Removing And Replacing Cold-Swappable Components
Removing and Replacing Cold- Swappable Components Cold-swappable components require the system to be powered down before you can remove them. In a Netra 440 server, the following components are cold-swappable: “DVD Drive” on page 54 ■ “System Configuration Card (SCC)” on page 57 ■... -
Page 72: Dvd Drive
2. Attach the antistatic wrist strap. “Avoiding Electrostatic Discharge” on page 3. Open the system door. 4. Press down on the two DVD drive locking tabs, releasing the DVD drive from its cage ( FIGURE 4-1 Netra 440 Server Service Manual • August 2004... -
Page 73: Figure 4-1 Removing A Dvd Drive
Removing a DVD Drive FIGURE 4-1 5. Pull out the DVD drive from the front of the system. 6. If you are not replacing the DVD drive immediately, install the DVD slot cover over the empty DVD space. Insert the lower two tabs of the DVD cover into the two slots in the empty DVD space, then push the top of the DVD slot cover up until it clicks into place FIGURE 4-2 Installing the DVD Slot Cover... -
Page 74: Installing The Dvd Drive
2. Slide the DVD drive into the system until the two DVD drive locking tabs click into place. 3. Close the system door. 4. Power on the system and perform a configuration reboot. “Powering On the System” on page Netra 440 Server Service Manual • August 2004... -
Page 75: System Configuration Card (Scc)
Note that you can only migrate a system configuration card from one Netra 440 server to another Netra 440 server. -
Page 76: Removing The System Configuration Card
For a list of OpenBoot configuration variables stored on the system configuration card, refer to the Netra 440 Server System Administration Guide (817-3884-xx). The part number for the system configuration card is F370-5155. Removing the System Configuration Card Caution –... -
Page 77: Installing The System Configuration Card
5. Pull the security post out of its position from in front of the system configuration card ( FIGURE 4-5 Removing a System Configuration Card FIGURE 4-5 6. Grasp the system configuration card with your fingers and pull it out of the system. -
Page 78: System Configuration Card Reader
“Removing the Top Cover” on page 5. Completely remove the system configuration card from the system configuration card reader. 6. Remove the DVD drive from the front of the system. “Removing the DVD Drive” on page Netra 440 Server Service Manual • August 2004... -
Page 79: Figure 4-6 Disconnecting The Fan Cable From The Scsi Backplane
7. Disconnect the fan cable from the SCSI backplane ( FIGURE 4-6 Fan cable SCSI backplane Disconnecting the Fan Cable from the SCSI Backplane FIGURE 4-6 8. Pull the rotary switch away from the system to remove it from the server FIGURE 4-7 Rotary switch Removing the Rotary Switch... -
Page 80: Figure 4-8 Locating J18 And P1 Connectors
If long PCI cards are installed in the PCI slots at the rear of the system, you must ■ remove them from the system before you can remove the system configuration card reader. See “Removing a PCI Card” on page 86 for those instructions, then return here. Netra 440 Server Service Manual • August 2004... -
Page 81: Figure 4-9 Unscrewing The Captive Screw For The Fan Tray 3 Assembly
12. Unscrew the one screw that secures the fan tray 3 assembly to the system FIGURE 4-9 Captive screw Unscrewing the Captive Screw for the Fan Tray 3 Assembly FIGURE 4-9 Chapter 4 Removing and Replacing Cold-Swappable Components... -
Page 82: Figure 4-10 Removing The Fan Tray 3 Assembly
13. Slide the fan tray 3 assembly to the rear of the system to disengage it and lift it up to remove it from the system ( FIGURE 4-10 Removing the Fan Tray 3 Assembly FIGURE 4-10 Netra 440 Server Service Manual • August 2004... -
Page 83: Figure 4-11 Loosening The Fan Tray 3 Assembly Captive Screw
14. Unscrew the one screw to split the fan tray 3 assembly into two pieces FIGURE 4-11 Captive screw Loosening the Fan Tray 3 Assembly Captive Screw FIGURE 4-11 Chapter 4 Removing and Replacing Cold-Swappable Components... -
Page 84: Figure 4-12 Splitting The Fan Tray 3 Assembly Into Two Pieces
). Do not discard the upper piece of the fan tray 3 assembly; you will FIGURE 4-12 attach that to the replacement lower piece. Upper piece (retain) Lower piece (replace) Splitting the Fan Tray 3 Assembly Into Two Pieces FIGURE 4-12 Netra 440 Server Service Manual • August 2004... -
Page 85: Installing The System Configuration Card Reader
Installing the System Configuration Card Reader Caution – The system supplies power to the system configuration card reader even when the system is powered off. To avoid personal injury or damage to the system, you must disconnect all AC or DC power cables before servicing the system configuration card reader. -
Page 86: Scsi Backplane
SCSI backplane. 5. Remove the top cover. “Removing the Top Cover” on page Netra 440 Server Service Manual • August 2004... -
Page 87: Figure 4-13 Removing The Air Diverter
6. Raise the slotted PCI card retainer flap on the fan tray 3 assembly ( FIGURE 4-13 7. Locate the air diverter and SCSI backplane ( FIGURE 4-13 Captive screws Air diverter SCSI backplane PCI card retainer flap Removing the Air Diverter FIGURE 4-13 8. -
Page 88: Figure 4-14 Scsi Backplane Connectors, Front
FIGURE 4-14 SCSI/system LED connector Fan tray 3 connector SCSI data to motherboard connector System configuration card reader to smart card connector SCSI Backplane Connectors, Front FIGURE 4-14 Netra 440 Server Service Manual • August 2004... -
Page 89: Figure 4-15 Scsi Backplane Connectors, Rear
10. Disconnect the cables from the following connectors on the rear of the SCSI backplane (the side facing the rear of the system): Alarm input connector ■ SCSI power to motherboard connector ■ shows the locations of these connectors. FIGURE 4-15 Alarm input connector SCSI power to motherboard connector SCSI Backplane Connectors, Rear... -
Page 90: Figure 4-16 Removing The Scsi Backplane
11. Unscrew the two captive screws that secure the SCSI backplane to the system FIGURE 4-16 Captive screws SCSI backplane Tabs Removing the SCSI Backplane FIGURE 4-16 12. Pull the SCSI backplane up and out of the system. Netra 440 Server Service Manual • August 2004... -
Page 91: Installing The Scsi Backplane
Installing the SCSI Backplane Caution – The system supplies power to the SCSI backplane even when the system is powered off. To avoid personal injury or damage to the system, you must disconnect all AC or DC power cables before servicing the SCSI backplane. 1. -
Page 92: Fan Tray 3
Fan Tray 3 Caution – Fan tray 3 on a Netra 440 server is not hot-swappable. Attempting to replace fan tray 3 while the server is running poses an extreme risk of bodily injury, and could damage the system hardware and environmental monitoring components. -
Page 93: Figure 4-17 Disconnecting The Fan Cable From The Scsi Backplane
3. Remove the top cover. “Removing the Top Cover” on page 4. Disconnect the fan cable from the SCSI backplane ( FIGURE 4-17 Fan cable SCSI backplane Disconnecting the Fan Cable from the SCSI Backplane FIGURE 4-17 Chapter 4 Removing and Replacing Cold-Swappable Components... -
Page 94: Installing Fan Tray 3
1. Align the tabs on fan tray 3 with their corresponding slots in the chassis FIGURE 4-18 The side tab fits into a slot in the chassis side. The two bottom tabs correspond to two slots in the bottom of the chassis. Netra 440 Server Service Manual • August 2004... -
Page 95: Cpu/Memory Module
2. Insert fan tray 3 into the system until it is firmly seated. 3. Connect the fan cable to the SCSI backplane. 4. Replace the top cover. “Installing the Top Cover” on page 5. Power on the system. “Powering On the System” on page CPU/Memory Module The part numbers for the CPU/memory module are: 1.28 GHz CPU/memory module with no memory—F501-6370... -
Page 96: Figure 4-19 Cpu Locations
4. Identify the CPU/memory module to be removed ( FIGURE 4-19 Refer to the Netra 440 Server Diagnostics and Troubleshooting Guide (817-3886-xx) for information about isolating failed parts. CPU 0 CPU 1 CPU 2 CPU 3 CPU Locations FIGURE 4-19... -
Page 97: Figure 4-20 Removing A Cpu/Memory Module
5. Loosen the two Phillips No. 2 captive screws securing the CPU/memory module to the CPU cage ( FIGURE 4-20 Ejector levers Captive screws Removing a CPU/Memory Module FIGURE 4-20 6. Rotate the CPU/memory module ejector levers upward so that the CPU/memory module connectors disengage from the CPU cage ( FIGURE 4-20 7. -
Page 98: Installing A Cpu/Memory Module
CPU/memory modules one last time to verify that they are all fully seated. 8. Replace the top cover. “Installing the Top Cover” on page 9. Power on the system. “Powering On the System” on page Netra 440 Server Service Manual • August 2004... -
Page 99: Memory Modules
The system reads from, or writes to, both DIMMs in a group simultaneously. DIMMs, therefore, must be added in pairs. The figure below shows the DIMM slots and DIMM groups on a Netra 440 server CPU/memory module. Adjacent slots belong to the same DIMM group. -
Page 100: Memory Interleaving
Memory Interleaving You can maximize the system’s memory bandwidth by taking advantage of its memory interleaving capabilities. The Netra 440 server supports two-way interleaving. In most cases, higher interleaving results in improved system performance. However, actual performance results can vary depending on the system application. -
Page 101: Removing A Memory Module
4. Remove the appropriate CPU/memory module from the system. “Removing a CPU/Memory Module” on page 5. Identify the memory module to be removed. Refer to the Netra 440 Server Diagnostics and Troubleshooting Guide (817-3886-xx) for information about isolating failed parts. Chapter 4 Removing and Replacing Cold-Swappable Components... -
Page 102: Figure 4-22 Removing A Memory Module
7. Grasp the top corners of the memory module and pull it up and out of its socket. 8. Place the memory module on an antistatic mat. 9. Repeat Step 5 through Step 8 for all the memory modules to be removed. Netra 440 Server Service Manual • August 2004... -
Page 103: Installing A Memory Module
Installing a Memory Module Caution – DIMMs are made of electronic components that are extremely sensitive to static electricity. Static electricity from your clothes or work environment can destroy the DIMM. Do not remove a DIMM from its antistatic packaging until you are ready to install it on the CPU/memory module. -
Page 104: Pci Cards
To avoid personal injury or damage to the system, you must disconnect all AC or DC power cables before servicing the PCI card. 1. Power off the system. “Powering Off the System” on page Netra 440 Server Service Manual • August 2004... -
Page 105: Figure 4-23 Removing The Screw For A Regular Pci Card
2. Attach the antistatic wrist strap. “Avoiding Electrostatic Discharge” on page 3. Remove the top cover. “Installing the Top Cover” on page 4. Disconnect any external cables attached to the faceplate of the PCI card. 5. Disconnect any internal cables connected to the PCI card internal connectors. 6. -
Page 106: Figure 4-24 Removing The Screw For A Long Pci Card
Removing the Screw for a Long PCI Card FIGURE 4-24 Netra 440 Server Service Manual • August 2004... -
Page 107: Figure 4-25 Lifting The Slotted Pci Card Retainer Flap
7. If you are removing a long PCI card, raise the slotted PCI card retainer flap on the fan tray 3 assembly ( FIGURE 4-25 Slotted PCI card retainer flap Lifting the Slotted PCI Card Retainer Flap FIGURE 4-25 Chapter 4 Removing and Replacing Cold-Swappable Components... -
Page 108: Figure 4-26 Removing A Regular Pci Card
Caution – Do not apply excessive force to one end or one side of the card. Doing so could damage the card. Removing a Regular PCI Card FIGURE 4-26 Netra 440 Server Service Manual • August 2004... -
Page 109: Figure 4-27 Removing A Long Pci Card
Removing a Long PCI Card FIGURE 4-27 9. Place the PCI card on an antistatic mat. 10. If you are not replacing the PCI card, install a PCI filler panel and reassemble the system. The PCI filler panel prevents debris from entering the system and ensures proper cooling. -
Page 110: Installing A Pci Card
33-MHz. For more information about PCI cards and buses, refer to the Netra 440 Server Product Overview (817-3881-xx). 4. If you are installing a PCI card into an unused slot, remove the corresponding filler panel from the system back panel. - Page 111 12. Run the OpenBoot diagnostics tests to verify that the system functions correctly with the new PCI card you have just installed. For additional information, see the Netra 440 Server System Administration Guide (817- 3884-xx). Chapter 4 Removing and Replacing Cold-Swappable Components...
-
Page 112: Alom System Controller Card
DB-9 connector on the system back panel, which corresponds to /dev/ttyb in the Solaris OS device tree, and as ttyb in the OpenBoot configuration variables. See the Netra 440 Server Product Overview (817-3881-xx) for more information. The ALOM system controller card is installed in a dedicated slot on the system ■... -
Page 113: Removing The Alom System Controller Card
The part number for the ALOM system controller card is F501-6346. Removing the ALOM System Controller Card Caution – The system supplies power to the ALOM system controller card even when the system is powered off. To avoid personal injury or damage to the ALOM system controller card, you must disconnect the AC or DC power cables before servicing the ALOM system controller card. -
Page 114: Figure 4-28 Removing The Alom System Controller Card
7. Remove the Phillips No. 1 screw securing the card to the system back panel FIGURE 4-28 Caution – Ensure that the power cords are disconnected from the system before removing the ALOM system controller card. Removing the ALOM System Controller Card FIGURE 4-28 Netra 440 Server Service Manual • August 2004... -
Page 115: Figure 4-29 Removing The Alom System Controller Card
Caution – Follow the instructions in the next step carefully or you may damage the ALOM system controller card or the motherboard. 8. Using equal force on both ends of the ALOM system controller card, pull the card straight up from its slot ( FIGURE 4-29 Hold the card by the faceplate and its opposite edge. -
Page 116: Installing The Alom System Controller Card
Insert the faceplate end of the card into the appropriate opening in the system back panel. b. Using both hands to apply even pressure along the edge of the card, push the card into the connectors on the motherboard. Netra 440 Server Service Manual • August 2004... -
Page 117: Figure 4-30 Inserting The Alom System Controller Card
Inserting the ALOM System Controller Card FIGURE 4-30 3. Secure the ALOM system controller card faceplate to the back panel with the Phillips No. 1 screw. 4. Connect the cables to the faceplate of the ALOM system controller card. 5. Replace the top cover. “Installing the Top Cover”... -
Page 118: Alarm Card
1. Power off the system. “Powering Off the System” on page 2. Attach the antistatic wrist strap. “Avoiding Electrostatic Discharge” on page 3. Disconnect the AC or DC power cables from the back of the system. Netra 440 Server Service Manual • August 2004... -
Page 119: Figure 4-31 Removing The Alarm Port Connector From The Rear Of The System
4. Remove the two screws that secure the alarm port connector to the rear of the system ( FIGURE 4-31 Removing the Alarm Port Connector from the Rear of the System FIGURE 4-31 5. Remove the top cover. “Removing the Top Cover” on page Chapter 4 Removing and Replacing Cold-Swappable Components... -
Page 120: Figure 4-32 Locating The Alarm Card
Alarm In cable Alarm Out cable Cable retainer clip Rear of server Front of server Locating the Alarm Card FIGURE 4-32 7. Disconnect the Alarm In cable from the SCSI backplane ( FIGURE 4-32 Netra 440 Server Service Manual • August 2004... -
Page 121: Installing The Alarm Card
8. Remove the Alarm Out cable from the cable retainer clip on the side of the server FIGURE 4-32 9. Press against the sides of the alarm card to first disengage the bottom of the alarm card from the two posts on the side of the server, then the top of the alarm card from the one post on the side of the server ( FIGURE 4-32 10. -
Page 122: Power Distribution Board
Caution – There are several pinch points on the power supplies, so use caution when removing or installing a power supply in the system. Refer to the caution label on the power supplies for more information. Netra 440 Server Service Manual • August 2004... -
Page 123: Figure 4-33 Removing A Power Supply Unit
4. Disengage all of the power supplies from the power distribution board. a. Go to the back of the system and pull the lever on the power supply to the right ( FIGURE 4-33 This disconnects the power supply from the power distribution board. Power supply Lever Removing a Power Supply Unit... -
Page 124: Figure 4-34 Removing The Power Distribution Board
( FIGURE 4-34 7. Pull on the ejector latches and pull the power distribution board out if its bay FIGURE 4-34 Removing the Power Distribution Board FIGURE 4-34 Netra 440 Server Service Manual • August 2004... -
Page 125: Installing The Power Distribution Board
Installing the Power Distribution Board Caution – The system supplies power to the power distribution board even when the system is powered off. To avoid personal injury or damage to the system, you must disconnect all AC or DC power cables before servicing the power distribution board. -
Page 126: Motherboard
“Removing a PCI Card” on page 7. Remove the ALOM system controller card. “Removing the ALOM System Controller Card” on page 8. Remove the alarm card. “Removing the Alarm Card” on page 100. Netra 440 Server Service Manual • August 2004... -
Page 127: Figure 4-35 Removing The Air Diverter
9. Locate the air diverter ( FIGURE 4-35 Captive screws Air diverter Removing the Air Diverter FIGURE 4-35 10. Unscrew the two screws from the top of the air diverter and remove the air diverter from the system ( FIGURE 4-35 Chapter 4 Removing and Replacing Cold-Swappable Components... -
Page 128: Figure 4-36 Disconnecting The Cables From The Motherboard
Caution – There are several pinch points on the power supplies, so use caution when removing or installing a power supply in the system. Refer to the caution label on the power supplies for more information. Netra 440 Server Service Manual • August 2004... -
Page 129: Figure 4-37 Removing A Power Supply
14. Disengage the power supplies from the power distribution board. a. Go to the back of the system and pull the lever on the back of a power supply to the right ( FIGURE 4-37 This disconnects the power supply from the power distribution board inside the server. -
Page 130: Figure 4-38 Disengaging The Power Distribution Board
Pull on the ejector latches to unseat the power distribution board from the motherboard ( FIGURE 4-38 Leave the power distribution board in its bay, but disconnected from the motherboard. Disengaging the Power Distribution Board FIGURE 4-38 Netra 440 Server Service Manual • August 2004... -
Page 131: Figure 4-39 Unscrewing The Motherboard Screws
16. At the back of the system, disconnect any external cables attached to the motherboard. Note and label connector locations. 17. Unscrew the three Phillips No. 2 screws that secure the motherboard to back of the system ( FIGURE 4-39 Unscrewing the Motherboard Screws FIGURE 4-39 Chapter 4 Removing and Replacing Cold-Swappable Components... -
Page 132: Installing The Motherboard
2. Lower the motherboard into the chassis at an angle, inserting the CPU side of the board first. Ensure that the DVD cable and the SCSI cable are folded back out of the way. You might have to rock the motherboard from side-to-side to install it cleanly. Netra 440 Server Service Manual • August 2004... - Page 133 3. With the motherboard sitting flat on the base of the system, slide the motherboard toward the back of the system to engage the tabs at the bottom of the motherboard with the slots at the base of the system. 4.
- Page 134 17. Replace the top cover. “Installing the Top Cover” on page 18. Connect the AC or DC power cables to the back of the system. 19. Power on the system. “Powering On the System” on page Netra 440 Server Service Manual • August 2004...
-
Page 135: Illustrated Parts Breakdown
A P P E N D I X Illustrated Parts Breakdown This appendix contains a sequence of illustrations that show how the various pieces of the system fit together. Use the accompanying tables as a reference for ordering field-replaceable units (FRUs). The part numbers listed in the following tables are correct as of the manual publication date but are subject to change without notice. -
Page 136: Front Panel Components And Fan Tray 3 Assembly
Front Panel Components and Fan Tray 3 Assembly Front Panel Components and Fan Tray 3 Assembly FIGURE A-1 Netra 440 Server Service Manual • August 2004... -
Page 137: Table A-1 Front Panel Components And Fan Tray 3 Assembly
Front Panel Components and Fan Tray 3 Assembly TABLE A-1 Reference Number Part Part Number Fan trays 0, 1 or 2 F540-5855 73 GB SCSI hard drive F540-5924, XRA-SC1N2-73G15K Power distribution board F540-5854 Air filter X8217A DVD-RW drive F540-6068, X7424A DVD-ROM drive F540-6067, X7423A System configuration card... -
Page 138: Motherboard And Other Miscellaneous Components
Motherboard and Other Miscellaneous Components SE RI NE T Motherboard and Other Miscellaneous Components FIGURE A-2 Netra 440 Server Service Manual • August 2004... -
Page 139: Table A-2 Miscellaneous Components
Miscellaneous Components TABLE A-2 Reference Number Part Part Number Power supply, DC F300-1567 Power supply, AC F300-1674 Alarm card, with Alarm In and Alarm Out cables F595-7287 ALOM system controller card F501-6346 Motherboard F540-5919 1.28 GHz CPU/memory module with no memory F501-6370 1.28 GHz CPU/memory module with 2 GB memory X7426A... -
Page 140: Rackmount Kits
Rackmount Kits System Cables TABLE A-3 Part Part Number 23-inch 2-post Hard Mount Kit X7903A 600mm x 600mm 2-post Hard Mount Kit X7905A 19-inch 4-post Slide Mount Kit X8100A Netra 440 Server Service Manual • August 2004... -
Page 141: Connector Pinouts
A P P E N D I X Connector Pinouts This appendix provides reference information about the system back panel ports and pin assignments. Topics covered in this appendix include: “Serial Port (TTYB)” on page 124 ■ “USB Ports” on page 125 ■... -
Page 142: Serial Port (Ttyb)
Serial Port Connector Signals TABLE B-1 Signal Description Signal Description Data Carrier Detect Data Set Ready Receive Data Request to Send Transmit Data Clear to Send Data Terminal Ready Ring Indicate Ground Netra 440 Server Service Manual • August 2004... -
Page 143: Usb Ports
USB Ports Four Universal Serial Bus (USB) ports are located on the motherboard in a double- stacked layout. The ports can be accessed from the back panel. USB3 USB2 USB1 USB0 USB Connector Pin Numbering FIGURE B-2 USB Ports Pin Numbering TABLE B-2 Signal Description Signal Description... -
Page 144: Ethernet Ports
Transmit/Receive Data 0 + Transmit/Receive Data 2 – Transmit/Receive Data 0 – Transmit/Receive Data 1 – Transmit/Receive Data 1 + Transmit/Receive Data 3 + Transmit/Receive Data 2 + Transmit/Receive Data 3 – Netra 440 Server Service Manual • August 2004... -
Page 145: Network Management Port
Network Management Port The network management port (labeled NET MGT) is an RJ-45 connector located on the ALOM system controller card and can be accessed from the back panel. This port needs to be configured prior to use. NET MGT Network Management Port Pin Numbering FIGURE B-4 Network Management Port Pin Signals... -
Page 146: Serial Management Port (Serial Mgt)
Serial Management Port Pin Numbering FIGURE B-5 Serial Management Port Pin Signals TABLE B-5 Signal Description Signal Description Request to Send Ground Data Terminal Ready Receive Data Transmit Data Data Set Ready Ground Clear to Send Netra 440 Server Service Manual • August 2004... -
Page 147: Scsi Port
SCSI Port The SCSI serial data connector is located on the motherboard and can be accessed from the back panel. SCSI Port Pin Numbering FIGURE B-6 SCSI Port Pin Signals TABLE B-6 Signal Description Signal Description Data12 + Data12 – Data13 + Data13 –... - Page 148 SEL + SEL – CD + CD – REQ + REQ – I/O + I/O – Data8 + Data8 – Data9 + Data9 – Data10 + Data10 – Data11 + Data11 – Netra 440 Server Service Manual • August 2004...
-
Page 149: Alarm Port
Alarm Port The alarm port uses a standard DB-15 connector. In a telecommunications environment, use this port to connect to the central office alarming system. shows the pin numbering of the alarm port, and describes the FIGURE B-7 TABLE B-7 pin signals. - Page 150 Netra 440 Server Service Manual • August 2004...
-
Page 151: System Specifications
A P P E N D I X System Specifications This appendix provides the following specifications for the Netra 440 server: “Physical Specifications” on page 133 ■ “Electrical Specifications” on page 134 ■ “Environmental Specifications” on page 136 ■ “Clearance and Service Access Specifications” on page 136 ■... -
Page 152: Electrical Specifications
Electrical Specifications AC Operating Power Limits and Ranges The information in this section applies to the AC version of the Netra 440 server. gives AC power source requirements for each power supply in the Netra TABLE C-2 440 server, and... -
Page 153: Dc Power Source Requirements
DC Power Source Requirements The information in this section applies to the DC version of the Netra 440 server. gives DC power source requirements for each power supply in the Netra TABLE C-4 440 server, and gives DC power source requirements for the Netra 440 TABLE C-5 server as a whole. -
Page 154: Environmental Specifications
Environmental Specifications You can operate and store the Netra 440 server safely in the conditions detailed in TABLE C-6 Netra 440 Server Operating and Storage Specifications TABLE C-6 Specification Operating Storage Ambient 5˚C (41˚F) to 40˚C (104˚F) -40˚C (-40˚F) to 70˚C (158˚F) -
Page 155: Board Connector Locations
A P P E N D I X Board Connector Locations This appendix illustrates the connector locations on the system boards. It contains the following sections: “Motherboard Connectors” on page 138 ■ “SCSI Backplane Connectors” on page 139 ■ “ALOM System Controller Card Connectors” on page 141 ■... -
Page 156: Motherboard Connectors
USB connectors Ethernet connectors DVD cable SCSI external connector connector ALOM (system controller) slot 33-MHz PCI 66-MHz PCI slots slots (0, 1, and 3) (2, 4, and 5) Motherboard Connectors FIGURE D-1 Netra 440 Server Service Manual • August 2004... -
Page 157: Scsi Backplane Connectors
SCSI Backplane Connectors SCSI/system LED connector Fan tray 3 connector Fan tray 0, 1 and 2 connectors SCSI data to motherboard connector System configuration card reader to smart card connector Hard drive connectors SCSI Backplane Connectors, Front FIGURE D-2 Appendix D Board Connector Locations... -
Page 158: Figure D-3 Scsi Backplane Connectors, Rear
Alarm input connector SCSI power to motherboard connector SCSI Backplane Connectors, Rear FIGURE D-3 Netra 440 Server Service Manual • August 2004... -
Page 159: Alom System Controller Card Connectors
ALOM System Controller Card Connectors Serial management connector S E R I A L Network management connector N E T ALOM System Controller Card Connectors FIGURE D-4 Appendix D Board Connector Locations... - Page 160 Netra 440 Server Service Manual • August 2004...
- Page 161 Index location, 12, 17 pinouts, 131 Activity (fan tray 0-2 LED), 8 ALOM system controller card Activity (hard drive LED), 7 connectors, 141 Activity (system status LED), 6, 24 installing, 98 Advanced Lights Out Manager (ALOM) location, 12 installing a power supply, 44 part number, 95 remote power-off, 27, 28 ports, 18...
- Page 162 Ethernet connection LEDs location, 2, 47 description, 14 part number, 45 location, 14 removing, 45 Ethernet ports cfgadm command, 46 description, 17 requirements, 45 location, 12, 17 SCSI IDs, 45 pinouts, 126 Netra 440 Server Service Manual • August 2004...
- Page 163 location, 4, 8 front panel, 4 installing hard drive air filter, 52 description, 7 alarm card, 103 location, 4, 7 ALOM system controller card, 98 Locator (system status LED), 6 CPU/memory module, 80 network management port (NET MGT) DIMMs, 85 description, 15 DVD drive, 56 location, 14...
- Page 164 PCI card, 86 power distribution board, 104 power supplies, 40 reconfiguration boot, 28 SCSI backplane, 68 relay state system configuration card, 58 normally closed (NC), 11 system configuration card (SCC) reader, 60 Netra 440 Server Service Manual • August 2004...
- Page 165 normally open (NO), 11 location, 12, 17 pinouts, 124 removing air filter, 52 service access specifications, 136 alarm card, 100 service guidelines, 21 ALOM system controller card, 95 Service Required (fan tray 0-2 LED), 8 CPU/memory module, 77 Service Required (hard drive LED), 7 DIMMs, 83 Service Required (system status LED), 6 DVD drive, 54...
- Page 166 USB ports description, 17 location, 12, 17 pinouts, 125 user, alarm LED, 11 Netra 440 Server Service Manual • August 2004...
Need help?
Do you have a question about the Netra 440 and is the answer not in the manual?
Questions and answers