Kyocera KM-5530 Operation Manual
Kyocera km-5530: operation guide
Hide thumbs
Also See for KM-5530:
- Command reference manual (410 pages) ,
- Technical reference manual (260 pages) ,
- Operation manual (226 pages)

Related Manuals for Kyocera KM-5530


Summary of Contents for Kyocera KM-5530
-
Page 1: Operation Guide
4530/5530 Operation Guide Please read the Operation Guide before using the copier. Keep it close to the copier for easy reference. - Page 2 When the copier includes printer and fax functions, the printer and fax must enter a “Low Power Mode” where power consumption is automatically reduced after a certain amount of time elapses since they were last used, and they must also support a “Sleep Mode”...
- Page 3 Please read this Operation Guide before using the copier. Keep it close to the copier for easy reference. The sections of this guide and parts of the copier marked with symbols are safety warnings meant to protect the user, other individuals and surrounding objects, and ensure correct and safe usage of the copier.
-
Page 4: Table Of Contents
CONTENTS Section 1 IMPORTANT! PLEASE READ FIRST. .. 1-1 CAUTION LABELS ... 1-1 INSTALLATION PRECAUTIONS ... 1-2 PRECAUTIONS FOR USE ... 1-3 Section 2 NAMES OF PARTS ... 2-1 1. Main body ... 2-1 2. Operation panel ... 2-4 3. Touch panel ... 2-6 Section 3 PREPARATIONS ... - Page 5 (1) Side Feeder ... 8-1 (2) Document Finisher (A) ... 8-1 (3) Document Finisher (B) ... 8-6 (4) Key Counter ... 8-7 (5) Printer Kit ... 8-7 (6) Network Scanner Kit ... 8-7 (7) Tandem Copier Kit ... 8-8 Section 9 TROUBLESHOOTING ...
- Page 6 ● MAKING FULL USE OF THE COPIER'S ADVANCED FUNCTIONS Having the copier automatically select copy paper of the same size as the original <Auto paper selection mode> (Page 4-2) ■ Enlarging/reducing the copy image to a desired size between 25% and 400% (between 50% and 200% when using the Document Processor) <Zoom mode>...
- Page 7 Making booklets from sheet originals <Booklet/Stitching mode> (Page 5-22) Automatic rotation of the copy image <Auto rotation function> (Page 5-29) Feeding paper as a backing sheet for OHP transparencies <Transparency + backing sheet mode> (Page 5-37) Making a test copy prior to large volume copying <Proof mode>...
- Page 8 Printing out different stored originals in one operation <Synergy print boxes> (Page 6-9) Changing the language used in the touch panel <Language selection function> (Page 7-74) Español English ■ Document Finisher + Multi Job Tray + Center-Folding Unit (Page 8-1) ■ Printer Kit (Page 8-7)
-
Page 9: Important! Please Read First
Section 1 IMPORTANT! PLEASE READ FIRST. CAUTION LABELS Caution labels have been attached to the copier at the following locations for safety purposes. BE SUFFICIENTLY CAREFUL to avoid fire or electric shock when removing a paper jam or when replacing toner. Label 1 High temperature inside. -
Page 10: Installation Precautions
INSTALLATION PRECAUTIONS ■ Environmment CAUTION • Avoid placing the copier on or in locations which are unstable or not level. Such locations may cause the copier to fall down or fall over. This type of situation presents a danger of personal injury or damage to the copier. -
Page 11: Precautions For Use
PRECAUTIONS FOR USE ■ Cautions when using the copier WARNING • DO NOT place metallic objects or containers with water (flower vases, flower pots, cups, etc.) on or near the copier. This of situation presents a danger of fire or electrical shock should they fall inside. - Page 12 PRECAUTIONS FOR USE Other precautions • DO NOT place heavy objects on the copier or cause other damage to the copier. • DO NOT open the front cover, turn off the main switch, or pull out the power plug during copying. •...
-
Page 13: Names Of Parts
Section 2 NAMES OF PARTS 1. Main body 1 Operation panel (Perform copy operations here.) 2 Cover on the right side of the operation panel (Open this cover when you need to add toner.) 3 Front cover (Open this cover if a paper misfeed occurs inside the copier.) 4 Drawer[Cassette] No.1 (This drawer[cassette] has a storage capacity of 500 sheets of standard copy paper.) - Page 14 Section 2 NAMES OF PARTS & # Original table (Set originals to be copied on this table.) $ Original insert guides (Align these guides to fit the width of the originals to be copied.) % Document Processor cover (Open this cover if an original misfeed occurs.) ^ Original set indicator (This indicator lights when originals are set in the Document Processor.)
- Page 15 ¤ › fi fl ‡ ⁄ Œ ¤ Original size indicator lines (Be sure to align the original with these lines whenever setting an original on the platen.) ‹ Platen (Set originals here for copying. Lay originals face-down and align the edges with the size indicator lines located on the left and rear sides of the platen.) ›...
-
Page 16: Operation Panel
(Press this key when you want to use the optional printer functions of this machine. The lamp in that key will light when the machine is in the printer operation mode. The indicator to the left of the key will either light green or orange, or will flash, depending upon the status of the machine.) - Page 17 ● Initial mode (at the end of warm-up or when the [Reset] key is pressed) In the default settings prepared at the factory, paper of the same size as the original is selected automatically and the copy magnification ratio is set to “100%” [1:1] (under the auto paper selection mode), the number of copies to be made is set to “1”...
-
Page 18: Touch Panel
Section 2 NAMES OF PARTS 3. Touch panel Ready to copy. 11x8 " Plain x11" Color Bypass 11x8 " Plain Plain 11x8 " Recycled Basic User choice & Ready to copy. Plain Color Bypass Plain Plain Recycled Basic User choice &... - Page 19 1 This area displays messages on the machine's status and on operational procedures. 2 This area displays information on the size of paper in the drawer[cassette] and the current copy magnification ratio. 3 This area displays the current number of copies to be made. 4 Paper size keys (Remaining paper volume icons) (Touch these keys when you want to change the currently selected drawer[cassette] in order to change the size of paper that will be...
- Page 20 Section 2 NAMES OF PARTS ) “Program” tab (Touch this tab when you want to register the currently selected settings as a program, or to delete a previously registered program.) NOTE If you press any key that has an arrow (P P P P P ) in its bottom right corner, the corresponding setting screen will be displayed.
-
Page 21: Preparations
Section 3 PREPARATIONS 1. Loading paper Paper can be loading into 5 locations in this copier: the 4 drawers[cassettes] and the multi-bypass tray. (1) Note when adding paper After taking new paper out of its packaging, be sure to fan through them a few times to separate the sheets before loading the paper into a drawer[cassette] or setting the paper on the multi-bypass tray. - Page 22 Section 3 PREPARATIONS Move the paper width guide plate to fit the width of the paper that is to be loaded in that drawer[cassette]. Align the paper flush against the right side of the drawer[cassette], and then set the paper in the drawer[cassette].
-
Page 23: No.3 And No.4
(3) Loading paper into drawers[cassettes] No.3 and No.4 Up to 1000 sheets of 11" x 8 " or A4 size standard copy paper (75 g/m – 80 g/m ) or color paper can be loaded into drawer[cassette] No.3 (right side drawer[cassette]). Drawer[Cassette] No.4 (left side drawer[cassette]) can accept up to 1500 sheets of that same size paper. -
Page 24: Setting Paper On The Multi-Bypass Tray
Section 3 PREPARATIONS (4) Setting paper on the multi-bypass tray Standard copy paper as well as special paper can be set on the multi- bypass tray. When copying onto special paper, be sure to use the multi-bypass tray. NOTES • Up to 100 sheets of standard copy paper or special paper can be set on the multi-bypass tray at one time. -
Page 25: Loading Paper Into The Side Feeder (An Optional Drawer[Cassette] Only Available For 55 Cpm Copiers)
(5) Loading paper into the Side Feeder (an optional drawer[cassette] only available for 55 cpm copiers) Up to 4000 sheets of 11" x 8 " or A4 size standard copy paper (75 g/m – 80 g/m ) or color paper can be loaded into the optional Side Feeder. -
Page 26: Setting Originals
Section 3 PREPARATIONS 2. Setting originals (1) Setting originals in the Document Processor The Document Processor automatically feeds and scans each original, one by one, for copying. You can also have two-sided originals turned over automatically in order to make two-sided copies or separate copies from each side. -
Page 27: Setting Originals On The Platen
IMPORTANT! DO NOT set more originals than indicated on the sticker that is attached to the rear original insert guide. If more than the acceptable number of originals is set, the originals may not feed properly. (2) Setting originals on the platen To make copies from originals that cannot be set in the Document Processor (books, magazines, etc.), lift open the Document Processor and set one original at a time on the platen. -
Page 28: Adding Toner
Section 3 PREPARATIONS 3. Adding toner Add toner when “Add toner” is displayed. Although a few copies can still be made once this message is displayed, you should add toner as soon as possible. * DO NOT add toner unless this message is displayed. * Touch the “Adding toner”... - Page 29 Turn the bottle clockwise 90 degrees and the toner in the bottle will be emptied into the copier. * Be sure to turn the bottle all the way until it stops, so that the ■ on the bottle is aligned with the ▲ on the main body of the copier.
- Page 30 Section 3 PREPARATIONS 3-10...
-
Page 31: Basic Operation
Section 4 BASIC OPERATION 1. Basic copying procedure 1. Warm-up Turn the main switch ON ( | ). At the end of warm-up, “Ready to copy.” will be displayed. NOTE If you set the originals that you want to copy and press the [Start] key while the copier is still warming up, copying will begin as soon as warm-up is finished. - Page 32 Section 4 BASIC OPERATION x11" Plain 11x8 " Color 11x8 " Bypass Plain Plain 11x8 " Recycled Inch specifications Plain Colour BYPASS Plain Plain Recycled Metric specifications 4. Selecting the paper size When the “APS” key is highlighted on the touch panel, copy paper of the same size as the original will be automatically selected.
- Page 33 2-sided / Orig. image Select Separation quality orig. size Proof Copy User choice Basic Function Inch specifications 2-sided / Image Select Split quality size orig. Test copy User choice Basic Function Metric specifications 6. Selecting the image quality The image quality is selected according to the type of original. Touch the “User choice”...
- Page 34 Section 4 BASIC OPERATION 9. At the end of copying Finished copies will be ejected onto the copy eject tray. IMPORTANT! • Up to 250 copies can be stored on the copy eject tray. • The copy eject tray may be optional equipment in certain countries or regions of purchase.
-
Page 35: Enlarging/Reducing The Copy Image
2. Enlarging/reducing the copy image (1) Auto magnification selection mode With this mode, the original image is enlarged/reduced automatically according to the selected paper size. IMPORTANT! If you use this mode most often, select “AMS” under “Default magnification ratio” on page 7-49. Set the original to be copied. -
Page 36: Zoom Mode
Section 4 BASIC OPERATION (2) Zoom mode With this mode, the magnification ratio can be set to any 1% increment between 25% and 400% (between 25% and 200% when using the Document Processor). Set the original to be copied. Touch the “Reduce/Enlarge” key. The “Reduce/Enlarge” screen will be displayed. -
Page 37: Preset Zoom Mode
(3) Preset zoom mode With this mode, the magnification ratio can be set to one of the pre- set ratios: [Available magnification ratios] Inch specification Reduction 50% (11" x 17" R 5 64% (11" x 17" R 8 77% (11" x 17" R 8 "... -
Page 38: Xy Zoom Mode
Section 4 BASIC OPERATION (4) XY zoom mode With this mode, it is possible for you to select the length and width of the copy image separately. The magnification ratio can be set to any 1% increment between 25% and 400% (between 25% and 200% when using the Document Processor). -
Page 39: Interrupt Copying
3. Interrupt copying Interrupt copying is useful if, during one copy job, you want to copy other originals at different settings. Once the rush job is completed, the interrupted copy job can be resumed at the same settings as before. Press the [Interrupt] key to light the lamp in the [Interrupt] key. -
Page 40: Job Reservation
Section 4 BASIC OPERATION 4. Job reservation Copy jobs can be scheduled even while another copy job is in progress any time the “Reserve next copy” key is displayed. Inch specifications Now copying. O r i g . p a g e C o u n t / S e t 1/999 11x8... -
Page 41: Energy-Saving Preheat Function
5. Energy-saving preheat function If you press the [Energy Saver] key, even while the main switch is still turned ON, the copier will enter the energy-saving preheat mode. When the copier is in this preheat mode, the light the lamp in the [Energy Saver] key will be the only lit indication on the operation panel. - Page 42 Section 4 BASIC OPERATION 4-12...
-
Page 43: Other Convenient Functions
Section 5 OTHER CONVENIENT FUNCTIONS 1. Making 2-sided copies from various types of originals [2-sided copy modes] With these modes, 2-sided copies can be made from a variety of originals including open-faced (books, etc.) or 2-sided originals. (1) Making 2-sided copies from a 2-sided original With this mode, a 2-sided original is copied and the front and back sides of the copy paper are used so that the copy looks just like the original. -
Page 44: Making 2-Sided Copies From One-Sided Originals
Section 5 OTHER CONVENIENT FUNCTIONS (3) Making 2-sided copies from one-sided originals With this mode, multiple one-sided originals are copied onto the front and back sides of the copy paper. If you are copying an odd number of originals, the back side of the last copy page will be blank. NOTE The image that is copied onto the back side of the copies can also be rotated 180 degrees. - Page 45 Specify the binding direction of the originals. Inch specifications <for 2-sided originals> <for open-faced originals> to copy. to copy. Register Finished Original 1 sided 1 sided Open from Open from ➔2 sided ➔2 sided left/right left/right 2 sided Open from Open from 2 sided ➔2 sided...
-
Page 46: Copying Two-Page Originals Onto Separate Sheets [Page Separation/Split Copy Modes]
Section 5 OTHER CONVENIENT FUNCTIONS 2. Copying two-page originals onto separate sheets [Page separation/Split copy modes] (1) Page separation/Split copy from book originals With this mode, the two facing pages of an open-faced original such as a book, a magazine, and the like are each copied onto a separate sheet of paper. - Page 47 Touch the “2 sided / 1 sided” key or the “Book / 2 sided” key, as appropriate to the type of originals being copied and the type of finished copies to be made. Inch specifications Ready to copy. Register 2 sided/Separation 1 sided 1 sided Able to copy 1 sided (separate) or...
-
Page 48: Making A Margin Space On The Copies [Margin Mode]
Section 5 OTHER CONVENIENT FUNCTIONS 3. Making a margin space on the copies [Margin mode] (1) Standard margin Inch specifications The image of the original can be shifted to the left or right and up or down to make a margin (blank) space on the copy. The width of each margin can be set to any 1/8"... - Page 49 Touch the “Margin” key. The screen to set the front side margin will be displayed. Inch specifications Ready to copy. Margin/Centering Register None Reposition image to left/right or top/bottom, and also center image on paper. Margin Centering Metric specifications Ready to copy. Register Margin/Image shift None...
-
Page 50: Centering The Copy Image [Centering/Image Shift Mode]
Section 5 OTHER CONVENIENT FUNCTIONS 4. Centering the copy image [Centering/Image shift mode] With this mode you can center the image on the copy paper when you copy onto a paper size that is larger than that of the original. Set the originals to be copied. -
Page 51: Adding A Space Next To The Copy Images For Making Notes [Memo Mode]
5. Adding a space next to the copy images for making notes [Memo mode] With this mode you can leave a space for adding notes next to the copied image. It is also possible to fit the images of 2 originals onto the same copy page along with a blank space for each. - Page 52 Section 5 OTHER CONVENIENT FUNCTIONS Select the desired direction of the layout. Inch specifications <Layout A> to copy. to copy. Register Layout Border line None Solid Dotted Borders Metric specifications <Layout A> to copy. to copy. Register Layout Border line None Solid Dotted...
-
Page 53: Making Copies With Clean Edges [Border Erase Modes]
6. Making copies with clean edges [Border erase modes] (1) Erasing blemishes from edges of copies (Sheet erase mode) Inch specifications With this mode, shadows, lines, etc., that occur around the edges of copies made from sheet originals can be erased. The width of the border to be erased can be set to any 1/8"... - Page 54 Section 5 OTHER CONVENIENT FUNCTIONS Set the original to be copied. Touch the “Function” tab. The content of the “Function” tab will be displayed. Touch the “Border Erase” [“Erase Mode”] key. The “Border Erase” [“Erase Mode”] screen will be displayed. Inch specifications Ready to copy.
-
Page 55: Fitting The Image Of Either Two Or Four Originals Onto A Single Copy Page [Combine/Merge Copy Modes]
7. Fitting the image of either two or four originals onto a single copy page [Combine/Merge Copy modes] With this mode, the images from either 2 or 4 originals can be reduced and then combined onto a single copy. The borderline of each original can also be marked with either a solid line or a dotted line. - Page 56 Section 5 OTHER CONVENIENT FUNCTIONS Set the originals to be copied. Touch the “Function” tab. The content of the “Function” tab will be displayed. Inch specifications Ready to copy. 11x8 " Plain x11" Color Bypass 11x8 " Plain Plain 11x8 "...
- Page 57 Press the [Start] key. Scanning of the originals will start. If you set the originals in the Document Processor, copying will start automatically. If you set an original on the platen, a message will appear telling you to set the next original. In this case, go to the next step.
-
Page 58: Printing Page Numbers On Copies [Print Page Numbers Mode]
Section 5 OTHER CONVENIENT FUNCTIONS 8. Printing page numbers on copies [Print page numbers mode] When you make copies from multiple originals, you can have page numbers printed on the corresponding copies in numerical order from the first original. There are three styles of page numbers to choose from: “-1-”, “P.1”... - Page 59 If you want printing of the page numbers to be started from a page other than the first page, touch the “Setting 1st page” key. The “Setting 1st page” screen will be displayed. Inch specifications Ready to copy. Register Page # Start page # Start # Setting...
- Page 60 Section 5 OTHER CONVENIENT FUNCTIONS If you want the last page number that is printed to be on a copy other than that for the last original, touch the “Setting last page” key. The “Setting last page” screen will be displayed.
- Page 61 Touch the “Manual” key. The screen to designate the denominator will be displayed. Inch specifications Ready to copy. Setting denominator # Auto Manual Metric specifications Ready to copy. Setting denominator # Auto Manual Touch the “+” key or the “-” key to select the desired denominator for the page numbers.
-
Page 62: Overlaying One Image Over Another [Form Overlay Mode]
Section 5 OTHER CONVENIENT FUNCTIONS 9. Overlaying one image over another [Form overlay mode] This mode can be used to scan the first original (the “form”) into memory and have its image overlaid onto copies made from subsequent originals. It is also possible to register and store in memory, in advance, the images that you want to use as original forms. - Page 63 Touch the “Loading Form” key. A list of registered forms will be displayed. Inch specifications Select Form Scan form once Overlay first scanned image onto Loading the scanned image or on registered from. Form Metric specifications Set form. Form selection Press Start key.
-
Page 64: Making Booklets From Sheet Originals [Booklet/Stitching Mode]
Section 5 OTHER CONVENIENT FUNCTIONS 10. Making booklets from sheet originals [Booklet/Stitching mode] With this mode, you can use 1-sided or 2-sided originals to make open-faced, two-sided copies in such a way that the finished copies can be stacked and folded into a booklet format. You can also select to have color paper or relatively thick paper fed as front and/or back covers to the copy sets. - Page 65 Set the originals to be copied in the Document Processor. IMPORTANT! If you are using the platen, be absolutely certain to set the first original first. Touch the “Function” tab. The content of the “Function” tab will be displayed. Touch the “Booklet” key. The “Booklet” screen will be displayed.
- Page 66 Section 5 OTHER CONVENIENT FUNCTIONS Touch the “Saddle stitch” key or the “Bind & Fold” key, as appropriate. * It is possible for you to center staple, or center staple and fold, up to 16 copy sheets (64 layout pages) at one time. Inch specifications Set first page.
-
Page 67: Making Booklets From Book Originals [Book To Booklet Mode]
11. Making booklets from book originals [Book to Booklet mode] With this mode, you can add covers, and either copy onto them or not, so that the finished copy sets will appear like a magazine, etc. NOTES Inch specifications • Only 8 "x 11"... - Page 68 Section 5 OTHER CONVENIENT FUNCTIONS Specify the binding direction of both the originals and the finished copies. Inch specifications Set first page. Press "Start" key. Booklet Original Finishing Book Open from Copy on None Left left front cvr Book Open from Booklet Right right...
- Page 69 Touch the “On” key. Inch specifications Set first page. Press "Start" key. Copy on front cover When selecting "ON" for copying on the front cover, follow the instruction. 1. Scan front cover book original 2. Start scan book originals Metric specifications Set first page.
-
Page 70: Automatic Sorting Of Copy Sets Without The Document Finisher [Sort/Finished Mode]
Section 5 OTHER CONVENIENT FUNCTIONS 12. Automatic sorting of copy sets without the Document Finisher [Sort/Finished mode] Since copying in this mode is performed after multiple originals are scanned and memorized, copies can be sorted into the required number of sets even without the optional Document Finisher. When “Sort:ON”... -
Page 71: Auto Rotation Function
13. Auto rotation function If the orientation of the original is different from that of the paper loaded in the drawers[cassettes], the image will be automatically turned 90 degrees counter-clockwise for copying. No special setting is required in order to use this function. IMPORTANT! •... -
Page 72: Auto Selection/Filing Mode
Section 5 OTHER CONVENIENT FUNCTIONS 14. Auto selection/Filing mode With this mode, when you are using the Document Processor without pressing one of the paper size keys, and thereby, specifying a desired paper size, originals will be checked one by one for their size, and you can select to either have paper of the same size as each original selected automatically (auto selection) or to have the originals all copied onto one single size of copy paper (filing). - Page 73 Specify the size of the very first original to be copied and then touch the “Close” key. The touch panel will return to the contents of the “Basic” tab. Inch specifications Place originals in Document processor. Auto Selection 1st original x11"/ 11x8 "...
-
Page 74: Adding A Front And/Or Back Cover To Your Copy Sets
Section 5 OTHER CONVENIENT FUNCTIONS 15. Adding a front and/or back cover to your copy sets [Cover mode] With this mode, you can select to have color paper or relatively thick paper fed as front and/or back covers to your copy sets. NOTE It is possible for you to change the drawer[cassette] that will be used to feed the cover sheets. -
Page 75: [Cover Mode]
Set the originals to be copied. Touch the “Function” tab. The content of the “Function” tab will be displayed. Touch the “Cover Mode” key. The “Cover Mode” screen will be displayed. Inch specifications Ready to copy. Select 2 sided/ Select Combine paper Separation... - Page 76 Section 5 OTHER CONVENIENT FUNCTIONS Press the [Start] key. Scanning of the originals will start. If you set the originals in the Document Processor, copying will start automatically. If you set an original on the platen, a message will appear telling you to set the next original.
-
Page 77: Original Size Selection Mode
16. Original size selection mode With this mode, if you manually select a size for the original, only that size image will be scanned for copying. Use this mode as well when copying from originals of non-standard sizes. NOTES • You can register the size of non-standard originals that you often use as a custom original size. - Page 78 Section 5 OTHER CONVENIENT FUNCTIONS Based on the left rear corner of the platen being a setting of “0”, touch the “+” key or the “-” key to change the dimensions of the scan area to the desired setting. * In metric specification copiers, the dimensions can also be entered directly by touching the “#keys”...
-
Page 79: Feeding Paper As A Backing Sheet For Ohp Transparencies [Transparency + Backing Sheet Mode]
17. Feeding paper as a backing sheet for OHP transparencies [Transparency + backing sheet mode] When 2 or 3 transparencies are piled on top of one another, static electricity can cause problems. This mode automatically places a backing sheet between the transparencies during copying for easy handling. - Page 80 Section 5 OTHER CONVENIENT FUNCTIONS Touch the “Copy” key or the “Blank” key, as appropriate. Inch specifications Ready to copy. OHP back None Copy Blank Metric specifications Ready to copy. OHP back None Copy Blank Press the [Start] key. Copying will start. 5-38 Paper Size 11x8...
-
Page 81: Inverting Black And White [Invert Mode]
18. Inverting black and white [Invert mode] With this mode, you can make copies where the black and white areas of the image are inverted (or reversed). * If multiple inverted copies are being made, “Please wait Now cleaning” may be displayed. Set the originals to be copied. -
Page 82: Making Mirror Image Copies [Mirror Image Mode]
Section 5 OTHER CONVENIENT FUNCTIONS 19. Making mirror image copies [Mirror image mode] With this mode, you can make mirror image copies. Set the originals to be copied. Touch the “Function” tab. The content of the “Function” tab will be displayed. Touch the “▼... -
Page 83: Making A Test Copy Prior To Large Volume Copying [Proof Mode]
20. Making a test copy prior to large volume copying [Proof mode] With this mode, you can use the same settings to create a single set of test copies in order to verify the results prior to actually starting to make a large number of copies or copy sets. - Page 84 Section 5 OTHER CONVENIENT FUNCTIONS Once the test copy set is complete, a screen will be displayed in order to verify whether or not you want to make the initially designated number of copy sets at the present settings, and the copier will enter a waiting-to-copy state. Check the test copies.
-
Page 85: Making More Of The Same Copies After A Copy Job Is Finished [Repeat Copy Mode]
21. Making more of the same copies after a copy job is finished [Repeat copy mode] With this mode, if you think you might want to make another set of the same copies even after the initial copy job is finished, simply turn the repeat copy mode ON and you can make the necessary number of additional copies later. -
Page 86: Printing Out With The Repeat Copy Mode
Section 5 OTHER CONVENIENT FUNCTIONS Touch the “#keys” key to highlight that key and then enter the security code that will enable repeat copying for these originals. Inch specifications Ready to copy. Modify Copy Security # keys Metric specifications Ready to copy. Modify copy Security #-Keys... - Page 87 Use the keypad to enter the appropriate security code and the touch the “Enter” key. If the entered code matches the registered one, the screen to select the number of copies or copy sets to be made will be displayed. Inch specifications Enter the re-print code.
- Page 88 Section 5 OTHER CONVENIENT FUNCTIONS Use the keypad to enter the appropriate security code and the touch the “Enter” key. If the entered code matches the registered one, the “Check details / Reprint” screen will be displayed. Inch specifications Enter the re-print code. Clear Metric specifications Enter the re-print code.
- Page 89 If you want to cancel another registered copy job, repeat steps 2 through 3. Touch the “Close” key. The touch panel will return to the contents of the “Basic” tab. Section 5 OTHER CONVENIENT FUNCTIONS 5-47...
-
Page 90: Copying A Large Volume Of Originals In One Operation [Batch Scanning Mode]
Section 5 OTHER CONVENIENT FUNCTIONS 22. Copying a large volume of originals in one operation [Batch scanning mode] With this mode, you can scan multiple sets of originals and then have them all copied at the same time. Scan one set of originals of the same type and size and then register that as a single step in the copy job, and you can copy an extremely large volume of originals in one batch. -
Page 91: Saving On Toner Use [Eco Print Mode]
23. Saving on toner use [Eco print mode] With this mode, you can reduce the amount of toner that is used to make the copies. Use this mode with, for example making test copies, when you do not especially need to print out high quality copies. You can also make the eco print mode the default setting in the initial mode. -
Page 92: Original Set Direction
Section 5 OTHER CONVENIENT FUNCTIONS 24. Original set direction It is necessary to specify the direction in which the originals were set whenever you use the 2-sided copy modes, the page separation/split copy modes, the margin mode, the centering/image shift mode, the memo mode, the border erase modes, the combine/merge copy modes, the print page numbers mode, the booklet/stitching mode, the auto selection/filing mode, the staple mode (optional) and the punch... -
Page 93: Memorizing Frequently Used Settings
25. Memorizing frequently used settings [Program function] Up to eight combinations of copy modes and other functions displayed on the operation panel can be registered as a single program using this function. You can also register a name for each registered program. -
Page 94: Using Programmed Settings To Make Copies
Section 5 OTHER CONVENIENT FUNCTIONS (2) Using programmed settings to make copies Touch the “Program” tab. The content of the “Program” tab will be displayed. Touch the program key under which the settings that you want to use are registered. Inch specifications Ready to copy. -
Page 95: Deleting A Registered Program
(4) Deleting a registered program Touch the “Program” tab. The content of the “Program” tab will be displayed. Touch the “Delete” key. Inch specifications Ready to copy. Recall File A Catalog A Catalog B File B Catalog C List A Catalog D Basic User choice... -
Page 96: Registration Keys
Section 5 OTHER CONVENIENT FUNCTIONS 26. Registration keys You can register up to 3 functions and/or modes, from among those displayed in the “Function” tab, under the registration keys. The functions and modes in the “Basic” tab and the “User choice” tab can be registered under registration keys as well. - Page 97 Touch the registration key under which you want to register the function. “Register this selecting mode. OK?” will be displayed. Inch specifications Register present setting S e l e c t t h e nu m b e r o f p r o gra m t o r e g i s t e r e d . registration registration registration...
-
Page 98: Deleting A Registration Key
Section 5 OTHER CONVENIENT FUNCTIONS (2) Deleting a registration key Perform the following procedure when you want to delete a registration key. Touch the registration (to the right of the “Basic” tab) that you want to delete. (Example: “Combine” [“Merge copy”]) lnch specifications Ready to copy. - Page 99 Touch the “Yes” key. The “Combine” [“Merge copy”] screen will be displayed again. Inch specifications Delete registration. R e g i s t e r N o. A r e yo u s u r e yo u wa n t t o d e l e t e ? Metric specifications Delete registration.
-
Page 100: Easily Add Covers And Insert Sheets Between Various Sets Of Originals In One Operation [Job Build Mode]
Section 5 OTHER CONVENIENT FUNCTIONS 27. Easily add covers and insert sheets between various sets of originals in one operation [Job build mode] The job build function enables you to scan different sets of originals into memory in separate steps and then copy them all at one time. Each set of scanned originals is then seen as one step in the copy process and you can select different copy modes for each step (enlarge/reduce, border erase, original type [2-sided originals, 1-sided... - Page 101 Touch the “2 sided copy” key and then touch the “Open from left” [“Left binding”] key. Finally, touch the “Close” key. The touch panel will return to the screen in step 2. Inch specifications Ready to Job build. Place originals then press Start key. 1 sided/ 2 sided copy Finished 1 sided...
- Page 102 Section 5 OTHER CONVENIENT FUNCTIONS Touch the “Bypass” key. Touch the “Close” key. The touch panel will return to the screen in step 6. Inch specifications Ready to Job build. Place originals then press Start key. Select paper 11x8 ” Plain 11x8 ”...
- Page 103 ● Step 4: Making the settings for the third original (“C” in the illustration on page 5-58.) The multi-bypass is to be selected for color paper feed under the “Select paper” screen. Touch the “Select paper” key. The “Select paper” screen will be displayed.
- Page 104 Section 5 OTHER CONVENIENT FUNCTIONS Touch the key that corresponds to drawer[cassette] No. 1. Touch the “Close” key. The touch panel will return to the screen in step 17. Inch specifications Ready to Job build. Place originals then press Start key. Select paper 11x8 ”...
-
Page 105: Selecting The Settings And Functions
If there are no problems with the copy set you made, then you can use the repeat copy mode to make any additional number of copy sets as desired (see “(2) Printing out with the repeat copy mode” on page 5-44). (2) Selecting the settings and functions 1 Selecting the paper This procedure selects the size of the copy paper. - Page 106 Section 5 OTHER CONVENIENT FUNCTIONS 3 Selecting between 1-sided or 2-sided copies This procedure selects the type of finished copies to be made between 1-sided and 2-sided. With the content of the “Basic” tab displayed, touch the “1 sided/2 sided” key. The “1 sided/2 sided” screen will be displayed.
- Page 107 IMPORTANT! If the designation for the direction that the originals are set is not correct, copying may be accomplished incorrectly. Touch the “Close” key. The touch panel will return to the screen in step 1. 5 Making copies at an enlarged or reduced magnification ratio This procedure selects the magnification ratio of the finished copies.
- Page 108 Section 5 OTHER CONVENIENT FUNCTIONS 7 Setting the scanning density This procedure sets the copy exposure for the finished copies. Touch the “Quality” key. Then, in the resulting screen, touch the “Scanning density” key. The “Scanning density” screen will be displayed. Inch specifications Ready to Job build.
- Page 109 9 Turning the eco print mode ON This procedure allows you to turn the eco print mode ON in order to save on toner use. Touch the “Quality” key. Then, in the resulting screen, touch the “Eco Print” key. The “Eco Print” screen will be displayed. Inch specifications Ready to Job build.
- Page 110 Section 5 OTHER CONVENIENT FUNCTIONS ! Manually selecting the size of the originals This procedure allow you to select the size of the originals manually using the touch panel. Touch the “Edit” key. Then, in the resulting screen, touch the “Select orig.
- Page 111 # Selecting the margin mode or the centering/image shift mode This procedure selects the margin mode or the centering/image shift mode in order to create a margin space or center the copy image. Touch the “Edit” key. Then, in the resulting screen, touch the “Margin/Centering”...
- Page 112 Section 5 OTHER CONVENIENT FUNCTIONS % Selecting the location of copy ejection If the optional Document Finisher or Multi Job Tray is installed on your copier, this procedure lets you select the location for the ejection of finished copies. Touch the “Edit” key. Then, in the resulting screen, touch the “Select of Output”...
-
Page 113: Document And Output Management Functions
If you store multiple sets of documents in a synergy print box, you can print out up to 10 of these sets at one time. If the optional Printer Kit or Scanner Kit is installed in your copier, you can also store print and scan data in synergy print boxes and add them to the copy jobs. - Page 114 Section 6 DOCUMENT AND OUTPUT MANAGEMENT FUNCTIONS NOTE Refer to “Entering characters” on page 7-75 for information on entering characters. Touch the “Select orig. size” [“Select size orig.”], “Select regi. size”, “Reduce/Enlarge” and/or “Orig. set direction” keys if you want to perform the corresponding settings for the originals being used.
- Page 115 Check the displayed information. If you want to print out the selected form, touch the “Print Form” key. If you want to change the name of the selected form, touch the “Change form name” key and then enter the new name. Inch specifications Check/Correct details Details...
-
Page 116: Shared Data Box
Section 6 DOCUMENT AND OUTPUT MANAGEMENT FUNCTIONS NOTE It is possible to change the order of display for the stored documents. To do so, touch the “Order of indication” key, and then touch the “Sort by date” key or the “Sort by name” key, as appropriate. Touch the “Yes”... - Page 117 Touch the “Change name” key and then enter a name for the documents. If you do not want to register a name for the documents, go directly to the next step. Inch specifications Ready to register document(s). Place originals then press Start key. Document registration Shared Data Box Select...
- Page 118 Section 6 DOCUMENT AND OUTPUT MANAGEMENT FUNCTIONS NOTE It is possible to change the order of display for the stored documents. To do so, touch the “Order of indication” key, and then touch the “Sort by date” key or the “Sort by name” key, as appropriate. Touch the “Select paper”...
- Page 119 Select the documents that you want to check and then touch the “Cont/Crrt. details” [“Check/Rev. details”] key. The “Check/Correct details” [“Check/revice details”] screen will be displayed. Inch specifications Box editing Document data box Job 005 25/10/01 25/10/01 Job 004 25/10/01 Job 003 25/10/01 Job 002...
-
Page 120: Deleting Stored Documents
Section 6 DOCUMENT AND OUTPUT MANAGEMENT FUNCTIONS 4 Deleting stored documents Perform the following procedure when you want to delete stored documents. Press the [Document Management] key. The “Document Management” screen will be displayed. Touch the “Box Editing” key under “Shared Data Box”. The “Box editing”... -
Page 121: Synergy Print Boxes
NOTE If the optional Printer Kit is installed in your copier, you can also send the document data from your computer and store it in the synergy print box. For more detailed information, refer to the Operation Guide for your Printer Kit. - Page 122 Section 6 DOCUMENT AND OUTPUT MANAGEMENT FUNCTIONS Touch the “Select orig. size” [“Select size orig.”] key, the “Select regi. size” key, the “Original type” key, the “Reduce/ Enlarge” key and/or the “Orig.set direction” key, if you want to perform the corresponding settings. If you want to access the “Scanning density”...
- Page 123 NOTES • If that box was registered with a password, the password entry screen will be displayed. Enter the registered password with the keypad and then touch the “Enter” key. Inch specifications password ******** Clear Metric specifications password ******** Clear 007 Box Name ABCDEFG •...
- Page 124 Section 6 DOCUMENT AND OUTPUT MANAGEMENT FUNCTIONS 3 Printing out the full contents of a box Perform the following procedure when you want to print out all of the documents that are stored in a synergy print box at one time. Press the [Document Management] key.
- Page 125 4 Checking stored documents and changing their names Perform the following procedure when you want to verify the name of stored documents, the size of the original documents or the date and time they were stored in the synergy print box, or when you want to print out the first page of those document in order to check them.
- Page 126 Section 6 DOCUMENT AND OUTPUT MANAGEMENT FUNCTIONS Select the documents that you want to check and then touch the “Conf/Correct details” [“Check/Rev. details”] key. The “Check/Correct details” [“Check/revise details”] screen will be displayed. Inch specifications Box editing Select : 0 WED 15:32 JOB005 WED 15:33...
- Page 127 5 Deleting stored documents from a box Perform the following procedure when you want to delete stored documents. Press the [Document Management] key. The “Document Management” screen will be displayed. Touch the “Box Editing” key under “Synergy Print Box”. The screen to select the synergy print box will be displayed.
- Page 128 Section 6 DOCUMENT AND OUTPUT MANAGEMENT FUNCTIONS Touch the “Yes” key or the “No” key, as appropriate. Inch specifications Document name : Job 005 This document(s) will be deleted. Do you want to delete it? Metric specifications Document name : JOB005 This document will be deleted.
- Page 129 NOTES • If that box was registered with a password, the password entry screen will be displayed. Enter the registered password with the keypad and then touch the “Enter” key. Inch specifications password ******** Clear Metric specifications password ******** Clear 007 Box Name ABCDEFG •...
- Page 130 Section 6 DOCUMENT AND OUTPUT MANAGEMENT FUNCTIONS 7 Registering a password for a box For security and privacy purposes, you can register a password for each synergy print box. In this case, it will be necessary to enter the registered password in order to print out, check or delete any documents stored in that box.
- Page 131 Touch the “Box Password” key. A verification screen will be displayed. Inch specifications Box editing Select : 0 WED 15:32 JOB005 WED 15:33 JOB004 WED 15:34 JOB003 WED 15:35 JOB002 WED 15:37 JOB001 001/005 Document Management - Synergy Print Box Metric specifications Box editing 007 Box ABCDEFGHIJK...
-
Page 132: Output Management Functions
With the "output management functions", jobs using the printer functions of this copier and printing out from a computer are displayed just like any other copy job. These print jobs can be verified just like copy jobs by checking the “Print status”... -
Page 133: The "Print Status" Screen
(3) The “Print status” screen This screen displays the currently set printing conditions and the job queue of documents waiting to be printed. Inch specifications Print management User Original _ _ _ _ _ _ _ _ _ _ 10/10 23:00 User1 10/10 23:00 User2... -
Page 134: The "Job History" Screen
Section 6 DOCUMENT AND OUTPUT MANAGEMENT FUNCTIONS (4) The “Job history” screen This screen displays the jobs for which printing has been completed, as well as jobs that have been canceled after scanning. Inch specifications Print management User Original Registration _ _ _ _ _ _ _ _ _ _ 10/10 22:32 User3... -
Page 135: Copier Management Functions
Section 7 COPIER MANAGEMENT FUNCTIONS 1. Copy management mode The total number of copies made by each department can be managed using up to 8-digit department ID-codes for up to 1000 different departments. Limits for the number of copies can be changed on a department-by-department basis. (1) What’s in the “copy management mode”... - Page 136 Sets whether or not the “Print Err. PRT.” key will be displayed when you are using the ON/OFF: “Print Err. PRT.” printer functions of this copier with copy management turned ON. Turn the display of this key ON if you want to be able to print out an error report whenever printing is attempted with an unregistered department ID-code (only available when the optional Printer Kit is installed in your copier).
-
Page 137: Accessing The Copy Management Mode Settings
(2) Accessing the copy management mode settings Perform the following procedure when you want to access the screens for each of the various copy management mode settings. With the content of the “Basic” tab displayed, press the [ ] key. The “Default setting” screen will be displayed. Touch the “Management”... -
Page 138: Making Copy Management Settings
Section 7 COPIER MANAGEMENT FUNCTIONS (3) Making copy management settings Perform the following procedure that corresponds to the desired setting. ● Registering new department ID-codes Perform this procedure to register a new department ID-code (up to 8 digits) and set the maximum number of copies that can be made under that code. - Page 139 Touch the “Close” key. The touch panel will return to the screen in step 3. Inch specifications Management menu New register I D - c o d e N u m b e r o f c o py Default setting - Management code menu - Register/Delete Metric specifications Management mode New register...
- Page 140 Section 7 COPIER MANAGEMENT FUNCTIONS Touch the “ID-code Reg./Del.” key. The “Register/Delete” screen will be displayed. Inch specifications Management menu Management code menu ID-code Counter Print by ID-code the list Reg./Del. # of copy correct Counter Print clear Err. PRT. Default setting Metric specifications Management mode...
-
Page 141: Changing Copy Limits
● Changing copy limits Perform this procedure to change the copy limit registered for each department ID-code without having to delete or re-register the corresponding code. Display the “Management code menu” screen. (See “(2) Accessing the copy management mode settings” on page 7-3.) Inch specifications Default setting... -
Page 142: Clearing Copy Counts
Section 7 COPIER MANAGEMENT FUNCTIONS Touch the “Close” key. The touch panel will return to the screen in step 3. Touch the “Close” key once again. The touch panel will return to the screen in step 2. Inch specifications Management menu Amend the number of copy I D - c o d e N u m b e r o f c o py... -
Page 143: Checking The Copy Counts
If you DO want to clear the copy counts, touch the “Yes” key. If you do NOT want to clear the counts, touch the “No” key. The touch panel will return to the screen in step 2. Inch specifications D e l e t e t h e c o u n t e d nu m b e r fo r t h i s I D - c o d e. A r e yo u s u r e ? A l l d e p t . - Page 144 Section 7 COPIER MANAGEMENT FUNCTIONS Check the total number of copies made under each department ID-code, as desired as well as the total made with the copier as a whole. Inch specifications Management menu Overview by department All dept. total ID-code Counter ID-code...
- Page 145 The “Printing report.” screen will be displayed and printing of the department ID-code list will start. Inch specifications Printing report. O r i g . p a g e C o u n t / S e t x11" 1 sided Metric specifications Printing report O r i g i n a l...
- Page 146 Language default Bypass setting Machine Document default Management Touch the “On” key or the “Off” key under “Printer” screen to turn print management ON or OFF, as desired. Inch specifications Management menu Management code menu ID-code Counter Print by ID-code the list Reg./Del.
-
Page 147: Making Copies When Copy Management Is Turned On
Touch the “On” key or the “Off” key to turn the display of the “Print Err. PRT.” key ON or OFF, as desired. Inch specifications Management menu Print Error report Default setting - Management code menu Metric specifications Management mode Print Error report Default setting - Management code menu Touch the “Close”... -
Page 148: Weekly Timer
Section 7 COPIER MANAGEMENT FUNCTIONS 2. Weekly timer Power to the copier can be turned ON and OFF automatically at specified times on each day of the week between Monday and Sunday. Set the copier to be turned ON early so that it is warmed up and ready for the start of work in the morning, and set it to be turned OFF automatically in the evening in case nobody remembers to switch it off manually. -
Page 149: Making Weekly Timer Settings
Use the keypad to enter the 4-digit management code. The factory default setting for 45 cpm copiers is “4500” and for 55 cpm copiers is “5500”. If the entered code matched the registered one, the “Weekly timer” [“Week timer”] screen will be displayed. - Page 150 Section 7 COPIER MANAGEMENT FUNCTIONS If you want to have the copier left ON all day on that day, touch the “All day-ON” key. Inch specifications Monday Set the timer to turn on main SW on/off in a day. By selectiong "Cancel", set time is invalided once. Select work time All day...
- Page 151 Touch the “On” key under “Cancel” at the bottom right of the touch panel. Inch specifications Monday Set the timer to turn on main SW on/off in a day. By selectiong "Cancel", set time is invalided once. Select SW ON 8:30 SW OFF work time...
-
Page 152: Default Settings
Section 7 COPIER MANAGEMENT FUNCTIONS 3. Default settings The state that the copier enters at the end of warm-up or when the [Reset] key is pressed is called the “initial mode”. The modes, functions and other settings that are automatically pre-set for the initial mode are called “default settings”. These default settings are separated into two categories: “Copy defaults”... - Page 153 Default setting Paper type Sets and then displays the type of paper that is loaded in (drawer[cassette] No.1 - drawers[cassettes] No.1 through No.5. No. 5) * The drawer[cassette] No.5 setting will only be displayed when the optional Side Feeder, which is only available for 55 cpm copiers, is installed on your copier.
- Page 154 Section 7 COPIER MANAGEMENT FUNCTIONS Default setting Copy eject location Sets the location for the ejection of finished copies. * This setting will only be displayed when the optional Document Finisher or Multi Job Tray is installed on your copier. Touch panel sound ON/ Sets whether or not the touch panel will emit a “beep”...
-
Page 155: Accessing The Machine Default Settings
(2) Accessing the machine default settings Perform the following procedure when you want to access the screens for each of the various machine default settings. With the content of the “Basic” tab displayed, press the [ ] key. The “Default setting” screen will be displayed. Touch the “Machine default”... -
Page 156: Making Machine Default Settings
Section 7 COPIER MANAGEMENT FUNCTIONS (3) Making machine default settings Perform the following procedure that corresponds to the desired setting. ● Auto drawer[cassette] switching ON/OFF Perform the following procedure to turn automatic drawer[cassette] switching ON or OFF, as desired. Display the “Machine default” screen. (See “(2) Accessing the machine default settings”... - Page 157 ● Paper size (drawer[cassette] No.1 & No.2) Perform the following procedure to set the size of paper that is loaded in drawer[cassette] No.1 and No.2. Display the “Machine default” screen. (See “(2) Accessing the machine default settings” on page 7-21.) Inch specifications Default setting Default setting...
- Page 158 Section 7 COPIER MANAGEMENT FUNCTIONS ● Paper type (drawer[cassette] No.1 - No. 5) Perform the following procedure to set the type of paper that is loaded in drawers[cassettes] No.1 through No.5. Display the “Machine default” screen. (See “(2) Accessing the machine default settings” on page 7-21.) Inch specifications Default setting...
- Page 159 ● Custom paper type for 2-sided copying Perform the following procedure to set whether or not each custom type of paper (custom 1 - custom 8) will be available for use in 2-sided copying. Display the “Machine default” screen. (See “(2) Accessing the machine default settings” on page 7-21.) Inch specifications Default setting...
- Page 160 Section 7 COPIER MANAGEMENT FUNCTIONS ● Paper type (for used paper) Perform the following procedure to set whether or not the used paper function will be turned ON for each custom type of paper (custom 1 - NOTES This setting will only be effective if the corresponding custom paper type (custom 1 - 8) is selected for use in one of the drawers[cassettes], or the multi-bypass tray.
- Page 161 ● Paper type (for high-resistance paper) Perform the following procedure to set whether or not the high- resistance paper function will be turned on for each custom type of paper (custom 1 - 8). NOTES This setting will only be effective if the corresponding custom paper type (custom 1 - 8) is selected for use in one of the drawers[cassettes], or the multi-bypass tray.
-
Page 162: Auto Preheat Time
Section 7 COPIER MANAGEMENT FUNCTIONS Select “Auto shut-off time” in the settings list on the left side of the touch panel and then touch the “Change #” key. The “Auto shut-off time” screen will be displayed. Inch specifications Default setting Machine default Default menu Setting mode... - Page 163 Touch the “+” key or the “-” key to change the displayed time to that desired (any available setting between 1 minute and 240 minutes). Inch specifications Auto preheat time S e l e c t a u t o p r e h e a t t i m e l a s t s e t t i n g o r w h e n c o py i n g i s d o n e.
- Page 164 Section 7 COPIER MANAGEMENT FUNCTIONS NOTE If you want to quit the displayed setting without changing it, touch the “Back” key. The touch panel will return to the screen in step 2. Touch the “Close” key. The touch panel will return to the screen in step 2.
- Page 165 ● Silent mode ON/OFF Perform the following procedure to set whether or not to use the silent mode which shortens the length of time that the laser data writing motor continues to spin after each copy job is finished. Turn the silent mode ON if the noise of the motor bothers you in any way.
- Page 166 Section 7 COPIER MANAGEMENT FUNCTIONS Select “Date/Time” in the settings list on the left side of the touch panel and then touch the “Change #” key. The “Date/Time” screen will be displayed. Inch specifications Default setting Machine default Default menu Setting mode Auto preheat time 15 Minute...
- Page 167 Touch the “+” key or the “-” key to change the displayed time difference to the desired setting. Inch specifications Time difference GMT+ 00 : 00 Default setting - Machine default Metric specifications Time difference GMT+ 00 : 00 Default setting - Machine default NOTE If you want to quit the displayed setting without changing it, touch the “Back”...
- Page 168 Section 7 COPIER MANAGEMENT FUNCTIONS Use the keypad to enter a new 4-digit management code. Inch specifications Management code change A bl e t o c h a n g e m a n a g e m e n t c o d e. ( # key ) Default setting - Machine default Metric specifications Change MGMT code with #...
-
Page 169: Copy Default Settings
(4) Copy default settings The following table indicates the copy default settings available in this copier. Change any or all of the settings as desired in order to make the most effective use of your copier. Default setting Exposure mode Selects between auto exposure and manual exposure as the default copy exposure mode in the initial mode. - Page 170 Section 7 COPIER MANAGEMENT FUNCTIONS Default setting Default drawer[cassette] Sets one drawer[cassette] that will be selected automatically regardless of the size of paper loaded in that drawer[cassette]. * It is NOT possible to select the multi-bypass tray as the default drawer[cassette]. * The “5th paper”...
- Page 171 Default setting Copy limit Sets the limit for the number of copies (or copy sets) that can be made at a time. Repeat copying ON/ Sets whether or not to prohibit repeat copying, as well as whether or not to make repeat copying the default setting in the initial mode.
-
Page 172: Accessing The Copy Default Settings
Section 7 COPIER MANAGEMENT FUNCTIONS (5) Accessing the copy default settings Perform the following procedure when you want to access the screens for each of the various copy default settings. With the content of the “Basic” tab displayed, press the [ ] key. -
Page 173: Making Copy Default Settings
(6) Making copy default settings Perform the following procedure that corresponds to the desired setting. ● Exposure mode Perform the following procedure to select between auto exposure and manual exposure as the default copy exposure mode in the initial mode. Display the “Copy default”... - Page 174 Section 7 COPIER MANAGEMENT FUNCTIONS ● Exposure adjustment step Perform the following procedure to change the incremental step to be used during adjustment of the copy exposure. Display the “Copy default” screen. (See “(5) Accessing the copy default settings” on page 7-38.) Inch specifications Default setting Default setting...
-
Page 175: Original Quality
● Original quality Perform the following procedure to determine the default setting that will be used for the image quality in the initial mode. Display the “Copy default” screen. (See “(5) Accessing the copy default settings” on page 7-38.) Inch specifications Default setting Default setting Copy... - Page 176 Section 7 COPIER MANAGEMENT FUNCTIONS ● Custom original size (setting No.1 – No.4) Perform the following procedure to set the custom paper sizes (settings No.1 through No.4) that can be used under the original size selection mode. Display the “Copy default” screen. (See “(5) Accessing the copy default settings”...
- Page 177 ● Eco print mode ON/OFF Perform the following procedure to determine whether or not the eco print mode will be the default setting in the initial mode. Display the “Copy default” screen. (See “(5) Accessing the copy default settings” on page 7-38.) Inch specifications Default setting Default setting...
- Page 178 Section 7 COPIER MANAGEMENT FUNCTIONS ● Black-line correction ON/OFF Perform the following procedure to turn black-line correction ON and make black lines, which appear on copies when you feed originals from the Document Processor (but they do not exist on the originals themselves), less apparent.
-
Page 179: Paper Selection
● Paper selection Perform the following procedure to set whether the copier will automatically select the same size of copy paper as the original once an original is set, or whether the designated default drawer[cassette] will be automatically selected. Display the “Copy default” screen. (See “(5) Accessing the copy default settings”... - Page 180 Section 7 COPIER MANAGEMENT FUNCTIONS ● Paper type (auto paper selection mode) Perform the following procedure to set which types of paper can be selected under the auto paper selection mode. Display the “Copy default” screen. (See “(5) Accessing the copy default settings” on page 7-38.) Inch specifications Default setting Default setting...
- Page 181 ● Default drawer[cassette] Perform the following procedure to set one drawer[cassette] that will be selected automatically regardless of the size of paper loaded in that drawer[cassette]. * It is NOT possible to select the multi-bypass tray as the default drawer[cassette]. Display the “Copy default”...
- Page 182 Section 7 COPIER MANAGEMENT FUNCTIONS ● Cover drawer[cassette] Perform the following procedure to set which drawer[cassette] will be used to feed the cover sheets in the cover mode, the booklet/stitching mode and the book to booklet mode. Display the “Copy default” screen. (See “(5) Accessing the copy default settings”...
- Page 183 ● Default magnification ratio Perform the following procedure to set whether or not the appropriate magnification ratio to be calculated automatically when you select the size of copy paper. Display the “Copy default” screen. (See “(5) Accessing the copy default settings” on page 7-38.) Inch specifications Default setting Default setting...
-
Page 184: Auto Exposure Adjustment
Section 7 COPIER MANAGEMENT FUNCTIONS ● Auto exposure adjustment Perform the following procedure to adjust the overall exposure level for the auto exposure mode. Display the “Copy default” screen. (See “(5) Accessing the copy default settings” on page 7-38.) Inch specifications Default setting Default setting Copy... - Page 185 ● Auto exposure adjustment (OCR) Perform the following procedure to adjust the overall exposure level for scanning with OCR (Optical Character Recognition) software when using the optional scanner functions of this copier. Display the “Copy default” screen. (See “(5) Accessing the copy default settings” on page 7-38.) Inch specifications Default setting Default setting...
- Page 186 Section 7 COPIER MANAGEMENT FUNCTIONS ● Manual exposure adjustment (text+photo mode) Perform the following procedure to adjust the median exposure value when the text+photo mode is selected for the image quality. Display the “Copy default” screen. (See “(5) Accessing the copy default settings” on page 7-38.) Inch specifications Default setting Default setting...
- Page 187 ● Manual exposure adjustment (text mode) Perform the following procedure to adjust the median exposure value when the text mode is selected for the image quality. Display the “Copy default” screen. (See “(5) Accessing the copy default settings” on page 7-38.) Inch specifications Default setting Default setting...
- Page 188 Section 7 COPIER MANAGEMENT FUNCTIONS ● Manual exposure adjustment (photo mode) Perform the following procedure to adjust the median exposure value when the photo mode is selected for the image quality. Display the “Copy default” screen. (See “(5) Accessing the copy default settings” on page 7-38.) Inch specifications Default setting Default setting...
-
Page 189: Margin Width
● Margin width Perform the following procedure to determine the default value of the location and width of the margins in the margin mode. Display the “Copy default” screen. (See “(5) Accessing the copy default settings” on page 7-38.) Inch specifications Default setting Default setting Copy... -
Page 190: Erased Border Width
Section 7 COPIER MANAGEMENT FUNCTIONS ● Erased border width Perform the following procedure to determine the default value for the width of the border to be erased in the two border erase modes. Display the “Copy default” screen. (See “(5) Accessing the copy default settings” on page 7-38.) Inch specifications Default setting Default setting... -
Page 191: Copy Limit
● Copy limit Perform the following procedure to set the limit for the number of copies (or copy sets) that can be made at a time. Display the “Copy default” screen. (See “(5) Accessing the copy default settings” on page 7-38.) Inch specifications Default setting Default setting... - Page 192 Section 7 COPIER MANAGEMENT FUNCTIONS ● Repeat copying ON/OFF Perform the following procedure to set whether or not to prohibit repeat copying, as well as whether or not to make repeat copying the default setting in the initial mode. Display the “Copy default” screen. (See “(5) Accessing the copy default settings”...
- Page 193 ● “Job history” screen ON/OFF Perform the following procedure to set the contents of the “Job history” screen or turn display of that screen OFF. Display the “Copy default” screen. (See “(5) Accessing the copy default settings” on page 7-38.) Inch specifications Default setting Default setting...
- Page 194 Section 7 COPIER MANAGEMENT FUNCTIONS ● Registration keys ON/OFF Perform the following procedure to set whether or not to allow a “Register” key to be displayed in the screen for those function and modes which can be registered under the registration keys. Functions and/or modes can only be registered under registration keys through the “Register”...
- Page 195 ● Customize screen layout (Main functions) Perform the following procedure to change the order of the main functions and modes that are displayed in the “Basic” and the “User choice” tabs in order to make the display more appropriate to the way you use the copier.
- Page 196 Section 7 COPIER MANAGEMENT FUNCTIONS ● Customize screen layout (Add functions) Perform the following procedure to add often-used functions and/or modes, or to change the order of their layout, in order to make the display more appropriate to the way you use the copier. Display the “Copy default”...
-
Page 197: Multi-Bypass Tray Paper Settings
4. Multi-bypass tray paper settings (1) Paper size and type Perform the following procedure in order to use the multi-bypass tray to feed copy paper. With the content of the “Basic” tab displayed, press the [ ] key. The “Default setting” screen will be displayed. Touch the “Bypass setting”... -
Page 198: Selecting Other Standard Sizes
Section 7 COPIER MANAGEMENT FUNCTIONS (2) Selecting other standard sizes Perform the following procedure when you want to print out onto other standard sizes of special paper. With the content of the “Basic” tab displayed, press the [ ] key. The “Default setting” screen will be displayed. Touch the “Bypass setting”... - Page 199 Touch the “Select paper type” key. The “Select paper type” screen will be displayed. Touch the key that corresponds to the type of paper you want to use, and then touch the “Close” key. The touch panel will return to the screen in step 4. Inch specifications Default setting Select paper type...
-
Page 200: Box Management Default Settings
Section 7 COPIER MANAGEMENT FUNCTIONS 5. Box management default settings Perform the following settings in order to manage the “boxes” that are used under the document management functions. (1) Box settings Setting ● Document list print out This procedure will allow you to print out a list of all of the images stored in the box for the form overlay mode, of the documents stored in the shared data box or of the documents stored in the synergy print boxes. -
Page 201: Making Box Management Default Settings
Touch the key that corresponds to the desired box management default setting. Inch specifications Document Management Document Management Shared Data Box Synergy Print Box Print Print the list the list editing Reset Document Reset save term Default setting Metric specifications Document management Document management Shared Data Box... - Page 202 Section 7 COPIER MANAGEMENT FUNCTIONS ● Reset box Touch the “Reset Box” key under the box (“Form Box”, “Shared Data Box” or “Synergy Print Box”) that you want to delete all data for. A verification screen will be displayed. Inch specifications Document Management Document Management Shared Data Box...
- Page 203 If you want to change the name of that box, first select “Box name” and then touch the “Change #” key. Enter the new name as desired. Inch specifications Box007 Default menu Setting mode Box name ABCD_0000101 password (No registrat.) Default setting - Document Management - Box editing Metric specifications BOX 007...
- Page 204 Section 7 COPIER MANAGEMENT FUNCTIONS ● Document save time Touch the “Document save term” [“Document saveing”] key under “Synergy Print Box”. The “Document data saving term” [“Document data save period”] screen will be displayed. Inch specifications Document Management Document Management Shared Data Box Synergy Print Box Print...
-
Page 205: Hard Disk Management
6. Hard disk management Perform the following procedure to access the “Storage Management” screen and check available space on the hard disk and/or delete any invalid data. With the content of the “Basic” tab displayed, press the [ ] key. The “Default setting” screen will be displayed. Touch the “BOX Management”[“Hard Disk Management”] key. -
Page 206: Report Print Out
Lists all of the values for the machine default settings. < Counter report > Lists the average toner density (black ratio) for each size of copy paper used under each of the copy and printer functions of this machine. NOTE Inch specification •... - Page 207 The “Printing report” screen will be displayed and printing of the corresponding report will start. Inch specifications Printing report. O r i g . p a g e C o u n t / S e t - - - - - - 11x8 "...
-
Page 208: Changing The Language Used For Messages
Section 7 COPIER MANAGEMENT FUNCTIONS 8. Changing the language used for messages You can select the language that will be used on the touch panel. The available languages are as follows: Inch specification copiers: English, French (“Français”), Spanish (“Español”) and Japanese (“... -
Page 209: Entering Characters
9. Entering characters Follow the procedure below when you want to register names for programs, boxes and other stored documents. ● Character input screen Inch specifications abcde Metric specifications abcde Illustration No Name of part Entry field “r” and “R” keys “Back”... - Page 210 Section 7 COPIER MANAGEMENT FUNCTIONS ● Example character input Touch the “a”, “b”, “c”, “d” and “e” keys in that order on the keyboard. “abcde” will be displayed in the entry field. Inch specifications abcde Metric specifications abcde Touch the “End” key. A verification screen will be displayed.
-
Page 211: Optional Equipment
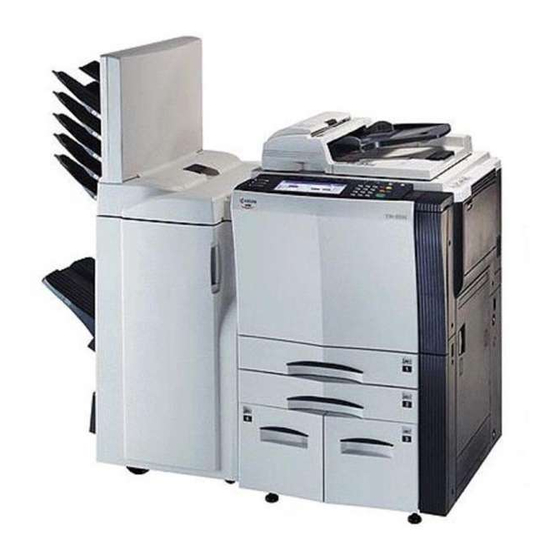
Section 8 OPTIONAL EQUIPMENT (1) Side Feeder This unit is an auxiliary paper feed unit that holds up to 4,000 sheets of standard 11" x 8 " or A4 size copy paper. (This option is only available for 55 cpm copiers.) (2) Document Finisher (A) The Document Finisher stores a large quantity of copies and can sort multiple copy sets (Sort/Finished mode), or it can groups copies made... -
Page 212: Copying In The Group Mode
Section 8 OPTIONAL EQUIPMENT Touch the “Sort:ON” key. The “One page per file” [“Output each page”] key will change to the “1 set” key. Inch specifications Ready to copy. Sort/Finished Sor t Sor ting Staple Staple Punch Sort:OFF None mode mode One page Sort:ON... - Page 213 Once all of the originals have been completely scanned, touch the “Scanning finished” key. Copying will start and each set of copies made from each original will be stacked separately by shifting their position of ejection. Once copying is completed, removed the finished copy sets from the Finisher.
-
Page 214: Copying In The Hole Punch Mode
Section 8 OPTIONAL EQUIPMENT Set the originals to be copied. Verify the direction in which the originals were set. Press the [Start] key. Scanning of the originals will start and the number of originals that was set will be displayed. NOTE If you do not set the originals in the Document Processor, perform the appropriate procedure to set all of the originals to be copied. - Page 215 * The hole punching position will be displayed on the image of the finished copies that appears in the touch panel, as shown in the illustration below. Verify the number and position of the holes before copying. When the combination of the selected functions does not allow hole punching, the hole marks will not appear on the displayed image.
-
Page 216: Document Finisher (B)
Section 8 OPTIONAL EQUIPMENT 5 Selecting the location of copy ejection Touch the “Function” tab and then touch the “Select of Output” key. The “Select of Output” screen will be displayed. Inch specifications Ready to copy. Auto Proof Copy Rotation backing Orig. -
Page 217: Key Counter
Section 8 OPTIONAL EQUIPMENT (5) Printer Kit If the Printer Kit is installed in your copier, you can use the copier as a printer. For more details, refer to the Operation Guide for the Printer Kit. -
Page 218: Tandem Copier Kit
Section 8 OPTIONAL EQUIPMENT (7) Tandem Copier Kit The Tandem Copier Kit is required when two copy machines are connected together. Connecting two copy machines will reduce the copy time by half. In addition, for example, if copying is stopped in one copier due to insufficient toner or other such reason, the remaining copies will be automatically produced in the other copier. -
Page 219: Troubleshooting
Section 9 TROUBLESHOOTING 1. If one of the following messages is displayed When any of the following messages appears on the message display, take the indicated action. Message “Close xxx cover.” The indicated cover is open. Close all covers securely. “Check the cover.”... - Page 220 Section 9 TROUBLESHOOTING Message “Place transparency in bypass.” [“Place transparencies on stack bypass.”] “Check paper size.” “Reposition original.” “Check paper size. Copy paper is not the same size as original.” [“Paper size in cassette differs from actual size. Check paper size in cassette.”] “Reposition original or change drawer.”...
- Page 221 Message “Exceeds pre registered copying The number of copies made under your department ID-code has reached the limit that quantity.” [“Copy limit for this ID- was set under the copy management mode and copying is no longer possible with that code has been reached.”] code.
- Page 222 Section 9 TROUBLESHOOTING Message “Paper capacity exceeded. Remove paper from Finisher.” “Remove paper from inner tray of Finisher.” “Remove paper from Finisher.” Check paper in Finisher. Incomplete copies inside. “Cannot sort this size.” [“Cannot sort this paper size.”] “Cannot staple. _____:maximum capacity (Staple)”...
-
Page 223: If One Of These Indicators Lights Or Flashes
2. If one of these indicators lights or flashes If one of the indicators to the left of the [Copier] key, the [Printer] key, or the [Scanner] key either lights orange or flashes orange, carry out the appropriate procedure indicated below. -
Page 224: If Paper Jams
Section 9 TROUBLESHOOTING 3. If paper jams If a paper misfeed occurs, copying will stop and a message will appear on the touch panel about the misfeed. Leave the main switch ON ( | ) and refer to “(2) Removal procedures” to remove the jammed paper. Inch specifications Paper misfeed. - Page 225 Pull out the drawer[cassette] currently being used. Remove the jammed paper without tearing it. * If the paper does happen to tear, remove any loose scraps from inside the copier. IMPORTANT! If there is any paper jammed further inside the copier, pull the drawer[cassette] out and remove the jammed paper.
- Page 226 Section 9 TROUBLESHOOTING Remove the jammed paper without tearing it. * If the paper does happen to tear, remove any loose scraps from inside the copier. Push the drawer[cassette] back in firmly. ● Misfeed inside drawer[cassette] No.4 (“JAM 13” through “JAM 16”, “JAM 17” or “JAM 31”) If one of the messages above is displayed, a misfeed has occurred in drawer[cassette] No.4.
- Page 227 Remove the jammed paper without tearing it. * If the paper does happen to tear, remove any loose scraps from inside the copier. If the paper is jammed in the paper feeder unit, go to the next step. Leave drawer[cassette] No.4 open and pull out drawer[cassette] No.3 as well.
- Page 228 Section 9 TROUBLESHOOTING ● Misfeed in the multi-bypass tray (“JAM 14”) If the message above is displayed, a misfeed has occurred in the multi-bypass tray. Perform the following procedure to remove the jammed paper. Inch specifications Paper misfeed. 1.Remove paper from Multi purpose tray. JAM 00 Metric specifications Paper misfeed.
- Page 229 ● Misfeed in the optional Side Feeder (“JAM 15”) If the message above is displayed, a misfeed has occurred in the optional Side Feeder. Perform the following procedure to remove the jammed paper. Inch specifications Paper misfeed. 1.Remove paper from between Copier and Side Paper Deck.
- Page 230 Section 9 TROUBLESHOOTING 2 Misfeed in the paper conveyor section (“JAM 23”, “JAM 30” or “JAM 32”) If one of the messages above is displayed, a misfeed has occurred in the paper conveyor section. Perform the following procedure to remove the jammed paper. Inch specifications Paper misfeed.
- Page 231 Replace the paper conveyor unit in its original position in the copier. Push the green release lever (B) back up to its original position. Close the front cover. 3 Misfeed in the fixing section (“JAM 40”, “JAM 50”, “JAM 52” or “JAM 53”) If one of the messages above is displayed, a misfeed has occurred in the fixing section.
- Page 232 Section 9 TROUBLESHOOTING Pull the paper conveyor unit out towards you as far as it will WARNING High voltage is present in the charger section. Take sufficient care when working in this area, as there is a danger of electrical shock. CAUTION The copier’s fixing unit is extremely hot.
- Page 233 Replace the paper conveyor unit in its original position in the copier. Push the green release lever (B) back up to its original position. Close the front cover. 4 Misfeed in the Duplex Unit (“JAM 51” or “JAM 60” through “JAM 68”) If one of the messages above is displayed, a misfeed has occurred in the Duplex Unit.
- Page 234 Section 9 TROUBLESHOOTING Turn the green conveyor knob (C) to the left at least 4 full turns. WARNING High voltage is present in the charger section. Take sufficient care when working in this area, as there is a danger of electrical shock. CAUTION The copier’s fixing unit is extremely hot.
- Page 235 Open the upper cover to the Duplex Unit and remove any jammed paper without tearing it. Close the upper cover and then go to the next step. Undo the 2 green screws on the bottom of the Duplex Unit. Lower the Duplex Unit guide plate open and remove any jammed paper without tearing it.
- Page 236 Section 9 TROUBLESHOOTING If there is an original there, remove the jammed original without tearing it. * If the original does happen to tear, remove any loose scraps from inside the Document Processor. Loose scraps of paper may cause other originals to misfeed. lift open the reversing unit.
-
Page 237: If Other Trouble Occurs
4. If other trouble occurs If trouble occurs with your copier, carry out the applicable checkpoints and procedures indicated on the following pages. If the trouble persists, contact your service representative or authorized service center. Trouble Nothing lights on the Is the power plug connected to an AC operation panel when the outlet? - Page 238 Section 9 TROUBLESHOOTING Trouble Black lines appear on Is the slit glass dirty? copies when you feed originals from the Document Processor (but they do not exist on the originals themselves). A white band (unprinted Are you using paper which has already been area) appears on copies copied onto or was used previously? parallel to their direction of...
-
Page 239: Maintenance And Operation Information
Section 10 MAINTENANCE AND OPERATION INFORMATION 1. Cleaning the copier CAUTION For safety purposes, ALWAYS remove the power plug from the outlet when performing cleaning operations. ● Cleaning the Document Processor Lift open the Document Processor. Wipe the back side of the Document Processor with a soft cloth dampened with alcohol or mild detergent. -
Page 240: Specifications
Section 10 MAINTENANCE AND OPERATION INFORMATION 2. Specifications Type ... Console Original table ... Main Body: Fixed type Copying system ... Indirect electrostatic system Acceptable originals ... Sheets of paper, books and 3-dimensional objects (Maximum size: 11" x 17" / A3) Copy sizes ... - Page 241 680 mm x 804 mm x 1,141 mm " x 31 " 7/16 11/16 1,331 mm x 804 mm Eject Tray (may come as standard equipment in certain countries or regions of purchase), Printer Kit, Network Scanner Kit and Tandem Copier Kit 10-3...
-
Page 242: Installing The Optional Equipment
This section shows where to install the optional units for this copier. For more details, refer to the Operation Guide for the corresponding optional unit. ● Available optional units The following optional units can be installed on your copier. Multi Job Tray Key Counter Printer Kit Network Scanner Kit Tandem Copier Kit Center-folding Unit Document Finisher (A) Document Finisher (B) - Page 243 Printer Kit If the Printer Kit is installed in your copier, you can use the copier as a printer. For more details, refer to the Operation Guide for the Printer Kit. Since a networking board is installed as standard equipment in the copier, access from multiple computers is possible and the machine can be used as a network printer.
-
Page 244: Appendix: Functions And Settings Combination Chart
Appendix: Functions and settings combination chart : Combination is possible This copier contains many different ---: Combination is NOT possible functions and settings, and many of 01: Auto exposure adjustment is not available for the photo mode. The text+photo mode, the text them can be used in combination mode, or manual exposure adjustment will be for more efficient copying. - Page 245 12: The booklet/stitching mode and book to booklet 16: The book R page separation/split copy mode mode will be given second priority when the and the transparency + backing sheet mode 2-sided copy modes or the page separation/ cannot be used in combination with each other. split copy modes are selected.
-
Page 246: Safety Of Laser Beam
SAFETY OF LASER BEAM 1. Safety of laser beam This copier has been certified by the manufacturer to Class 1 level under the radiation performance standards established by the U.S. DHHS (Department of Health and Human Services) in 1968. This indicates that the product is safe to use during normal operation and maintenance. - Page 248 CAUTION! The power plug is the main isolation device! Other switches on the equipment are only functional switches and are not suitable for isolating the equipment from the power source. ATTENTION ! Le débranchement de la fiche secteur est le seul moyen de mettre l'appareil hors tension. Les interrupteurs sur l'appareil ne sont que des interrupteurs de fonctionnement : ils ne mettent pas l'appareil hors tension.
- Page 249 This equipment has been tested and found to comply with the limits for a Class A digital device, pursuant to Part 15 of the FCC Rules. These limits are designed to provide reasonable protection against harmful interference when the equipment is operated in a commercial environment.
- Page 250 In order to obtain performance of this warranty, the Customer must immediately notify the Authorized Kyocera Dealer from whom the product was purchased. If the Kyocera Dealer is not able to provide service, write to Kyocera at the address below for the name and address of the Authorized Kyocera Dealer in your area.
- Page 251 * For best copy results and machine performance, we recommend that you use only KYOCERA MITA original supplies for your KYOCERA MITA copier.
- Page 252 ©2001 http://www.kyoceramita.com 2004. 6 is a trademark of Kyocera Corporation 302BC80025...
Need help?
Do you have a question about the KM-5530 and is the answer not in the manual?
Questions and answers