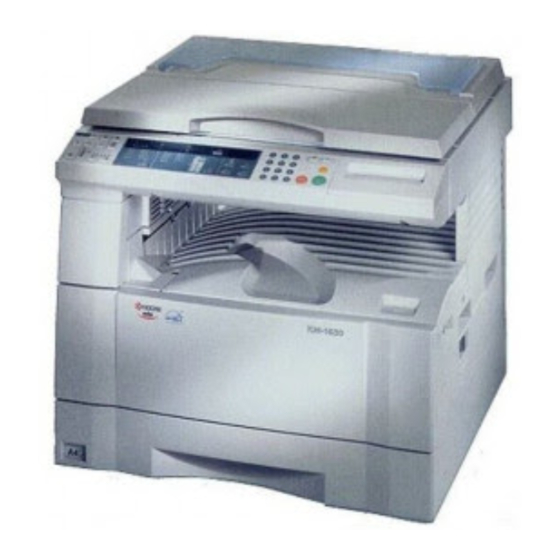
Kyocera KM-1530 User Manual
Kx driver
Hide thumbs
Also See for KM-1530:
- Quick configuration manual (205 pages) ,
- Instruction handbook manual (115 pages) ,
- Service manual (20 pages)
Table of Contents
Advertisement
Quick Links
Advertisement
Table of Contents

Related Manuals for Kyocera KM-1530


Summary of Contents for Kyocera KM-1530
- Page 1 KX Driver User Guide...
-
Page 2: Legal Notes
When using this printer driver, the items that can be configured will differ depending on the model of your printing system. The explanatory screens shown in this guide may differ from your printing system. Copyright © 2007 KYOCERA Corporation Copyright © 2007 Revised Edition KYOCERA MITA Corporation All rights reserved. TC Rev. 5.7v... -
Page 3: Table Of Contents
Table of Contents Chapter 1 Installation Express Installation ............1-2 Windows XP and Vista - Express Installation . - Page 4 Custom Paper Sizes ..........3-6 Duplex Printing.
- Page 5 Chapter 7 Publishing Cover Mode, Page Insert, and Transparency Interleaving......7-1 Printing with Covers ........... . . 7-1 Cover Printing Options .
- Page 6 Import and Export Profile ..........10-2 Available Fonts .
-
Page 7: Chapter 1 Installation
1 Installation A printer driver is an application that sends documents to a printer and manages communication between a printer and your computer. Install the printer driver from the supplied Product Library CD-ROM. Once installed, a variety of printer settings can be configured. -
Page 8: Express Installation
Click Accept to proceed. To begin installation, click Install Software. The Software Installation Wizards appears. Click Next. The installation differs depending on your operating system and connection method. Select your operating system and connection method from the list below and proceed to the referenced page to continue the installation Windows XP and Vista - Express Installation Vista - Custom Installation... -
Page 9: Windows 98 - Usb, Express
Select your printing system and then click Next. KM-3060 Note: If the Found New Hardware Wizard appears, click Cancel. If the Hardware Installation warning dialog box appears, click Continue Anyway. In Printer Settings you can customize the name of the printing system. This is the name that appears in Windows Printers and Faxes and in the printer lists in applications. -
Page 10: Custom Installation
When the installation of the required software is complete, the installer will notify you that the software has finished installing. Click Finish. The installation of the printer is now complete. If prompted, restart your system. Custom Installation When using the Custom method you can specify the printer port and choose which software packages to install. - Page 11 Ensure that the KX Driver is selected and then click Next. The Discover Printing System page appears. To find a printing system that is already turned on and is connected to the network, click Discover. and go to -OR- To manually select your printing system and port select Custom select and then click Next.
- Page 12 Installation Vista - Custom Installation To create a new port, click Add Port and then click Next. The Add Port wizard will appear. Add Port Wizard in Vista Ensure that the printing device is turned on and connected to the network, then click Next.
- Page 13 Type the printer name or IP address and then click Next. When the port has been created, the page shown below appears. Click Finish to close the Add Port Wizard and return to the installation wizard. User Guide...
- Page 14 Vista Custom Installation, continued from page 1-5 The Printing System page appears. From the list, select the Printing System to install, and click Next. In Printer Settings you can customize the name of the printing system. This is the name that appears in Windows Printers and Faxes and in the printer lists in applications.
-
Page 15: Windows Xp - Usb, Custom
For Custom Mode select Driver or Utilities or both. Later in the installation you can select which driver and utilities to install. Choices for Driver include the KX Driver and the mini Driver. Choices for Utilities include Fonts, the Kyocera Scanner Driver, KMnet for Clients, and Driver Deleter. - Page 16 Select Universal serial bus (USB) in Connection Type, and then click Next. In Printing System select your printer, and then click Next. In Custom Installation select the software packages you want to install and clear those not intended for installation. Click Next. 1-10 KX Driver...
-
Page 17: Windows 98 - Usb, Custom
For Custom Mode select Driver or Utilities or both. Later in the installation you can select which driver and utilities to install. Choices for Driver include the KX Driver and the mini Driver. Choices for Utilities are Fonts, the Kyocera Scanner Driver, KMnet for Clients, and Driver Deleter. -
Page 18: Windows 98 And Xp - Parallel Port (Lpt)
In Printing System select your printer, and then click Next. In Custom Installation select the software packages you want to install, and clear those not intended for installation. Click Next. In Confirm Settings click Install. If the Connect the USB cable to the USB port on the printing system page appears, verify that the USB cable is connected, and then click Cancel. - Page 19 Driver. Choices for Utilities are Fonts, the Kyocera Scanner Driver, KMnet for Clients, and Driver Deleter. In Connection Type select Parallel Port (LPT), then click Next. In Printing System select your printer, and then click Next. User Guide...
-
Page 20: Windows 98 And Xp - Network Connection, Custom
In Custom Installation select the software packages you want to install and clear those not intended for installation. Click Next. In Printer Settings you can customize the name of the printing system. This is the name that appears in Windows Printers and Faxes and in the printer lists in applications. - Page 21 Driver. Choices for Utilities are Fonts, the Kyocera Scanner Driver, KMnet for Clients, and Driver Deleter. In Connection Type select Network connection and then click Next. In Network Port Type select a port type. Select Standard TCP/IP Port or KPrint Port.
-
Page 22: Create A New Port
If you chose Kprint Port in page 1-16 In Standard TCP/IP Port you can select Discover or Host name or IP address. Discover searches the network for the printer. Once it is found select the printer and then click Next. To use Host name or IP address enter the IP address or host name and then click Next. - Page 23 • If the IP Address or Host Name is not known, click Search... A list of available network printers appears. Select a network printer, then click OK. • If you know the IP address, enter it in the IP address or Host name field. Enter a custom name (optional) for the port, and then click Next.
- Page 24 Add an LPR Port The KPrint Add Port Wizard appears. Select Print using LPR, and click Next. In the Enter the IP address or host name of the print server page, enter the IP Address or Host Name, and click Next. •...
- Page 25 Confirm the settings, and click Finish. The Confirm Settings page appears. Verify the printer settings are correct, then click Install. The printer driver installation begins. Once the installation is complete, the Printer Installed Successfully page The installation of the printer is now complete. If prompted, restart your system. Add an IPP Port The KPrint Add Port Wizard appears.
- Page 26 Select Connects using a local area network, and then click Next. If your network uses a proxy enter the information here and click Next. Enter the Printing system URL and then click Next. Note that the syntax for the URL is ipp://xxx.xxx.xxx.xxx/ipp. 1-20 KX Driver...
-
Page 27: Installing Optional Components
A plug-in is a small computer program that interacts with a larger program to provide additional functionality. An example is Security Watermark, which is available for Kyocera printer drivers. Installing the plug-in adds Security Watermark functionality to the printer driver, adds a Security Watermark icon to the Advanced tab, and adds the dialog boxes that are used to set up a Security Watermark. - Page 28 The Optional Components Wizard appears. Click Next to install optional components or Cancel to close the wizard. The Select Printer page appears. Select a printer and click Next. 1-22 KX Driver...
- Page 29 The Select Components page appears. Select the components to install, and click Next. Other pages, such as Select Common Profiles and Select Plug-In Modules may appear, depending on what selections are made here. In any Select pages that appear make your selections and click Next. User Guide 1-23...
-
Page 30: Installing Using The Add Printer Wizard
The Confirm Settings page appears. Verify the selected component items and then click Install. The Printer Components Installation Completed page appears. When you have completed installing printers and optional components, if prompted, restart your system. Installing using the Add Printer Wizard This section describes how to install a printer driver using the Add Printer Wizard. - Page 31 Click Add a printer in the Printer Tasks group box on the left. Note: The Add Printer Wizard can also be launched by clicking Add printer in the File menu. The Add Printer Wizard appears. Click Next and follow the instructions. When the Completing the Add Printer Wizard page appears, click Finish.
-
Page 32: Printer Properties
2 Printer Properties This chapter explains how to customize the following printer driver settings: • • • • • • • Follow the steps below to set your preferred options as the default settings. These default settings can be changed temporarily when printing from Windows-based applications. -
Page 33: Device Options
the Device Options list. Depending upon the model, available devices include finishers, paper feeders, side feeders, high-capacity feeders, hard disk and RAM disk, tandem unit, booklet stitcher, and duplex unit. For models connected to a network, the Auto Configure button can be used to select all available devices. -
Page 34: Punch Settings
In the Memory box, select the memory capacity of your printing system. This setting is required to optimize the downloading of printing system fonts. Punch Settings When you select the check box for a finishing device shown in blue in the Device options list, such as Finisher or Multi Finisher, the Punch Unit Settings dialog box appears. -
Page 35: Ram Disk
RAM Disk The RAM disk functions as a hard disk saving print requests into the printing system’s memory if a hard disk for printing is not installed. When a hard disk is installed, the RAM disk function is inactive. Note: Because the RAM disk is volatile memory, all data sent to the printing system is lost when the power is turned off. -
Page 36: Unit Of Measurement
• Type the user's department or group name in the Department box. Click OK. Unit of Measurement The unit of measurement will be used for the following settings: • Custom Page Sizes setting in the Page Sizes section in the Basic tab •... - Page 37 PostScript 2 or 3. • An optional KPDL upgrade kit may be required for some models. • Kyocera’s emulation of PostScript printing • Strong graphics reproduction • Print speeds may be slower than PCL 5e/c •...
- Page 38 Option (Portable Document Format) Note: PDF is not supported by Windows 95/98/Me. In GDI compatible mode, vector graphics are rasterized for printing as bitmap images. Use the GDI compatible mode option to improve the graphic output quality created by the application. Due to memory restrictions, this feature is not available in certain printing environments.
- Page 39 Note: PDF is not supported by Windows 95/98/Me. Options Embed fonts Compress data Security Save to file Note: If Save to file is selected, the document is not printed when you click OK in the Print dialog box. Security Settings User Guide Description Select to ensure document fonts appear accurately in the PDF file on screen.
-
Page 40: Administrator Settings
Administrator Settings The following settings can be specified by selecting Administrator in the Device Settings tab. • User Login • Job Accounting • Operation Panel Message • Color Page Count • Monochrome Mode • Administrator Password Note: The Administrator Settings dialog box appearance and options may vary depending on your printing system. - Page 41 Select this option and type a user name and password to use the same user login for every print job. If this option is selected, the user will not have to type the name and password for each print job. •...
-
Page 42: Job Accounting
Use Look in to browse for the file to import, or type the file name, and click You can then select the imported file from the list of Login User Names. Export In the Administrator Settings dialog box, click Login User Name List, then click Export. -
Page 43: Operation Panel Message
Note: Some versions say Password protect instead of Password protect administrator settings. Both open the same dialog box. Prompt for account ID: This option can be used to prompt the user for an account ID when printing. When sending a print job, type an account ID when prompted, then click OK to print. -
Page 44: Color Page Count
Set the Password In the Administrator Settings dialog box, select the Password protect administrator settings check box to open the Password dialog box. In the Password dialog box, enter the new password in the Password box. Reenter the password in Confirm password and click OK. Note: Use a password from 4 to 16 characters. -
Page 45: Monochrome Mode
information embedded in each page. Embedded information does not affect the appearance of printed documents. Select Color page count to enable this feature. For accounting purposes: • A page with any color is counted as a color page. • A page with black only is counted as a monochrome page. •... -
Page 46: Auto Configure
The Compatibility Settings dialog box appears. From the list in the Media source enumeration area, select the paper supply method. The current value is listed in the Enumerated value box. Type a new Enumerated value for the media source and click OK. You can also restore all the parameters to the default by clicking Reset. - Page 47 Auto Configure currently supports these ports for Microsoft Windows operating systems: • Windows 98 and Me – KPrint ports (Raw mode, LPR, and IPP) only • Windows NT 4.0 – KPrint ports (Raw mode, LPR, and IPP) only • Windows 2000 – TCP/IP Ports and KPrint Ports (Raw mode, LPR, and IPP) •...
- Page 48 • The Windows XP firewall prevents the communication. It generates the following message: The Microsoft Windows XP Firewall settings can be changed to allow communication between the printing system and your computer. The default setting for Windows XP Service Pack 2 is for the Windows Firewall to be set to On. When the Windows Security alert shown above appears, click Unblock to allow communication between the printing system and your computer.
-
Page 49: Chapter 3 Printing Basics
3 Printing Basics This chapter describes the following printing tasks when printing from Microsoft Windows applications. • • • • • Basic Printing Tasks The steps required to print a document created with an application are explained below. You can select the printing paper size and output destination. Note: The Print dialog box does not look the same in every application. - Page 50 Printing Basics When using Microsoft Word, we recommend that you click Options, and for default tray select Use printer settings. Click Properties to open the Properties dialog box. KX Driver...
- Page 51 In the Basic tab, click Page Sizes to open the Page Sizes dialog box. In the Select page size list, select a page size for the print job. Click OK to return to the Basic tab. Click OK to return to the Properties dialog For best results when printing on transparencies or recycled paper (the back side of paper which has already been printed on), from the Media type list select the media type.
- Page 52 In the Page Sizes list, select the document’s paper size and click OK. In the Basic tab, click the Print Size list and select the preferred output paper Confirm the proper paper size is loaded. Click OK to return to the Print dialog box. Click OK to start printing.
- Page 53 selection of media types can be disabled in the PCL XL settings dialog box. For further details, refer to Labels, transparencies, and envelopes must be printed using the MP tray. Ensure the paper is properly loaded by following the instructions outlined in the printing system's Operation Guide.
-
Page 54: Printing On Paper Of Non-Standard Sizes
Options Available in the Media Type List Media Type Plain 64 to 90 g/m Preprinted Bond (securities) Coated Recycled Vellum Less than 64 g/m Letterhead Color 64 to 90 g/m Prepunched High quality Cardstock Envelopes Thick Rough 90 to 200 g/m Labels Transparency Custom (1-8) - Page 55 Right-click the printer icon and select Properties to open the Properties dialog box. Click Printing Preferences to open the Printing Preferences dialog box. Click Page Sizes. The Page Sizes dialog box appears. Click New. Custom_01 will appear in the Name box. You can replace Custom_01 with the name for your new custom paper size.
-
Page 56: Duplex Printing
Sample Paper Measurements (150 mm x 200 mm) Click OK. To add more custom paper sizes, repeat the steps above (Maximum 20 custom paper sizes). Printing with Custom Paper Sizes Select Print from the File menu. From the application’s Print dialog box, open Print Properties. -
Page 57: Print On Both Sides
Print on Both Sides Within your application, select Print from the File menu. Then, from the Print dialog box, open Properties. From the Basic tab, select Print on Both Sides. Choose Flip on Long Edge or Flip on Short Edge. Portrait Landscape Click OK to return to the Print dialog box. - Page 58 Printing Basics The steps for using Manual Duplex may vary, depending on your printing system, what optional devices are installed, and what application you are printing from. The Print dialog boxes of some applications allow you to print just the odd or even pages so that you can use manual duplex, as shown in the examples below.
- Page 59 • When using a network port, select Enable manual duplex on network port in the Compatibility Settings dialog box, accessed from the Device Settings tab. Manual Duplex cannot be used on a network port in Windows 9x. See Compatibility Settings settings.
-
Page 60: Reverse Order Printing
Clear Print manual duplex instructions and follow steps 5-7. Click OK in the Properties dialog and Print dialog. The even-numbered pages will be printed. When printing stops, remove all printed sheets from the output tray. With Flip on Long Edge selected, turn the stack over on the long edge and put the pages into the cassette. -
Page 61: Collating Modes
Select Reverse page order. If Reverse page order is not present, you can change the Destination output tray to enable this feature. Click OK to return to the Print dialog box. Click OK to start printing. Collating Modes By attaching a sorter to your printing system, you can specify how printed documents are stacked in the output trays after printing. -
Page 62: Sorter Modes
Sorter Modes There are three sorter modes available. These modes are selected in the Basic tab: Collating Tray 1 Tray 2 Tray 3 Tray 4 Tray 5 Page 2 Page 2 Page 2 Page 1 Page 1 Page 1 Non-collating 20 copies of page 1 Tray 1 Tray 2... - Page 63 Collate Open the Properties dialog box. From the Destination list, select a face-down destination, such as Finisher (face- down) or Top Tray (face-down). Select the Collate check box. Select the number of complete sets in the Number of copies box. When printing using the collate option, specify the number of copies not to exceed the number of trays.
-
Page 64: Chapter 4 Layout
4 Layout In the Layout tab you can arrange document data on printed pages without changing the original document. • • • • Note: Some printer models also have a button labeled Gutter on this tab. For details on using this feature, see Gutters on page 5-3. Booklet Use the Booklet option to print a two-page layout on both sides of each sheet of paper. -
Page 65: Left Edge And Right Edge Binding
Left Edge and Right Edge Binding Select left edge or right edge binding of the booklet to match the direction of your written language: • Select Left edge binding for languages that read left to right. • Select Right edge binding for languages that read right to left. Outside Outside Booklet Printing... -
Page 66: Multiple Pages Per Sheet
Select Booklet. Choose either Left edge binding or Right edge binding. To use the stapling feature, complete the following steps: Click the Basic tab, and under Destination, select a face-down finishing tray. If the Staple check box is not available in the Finishing tab, change the setting for Destination in the Basic tab to an output tray that has a stapler. -
Page 67: Poster
Select Multiple pages per sheet. In the Pages per sheet list, select the number of source pages. From the Layout list, select the horizontal and vertical direction for the page Examples: • If you select six pages per sheet and select Top to bottom and left, the pages will be arranged from the top right corner to the bottom left corner. -
Page 68: Available Poster Sizes
Available Poster Sizes • Select 2 x 2 to print a poster 4 times larger than the original. • Select 3 x 3 to print a poster 9 times larger than the original. • Select 4 x 4 to print a poster 16 times larger than the original. •... - Page 69 • Select Poster pages and proof sheet to print all poster sheets and a one-page proof sheet. Poster Settings To make it easier to create a poster, you can print visual cues on the poster sheets that provide help in cropping and assembling the pages. In the Layout tab, click the Poster Settings button to open the Poster Settings dialog box.
-
Page 70: Scaling
Layout Scaling Based on the page size and print size specified in the Basic tab, you can reduce or enlarge the image from 20% to 500% of the original size, or increase the top or left margin, before printing. Click the Layout tab in the Properties dialog box, and enter the scale percentage into the Scaling (20-500%) box, or click the up or down arrow buttons to adjust the value. -
Page 71: Chapter 5 Finishing
5 Finishing This chapter describes the uses of finishing equipment. The Finishing tab is available for models that support optional finishing devices such as Multi finisher or Booklet stitcher. Note: For some features in the Finishing tab, the caution symbol appears when the feature is unavailable. - Page 72 Page Size Combinations Finishing edge can be used for the following combinations of page sizes: • A4 and A3 (210 x 297 mm and 297 x 420 mm) • B5 (JIS) and B4 (182 x 257 mm and 257 x 364 mm) •...
-
Page 73: Gutters
In the Custom Finishing Edge Settings dialog box: The top two settings (e.g. A4/Letter) are for the smaller size paper in the mixed page document. The second row of settings (e.g. A3/Legal/Ledger) is for the larger size paper in the mixed page. Select the one setting that best illustrates the edge of the mixed pages you want to align. -
Page 74: Staple
• If the document data is small enough that it will not extend beyond the edge of the paper when the gutter is increased, clear the Reduce image to fit check box. When you want to change the page size (for example, to enlarge an A4-size brochure for printing on A3 paper), refer to Staple The Staple feature is available on printing systems with an optional finishing device... -
Page 75: Punch
In the Basic tab, under Destination, select a face-down finishing tray, such as Finisher (face-down) or Tray A (face-down). Click the Finishing tab, then select Staple. Select one of the available stapling positions: Upper left, Upper right, or Booklet. (Some models support multiple booklet positions.) Note: You can increase the left or top margin to provide additional space for stapling by using the Gutter feature. -
Page 76: Using Hole Punch
Using Hole Punch In your application, open the Print dialog box, then open Properties. (Select Print from the File menu, and select Properties.) In the Basic tab, under Destination, select a face-up or face-down finishing tray. Click the Finishing tab, then select Punch. Select the number of hole punches: 2 hole, 3 hole, or 4 hole. -
Page 77: Separation
With Punch selected in the Finishing tab, click the Settings button. In the Punch Position Settings dialog box, select where to place the hole punches on the page: Left, Right, or Upper. In the Punch Position Settings dialog box, click OK. Click OK to return to the Print dialog box. -
Page 78: Rotate Copies
Click the Finishing tab, then select Separation. The Offset jobs option is Click OK to return to the Print dialog box. Click OK to start printing. Your print job will be stacked in the output tray, offset from other jobs in the same tray. Rotate Copies Rotate copies stacks each copy of a print job at right angles in the output tray. - Page 79 Finishing Click OK to start printing. Your print job will be stacked in the output tray with each copy alternating horizontally and vertically. User Guide...
-
Page 80: Chapter 6 Imaging
Description Uses the highest printing system resolution. Uses the second highest printing system resolution. Uses a resolution of 600 dpi. Choose your own combination of settings for Resolution, Kyocera Image Refinement (KIR), and EcoPrint. Resolution Kyocera Image Refinement (KIR) EcoPrint... -
Page 81: Fonts
Note: The availability of EcoPrint (Draft) mode on color printers depends on the printer model and PDL (Page Description Language). For further details on changing the page description language, refer to PDL Settings on page printer models, Kyocera Image Refinement (KIR) is only available for monochrome printing. Custom... - Page 82 Click Fonts to open the Font Settings dialog box. Select one of the methods for sending TrueType fonts, and then click OK to save your selection: Fonts Option Download as outlines Allow native download Download as bitmaps Substitute with device fonts Description Best suited for large documents or print jobs using...
-
Page 83: Font Substitution
Note: GDI compatible mode does not support Substitute with device fonts. For further details on GDI compatible mode see page 2-7. Font Substitution With Substitute with device fonts selected as the font setting, click Fonts to open the Font Substitution dialog box. The System fonts list shows the fonts installed on your computer. -
Page 84: Pattern Scaling
Note: Some options are available only when a specific PDL is selected. To view or change PDL settings, in the Windows Printers and Faxes folder, right-click the icon for your printing system and select Properties. For further details on changing the page description language, refer to PDL Settings on page 2-5. -
Page 85: Optimization
Optimization Optimization selections are available when KPDL is selected in the PDL Settings dialog box. Optimization Option Fast printing Document portability CIE Option CIE optimization is available when KPDL is selected in Device Settings > PDL > Select PDL and Allow data passthrough is selected in PDL Settings > Settings >... - Page 86 From the Graphic Settings dialog box, click Halftone Screen. Clear the Use printer’s default screens check box. Select from the list for each option, or enter the values: Halftone Screen Option Frequency Angle Shape Increase accuracy of screens Grayscale Use the Grayscale options to adjust the appearance of graphics and text produced by monochrome printing systems, or by color models when the monochrome option is selected.
- Page 87 Grayscale Option Print graphics as black Prints all colors as black. This feature works for vector Grayscale adjustment settings let you change the Brightness and Contrast of graphics for monochrome printers. This feature is also available on color printer models when the monochrome option is selected. Grayscale adjustment settings are useful if graphic images are printing too light, too gray, or too dark.
-
Page 88: Color
Color Options in Color Mode let you choose how the printing system processes color matching for a print job. Color matching is the process of accurately and consistently converting RGB colors (colors as shown on the computer monitor) to CMYK colors (colors as used for output printing). -
Page 89: Rgb
Select HSL (hue, saturation, lightness) or RGB (red, green, blue) as the color space to work with. Click the arrow buttons beneath the photograph to select one of three different images. Different colors are emphasized in each of the photographs to aid in the color adjustment process. -
Page 90: Color Correction
Under each bar, drag the slider to adjust the relative values of Red, Green, and Blue between -10 and +10. You can also type values in the boxes. If you want to return all RGB settings to zero, click Reset. Click OK to save the new RGB settings. -
Page 91: Color Reproduction
Color Correction Option ICM (system corrected) None (application corrected) Color Reproduction In the Color Correction dialog box, select Automatic, then click Color Reproduction. (The Color Reproduction button is enabled only when Automatic is selected.) In the Color Reproduction dialog box, select one Mode, then click OK to save the selection. -
Page 92: Icm Color Correction
Color Reproduction Option Text and Photos Vivid colors Publications Line art Color Reproduction Option Auto 1 Auto 2 Auto 3 Auto 4 Picture image Text Chart (graphic) ICM Color Correction In the Color Correction dialog box, select ICM (system corrected), then click ICM Settings. - Page 93 In the ICM Settings dialog box, select one Rendering intent, then click OK to save the selection. ICM Settings Option Optimize for exact color (Colormetric) Optimize for color contrast (best for images) Optimize for color saturation (best for graphs) User Guide Description Select when colors must match precisely in all print jobs, such as colors in a corporate logo.
-
Page 94: Chapter 7 Publishing
7 Publishing Note: The display of device options in the Properties dialog boxes is dependent upon both the specific model printing system and the selected device options in the Devices Settings tab. Cover Mode, Page Insert, and Transparency Interleaving This section describes the Cover mode, Page insert, and Transparency interleaving features of the printer driver. -
Page 95: Cover Printing Options
Cover Printing Options Check Box Selection Front Front Front Outside Front Front Inside Front Front Outside Front Inside Front and Back User Guide Cover Insertion Type Inserts a blank front cover. Front cover Prints on the outside surface of the front cover. Front cover Prints on the inside surface of the front cover. - Page 96 Check Box Selection Front and Back Front Outside Front and Back Front Inside Front and Back Front Outside Front Inside Front and Back Back Inside Front and Back Back Outside Cover Insertion Type Prints on the outside surface of the front cover and inserts a blank back cover.
-
Page 97: Page Insert
Check Box Selection Front and Back Back Inside Back Outside Front and Back Front Outside Front Inside Back Inside Back Outside Edit Cover Printing Options From the Media for cover list, select the media type or source cassette for the front and back covers. -
Page 98: Combinations
Select the Page insert check box. Select the option corresponding to your desired page arrangement as shown in the table below. To print on both the front and back of the inserted page, enable the Print onto front and Print onto back check Check Box Options Page insert Page insert... -
Page 99: Transparency Interleaving
To designate several pages in the document for insertion, enter a comma (,) to separate them. For a series of insertions in a range of pages, use a hyphen (-). For example, to insert a page before pages 5, 11, 12, 13, and 18, enter [5,11-13,18]. From the Media for page list, select the media type of the inserted page or the source paper cassette. -
Page 100: Chapter 8 Job
8 Job The Job options are available for printing systems with a hard disk installed or a RAM disk enabled. For further details on RAM disk setup, refer to For some models, Private print and Proof and hold can be used with a RAM Disk. Job Storage (e-MPS) The Job tab offers a variety of features, as listed below. - Page 101 Printer Driver Function Menu Options Quick Copy Prints all copies of a job and then saves it on the printing system’s hard disk so it can be reprinted from the printing system’s operation panel. Proof and Hold When you print multiple copies, the printing system produces one copy...
- Page 102 Temporary and Permanent Jobs Functions for jobs saved as Temporary and Permanent jobs are similar to the functions for Quick Copy and other features described in page 8-1. However, these functions are provided for backward compatibility with printing environments developed before the Job option. Similar to job options, temporary and permanent jobs use electronic sorting for faster printing of jobs with multiple copies.
- Page 103 After installation, follow these steps to launch the KM-NET for Clients Job Manager utility: Click Start in the Windows taskbar and All Programs > Kyocera > KM-NET for Clients. Windows 98/Me: Click Programs, find your printer model, and then KM-Net for Clients.
- Page 104 Select the printing system to connect and click Finish to return to the main dialog box of the KM-NET for Clients. Select the printer icon in the main dialog box and click the Job Manager icon. Print jobs saved in the printing system appear. Right-click on the job name and select Print from the list to print a saved job.
- Page 105 When initially printing a job, follow the steps below to print a barcode representing the job ID on each page or on the cover page only. By simply reading the barcode with the barcode reader, you can reprint either a page or the entire job.
- Page 106 The combinations of barcode printing position and orientations are shown in the table below. Orientations Horizontal Vertical When printing, the barcode is printed in the designated position. Use the Barcode Reader When the printed barcode is read by the barcode reader, the printing system outputs that page.
- Page 107 Virtual Mail Box With the Virtual mail box feature, mail boxes created on the hard disk are assigned to multiple users. Jobs posted to a virtual mail box can be printed later from the printing system’s operation panel. Jobs saved in virtual mail boxes are automatically deleted after printing, and jobs that have not been printed are saved if the printing system is switched off.
- Page 108 Create Virtual Mail Boxes Click Start in the Windows taskbar, and click Printers and Faxes to open the Printers and Faxes window. In the Printers and Faxes window, right-click the icon for your printing system. A list appears. Click Properties in the list. The Properties dialog box appears. Click the Device Settings tab.
- Page 109 Export Click Start in the Windows taskbar, and click Printers and Faxes to open the Printers and Faxes window. In the Printers and Faxes window, right-click the icon for your printer. A list appears. Click Properties in the list. The Properties dialog box appears. Click the Device Settings tab.
- Page 110 Right-click the icon for your printing system in the Printers and Faxes window. A list appears. Click Properties in the list. The Properties dialog box appears. Click the Device Settings tab. Select the Hard Disk check box. The Hard Disk Settings dialog box appears. Click Import.
- Page 111 Select the Job storage (e-MPS) check box. Select Virtual mail box (VMB) and click Selection. If Virtual mail box (VMB) is inactive, no virtual mail boxes have been created yet. Click Cancel in the screen above, and create a virtual mail box while referring to Create Virtual Mail Boxes The Virtual Mailbox Selection dialog box appears.
- Page 112 Note: The actual key sequence may differ depending on the model. At the printing system’s operation panel, press the MENU key. Press the Press the Press the This menu is not shown if all virtual mail boxes are empty. Press the ENTER key. A blinking question mark [ ? ] appears. Press the ENTER key again.
-
Page 113: Quick Copy
Press the below. This menu is not available if all virtual mail boxes are empty. >Print VMB Data Tray 001: Tray 001: Represents Virtual Mail Box 1. Press the ENTER key. A blinking question mark [ ? ] appears. Note: At this point, if there are jobs in other virtual mail boxes, you can select them (Tray) by pressing the To print the jobs in those virtual mail boxes, press the ENTER key. - Page 114 name is the same as the document name. To remove the application name, select Don’t use application name. Click OK. When you Print from the application, the job will be saved to the hard disk while the specified number of copies prints. Print Additional Copies of Quick Copy Jobs Note: The actual key sequence may differ depending on the model.
-
Page 115: Proof And Hold
Proof and Hold Open the Job tab as indicated in the instructions for Proof and hold. Name the job for future reference when printing from the printing system’s operation panel. • If you select Application defined in Job name, the application automatically names the document. -
Page 116: Job Storage
Press the Press the Press the Press the ENTER key, the user name appears with a blinking question mark [ ? ]. If the user name is correct, press the ENTER key. Otherwise, press the until the correct name appears. The job name appears with a blinking question mark [ ? ]. -
Page 117: Synergy Print Box
In the Job tab, click Job storage (e-MPS) and then select Job Storage. Select the Access code check box and type in the desired four-digit access code. When you want to print the saved jobs, type in the access code on the printing system’s operation panel. - Page 118 To use Synergy print box, in the Imaging tab printing quality must be set to High quality, Proof, or Draft; or select Fast 1200 or 600 dpi in the Custom Quality Settings dialog box. Synergy print box uses printing system memory and does not require an optional Hard disk or setting up a RAM disk.
- Page 119 The Document Management menu appears. Under Synergy Print Box, select Document reg. Select a print box from the list. (Optional) To give a custom name to the document, touch Change name, and then enter the name on the keyboard that appears. Click End to confirm the new name and return to the Document registration menu.
- Page 120 From the list of print boxes, select the print box you want to print. The list of documents in the print box appears. • Documents can be sorted by date, new to old, old to new, or in alphabetical or reverse-alphabetical order.
-
Page 121: Form Gallery
Select Print from list. The selected document will print. Edit a Print Box At the printing system’s operation panel, press the Document Management key. The Document Management menu appears. Under Synergy Print Box, select Box Editing. The options are: Order of indication Use this option to sort the contents of the print box. The available sorting methods are alphabetical, reverse alphabetical, new to old, and old to new. -
Page 122: Job Name
gallery is unavailable when PCL 5e is selected in the PDL Settings dialog box, accessed from the Device Settings tab. Send a Document to the Form Box Open the document and from the File menu select Print. From the Print dialog box, open Properties and then select the Job tab. In the Job tab, select Job storage (e-MPS). -
Page 123: Job Option (Tandem Print)
message and in job storage features. The job name will be easier to find in a job list. This feature is useful only when printing from Microsoft Word or PowerPoint. Job Option (Tandem Print) Distributes a large print job between two printing systems, effectively doubling print speed and providing backup printing support. -
Page 124: Chapter 9 Advanced
9 Advanced The Advanced tab contains special features that extend the capabilities of the printing system. Click the button at the left of the feature name to open a dialog box containing options for that feature. • • • • •... -
Page 125: Select Prologue/Epilogue File To Insert
Select Prologue/Epilogue File to Insert From the list, select the name of a command file to insert into the print job. (If no file names are visible in the list, you must click Add to browse for files on your computer or network to add to the list.) Selecting a file enables the insertion point options for that file in the dialog box. -
Page 126: Watermark
Language). For further details on changing the page description language, refer to PDL Settings on page 2-5. Start of the page The command file is inserted at the top of each page of the print job. End of the page The command file is inserted at the bottom of each page of the print job. -
Page 127: Select Watermark
Select Watermark Select a watermark from the Select watermark list. The selection list contains four standard watermarks: Confidential 1, Confidential 2, Sample and Copy. For details on creating your own watermarks, see Page selection Page selection options are enabled after a watermark is selected from the list. Choose one of the following: All pages The watermark prints on every page of the document. -
Page 128: Add Watermark
disabled. This is because cover printing is already enabled by the two Publishing tab selections. In the Publishing tab you can also select different media for the cover than that used for the rest of the print job. For further details, see Add Watermark You can create your own custom watermarks with different fonts, styles, colors, sizes, positions, and angles. - Page 129 Use the preview area and the Position or Angle features to adjust where the watermark prints on the page. Position Click the position button to change the position of the watermark without changing the angle. Position the cursor anywhere in the preview area. Click and hold as you move the mouse, adjusting the watermark image as you want it to appear on the printed page.
-
Page 130: Selecting And Creating Custom Colors (Color Models Only)
Selecting and Creating Custom Colors (Color Models Only) To use a predefined color for the watermark text, select one from the Color list. For more colors, select Custom at the bottom of the list. Click the […] button to open the Color dialog box. -
Page 131: Delete Watermark
Delete Watermark The Delete feature lets you delete custom watermarks that were added. The standard watermarks cannot be deleted. From the Select watermark list, select a watermark to delete. Click Delete. In the message box, click Yes to confirm the deletion. To refuse the deletion, click Security Watermark Security Watermark is an optional feature that is available with some printing systems. -
Page 132: Select Security Watermark
Booklet set to Off • Watermark set to Off • Poster set to Off • Kyocera Image Refinement (KIR) set to Off • Resolution set to 600 dpi • EcoPrint set to Off • Monochrome Brightness and Contrast set to 0 •... -
Page 133: Page Selection
Note: The quality and effectiveness of the printed and photocopied security watermark is dependent on the particular printing system and the settings used. Before printing a security watermark, it is necessary to adjust the calibration and print calibration pages. It is also necessary to adjust the calibration, then print calibration pages, whenever certain changes are made to the printing system or security watermark settings. -
Page 134: Add Security Watermark
Add Security Watermark You can create your own custom security watermarks with different fonts, styles, colors, sizes and angles. You can also make changes to the footer, footer position, background pattern, pattern shading, and text contrast. A maximum of 26 security watermarks can be added (in addition to the existing standard security watermarks). -
Page 135: Additional Options
Additional Options Fonts Select a font for the new watermark from the Font list. The Security Watermark feature uses only TrueType fonts. Select a font Size and Style. To adjust the Angle of the text on the page, select from the list. An angle is measured in degrees, ranging from 0 to 180. - Page 136 Available background pattern choices are: • Wave • Leaf • Diamond • Lattice Overprint Select Overprint to print the security watermark over the document content, leaving the content visible. The effect is the security watermark seems blended in with the document content.
-
Page 137: Edit Security Watermark
Text contrast: Select a contrast level from the list to specify text darkness in relation to the background pattern. Contrast 1 is the lightest against the background, and Contrast 9 is the darkest. The default value for Text contrast varies with the printing system model. -
Page 138: Delete Security Watermark
Click Edit to open the Edit Security Watermark dialog box. Make any adjustments you want to the security watermark. For details on how to change security watermark properties, see When you are finished editing, click OK to save any changes you made to the security watermark. -
Page 139: Add Profile
10 Profile This feature lets you save printer driver settings as a profile. You can select multiple options in the Printing Preferences tabs, save them to a profile, and use all of them at once when you apply the profile. For example, you can save a profile with selected options for Print on both sides, landscape, and rear tray destination. -
Page 140: Edit Profile
Note: To reset the printer driver to default settings, select the Factory Default profile and click Apply. This clears the settings of a selected profile. Edit Profile Follow these steps to edit a profile. Click Profile in the Printing Preferences dialog box. Select a profile and click Edit. - Page 141 The Export Profile dialog box appears. Name and save the profile. Import Click Import in the Profile dialog box. The Import Profile dialog box appears. Select a profile and click Open. The profile appears in the Select profile list. User Guide 10-3...
- Page 142 Appendix: Available Fonts Font Name Albertus Extra Bold Albertus Medium Antique Olive Antique Olive Bold Antique Olive Italic Arial Arial Bold Arial Italic Arial Bold Italic CG Times CG Times Bold CG Times Italic CG Times Bold Italic CG Omega CG Omega Bold CG Omega Italic CG Omega Bold Italic...
- Page 143 CourierPS Bold Oblique Garamond Antiqua Garamond Halbfett Garamond Kursiv Garamond Halbfett Kursiv Helvetica Helvetica Bold Helvetica Oblique Helvetica Bold Oblique Helvetica Narrow Helvetica Narrow Bold Helvetica Narrow Oblique Helvetica Narrow Bold Oblique ITC Avant Garde Gothic Book User Guide Times Bold Italic KYCW1_58.TTF Times New Roman KYCW1_15.TTF...
- Page 144 Glossary Access code print a Private Print job. An access code can also be used with the Job storage feature. Auto Configure work and automatically retrieves settings for optional devices, memory, and RAM disk. Driver settings will be updated with information received from the physical printing system. Installed devices will be displayed in the 3-D image.
- Page 145 Secure print jobs cannot be printed until requested, using the Access code, at the print- ing system's operation panel. KM-NET Software that provides network-wide management of printers and copiers. Kyocera image refinement (KIR) vector graphics. Mailbox Print job destination option that distributes print jobs to output trays when an op- tional device such as a Sorter stacker, Document finisher, or Mailbox is installed.
- Page 146 For restrictions see Job feature that stores print jobs in the printing system’s option- Kyocera's scripting language that you can use to embed commands into Job feature that sends secure print jobs to the printing system with a four-...
- Page 147 Separation copy is clearly distinguished from another. Separation options include Offset jobs and Rotate copies. Synergy print box (SPB) document and stores it in your choice of virtual output print boxes. Copier documents and print jobs from various applications can be combined. The job is printed out at the operation panel by selecting the synergy print box ID number.
- Page 148 Index Accessing Printer Properties 2-1 Add Port Wizard 1-6 Add Printer Wizard 1-24 Administrator Settings 2-9 job accounting 2-11 operation panel message 2-12 password 2-12 Advanced tab 9-1 Assembly marks 4-6 Assigning Virtual Mail Boxes 2-3 Auto Configure 2-15 Available device fonts 6-4 Barcode Reader reading with 8-7 Basic Printing Tasks 3-1...
- Page 149 8-8 KIR 6-2 KM-NET for Clients using to print saved jobs 8-4 KPDL 2-5 settings 2-6 Kyocera Image Refinement 6-1 Language Preference Selection 2-5 Layout 4-1 Left edge binding 4-2 License Agreement 1-1 Lightness 6-10 LPR Port 1-18...
- Page 150 – Offset 5-7 Operation Panel Message 2-12 Optimization 6-6 Optional devices, installing 2-1 Optional Printer Components installing 1-21 Page Description Language (PDL) Settings 2-5 Page Insert 7-1 Page Size 3-4 Paper Cassettes 3-6 Paper Size matching 3-4 parallel cable 1-1 Pattern Scaling 6-5 PCL 2-5 PCL 5c...
- Page 151 user 2-4 Sorter Modes 3-14 Staple 5-4 Substitute with device fonts 6-3 System fonts 6-4 Temporary and Permanent Jobs 8-3 Toner saturation 6-2 Transparency 3-3 Transparency Interleaving 7-1 Unit of Measurement 2-5 – USB 1-1 User login 2-9 User Settings 2-4 Identification 2-4 language preference 2-5 User Guide...
- Page 153 2007 KYOCERA MITA Corporation © is a trademark of Kyocera Corporation...
- Page 154 2007...
Need help?
Do you have a question about the KM-1530 and is the answer not in the manual?
Questions and answers