
Related Manuals for VWR avantor CHEMI


Summary of Contents for VWR avantor CHEMI
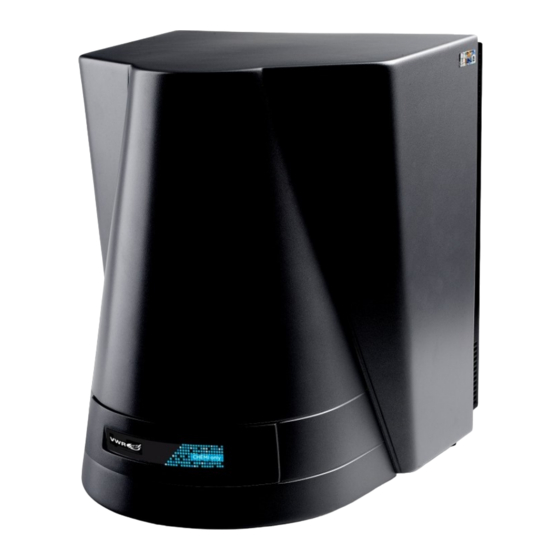
- Page 1 Instruction Manual Gel Documentation System CHEMI Only European Catalogue Number: 730-1471 Version 01 Issue 04/2021...
-
Page 2: Legal Address Of Manufacturer
Legal Address of Manufacturer Europe VWR International bv Researchpark Haasrode 2020 Geldenaaksebaan 464 B-3001 Leuven +32 16 385011 http://be.vwr.com UK Importer: VWR International Ltd Hunter Boulevard, Magna Park Lutterworth, Leicestershire, LE17 4XN http://uk.vwr.com Country of Origin ® vwr.com Instruction manual... - Page 3 ® vwr.com Instruction manual CHEMI Only...
-
Page 4: Table Of Contents
Introduction Creating and Saving a Protocol From the Home Screen In Auto Image Capture Mode In Manual Image Capture Mode Using Protocols Opening a Protocol Deleting a Protocol Editing a Saved Protocol Image Functions ® vwr.com Instruction manual CHEMI Only... - Page 5 Common Screen Functions and Tools Saving Images Printing Operator Maintenance Looking After a Chemi Only Instrument Cleaning a Chemi Only Instrument Contacting VWR International Chemi Only Troubleshooting Disposal Disposing of a Chemi ONLY The Waste Electrical and Electronic Equipment (WEEE) Directive ®...
-
Page 6: Safety Instructions
You are advised to post a copy of the precautions near to or on the instrument itself. WARNING Precautions The following precautions must be observed when using a VWR Chemi Only System: Be sure that the voltage of the VWR Chemi Only System corresponds to the voltage available where it is to be installed. - Page 7 However, if any adjustment, maintenance or repair is necessary while the instrument is open, this must be done by a skilled person who is aware of the hazards involved. Whenever circumstances arise that mean a VWR Chemi Only System may be unsafe, make it ...
- Page 8 Do not operate the instrument with any covers or internal parts removed. Do not attempt to make internal adjustments or replacements except as directed in the VWR Chemi Only System documentation. Disconnect the instrument from all live voltage sources before opening it to make any adjustments, replacements, maintenance or repair.
- Page 9 EMC Compliance EC Directive The VWR Chemi Only System is designed and tested to meet the requirements of the EC directive 2004/108/EC and 93/68/EC. The instrument complies with the EMC standard EN61326-1:2013 (EMC standard for electrical equipment for measurement, control and laboratory use) and EN55011:2009 AND A1:2010 (ISM) class A (rf emissions).
-
Page 10: Unpacking A Chemi Only System
Accessories are shipped in one or more separate cartons. To unpack a typical VWR Chemi Only Instrument: Chemi Only Instrument requires two people to lift it safely. A VWR Chemi Only Instrument complete weighs approximately 20Kg. WARNING ® 9 vwr.com... - Page 11 Chemi Only Unpacking Guide Original packing of VWR Chemi only . Open the box and remove the drawer and accessories bag Remove the cardboard surrounding Remove the foam and plastic surrounding the VWR Chemi Only the VWR...
- Page 12 PACKAGE CONTENTS Mains power cord - suitable for country of use Camera to PC lead (USB Type A) Darkroom to PC USB lead ® 11 vwr.com Instruction manual...
-
Page 13: Overview
Chemi Only Instrument; one for the Darkroom, and one for the Camera. The raw data recorded by the digital camera is processed by the VWR Image Capture software to generate the images and technical files which are the VWR Chemi Only Instrument's basic outputs. - Page 14 The VWR Image Capture software provides both automatic and manual modes of control of the VWR Chemi Only hardware and has an inbuilt database of application specific data which it uses in automatic capture mode to optimise the hardware configuration in order to obtain the optimal sample image. The database contains information relating to: ...
-
Page 15: Software Installation
Home versions of the Windows Operating Systems are not supported. Software Installation A VWR Chemi Only Instrument needs to have the VWR Image Capture software installed on the associated PC from which the instrument is to be controlled. The VWR Image Capture software can only be installed from a Windows account that has Administrator rights. -
Page 16: Select If Running Gel Doc In A Cfr21 Part 11 Compliance Environment
Select the instrument type that you have by selecting the appropriate radio button, i.e. VWR CHEMI only. Click on the Next > button. The CFR compliance screen will appear Select if running VWR Image Capture software in a CFR21 part 11 compliance environment ... -
Page 17: Select The Start Menu Folder
Select the Start Menu Folder SET-UP-VWR Image Capture-SELECT START MENU FOLDER SCREEN Select the folder in which you would like VWR Image Capture program start shortcut to be installed: To accept the displayed default folder click on Next > button. - Page 18 DEVICE DRIVER INSTALLATION WIZARD WELCOME SCREEN Click on the Next > button. The Wizard (a sub-program, part of the VWR Image Capture software) will automatically install the necessary device drivers on the PC that the hardware device you selected previously needs in order to operate.
-
Page 19: Operating
Chemi Only Instrument function as normal. Instrument Set-up - Darkroom Make sure that the Laboratory bench is strong enough to support the VWR Chemi Only Instrument and is stable and level. Caution Do not energise any of the components until instructed to. - Page 20 WORKFLOW STATUS BAR NAVIGATION ICONS TITLE BAR Displays an icon to show where you are in the VWR Image Capture program, e.g. here it shows the icon to show that you are on the Home Screen. On other screens within the VWR Image Capture program this button is used to return you to the Home screen.
- Page 21 Camera is establishing connection with the program. This icon changes depending on status: indicates that the Camera and Darkroom are OK and ready for use indicates that the Camera is overheated or ® 20 vwr.com Instruction manual...
-
Page 22: Entering Personal Preferences
Settings icon, to navigate to User Preferences screen Entering Personal Preferences Every individual who logs on to a VWR Chemi only Instrument can create a customised set of Instrument settings, i.e. a profile, which reflects the nature of the work the individual normally undertakes and what they do with the test results. - Page 23 If not checked, the report is printed without a preview being displayed. Quick Quant Report settings- select the analysis report setting for all your images Select to include or exclude full report details ® 22 vwr.com Instruction manual...
- Page 24 Displayed results only, incidence or quantity calibration results Export includes headers LOGGING DEFAULTS Increase Logging level-this will permit VWR Support to access more information on how the software is running on your instrument. USER PREFERENCES PRINTER SETTINGS SCREEN PRINTER SETTINGS Enables you to select a printer and set printer preferences for your selected printer, generally these will only be settable for the current session.
- Page 25 Hide chemi to completion check box -some users may wish to keep capturing their chemi image until signal can no longer be detected uncheck this box if you would like to use this feature. ® 24 vwr.com Instruction manual...
- Page 26 Alternatively, you can select the chemiluminescent reagent you wish to use as default by using the drop down menu. CHEMI MULTIPLE SETTINGS Chemi Series settings Check box to image a visible or colour marker for Chemi Series capture. ® 25 vwr.com Instruction manual...
- Page 27 Alternatively, you can select the chemiluminescent reagent you wish to use as default by using the drop down menu. Select to ‘Allow binning by Default’ use the drop down menu to select binning level. Binning will increase sensitivity but reduce resolution ® 26 vwr.com Instruction manual...
- Page 28 From the drop down menus select the default file format for export choose from TIFF, BMP and JPEG. Select the default DPI and the bit depth from the drop down menus. ® 27 vwr.com Instruction manual...
-
Page 29: Adjusting Basic Screen Viewing Size
Image Capture starts up with the display at full screen size. The size of the screen display can be adjusted by selecting the Maximise/Restore VWR Image Capture button in the Title Bar and then resizing the display by dragging the dotted arrow icon in the bottom right hand corner. -
Page 30: Automatic Image Capture Mode
When using binning resolution of the image can be lost). Slide the bar towards ‘high definition’ for more publication quality images (this will require longer exposure times as less binning will be used). ® 29 vwr.com Instruction manual... -
Page 31: Automatic Image Capture Chemi Blot (Series)
S.A.C. capture is useful for determining the optimal imaging time for a chemiluminescent sample. Note: For very faint signals it is advisable to use Chemi Blot (Series) capture. Select your Blot type from the drop-down list e.g. Signal Accumulation Calculator. ® 30 vwr.com Instruction manual... -
Page 32: Automatic Image Capture - Sample Positioning And Capturing An Image
Use the Door Open button on the right hand side of the Darkroom to open the Darkroom Door slightly to enable ® 31 vwr.com Instruction manual... - Page 33 (saturated). Select the Select AutoExpose Area button . This introduces a yellow selector box onto the sample image. The yellow box can be dragged around and resized. AUTOEXPOSE AREA SELECTOR BOX ® 32 vwr.com Instruction manual...
- Page 34 Pool pane. As more images are captured, these also appear in the Image Pool. When initially captured, images in the Image Pool are unsaved and are outlined in red. UNSAVED IMAGE POOL IMAGE To save the captured image, select the image in the Image Pool and select the Save icon ® 33 vwr.com Instruction manual...
- Page 35 If the graph reaches to the far right (65535 grayscales) this indicates that the image may be saturated. ® 34 vwr.com Instruction manual...
- Page 36 Iris f number Image size Range (range of grey scales captured) IMAGE INFORMATION POP-UP WINDOW The Image Information icon turns red. Selecting the Image Information icon a second time closes the pop-up window. ® 35 vwr.com Instruction manual...
-
Page 37: Automatic Image Capture - Image Actions Following Capture
IMAGE ACTION ICONS Manual Image Capture Mode Manual Capture mode allows the User to take complete control of every function of a VWR Chemi Only Instrument. Manual image capture is particularly useful for the more unusual imaging applications or if a User has known imaging parameters that they want to use. -
Page 38: Manual Image Capture - Single Image
Multiplex button. See Manual Image Capture - Multiplex. Manual Image Capture - Single Image Note: A single image can be captured directly from the basic Manual Capture screen without accessing the Image Capture options. ® 37 vwr.com Instruction manual... - Page 39 Use the Door Open button on the right hand side of the Darkroom to open the Darkroom Door slightly to enable you to move the sample around to align it with the grid projection. Pressing the Grid button calls up the grid menu. ® 38 vwr.com Instruction manual...
- Page 40 2 MP sensor with pixels four times the size of the 8 MP sensor pixels. Select the Binning button and select the binning ratio you want to use from the drop-down list. ® 39 vwr.com Instruction manual...
- Page 41 BINNING RATIO DROP-DOWN LIST You are now ready to capture your sample image. You have two options; to let the VWR Image Capture program set the exposure time automatically, or, you set the exposure time manually. Select the Auto Capture button ...
- Page 42 MANUAL CAPTURE - SINGLE IMAGE WITH MANUAL EXPOSURE 11a. Set an exposure time: The Exposure controls are simple plus/minus buttons for adjusting the following time periods; hours (h) , minutes (m) , seconds (s) , and milliseconds (ms) . ® 41 vwr.com Instruction manual...
- Page 43 Once saved, images in the Image Pool are outlined in green and their filename appears below the image. SAVED IMAGE POOL IMAGE If further images are captured, additional images appear in the Image Pool, stacked vertically. ® 42 vwr.com Instruction manual...
-
Page 44: Manual Image Capture - Series
Select the No Binning (4.03MP) button and select the binning ratio you want to use from the drop-down list, then select the Next arrow , or if you want to use the full resolution just select the Next arrow BINNING RATIO DROP-DOWN LIST ® 43 vwr.com Instruction manual... - Page 45 1. Use the Lighting and Filters functions in the right hand pane to make your lighting and filter selections as described previously. ® 44 vwr.com Instruction manual...
- Page 46 When the capture is complete a green tick appears inside the protocol box and the yellow highlight is removed. The yellow highlight then appears on the next protocol box in the series, once that capture has commenced. ® 45 vwr.com Instruction manual...
- Page 47 S\AVED IMAGE POOL IMAGE Images can be dismissed from the Image Pool by selecting them and then selecting the Close button . If an image has not been saved you will see a Save prompt. ® 46 vwr.com Instruction manual...
-
Page 48: Manual Image Capture - Additive Series
BINNING RATIO DROP-DOWN LIST You must now set the exposure time, capture intervals, and select lighting and filter options for image 1. This process is the same as that for Manual Image Capture - Series. ® 47 vwr.com Instruction manual... - Page 49 Position the sample and improve the preview sample image as much as possible using the Light / Digital Zoom / Grid / Select Autoexpose Area / Lens Controls, as described previously. Select the Capture button ® 48 vwr.com Instruction manual...
- Page 50 Image pane, along with the stack of series captured images, and also as a thumbnail in the central Image Pool pane. When initially captured, images in the Image Pool are unsaved and are outlined in red. ® 49 vwr.com Instruction manual...
-
Page 51: Manual Image Capture - Multiplex
Manual Image Capture - Multiplex Select the Multiplex button from the Image Capture options. You must now define the number of images you want in your series. In the right hand pane the Number of images selector is displayed. ® 50 vwr.com Instruction manual... - Page 52 2. Select the Last arrow apply the settings you have entered for image 1 to all of the remaining images in your series. Enter the settings for all the images in your series. Select the Next arrow ® 51 vwr.com Instruction manual...
- Page 53 In the left hand pane the main image displayed is the image in the thumbnail stack that is selected, this is indicated by a yellow highlight around the thumbnail. By default this is the combined image. ® 52 vwr.com Instruction manual...
- Page 54 SAVED IMAGE POOL IMAGE Images can be dismissed from the Image Pool by selecting them and then selecting the Close button . If an image has not been saved you will see a Save prompt. ® 53 vwr.com Instruction manual...
-
Page 55: Manual Image Capture - Image Actions Following Capture
Manual Image Capture - Image Actions Following Capture Further actions can be performed on captured images by selecting Image Action icons. The function of these is explained in other parts of this User Guide. IMAGE ACTION ICONS ® 54 vwr.com Instruction manual... -
Page 56: Protocols- Saving,Opening And Editing
Protocols- Saving,Opening and Editing Introduction The VWR Image Capture software can make the running of repeated workflows easier by storing a workflow as a Protocol. Protocols can be: Easily created Have a wide variety of settings ... -
Page 57: In Auto Image Capture Mode
By default when you save the Protocol that you have just created, the software will only allow you to access it. This behaviour can be modified using the two checkboxes at the bottom left of the pop-up. Use the Lock checkbox to prevent adjustments being made to the Protocol. ® 56 vwr.com Instruction manual... -
Page 58: In Manual Image Capture Mode
By default when you save the Protocol that you have just created, the software will only allow you to access it. This behaviour can be modified using the two checkboxes at the bottom left of the pop-up. Use the Lock checkbox to prevent adjustments being made to the Protocol. ® 57 vwr.com Instruction manual... -
Page 59: Using Protocols
Manual Image Capture mode the system will display the revelant Manual Capture screen with the difined protocols displayed. Position the sample and complete the the appropriate Automatic or Manual Image Capture process as described previously. ® 58 vwr.com Instruction manual... -
Page 60: Opening A Protocol
Search is by entering text in the Search title here... field. There is also a Clear button to clear entered search text. The software will configure your VWR Chemi Only Instrument based on the data in the Configuration file and will take you to the following point in the image capture process:... -
Page 61: Editing A Saved Protocol
For Manual Capture screen refer to Manual Image Capture Mode. If you make changes to an existing Protocol and want to save the new Protocol as a new Protocol, refer to Creating and Saving a Protocol. ® 60 vwr.com Instruction manual... -
Page 62: Image Functions
Sort by Name sorts the files in the displayed drive/folder alphabetically with 'A' at the top. Sort by Date sorts the files in the displayed drive/folder by date with the most recent at the top. ® 61 vwr.com Instruction manual... -
Page 63: Image Actions From Load Images Screen
Selecting the Edit icon opens the Image Edit screen with the image(s) selected on the Load Images screen displayed in the Selected Images pane. For the actions that can be performed using these screens refer to View Images Screen and Image Edit Screen sections of this Guide. ® 62 vwr.com Instruction manual... -
Page 64: View Images Screen
VIEW IMAGES SCREEN - SINGLE IMAGES ONLY DISPLAYED AND MULTIPLEXED IMAGES DISPLAYED View Images Screen - Single Images Single image captures selected for viewing are all displayed in a division of the main left hand pane labelled Single Images. ® 63 vwr.com Instruction manual... -
Page 65: View Images Screen - Multiplexed Images
This gives the recorded image an overall darker or lighter appearance. ® 64 vwr.com Instruction manual... - Page 66 For a 16-bit image there are a possible 65535 different intensities so the histogram will graphically display 256 numbers showing the distribution of pixels amongst those grayscale values. If the graph is bunched up ® 65 vwr.com Instruction manual...
- Page 67 This provides more area for the other images to be displayed in. The up arrow changes to a down arrow. Hidden images can be displayed again by selecting the down arrow. ® 66 vwr.com Instruction manual...
-
Page 68: View Images Screen - Combining Single Images Into A New Multiplexed Image
MULTIPLEXED IMAGE - MONOCHROME IMAGE Select the OK button to create the multiplexed image or select the Cancel button to cancel the multiplexed image creation. The multiplexed image created is displayed on the View Images screen. ® 67 vwr.com Instruction manual... -
Page 69: Image Edit Screen
Selected function buttons turn red. They stay red and the function remains active until the function button is re-selected. IMAGE EDIT SCREEN - GENERAL MODE The other main option modes are selected using the buttons in the top left hand pane. ® 68 vwr.com Instruction manual... -
Page 70: Image Edit Screen - General Option
GENERAL CONTROLS/FUNCTIONS IMAGE SOURCE As you make changes to an image file the VWR Image Capture software makes a copy of the file to which the changes are made. There are therefore two versions of the image file; the original unchanged image file, and the changed image file. - Page 71 If the image being edited is a multiplex image, the colour change is applied to all of the individual exposure captures but not the composite image. To apply the colour change to the composite image as well check the Use in Composite checkbox. ® 70 vwr.com Instruction manual...
-
Page 72: Image Edit Screen - Annote Option
Annotate screen provides the following controls/functions: Image Source Annotation Tools Copy and Paste Edit Note: Selected function buttons turn red. They stay red and the function remains active until the function button is re-selected. ANNOTATE CONTROLS/FUNCTIONS ® 71 vwr.com Instruction manual... - Page 73 Select Colour and Select Line Style tools. The Ellipse tool enables you to add ellipses (circles) to an image. Draw the shape, then select it using the Select tool, and the shape can be positioned by dragging and resized using the ® 72 vwr.com Instruction manual...
-
Page 74: Image Edit Screen - Enhance Option
The lower left hand pane of the Enhance screen provides the following controls/functions: Image Source Enhancement Tools Resolution Note: Selected function buttons turn red. They stay red and the function remains active until the function button is re-selected. ® 73 vwr.com Instruction manual... - Page 75 Selecting the Define area to be cropped tool twice more cancels the selection rectangle just made and also cancels the selection function. ® 74 vwr.com Instruction manual...
-
Page 76: Image Edit Screen - General / Annotate / Enhance Options Common Control
Image Edit Screen - General / Annotate / Enhance Options Common Controls The central image viewing pane of the General, Annotate and Enhance options of the Image Edit Screen provide a common set of image controls. ® 75 vwr.com Instruction manual... - Page 77 The information displayed is as follows: Image capture date / time Filter Light Exposure time Iris f number Image size Range (range of grey scales captured) ® 76 vwr.com Instruction manual...
-
Page 78: Image Edit Screen - 3D View Option
(and being proportional to) the distribution of grey scales recorded by the camera sensor. IMAGE EDIT SCREEN - 3D VIEW OPTION The lower left hand pane of the 3D View version of the screen provides the following controls/functions: Image Source Other Gamma ® 77 vwr.com Instruction manual... - Page 79 Use in Composite check box. Use the colour picker to add a custom colour to a single image. Select the ‘Colour Image’ button and then from the pop up use the slider bars to create a custom colour. ® 78 vwr.com Instruction manual...
-
Page 80: Image Edit Screen - All Options Common Controls
Image Edit Screen - All Options Common Controls ACTION ICONS All four of the Image Edit main option screens provide the same Action icons across the bottom of the screen. The left hand group of Action icons is as follows: ® 79 vwr.com Instruction manual... - Page 81 To change the image displayed, select the image in the right hand pane. At the bottom of the right hand pane there are two buttons for dismissing images from the image pool, as follows: REMOVE / REMOVE ALL BUTTONS ® 80 vwr.com Instruction manual...
-
Page 82: Common Screen Functions And Tools
Selecting the Remove All button dismisses all images from the image pool. Common Screen Functions and Tools The following general Action icons are available when using the VWR Image Capture software: The Home icon when selected takes you back to the VWR Image Capture Home screen. - Page 83 From the save screen the file name can be changed the default is set to date and time. To change the file name select the image from the list and type the new file name in the box. ® 82 vwr.com Instruction manual...
- Page 84 From the pop-up window the list of images that you have selected will appear. Check the box to export all the images in the selected range and then ‘as displayed’ or ‘as captured’. Then press ok. ® 83 vwr.com Instruction manual...
- Page 85 From the save screen the file name can be changed the default is set to date and time. To change the file name select the image from the list and type the new file name in the box. The file extension can be ® 84 vwr.com Instruction manual...
-
Page 86: Printing
Any time that an image is captured, viewed, or in some way changed, e.g. annotated, colour washed for increased contrast, etc, and the Print icon is active, using the VWR Image Capture software you have the opportunity to print the image. - Page 87 The selected constituent images print. OPTION 5 From Image Edit, to print all of the constituent images: Select any one of the constituent image thumbnails. Select the Print icon . The Printing series capture dialogue box is displayed. ® 86 vwr.com Instruction manual...
- Page 88 From View Images, to print a single constituent image: Select the constituent image. Select the Print icon The selected constituent image prints. OPTION 4 From View Images, to print more than one constituent image: Select the constituent images. ® 87 vwr.com Instruction manual...
- Page 89 If the Full Report option is selected on the User Preferences screen, when you select the Print icon you can view pages of the report and access the print settings screens using the icons at the top of the screen. The following actions are available: ® 88 vwr.com Instruction manual...
- Page 90 Print function without printing by selecting the Report icon at the top left of the screen and selecting Close from the drop-down menu. EXIT WITHOUT PRINTING ® 89 vwr.com Instruction manual...
-
Page 91: Operator Maintenance
Avoid spilling any liquid into the body of the instrument and clean any external spills immediately. If any liquid enters the main body of the instrument, make the instrument inoperative and contact the supplier. Contacting VWR International If it becomes necessary to contact VWR International the following information will be required: Unit Serial Number ... - Page 92 (2) years from date of delivery. If a defect is present, VWR will, at its option and cost, repair, replace, or refund the purchase price of this product to the customer, provided it is returned during the warranty period.
-
Page 93: Chemi Only Troubleshooting
Software driver for the camera is Install camera driver. missing. Press the refresh button on the Chemi Only. Chemi Substrate not in list. The dye that you are using is not Contact currently listed in the database. VWR International ® 92 vwr.com Instruction manual... -
Page 94: Disposal
Disposal Disposing of a VWR Chemi Only This equipment is marked with the crossed out wheeled bin symbol to indicate that this equipment must not be disposed of with unsorted waste. Instead it's your responsibility to correctly dispose of your equipment at lifecycle -end by handling it over to an authorized facility for separate collection and recycling. - Page 95 Local VWR offices in Europe and Asia Pacific Austria Hungary Poland VWR International GmbH VWR International Kft. VWR International Sp. z o.o. Graumanngasse 7 Simon László u. 4. Limbowa 5 1150 Vienna 4034 Debrecen 80-175 Gdansk Tel.: +43 1 97 002 0 Tel.: +36 (52) 521-130...
Need help?
Do you have a question about the avantor CHEMI and is the answer not in the manual?
Questions and answers