
Related Manuals for Satel INT-TSH2


Summary of Contents for Satel INT-TSH2
- Page 1 INT-TSH2 Keypad Installer manual Firmware version 2.00 int-tsh2_i_en 12/21 SATEL sp. z o.o. • ul. Budowlanych 66 • 80-298 Gdańsk • POLAND tel. +48 58 320 94 00 www.satel.eu...
- Page 2 This is a Class A product. In a domestic environment this product may cause radio frequency interference. SATEL aims to continually improve the quality of its products, which may result in changes in their technical specifications and software. Current information about the changes being introduced is available on our website.
-
Page 3: Table Of Contents
CONTENTS 1. Features ..........................2 2. Using the touch screen ...................... 2 3. Installation ......................... 4 Description of terminals ....................5 Address setting ......................5 3.2.1 Address setting in the factory new keypad ............6 3.2.2 Address setting in the service mode ..............6 3.2.3 Address setting without starting the service mode .......... -
Page 4: Features
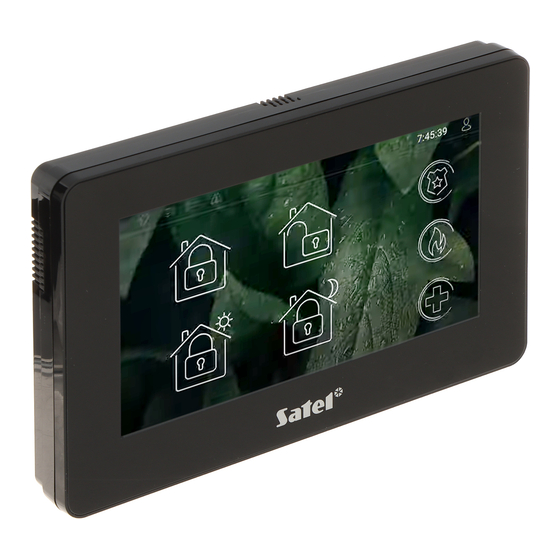
INT-TSH2 SATEL The INT-TSH2 keypad allows you to operate and program control panels of the INTEGRA series (firmware version 1.20 or newer) and the VERSA series (firmware version 1.06 or newer). 1. Features • Touch screen: – diagonal: 7”, – resolution: 1024 x 600, –... - Page 5 SATEL INT-TSH2 Tap and hold Tap on an item on the screen and hold for 3 seconds. Swipe up / down Tap the screen and slide your finger up or down to: • swipe the screen up / down (move between the screensaver / user screen / user menu home screen), •...
-
Page 6: Installation
3. Installation Disconnect power before making any electrical connections. The INT-TSH2 keypad is designed for indoor installation. The place of installation should be readily accessible to the system users. 1. Open the keypad enclosure (Fig. 1). The enclosure opening tool, shown in the illustration, is included in the keypad delivery set. -
Page 7: Description Of Terminals
SATEL INT-TSH2 5. Connect the DTM, CKM and COM keypad terminals to the appropriate terminals of the control panel communication bus (Fig. 2). It is recommended that the unshielded non-twisted cable be used for making the connection. If you use the twisted-pair type of cable, remember that CKM (clock) and DTM (data) must not be sent through one twisted-pair cable. -
Page 8: Address Setting In The Factory New Keypad
INT-TSH2 SATEL The keypad must have an address set in it: • for the INTEGRA 24 or INTEGRA 32 control panel: in the range from 0 to 3, • for other INTEGRA or INTEGRA Plus control panel: in the range from 0 to 7, •... - Page 9 SATEL INT-TSH2 Fig. 3. On-screen keypad. 3. Enter the service code (by default: 12345) and tap . The user menu home screen will be displayed (Fig. 4). Fig. 4. User menu home screen. 4. Tap the “Others” function. A list of functions will be displayed (Fig. 5).
- Page 10 INT-TSH2 SATEL Fig. 5. Functions available on the “Others” screen (example). 5. Tap the “Service mode” function. The service menu will be displayed (Fig. 6). Fig. 6. Service menu. The procedure described above applies to the keypad with factory default settings.
- Page 11 SATEL INT-TSH2 Fig. 7. Address setting. 2. Enter the new keypad address and tap . The keypad will restart. The service menu will be displayed. If you fail to set the new address within 2 minutes after you started the “Keypads addr.”...
- Page 12 INT-TSH2 SATEL 3. Enter the service code (by default: 12345) and tap . The user menu home screen will be displayed (Fig. 9). Fig. 9. User menu home screen. 4. Tap the “Terminal” function. The terminal will be displayed (Fig. 10).
- Page 13 SATEL INT-TSH2 Fig. 11. Terminal displaying the service menu. The procedure described above applies to the keypad with factory default settings. You can configure the keypad so that the access to the user screen is code-protected (a keypad will open before the user screen is displayed).
-
Page 14: Address Setting Without Starting The Service Mode
INT-TSH2 SATEL If you fail to set the new address within 2 minutes after you started the “Keypads addr.” function, the function will be terminated automatically and the keypad will restart. 3.2.3 Address setting without starting the service mode 1. Power off the keypad. -
Page 15: Memory Card
SATEL INT-TSH2 2. Tap . The identification function will start. 3. When identification is completed, information about the devices found will be displayed. to return to the menu. DLOADX program 1. Click in the main menu. The “VERSA – Structure” window will be displayed. -
Page 16: Audio Files For Chime Signaling
4.6 New firmware If a new version of the keypad firmware is published at www.satel.eu, you can download it and save it to the card in order to later update the keypad firmware (see “Updating the keypad firmware”... - Page 17 SATEL INT-TSH2 Fig. 13. DLOADX program: keypad in the INTEGRA system – “Keypad” tab (example settings). Bypass time [Chime bps. time] – time during which the CHIME signal will be disabled after the zone which disables the signaling is violated (time is counted from the zone restore).
- Page 18 INT-TSH2 SATEL Signal entry delay of partitions [Sign.entry del.] – the keypad audibly signals the entry delay countdown in selected partitions. Signal exit delay of partitions [Sign.exit delay] – the keypad audibly signals the exit delay countdown in selected partitions.
- Page 19 SATEL INT-TSH2 Show arm messages [Show arm] – if this option is enabled, the keypad displays the arming message. If this option is disabled, the arming message is not displayed. Quick control [Control (8#)] – if this option is enabled, the user can control the outputs by using widgets without entering the user code.
- Page 20 INT-TSH2 SATEL Macro Commands Fig. 14. DLOADX program: keypad in the INTEGRA system – “Macro command” tab (default settings). A macro command is a sequence of actions to be performed by the control panel. Configure a macro command and add it to the user screen as a widget. This will help the user to operate the alarm system.
- Page 21 SATEL INT-TSH2 State follow input – if you select this option, the widget will indicate the state based on the zone state (two icons will be used). State follow output – if you select this option, the widget will indicate the state based on the output state (two icons will be used).
- Page 22 INT-TSH2 SATEL Alarm clearing – select the partitions in which alarm is to be cleared. Bypass zones – select the zones which are to be inhibited. Unbypass zones – select the zones which are to be unbypassed. Outputs ON – select the outputs to be activated.
- Page 23 SATEL INT-TSH2 7. Select the icon (if you select the “No state indication” option) / icons (if you selected the “State follow input” / “State follow output” option) that will be used to display the macro command on the screen.
- Page 24 INT-TSH2 SATEL If you add a new image, you must save it to the memory card that will be installed in the keypad (see “MicroSD card” p. 28). Fig. 15. DLOADX program: “Theme” tab (default settings). Screensaver / User screen / Additional screen The screensaver is displayed when the keypad is unused.
- Page 25 SATEL INT-TSH2 Fig. 16. DLOADX program: “Screensaver” tab (default settings). Name – screen name. If entered, it will be displayed on the screen status bar. This field is not available for screensaver. Home screen – if this option is enabled, the user screen is selected as the home screen, i.e.
- Page 26 INT-TSH2 SATEL Fig. 17. DLOADX program: tab for user screen (default settings). Image – name of the image used as background. Click to select an image from the list or add a new image. If you want to add a new image, click “From file…”, then indicate the JPG file.
- Page 27 SATEL INT-TSH2 Switch – widget used to turn on / off an output. Rectangle – widget displays a rectangle on the screen. Macro – widget used to run a macro command. PANIC/FIRE/AUX. – widget used to trigger a panic / fire / medical alarm.
- Page 28 Position X/Y – position of the widget on the screen. Type – the way the zone state is presented: Indicator – zone state is presented by icons selected by SATEL. The widget will display different states. Text – zone state is presented by text messages. You can enter messages of your choice.
- Page 29 SATEL INT-TSH2 Color1 – color of the widget. Alignment – text alignment. The text can be left-aligned, centered or right-aligned. Size – size of the widget on the screen. Select one of three available sizes. “Date/time” widget settings Position X/Y – position of the widget on the screen.
- Page 30 INT-TSH2 SATEL Hold-down – if this option is enabled, tap and hold the widget for 3 seconds to run the macro command. No conf. messages – if this option is enabled, when you run the macro command, no messages to inform you that the command was executed / failed to be executed are displayed.
- Page 31 SATEL INT-TSH2 Fig. 18. DLOADX program: “Images/backgrounds” tab (example). Slideshow Go to this tab to create a set of images for a slideshow in the keypad. Add – click to add a new image to the slideshow. Delete – click to delete a selected image from the slideshow.
- Page 32 INT-TSH2 SATEL Fig. 20. DLOADX program: “Sounds” tab (example). Chime sound – list of additional sounds. The sounds are named after the zones they are assigned to. The sounds will be played back as CHIME signals when their corresponding zones are violated.
-
Page 33: Keypad In The Versa System
SATEL INT-TSH2 Fig. 22. Numbering of EOL resistors (same for the NO detector). T – tamper output. A – alarm output. 5.2 Keypad in the VERSA system To configure the keypad settings you can use: • DLOADX program: ”VERSA – Structure” window ”Hardware” tab ”Expansion modules”... - Page 34 INT-TSH2 SATEL Fig. 23. DLOADX program: keypad in the VERSA system – “INT-TSH2” tab (example). Keys sound – if this option is enabled, tapping the screen is confirmed by a sound. Sign. trbl in part. arm [Trbl.in part.arm] – if this option is enabled, the trouble information on the status bar will be hidden after both partitions are fully armed (if the option is disabled, the trouble information will be hidden after just one of the partitions is armed in any mode).
- Page 35 SATEL INT-TSH2 Arm mode review [Arm mode check.] – if this option is enabled, tap and hold for 3 seconds key to display information about the partition state. This function is not available when the “Grade 2” option is enabled.
- Page 36 INT-TSH2 SATEL Reset – click to restore the factory default settings of the keypad (this command applies to the settings presented in the “Keypad data” tab). Export to file – click to export the keypad data to a file. Import from file – click to import the keypad data from a file.
- Page 37 SATEL INT-TSH2 Code – code to be used when executing commands contained in the macro command. For execution of such commands to be possible, the code must be granted a suitable authority level. Click to view the code. If, when running a macro command, it turns out that the code is invalid (e.g. it has been changed in the meantime), the user will be able to enter the correct code.
-
Page 38: Updating The Keypad Firmware
“Starting the service mode in the VERSA system” p. 9). The alarm system must be in the service mode during the firmware update. 1. Download the new keypad firmware version from www.satel.eu. 2. Save the new firmware version to the memory card. -
Page 39: Update Using The Function
SATEL INT-TSH2 3. Open the keypad enclosure and insert the card into the slot. 4. Use the function or restart the keypad to update the firmware. 6.1 Update using the function 6.1.1 Keypad in the INTEGRA system 1. Run the “Hide SM now” function (”SM settings” ”Hide SM now”). The screensaver will be displayed. -
Page 40: Keypad In The Versa System
INT-TSH2 SATEL Fig. 26. “Keypad” screen. 7. Tap the “Firmware update” function. Two buttons will be displayed on the bottom of the screen. 8. Tap the button. The keypad will restart and the firmware update will begin. 6.1.2 Keypad in the VERSA system 1. -
Page 41: Manual Update History
SATEL INT-TSH2 Working temperature range ................-10°C…+55°C Maximum humidity ......................93±3% Enclosure dimensions (width x height x thickness) ........196 x 129 x 22 mm Weight ..........................400 g 8. Manual update history Manual version Introduced changes • 12/21 Section “Address setting” has been updated (p. 5).
Need help?
Do you have a question about the INT-TSH2 and is the answer not in the manual?
Questions and answers