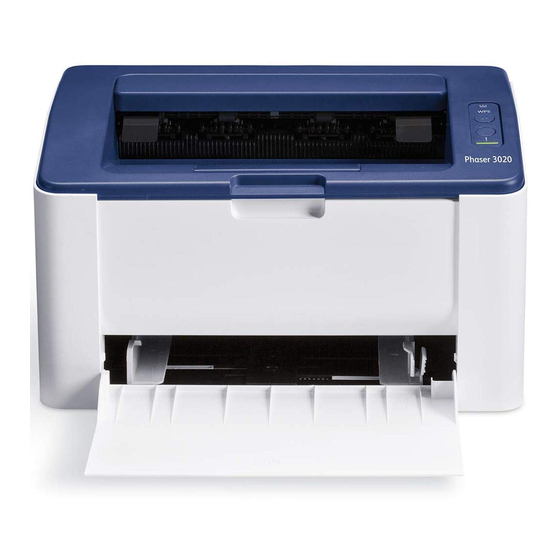
Xerox Phaser 3020 Service Manual
Hide thumbs
Also See for Phaser 3020:
- Quick use manual (5 pages) ,
- Quick use manual (5 pages) ,
- Quick use manual (5 pages)
Table of Contents
Advertisement
Quick Links
Advertisement
Chapters
Table of Contents

Related Manuals for Xerox Phaser 3020


Summary of Contents for Xerox Phaser 3020
- Page 1 Xerox Phaser 3020 ® ® Service Manual 702P02829 June 2014 Initial Issue...
- Page 3 Xerox service documentation is intended for use by certified, product-trained service per- sonnel only. Xerox does not warrant or represent that it will notify or provide to such customer any future change to this documentation. Customer performed service of equipment, or mod- ules, components, or parts of such equipment may affect whether Xerox is responsible to fix machine defects under the warranty offered by Xerox with respect to such equipment.
- Page 4 Initial Issue June 2014 Xerox® Phaser® 3020 Printer Service Manual...
-
Page 5: Table Of Contents
How to Use this Manual ....................Service Safety Summary....................Reference Symbology..................... Voltage Specifications..................... Health and Safety Incident Reporting ................viii Regulatory Specifications....................Translation of Warnings ....................Tag Usage........................Phaser® 3020 Overview ....................Additional Product Safety Information................Introduction June 2014 Xerox® Phaser® 3020 Printer Service Manual... - Page 6 Introduction June 2014 Xerox® Phaser® 3020 Printer Service Manual...
-
Page 7: About This Documentation
This section contains general information, change tag information, and general proce- Introduction dures. The Xerox® Phaser® 3020 Service Manual is part of the multinational documentation for the Section 7 Wiring Data Xerox® Phaser® 3020 Printer. It is structured in standard Xerox service documentation format. -
Page 8: How To Use This Manual
A caution is used whenever an operation or maintenance procedure, practice, condition or statement, if not strictly observed, could result in damage to the equipment. NOTE: A note is used where it is essential to highlight a procedure, practice, condition or state- ment. Introduction June 2014 Xerox® Phaser® 3020 Printer Service Manual... -
Page 9: Service Safety Summary
Do not use aerosol cleaners. The use of supplies that are not approved may cause poor performance and could create a hazardous condition. • Do not burn any consumables or routine maintenance items. For information on Xerox supplies recycling programs, go to www.xerox.com/gwa. Introduction... -
Page 10: Reference Symbology
Improper operation may result in injury to a person. Observe all ESD procedures to avoid component damage. CAUTION Improper operation may result in machine damage. The following reference symbols are used throughout the Xerox® Phaser® 3020 Service Man- ual. Flag •... -
Page 11: Voltage Specifications
In this example, the red meter lead would be placed on TP21 and the black meter lead would be placed on TP33. If a second test point is not given, it is assumed that the black meter lead may be attached to the copier frame. Introduction June 2014 Voltage Specifications Xerox® Phaser® 3020 Printer Service Manual... -
Page 12: Health And Safety Incident Reporting
Fund all field retrofits. Field Service Operations shall: II. Scope Preserve the Xerox product involved and the scene of the incident inclusive of any Xerox Corporation and subsidiaries worldwide. associated equipment located in the vicinity of the incident. Return any affected equipment/part(s) to the location designated by Xerox EH&S III. -
Page 13: Regulatory Specifications
United States (FCC Regulations) The Xerox® Phaser® 3020 has been tested and found to comply with the limits for a Class A digital device pursuant to Part 15 of the FCC Rules. These limits are designed to provide rea- sonable protection against harmful interference in a commercial installation. -
Page 14: Translation Of Warnings
GP 16. Das Modul ist sehr schwer. de las normas sobre incendios. AVISO: Utilice los procedimientos de seguridad cuando elimine el módulo. Consulte el GP 16. El módulo es pesado. Introduction June 2014 Translation of Warnings Xerox® Phaser® 3020 Printer Service Manual... -
Page 15: Tag Usage
WARNING Tag Usage Use only Xerox materials and components. This product is safety certified using Xerox Tags materials and components. The use of non Xerox materials and components may invali- If different parts or actions exist because of a modification, the Tag number will identify the date the safety certificate. -
Page 16: Phaser® 3020 Overview
AVISO: No toque ningún área marcada con etiquetas, mientras la máquina está en funci- onamiento. Podría sufrir lesiones en los dedos, causadas por los bordes del papel. Health and Safety Incident Reporting Go to GSN website, Library #1789 for reporting fires or other incidents involving a Xerox prod- uct. Introduction June 2014 Phaser®... - Page 17 Service Call Overview ..................... Safety Precautions ......................SCP 01 Introduction to Service Call Procedures ............SCP 02 Initial Actions...................... SCP 03 Corrective Actions....................SCP 04 Final Actions ...................... HFSI’s ..........................Service Call Procedures June 2014 Xerox® Phaser® 3020 Printer Service Manual...
- Page 18 Service Call Procedures June 2014 Xerox® Phaser® 3020 Printer Service Manual...
-
Page 19: Service Call Overview
NVM access. The diagnostic tests are accessed through the Embedded Diagnostic Control (EDC) tool. Refer to the Xerox® Phaser® 3020 User Guide for detailed instructions on using the Control Panel buttons and menus. Refer to Section 6 for information regarding diag-... -
Page 20: Scp 01 Introduction To Service Call Procedures
SCP 02 Initial Actions Purpose Purpose Service Call Procedures (SCP) are the guide to performing a service call on the Xerox® The purpose of the Initial Actions is to help organize the service call. Customer input, machine Phaser® 3020. observations and print samples are all used to gather information about the condition of the system. -
Page 21: Scp 03 Corrective Actions
Troubleshoot fault codes with the lowest chain number first If the problem is IQ related, refer to Section 3 Image Quality Entry RAP. When the primary problem is resolved, proceed to Final Actions. Service Call Procedures June 2014 SCP 03, SCP 04 Xerox® Phaser® 3020 Printer Service Manual... -
Page 22: Hfsi's
As with other CSE actions, these actions should be performed according to customer run may cause a return service call. requirements. Some actions may be deferred to a Xerox Initiated activity, taking into consider- ation any risks with deferring those actions. - Page 23 17-310 Communication Error (Main PWB to Wireless PWB) Fault......... 2-10 17-700 / 710 BOOTP Error Fault ..................2-11 17-800 / 810 DHCP Error Fault ..................2-11 17-910 Firmware Upgrade Fault ..................2-12 Status Indicator RAPs June 2014 Xerox® Phaser® 3020 Printer Service Manual...
- Page 24 Status Indicator RAPs June 2014 Xerox® Phaser® 3020 Printer Service Manual...
- Page 25 Check that the connectors are secure and no contamination is present. • Check that there are no broken or defective wires. • Disconnect and securely reconnect the harness. Status Indicator RAPs June 2014 01-100 , 06-100 / 200 Xerox® Phaser® 3020 Printer Service Manual...
- Page 26 Ensure that no paper is loaded in the tray. Clear any jammed sheets. Refer to Section 7: Trou- bleshooting, in the Xerox® Phaser® 3020 User Guide for detailed instructions on clearing If the problem is intermittent, check all wiring for open or short circuit.
- Page 27 • Power Off the machine, then power On while holding the WPS button to reboot the Clear any jammed sheets. Refer to Section 7: Troubleshooting, in the Xerox® Phaser® 3020 machine. User Guide for detailed instructions on clearing paper jams.
- Page 28 Check the remaining life of the Print Cartridge by using one of the methods listed below: • Print a Supplies Information Report. Refer to the Phaser 3020 User Guide, Section • Print a Supplies Information Report. Refer to the Phaser 3020 User Guide, Section...
- Page 29 Check the CRUM contact area for contamination and clean if necessary. Reinstall the Print Cartridge. Check the connections on the HVPS for contamination. Clean as necessary. If the problem continues, install a new Print Cartridge. Status Indicator RAPs June 2014 09-450 , 09-550 Xerox® Phaser® 3020 Printer Service Manual...
- Page 30 Check the Print Cartridge information by using one of the methods listed below: • Print a Supplies Information Report. Refer to the Phaser 3020 User Guide, Section Initial Actions 1, Control Panel and Information Pages, for detailed information on using the Control Switch Off the power then switch On the power.
- Page 31 If problem is intermittent, check the circuit of the Fuser Assembly for one of the following: • All connectors are securely connected and no contamination is present • Short Circuit or damaged wire. Repair as necessary Status Indicator RAPs June 2014 09-800 , 10-100 Xerox® Phaser® 3020 Printer Service Manual...
- Page 32 If the problem persists, replace parts in the following order: • Flat Cable (Not Shown) • Wireless PWB (REP 1.8), 1.1. • Main PWB (REP 1.6), 1.1. Status Indicator RAPs June 2014 17-100 , 17-310 2-10 Xerox® Phaser® 3020 Printer Service Manual...
- Page 33 Switch Off the power then switch On the power. Switch Off the power then switch On the power. Check BOOTP and network configuration. Check DHCP and network configuration. Status Indicator RAPs June 2014 17-700 / 710 , 17-800 / 810 Xerox® Phaser® 3020 Printer Service Manual 2-11...
- Page 34 The firmware upgrade aborted due to an invalid file. BSD-Reference: None Initial Actions Check the USB connection. Verify that the correct firmware file is being used. Procedure Cycle the machine power and repeat upgrade procedure Status Indicator RAPs June 2014 17-910 2-12 Xerox® Phaser® 3020 Printer Service Manual...
- Page 35 IQ6 Black or Dark Image RAP ..................IQ7 Uneven Density RAP....................IQ8 Background RAP ...................... IQ9 Residual Image (Ghosting) RAP ................IQ10 Blank Page RAP..................... IQ11 Partial Image Deletions RAP.................. 3-10 Image Quality June 2014 Xerox® Phaser® 3020 Printer Service Manual...
- Page 36 Image Quality June 2014 Xerox® Phaser® 3020 Printer Service Manual...
-
Page 37: Image Quality Overview
Areas of the printed image are light or missing entirely IQ11 • Ghosting tions on limited areas of the paper. • Vertical white lines • Vertical black line or band • Stains on the page back Image Quality June 2014 Image Quality Overview Xerox® Phaser® 3020 Printer Service Manual... -
Page 38: Iq1 Vertical Black Line And Band Rap
Care, for detailed instructions on how to replace the Drum Cartridge. Switch Off the power. Replace the Print Cartridge. Refer to the Xerox® Phaser® 3020 User Guide, Section 6 Maintenance, General Care, for detailed instructions on how to replace the Print Cartridge. -
Page 39: Iq3 Horizontal Black Bands Rap
Clean the voltage terminals for the Print Cartridges: • Refer to the Xerox® Phaser® 3020 User Guide, Section 6 Maintenance, General Care, Switch on the power and make a test print. The test print looks OK. for detailed instructions on how to replace the Print Cartridges. -
Page 40: Iq5 Low Image Density Rap
(REP 1.5). • The Charge Roller is likely defective, replace the Print Cartridge. Refer to the Xerox® Phaser® 3020 User Guide, Section 6 Maintenance, General Care, for detailed instructions on how to replace the Print Cartridges. Figure 1 Light Image... -
Page 41: Iq7 Uneven Density Rap
Switch Off the Power. Check the contacts on the Print Cartridge. The contacts are OK. Replace the Print Cartridge. Refer to the Xerox® Phaser® 3020 User Guide, Section 6 Maintenance, General Care, for detailed instructions on how to replace the Print Cartridges. -
Page 42: Iq8 Background Rap
Switch on the power and make a test print. The test print looks OK. Replace the LVPS / HVPS PWB; (REP 1.5), 3.1. Go to SCP 04 Final Actions. Figure 1 Uneven Density Figure 1 Background Image Quality June 2014 IQ7, IQ8 Xerox® Phaser® 3020 Printer Service Manual... -
Page 43: Iq9 Residual Image (Ghosting) Rap
General Care, for detailed instructions on how to replace the Print Cartridges. • Fuser; (REP 1.14), 3.2. Replace the Print Cartridge, refer to the Xerox® Phaser® 3020 User Guide, Section 6 Mainte- • LVPS / HVPS PWB; (REP 1.5), 3.1. -
Page 44: Iq11 Partial Image Deletions Rap
Check the supplies life of the Print Cartridge, refer to GP 2 Machine Status and Reports. Replace the Print Cartridge if it has reached end of life. Image Quality June 2014 IQ10, IQ11 3-10 Xerox® Phaser® 3020 Printer Service Manual... - Page 45 Figure 1 Image Deletions Image Quality June 2014 IQ11 Xerox® Phaser® 3020 Printer Service Manual 3-11...
- Page 46 Image Quality June 2014 IQ11 3-12 Xerox® Phaser® 3020 Printer Service Manual...
- Page 47 REP 1.14 Fuser Module....................4-20 REP 1.15 LSU Cables..................... 4-22 REP 1.16 Feed Clutch ....................4-23 REP 1.17 Paper Drive Roll and Drive Gear ..............4-24 REP 1.18 Paper Tray ...................... 4-26 Repairs June 2014 Xerox® Phaser® 3020 Printer Service Manual...
- Page 48 Repairs June 2014 Xerox® Phaser® 3020 Printer Service Manual...
-
Page 49: Rep 1.1 Front Cover
Make sure that the Plastic Screws go into plastic components and Machine Screws go into the metal frame. Install the components in the reverse of removal. Repairs June 2014 REP 1.1, REP 1.2 Xerox® Phaser® 3020 Printer Service Manual... -
Page 50: Rep 1.3 Rear Cover
Make sure that the Plastic Screws go into plastic components and Machine Screws go into the metal frame. Install the components in the reverse of removal. Repairs June 2014 REP 1.2, REP 1.3 Xerox® Phaser® 3020 Printer Service Manual... -
Page 51: Rep 1.4 Jam Clearance And Top Cover
Make sure that the Plastic Screws go into plastic components and Machine Screws go into the metal frame. Pivots Install the components in the reverse of removal. Figure 1 Jam Clearance Cover Support Arms and Pivots (Top View) Repairs June 2014 REP 1.4 Xerox® Phaser® 3020 Printer Service Manual... -
Page 52: Rep 1.5 Lvps / Hvps Pwb
Rear Cover (REP 1.3). Open the Jam Clearance Cover. Remove the Main PWB (REP 1.6). Disconnect the Fuser connector and Main PWB ribbon cable (Figure Remove the Insulator Strip (Black). Repairs June 2014 REP 1.5 Xerox® Phaser® 3020 Printer Service Manual... -
Page 53: Rep 1.6 Main Pwb
Make sure that the Plastic Screws go into plastic components and Machine Screws go into the metal frame. Install the components in the reverse of removal. Repairs June 2014 REP 1.5, REP 1.6 Xerox® Phaser® 3020 Printer Service Manual... - Page 54 PWS from the GSN website). Double-click the executable file and follow the steps listed in the USB Serial applica- tion window to write the machine serial number to the new Main PWB. (Figure Repairs June 2014 REP 1.6 Xerox® Phaser® 3020 Printer Service Manual...
-
Page 55: Rep 1.7 Control Panel Pwb
Make sure that the Plastic Screws go into plastic components and Machine Screws go into the metal frame. Install the components in the reverse of removal. Figure 1 Control Panel PWB Connector Repairs June 2014 REP 1.7 Xerox® Phaser® 3020 Printer Service Manual... -
Page 56: Rep 1.8 Wnpc (Wifi) Pwb
Figure 1 LVPS / HVPS PWB Connector frame. Make sure that the Plastic Screws go into plastic components and Machine Screws go into the metal frame. Install the components in the reverse of removal. Repairs June 2014 REP 1.8 4-10 Xerox® Phaser® 3020 Printer Service Manual... -
Page 57: Rep 1.9 Left Frame And Drive Motor
Disconnect the Drive Motor connector (Figure Figure 2 Main Drive Unit Removal (Left View) Connector Figure 1 Drive Motor Connector (Front View) Remove the Fuser Module (REP 1.14). Repairs June 2014 REP 1.9 Xerox® Phaser® 3020 Printer Service Manual 4-11... - Page 58 Install, but do not tighten, the screws (7) (Figure Tighten the Frame screws from the center of the Frame: To the Front of the printer, then to the Rear of the Printer. Repairs June 2014 REP 1.9 4-12 Xerox® Phaser® 3020 Printer Service Manual...
-
Page 59: Rep 1.10 Lsu
NOTE: The Flat Cable may be adhered to the LSU. Detach it from the LSU and rein- stall it on the new LSU in the same location. Remove the inside LSU cover screws (2). Repairs June 2014 REP 1.10 Xerox® Phaser® 3020 Printer Service Manual 4-13... - Page 60 NOTE: Tapered Plastic Screws and Round Machine Screws are used to hold the PWB to the frame. Make sure that the Plastic Screws go into plastic components and Machine Screws go into the metal frame. Install the components in the reverse of removal. Repairs June 2014 REP 1.10 4-14 Xerox® Phaser® 3020 Printer Service Manual...
-
Page 61: Rep 1.11 Feed Rolls And Retard Pad
Figure 2 LSU Cover Top Screws (Top View) Remove the Feed Rolls Assembly screws (2) through the bottom of the Printer (Figure Connector Figure 1 Motor Connector and LSU Cover Screws (Front View) Repairs June 2014 REP 1.11 Xerox® Phaser® 3020 Printer Service Manual 4-15... - Page 62 Be careful not to lose the Retard Pad Spring. From the rear of the printer, release the Pivot Latches (2). Move the Retard Pad into the printer to remove it. Repairs June 2014 REP 1.11 4-16 Xerox® Phaser® 3020 Printer Service Manual...
- Page 63 When replacing the Feed Rolls Assembly make sure the Locating Pins are positioned in the frame holes before installing the screws (2) (Figure Spring Figure 5 Retard Pad Removal (Rear View) Locating Pins Figure 6 Feed Rolls Assembly Locating Pins (Top View) Repairs June 2014 REP 1.11 Xerox® Phaser® 3020 Printer Service Manual 4-17...
-
Page 64: Rep 1.12 Feed Sensors Pwb And Actuators
Make sure that the Plastic Screws go into plastic components and Machine Screws go into the metal frame. NOTE: Make sure that the Actuator Spring is location in frame cutout (Figure Install the components in the reverse of removal. Repairs June 2014 REP 1.12 4-18 Xerox® Phaser® 3020 Printer Service Manual... -
Page 65: Rep 1.13 Transfer Roll
From the rear of the printer, using a small screwdriver release the latches (2) and push the Transfer Roll Bushing into the printer (Figure Latches Transfer Roll Figure 2 Transfer Roll Removal (Top View) Figure 1 Transfer Roll Bushing Latches (Rear View) Repairs June 2014 REP 1.13 Xerox® Phaser® 3020 Printer Service Manual 4-19... -
Page 66: Rep 1.14 Fuser Module
Remove the following covers: Left and Right Side Covers (REP 1.2). Rear Cover (REP 1.3). Front Cover (REP 1.1). Top Cover (REP 1.4). Remove the Main PWB (REP 1.6). Repairs June 2014 REP 1.13, REP 1.14 4-20 Xerox® Phaser® 3020 Printer Service Manual... - Page 67 Remove the screws (3) (Figure Wire Guides Connector Screws Figure 1 Fuser Connector and Wire Guides Figure 2 Fuser Screws (Top View) Repairs June 2014 REP 1.14 Xerox® Phaser® 3020 Printer Service Manual 4-21...
-
Page 68: Rep 1.15 Lsu Cables
(Figure Figure 1 Insulator Strip Install the components in the reverse of removal. Repairs June 2014 REP 1.14, REP 1.15 4-22 Xerox® Phaser® 3020 Printer Service Manual... -
Page 69: Rep 1.16 Feed Clutch
Make sure that the Plastic Screws go into plastic components and Machine Screws go into the metal frame. Connector Install the components in the reverse of removal. Figure 1 Feed Clutch Connector Remove the Left Frame (REP 1.9). Repairs June 2014 REP 1.15, REP 1.16 Xerox® Phaser® 3020 Printer Service Manual 4-23... -
Page 70: Rep 1.17 Paper Drive Roll And Drive Gear
Install the components in the reverse of removal. NOTE: Make sure the Feed Drive Shaft engages the Feed Roll Assembly. Screws Figure 1 Main Drive Unit (Left View) Repairs June 2014 REP 1.16, REP 1.17 4-24 Xerox® Phaser® 3020 Printer Service Manual... - Page 71 Note the location of the Spring in the frame cutout for reinstallation. Unlatch and remove the actuator. Spring Gear Figure 2 Paper Drive Roll Gear (Left View) Latch Feed Sensor Actuator Figure 3 Feed Sensor Actuator (Rear View) Repairs June 2014 REP 1.17 Xerox® Phaser® 3020 Printer Service Manual 4-25...
-
Page 72: Rep 1.18 Paper Tray
NOTE: When replacing the Main Drive Unit, the drive gears may need to be rotated to align them with the other drives. Install the components in the reverse of removal. Repairs June 2014 REP 1.17, REP 1.18 4-26 Xerox® Phaser® 3020 Printer Service Manual... - Page 73 Install the components in the reverse of removal. NOTE: Make sure the Locating Pins and Tabs on the Paper Tray align with the cutouts in the frame. Repairs June 2014 REP 1.18 Xerox® Phaser® 3020 Printer Service Manual 4-27...
- Page 74 Repairs June 2014 REP 1.18 4-28 Xerox® Phaser® 3020 Printer Service Manual...
- Page 75 PL 3.5 Main Frame Right ....................Middle And Bottom Frame PL 3.6 Paper Tray And LSU Frame ................5-10 Feed Idle Frame PL 3.7 Paper Feed Assembly ..................5-11 Part Number Index ......................5-12 Parts List June 2014 Xerox® Phaser® 3020 Printer Service Manual...
- Page 76 Parts List June 2014 Xerox® Phaser® 3020 Printer Service Manual...
-
Page 77: 1.1 Main
Wireless Cover 140N63727 WNPC (WIFI) PWB 002N03183 Right Cover – 002N03184 Right Cover (Black) 002N03178 Paper Support – 002N03179 Paper Support (Black) – Front Cover Assembly (Items 3, 11) Parts Lists June 2014 PL 1.1 Xerox® Phaser® 3020 Printer Service Manual... -
Page 78: 2.1 Top Cover
Shaft Holder – Jam Clearance Cover – Trim Strip – Top Cover – WPS Key 140N63725 Control Panel PWB 002N03159 Top Cover Assembly – 002N03160 Top Cover Assembly (Black) Parts Lists June 2014 PL 2.1 Xerox® Phaser® 3020 Printer Service Manual... -
Page 79: 3.1 Frame
Fuser Module (PL 3.2) – LSU Cover – Main Frame Right (PL 3.5) – HVPS Insulator – HVPS Contact 105N02303 LVPS/HVPS 220V – 105N02302 LVPS/HVPS 110V – Input Guide Parts Lists June 2014 PL 3.1 Xerox® Phaser® 3020 Printer Service Manual... -
Page 80: 3.2 Fuser
Fuser Gear – Heat Roll – Guide – Spring – Thermostat – Thermistor – Fuser Cover – Bushing – Fuser Lamp – Jam Lever – Right Lamp Cover Parts Lists June 2014 PL 3.2 Xerox® Phaser® 3020 Printer Service Manual... -
Page 81: 3.3 Paper Path Frame
Ground Clip – Paper Path Guide – Feed Roll Shaft 121N01246 Feed Clutch 007N01801 Feed Gear – Bushing – Spring – Bushing 001N00547 Retard Pad – Path Frame Parts Lists June 2014 PL 3.3 Xerox® Phaser® 3020 Printer Service Manual... -
Page 82: 3.4 Main Left Frame
– RDCN Drive Gear – Drive In Gear – Fuser Drive Gear – RDCN Fuser Gear – RDCN A Gear – Drive Motor 001N00548 Left Main Frame Assembly Parts Lists June 2014 PL 3.4 Xerox® Phaser® 3020 Printer Service Manual... -
Page 83: 3.5 Main Frame Right
CRUM Contact – Spring – Ground Clip – Washer – Tap Screw – CRUM Cover – Right Print Cartridge Guide – Right Main Frame (Items 1 - 8) Parts Lists June 2014 PL 3.5 Xerox® Phaser® 3020 Printer Service Manual... -
Page 84: 3.6 Paper Tray And Lsu Frame
– Left Guide – Rubber Friction Pad – Bottom Plate – Pinion Gear – Sponge Damper 062N00293 – Motor Cover – LSU Frame 117N01970 LSU Flat Cable Parts Lists June 2014 PL 3.6 5-10 Xerox® Phaser® 3020 Printer Service Manual... -
Page 85: 3.7 Paper Feed Assembly
Pick Up Clutch – Bushing – Pick Up Roller – Plain Washer – Bushing – Sleeve – Spring – Pick Up Gear – Feed Gear – Drive shaft Roller Parts Lists June 2014 PL 3.7 Xerox® Phaser® 3020 Printer Service Manual 5-11... -
Page 86: Part Number Index
PL 3.2 126N00433 PL 3.2 130N01757 PL 3.7 130N01759 PL 3.3 140N63719 PL 1.1 140N63720 PL 1.1 140N63721 PL 1.1 140N63725 PL 2.1 140N63727 PL 1.1 Parts Lists June 2014 Part Number Index 5-12 Xerox® Phaser® 3020 Printer Service Manual... - Page 87 GP 7 Usage of the Electrostatic Discharge (ESD) Field Service Kit ....... 6-14 GP 8 Software ServiceTools ................... 6-15 Diagnostics Diagnostic (EDC) Mode ....................6-17 Machine Reports ......................6-17 Glossary Glossary .......................... 6-19 General Procedures and Information June 2014 Xerox® Phaser® 3020 Printer Service Manual...
- Page 88 General Procedures and Information June 2014 Xerox® Phaser® 3020 Printer Service Manual...
- Page 89 General Information System Overview The Xerox® Phaser® 3020 printer produces high quality prints from electronic documents with This section provides illustrations of the following systems: speeds of up to 21 ppm and an effective output resolution of up to 1200 x 1200 dpi.
- Page 90 The following diagrams display the path that the paper follows during the printing process. The figures below illustrates the mechanical parts of the printer. Figure 1 Paper Path Figure 2 System Layout General Procedures and Information June 2014 System Overview Xerox® Phaser® 3020 Printer Service Manual...
- Page 91 The Scanner Unit receives image data from the HVPS PWB and scans the surface of the pho- cess. toreceptor drum (OPC) with a laser to create a latent image. Figure 3 Print Process Figure 4 Laser Scanner Unit General Procedures and Information June 2014 System Overview Xerox® Phaser® 3020 Printer Service Manual...
- Page 92 Drum Cartridge (OPC), Fuser, Pick-up, Registration, Feed and Exit and developer units are contained within the Print Cartridge. Rollers. Figure 5 Integrated Toner System General Procedures and Information June 2014 System Overview Xerox® Phaser® 3020 Printer Service Manual...
- Page 93 Wired Network Wireless Network 802.11b/g/n Wireless LAN Applications Easy Printer Man- Windows® and Macintosh® OS Only ager Printer Status Windows® OS Only Smart Panel Linux Only General Procedures and Information June 2014 Product Specifications Xerox® Phaser® 3020 Printer Service Manual...
- Page 94 Plain, Light-weight, Recycled, Archive Media Weight 16 to 24 lb. (60 to 90 gsm) Non-printable Area 0.12 in (3 mm) From Edge (Top, Bottom, Right, Left) General Procedures and Information June 2014 Product Specifications Xerox® Phaser® 3020 Printer Service Manual...
- Page 95 13.7 x 8.5 x 7.0 in. 332 x 215 x 178 mm Weight SET (with Print Cartridge) M202X 8.75 lbs (3.97 Kg) M202XW 8.82 lbs (4.0 Kg) General Procedures and Information June 2014 Product Specifications Xerox® Phaser® 3020 Printer Service Manual...
- Page 96 General Procedures and Information June 2014 Product Specifications 6-10 Xerox® Phaser® 3020 Printer Service Manual...
- Page 97 Section 6 Maintenance: Checking the Status of Consumables. • Section 7 Troubleshooting, Machine Status Indicators, for: – LED color and status descriptions – Printing machine reports. General Procedures and Information June 2014 GP 1, GP 2 Xerox® Phaser® 3020 Printer Service Manual 6-11...
- Page 98 From CWIS: • Layout • Printer Open the Xerox Easy Printer Manager to launch the CentreWare Internet Services (CWIS) application. • Network Settings Log into CWIS: enter user name: admin and password: 1111. Select the [Support] Tab. The Firmware version is listed next to the Main Controller Board.
- Page 99 11. In the Firmware Upgrade link, select the Upgrade Wizard button. In the Firmware File area, select Browse. Locate and select the correct firmware upgrade .hd file. Select Open. General Procedures and Information June 2014 GP 5, GP 6 Xerox® Phaser® 3020 Printer Service Manual 6-13...
- Page 100 ESD Field Service Kit. During transfer from or to the packing material or container, the PWB should be placed on the static dissipative work surface mat. General Procedures and Information June 2014 GP 6, GP 7 6-14 Xerox® Phaser® 3020 Printer Service Manual...
- Page 101 • USB Serial Number Writing Tool - to write the machine serial number to the Main PWB. • EDC tool - to enter Diagnostic Mode General Procedures and Information June 2014 GP 8 Xerox® Phaser® 3020 Printer Service Manual 6-15...
- Page 102 General Procedures and Information June 2014 GP 8 6-16 Xerox® Phaser® 3020 Printer Service Manual...
- Page 103 K [THV] - Bias Status: [Off] 109 Fuser Temp A Status: [0] 110 LSU LSU Mot1 Run Status: [Low] LD Power4 Status: [Off] LSU HSync4 [Low] General Procedures and Information June 2014 Diagnostic (EDC) Mode, Xerox® Phaser® 3020 Printer Service Manual 6-17...
- Page 104 General Procedures and Information June 2014 Diagnostic (EDC) Mode, 6-18 Xerox® Phaser® 3020 Printer Service Manual...
- Page 105 Glossary Table 1 Glossary Term/Acronym Definition NOTE: For a comprehensive list of Xerox acronyms, refer to the Xerox Acronym database at: Intranet A private computer network that uses internet protocol technology to https://open.xerox.com/Services/acronym share information, operational systems, or computing services within an organization.
- Page 106 General Procedures and Information June 2014 Glossary 6-20 Xerox® Phaser® 3020 Printer Service Manual...
- Page 107 AC / LOW VOLTAGE and HIGH VOLTAGE POWER / INTERLOCKS CHAIN 3 COMMUNICATIONS PRINTER COMMUNICATIONS This document contains wiring and mechanical power data for the Xerox® Phaser® 3020 Printer. CHAIN 4 MAIN DRIVE These block schematic diagrams are supplemental to the diagnostic and troubleshooting information MAIN DRIVE found in the Xerox Phaser 3020 Service Manual.
- Page 108 THIS PAGE INTENTIONALLY BLANK BSDs ® ® June 2014 Xerox Phaser 3020 Printer Service Manual...
- Page 109 DC COM DC COM +5VDC +5 VDC +5 VDC +5 VDC DC COM +3.3 VDC +24 VDC POWER GENERATION DC COM +3.3 VDC +3.3 VDC +3.3 VDC +3.3 VDC ® ® Xerox Phaser 3020 Printer Service Manual June 2014 BSDs...
- Page 110 WPS KEY WIDTH SENSOR POWER KEY FEED SENSOR WPS LED POWER LED ERROR LED READY LED DC COM DC COM DC COM TONER LED +3.3 VDC +3.3 VDC +3.3 VDC BSDs ® ® June 2014 Xerox Phaser 3020 Printer Service Manual...
- Page 111 4.1 MAIN DRIVE MAIN PWB PL 1.1 +24 VDC DRIVE MOTOR PL 3.4 MOTOR DRIVER PHASE A PHASE B PHASE C PHASE D ® ® Xerox Phaser 3020 Printer Service Manual June 2014 BSDs...
- Page 112 LSU 1 MOTOR LSU ON DC COM DC COM DC COM V1 DN V1 DP DC COM DC COM DC COM SYNC SIGNAL 3.3 VDC +3.3 VDC +3.3 VDC BSDs ® ® June 2014 Xerox Phaser 3020 Printer Service Manual...
- Page 113 +3.3 VDC WIDTH SENSOR PAPER AT REG SENSOR (L) +3.3 VDC +3.3 VDC +3.3 VDC FEED CLUTCH PL 3.3 +24 VDC FEED CLUTCH ON (L) +24 VDC DC COM ® ® Xerox Phaser 3020 Printer Service Manual June 2014 BSDs...
- Page 114 DEVELOPER AC DEVELOPER DC TRANSFER ENABLED SUPPLY PR DRUM ROLL CHARGE ENABLED TRANSFER ROLL CHARGE ON CRUM +3 VDC +3.3 VDC CRUM SIGNAL CRUM SIGNAL DC COM DC COM BSDs ® ® June 2014 Xerox Phaser 3020 Printer Service Manual...
- Page 115 PL 3.2 FUSER THERMISTOR RT10-001 Fuser Temperature Enable Fuser FUSER Signal Relay Fuser Relay +3.3 VDC FUSER MODULE +3.3 VDC PL 3.2 OVERTEMPERATURE THERMOSTAT Heat Lamp On ACH HEAT LAMP ® ® Xerox Phaser 3020 Printer Service Manual June 2014 BSDs...
- Page 116 ©2014 Xerox Corporation. All rights reserved. Xerox® and the sphere of connectivity design are trademarks of Xerox Corporation in the US and/or other countries.
Need help?
Do you have a question about the Phaser 3020 and is the answer not in the manual?
Questions and answers