
Related Manuals for Christie Velvet Apex A2L Series


Summary of Contents for Christie Velvet Apex A2L Series
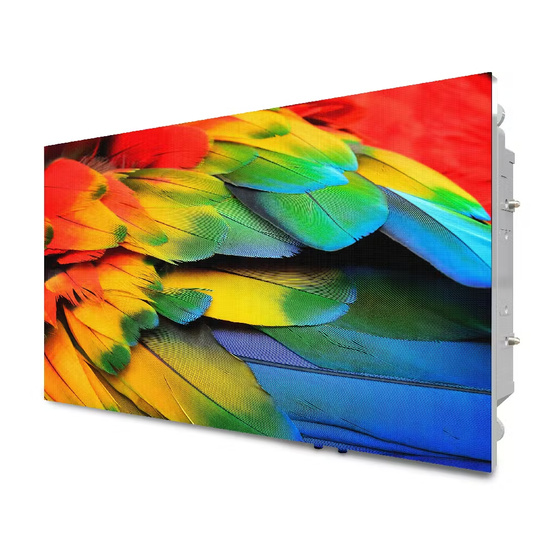
- Page 1 Installation and Setup Guide 020-102873-01 Velvet LED Display System Apex A2L Series...
- Page 2 The warranty does not apply to any product where the serial number has been removed or obliterated. The warranty also does not apply to any product sold by a reseller to an end user outside of the country where the reseller is located unless (i) Christie has an office in the country where the end user is located or (ii) the required international warranty fee has been paid.
-
Page 3: Table Of Contents
Setting the temperature units......... 26 Velvet LED Display System Installation and Setup Guide–Apex A2L Series 020-102873-01 Rev. 1 (06-2018) Copyright 2018 Christie Digital Systems USA, Inc. All rights reserved. ©... - Page 4 Environmental........... . 40 Velvet LED Display System Installation and Setup Guide–Apex A2L Series 020-102873-01 Rev. 1 (06-2018) Copyright 2018 Christie Digital Systems USA, Inc. All rights reserved. ©...
-
Page 5: Product Overview
Notice. If not avoided, the following could result in property damage. • Always wear clean, lint-free gloves when handling the product. Velvet LED Display System Installation and Setup Guide–Apex A2L Series 020-102873-01 Rev. 1 (06-2018) Copyright 2018 Christie Digital Systems USA, Inc. All rights reserved. ©... -
Page 6: Power Precautions
Warning! If not avoided, the following could result in death or serious injury. • After the replacement of the power supply, hi-pot and ground/earth bond tests must be performed. Only Christie qualified technicians who are familiar with the necessary precautions can perform these tests. •... -
Page 7: Remote Power Supply Rack Shelf Safety Warnings
A technical supplier specification related to the pixel size, and denotes the size of the surface-mounted diode (SMD) itself. Velvet LED Display System Installation and Setup Guide–Apex A2L Series 020-102873-01 Rev. 1 (06-2018) Copyright 2018 Christie Digital Systems USA, Inc. All rights reserved. ©... -
Page 8: Required Components
Remote Power Supply Rack Shelf module, you must purchase a power cord of an adequate length. Christie recommends one of the pre-terminated power cables offered as Christie accessories, or that you create a custom cable using the Christie Main Power Cable Spool (P/N 154-122106-XX), Connector Kit (P/N 154-125109-XX), and Molex Crimping Tool (P/N 154-124108-XX). -
Page 9: Product Documentation
Product overview Product documentation For installation, setup, and user information, see the product documentation available on the Christie Digital Systems USA Inc. website. Read all instructions before using or servicing this product. 1. Access the documentation from the Christie website: •... -
Page 10: Typical Led Solution
Video matrix switch and splicing video processor E500 controller or E600 controller Control computer Remote Power Supply Rack Shelf LED display Velvet LED Display System Installation and Setup Guide–Apex A2L Series 020-102873-01 Rev. 1 (06-2018) Copyright 2018 Christie Digital Systems USA, Inc. All rights reserved. ©... -
Page 11: Cable And Controller Layout And Design
1.9 mm 12 x 12 144 tiles LED025-A2L 2.5 mm 16 x 16 256 tiles Velvet LED Display System Installation and Setup Guide–Apex A2L Series 020-102873-01 Rev. 1 (06-2018) Copyright 2018 Christie Digital Systems USA, Inc. All rights reserved. ©... -
Page 12: E500 Controller Interface And Ports
• 8 bit—RGB 4:4:4 1080P • 12 bit—YCbCr 4:2:2 1080P Supports 3G-SDI progressive input in standard format SDI Loop Velvet LED Display System Installation and Setup Guide–Apex A2L Series 020-102873-01 Rev. 1 (06-2018) Copyright 2018 Christie Digital Systems USA, Inc. All rights reserved. ©... -
Page 13: E600 Controller Interface And Ports
USB interface for communication with a UDISK LCD screen Menu dial for interacting with the menu Velvet LED Display System Installation and Setup Guide–Apex A2L Series 020-102873-01 Rev. 1 (06-2018) Copyright 2018 Christie Digital Systems USA, Inc. All rights reserved. ©... - Page 14 Power supply port: AC 100-240V~ 50/60hz Power switch HDMI 8 bit, 10 bit, and 12 bit support Velvet LED Display System Installation and Setup Guide–Apex A2L Series 020-102873-01 Rev. 1 (06-2018) Copyright 2018 Christie Digital Systems USA, Inc. All rights reserved. ©...
-
Page 15: Fe600 Controller Extender Interface And Ports
FE600 controller extender interface and ports Learn about the interface and physical ports on the E600 controller. Front Status display Velvet LED Display System Installation and Setup Guide–Apex A2L Series 020-102873-01 Rev. 1 (06-2018) Copyright 2018 Christie Digital Systems USA, Inc. All rights reserved. ©... - Page 16 Power Power supply port: AC 100-240V~ 50/60hz Power switch Power supply port: AC 100-240V~ 50/60hz Velvet LED Display System Installation and Setup Guide–Apex A2L Series 020-102873-01 Rev. 1 (06-2018) Copyright 2018 Christie Digital Systems USA, Inc. All rights reserved. ©...
-
Page 17: Installation And Setup
9. Connect the data cables to the video sources (on page 27). 10. Power on the array (on page 29). Velvet LED Display System Installation and Setup Guide–Apex A2L Series 020-102873-01 Rev. 1 (06-2018) Copyright 2018 Christie Digital Systems USA, Inc. All rights reserved. ©... -
Page 18: Installing The Mounting Blocks
Warning! If not avoided, the following could result in death or serious injury. • External support for a display wall must be designed and implemented by a Christie qualified installer and must comply with local area regulations and safety standards. - Page 19 Repeat steps 2 to 4 for all other rows in the array. Velvet LED Display System Installation and Setup Guide–Apex A2L Series 020-102873-01 Rev. 1 (06-2018) Copyright 2018 Christie Digital Systems USA, Inc. All rights reserved. ©...
-
Page 20: Mounting The Tiles
Warning! If not avoided, the following could result in death or serious injury. • External support for a display wall must be designed and implemented by a Christie qualified installer and must comply with local area regulations and safety standards. -
Page 21: Installing The Carrier Assemblies
After the chassis is mounted, secure the carrier assembly to the chassis. 1. Install the carrier assembly rods onto the chassis. Velvet LED Display System Installation and Setup Guide–Apex A2L Series 020-102873-01 Rev. 1 (06-2018) Copyright 2018 Christie Digital Systems USA, Inc. All rights reserved. ©... -
Page 22: Connecting The Data Source Cables
E500 controller interface and ports (on page 12) E600 controller interface and ports (on page 13) Controller limitations (on page 11) Velvet LED Display System Installation and Setup Guide–Apex A2L Series 020-102873-01 Rev. 1 (06-2018) Copyright 2018 Christie Digital Systems USA, Inc. All rights reserved. ©... -
Page 23: Connecting The Power Cables
To ensure the modules are at the same level across all tiles, adjust the depth of each tile using the z adjustment screws on the backside of the tile. Velvet LED Display System Installation and Setup Guide–Apex A2L Series 020-102873-01 Rev. 1 (06-2018) Copyright 2018 Christie Digital Systems USA, Inc. All rights reserved. ©... -
Page 24: Installing And Configuring The Remote Power Supply Rack Shelf
4. Repeat steps 1 to 3 for each rectifier in the Remote Power Supply Rack Shelf. Velvet LED Display System Installation and Setup Guide–Apex A2L Series 020-102873-01 Rev. 1 (06-2018) Copyright 2018 Christie Digital Systems USA, Inc. All rights reserved. ©... -
Page 25: Connecting The Led Tile Power Cables To The Remote Power Supply Rack Shelf
Remote Power Supply Rack Shelf module, you must purchase a power cord of an adequate length. Christie recommends one of the pre-terminated power cables offered as Christie accessories, or that you create a custom cable using the Christie Main Power Cable Spool (P/N 154-122106-XX), Connector Kit (P/N 154-125109-XX), and Molex Crimping Tool (P/N 154-124108-XX). -
Page 26: Changing The Ip Address Of The Remote Power Supply Rack Shelf
2. Select Controller > Temperature Units. 3. Select whether the display units are Celsius or Fahrenheit. Velvet LED Display System Installation and Setup Guide–Apex A2L Series 020-102873-01 Rev. 1 (06-2018) Copyright 2018 Christie Digital Systems USA, Inc. All rights reserved. ©... -
Page 27: Resetting The Breakers
Remote Power Supply Rack Shelf module, you must purchase a power cord of an adequate length. Christie recommends one of the pre-terminated power cables offered as Christie accessories, or that you create a custom cable using the Christie Main Power Cable Spool (P/N 154-122106-XX), Connector Kit (P/N 154-125109-XX), and Molex Crimping Tool (P/N 154-124108-XX). -
Page 28: Installing The Fe600 Fiber Optic Extender
5. Plug the fiber extender power cables into a wall socket. 6. Power on all the components in the tile configuration. Velvet LED Display System Installation and Setup Guide–Apex A2L Series 020-102873-01 Rev. 1 (06-2018) Copyright 2018 Christie Digital Systems USA, Inc. All rights reserved. ©... -
Page 29: Powering On The Array
2. Wait for 3-5 minutes after powering off the controller. 3. Turn off each rectifier in the Remote Power Supply Rack Shelf. Velvet LED Display System Installation and Setup Guide–Apex A2L Series 020-102873-01 Rev. 1 (06-2018) Copyright 2018 Christie Digital Systems USA, Inc. All rights reserved. ©... -
Page 30: Configuring The E500 Controller
1. On the Christie website, navigate to the E500 product page. 2. Switch to the Downloads tab and click Software Downloads. 3. Download and unzip the Christie LED Control Unit E500 Software zip file. 4. Double-click the Christie Controller Software Setup <version>.exe file, and follow the on-screen instructions and install the E500 controller software. -
Page 31: Adjusting The Initial Picture Coordinates
1. In the E500 controller software, click Screen Configuration. 2. Select Configure Screen and click Next. 3. Switch to the Screen Connection tab. Velvet LED Display System Installation and Setup Guide–Apex A2L Series 020-102873-01 Rev. 1 (06-2018) Copyright 2018 Christie Digital Systems USA, Inc. All rights reserved. ©... -
Page 32: Setting The Input Resolution
1. Download the firmware file to a computer that will be connected to the controller for the upgrade, or to a USB key. 2. Unzip the downloaded firmware file. Velvet LED Display System Installation and Setup Guide–Apex A2L Series 020-102873-01 Rev. 1 (06-2018) Copyright 2018 Christie Digital Systems USA, Inc. All rights reserved. ©... - Page 33 9. To verify the upgrade was successful, in the top left corner of the controller display verify the version number displayed is 1.0.5.9. Velvet LED Display System Installation and Setup Guide–Apex A2L Series 020-102873-01 Rev. 1 (06-2018) Copyright 2018 Christie Digital Systems USA, Inc. All rights reserved. ©...
-
Page 34: Configuring The E600 Controller
1. On the Christie website, navigate to the E600 product page. 2. Switch to the Downloads tab and click Software Downloads. 3. Download and unzip the Christie LED Control Unit E600 Software zip file. 4. Double-click the Christie Controller Software Setup <version>.exe file, and follow the on-screen instructions and install the E600 controller software. -
Page 35: Testing The Communication Between The Controller And Tiles
E identifies the end of the daisy chain. Velvet LED Display System Installation and Setup Guide–Apex A2L Series 020-102873-01 Rev. 1 (06-2018) Copyright 2018 Christie Digital Systems USA, Inc. All rights reserved. ©... -
Page 36: Setting The Input Resolution
3. Connect an HDMI or Ethernet cable between the computer running the controller software and the controller. Velvet LED Display System Installation and Setup Guide–Apex A2L Series 020-102873-01 Rev. 1 (06-2018) Copyright 2018 Christie Digital Systems USA, Inc. All rights reserved. ©... - Page 37 9. To verify the upgrade was successful, in the top left corner of the controller display verify the version number displayed is 1.0.5.9. Velvet LED Display System Installation and Setup Guide–Apex A2L Series 020-102873-01 Rev. 1 (06-2018) Copyright 2018 Christie Digital Systems USA, Inc. All rights reserved. ©...
-
Page 38: Maintaining The Led Panels
Do not use the following products when cleaning the panels: • Compressed air cans • Liquids • Abrasive cloths Velvet LED Display System Installation and Setup Guide–Apex A2L Series 020-102873-01 Rev. 1 (06-2018) Copyright 2018 Christie Digital Systems USA, Inc. All rights reserved. ©... -
Page 39: Regulatory
IEC 61000-3-3/EN61000-3-3 • IEC/EN61000 • IEC 61000-4-2/EN61000-4-2 • IEC 61000-4-3/EN61000-4-3 • IEC 61000-4-4/EN61000-4-4 • IEC 61000-4-5/EN61000-4-5 Velvet LED Display System Installation and Setup Guide–Apex A2L Series 020-102873-01 Rev. 1 (06-2018) Copyright 2018 Christie Digital Systems USA, Inc. All rights reserved. ©... -
Page 40: Environmental
EU Directive (2012/19/EU) on waste and electrical and electronic equipment (WEEE) and the applicable official amendment(s). Velvet LED Display System Installation and Setup Guide–Apex A2L Series 020-102873-01 Rev. 1 (06-2018) Copyright 2018 Christie Digital Systems USA, Inc. All rights reserved. ©... - Page 41 Corporate offi ces Worldwide offi ces Christie Digital Systems USA, Inc. Australia Germany Republic of South Africa United Kingdom Cypress ph: +61 (0) 7 3624 4888 ph: +49 2161 664540 ph: +27 (0)11 510 0094 ph: +44 (0) 118 977 8000...
Need help?
Do you have a question about the Velvet Apex A2L Series and is the answer not in the manual?
Questions and answers