Christie MicroTiles LED Installation And Setup Manual
Hide thumbs
Also See for MicroTiles LED:
- Installation and setup manual (43 pages) ,
- User manual (38 pages) ,
- Technical reference (24 pages)
Table of Contents
Advertisement
Advertisement
Table of Contents

Related Manuals for Christie MicroTiles LED


Summary of Contents for Christie MicroTiles LED
- Page 1 Installation and Setup Guide 020-102825-01 MicroTiles LED...
- Page 2 The warranty does not apply to any product where the serial number has been removed or obliterated. The warranty also does not apply to any product sold by a reseller to an end user outside of the country where the reseller is located unless (i) Christie has an office in the country where the end user is located or (ii) the required international warranty fee has been paid.
-
Page 3: Table Of Contents
Typical MicroTiles LED solution........ - Page 4 Verifying the hardware installation........27 Accessing the MicroTiles LED web user interface......27 Installing the LED tiles.
-
Page 5: Product Overview
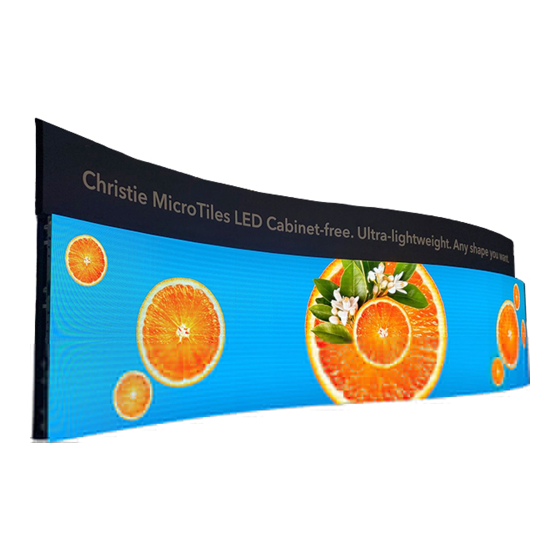
Product overview Christie MicroTiles LED tiles are modular, high-quality image display units that can be configured to create small display configurations as well as larger more complex display canvases of virtually any size and shape. Each tile captures a portion of the image and applies scaling, as required, which results in a single picture. -
Page 6: Ac Power Precautions
Warning! If not avoided, the following could result in death or serious injury. • Only Christie qualified technicians are permitted to open product enclosures. • This product must be installed within a restricted access location not accessible by the general public. -
Page 7: Product Labels
Learn about the labels that may be used on the product. Labels on your product may be yellow or black and white. General hazards Hazard warnings also apply to accessories once they are installed in a Christie product that is connected to power. Fire and Shock Hazard To prevent fire or shock hazards, do not expose this product to rain or moisture. -
Page 8: Typical Microtiles Led Solution
Product overview Typical MicroTiles LED solution A typical MicroTiles LED installation contains a variety of components. LED tiles Octrollers—Each Octroller can control up to eight LED tiles. LED wall controller Remote Power Rack Shelf Control computer for accessing the web user interface (WebUI) -
Page 9: Cable And Component Layout And Design
The video source connections between the components are represented by the blue line. The power connections between the components are represented by the red line. MicroTiles LED Installation and Setup Guide 020-102825-01 Rev. 1 (11-2019) Copyright 2019 Christie Digital Systems USA, Inc. All rights reserved. ©... -
Page 10: Wall Controller Interface And Ports
Powers on and off the unit. Sync out (SMA connector) Reserved for future use. Sync in (SMA connector) Reserved for future use. MicroTiles LED Installation and Setup Guide 020-102825-01 Rev. 1 (11-2019) Copyright 2019 Christie Digital Systems USA, Inc. All rights reserved. ©... - Page 11 3G SDI Accepts an SDI cable connection. Array link Use this port to connect to Octrollers or secondary wall controllers. MicroTiles LED Installation and Setup Guide 020-102825-01 Rev. 1 (11-2019) Copyright 2019 Christie Digital Systems USA, Inc. All rights reserved. ©...
-
Page 12: Octroller Ports
PWR OK—Connects to the local AC power supply when used in a redundant configuration. Product documentation For installation, setup, and user information, see the product documentation available on the Christie website. Read all instructions before using or servicing this product. -
Page 13: Related Documentation
• Europe, Middle East, and Africa: +44 (0) 1189 778111 or Support.EMEA@christiedigital.com • Asia Pacific: +65 6877-8737 or Support.APAC@christiedigital.com MicroTiles LED Installation and Setup Guide 020-102825-01 Rev. 1 (11-2019) Copyright 2019 Christie Digital Systems USA, Inc. All rights reserved. ©... -
Page 14: Installation And Setup
External support for a display wall must be designed and implemented by a Christie qualified installer and must comply with local area regulations and safety standards. • The area behind the MicroTiles LED tiles is a restricted access location not accessible by the general public. •... -
Page 15: Installing The Mounting Sheets
Affix the mounting template in place on the wall with staples or low-adhesive two-sided tape. Christie recommends putting the staples or adhesive tape close to the anchor locations on the mounting template. This helps to keep the mounting template from lifting while drilling pilot holes. -
Page 16: Installing The Wall Anchors
Notice. If not avoided, the following could result in property damage. • Wear protective eyewear while drilling holes. 1. Prepare the mounting surface. • Smooth contiguous structural walls: MicroTiles LED Installation and Setup Guide 020-102825-01 Rev. 1 (11-2019) Copyright 2019 Christie Digital Systems USA, Inc. All rights reserved. ©... - Page 17 The anchor shaft must be rotated until the hole in the shaft (E) is aligned with the appropriate slot in the anchor body. MicroTiles LED Installation and Setup Guide 020-102825-01 Rev. 1 (11-2019) Copyright 2019 Christie Digital Systems USA, Inc. All rights reserved. ©...
-
Page 18: Installing The Metal Mounting Sheets
(A) and the LED module tether holes are on the right side of the chassis cavity (B). 4. With the assistance of another person, lift and attach the sheet onto the magnetic anchors. MicroTiles LED Installation and Setup Guide 020-102825-01 Rev. 1 (11-2019) Copyright 2019 Christie Digital Systems USA, Inc. All rights reserved. ©... -
Page 19: Adjusting The Wall To Be Flat
3. Locate the area of the wall that requires the most adjustment. 4. Place the magnetic block of the depth adjustment tool onto the sheet. MicroTiles LED Installation and Setup Guide 020-102825-01 Rev. 1 (11-2019) Copyright 2019 Christie Digital Systems USA, Inc. All rights reserved. ©... -
Page 20: Adjusting And Leveling The Mounting Sheets
1. From the rear of the installed sheet, attach the sheet couplers at all sheet alignment feature locations on the edges where adjacent sheets are being installed with two M5 button head screws. MicroTiles LED Installation and Setup Guide 020-102825-01 Rev. 1 (11-2019) Copyright 2019 Christie Digital Systems USA, Inc. All rights reserved. ©... -
Page 21: Installing And Configuring The Remote Power Rack Shelf
However, each Octroller must be protected with a 20 to 30 A maximum circuit breaker with a medium trip delay. Alternate power systems must be reviewed and approved by Christie and by the local electrical authority at the installation site. -
Page 22: Mounting The Remote Power Rack Shelf
Remote Power Rack Shelf module, purchase a main power cord of an adequate length. Christie recommends one of the pre-terminated power cables offered as Christie accessories. Alternatively, create a custom cable using the Christie Main Power Cable Spool (P/N 154-122106-XX), Connector Kit (P/N 154-125109-XX), and Molex Crimping Tool (P/N 154-124108-XX). -
Page 23: Logging In To The Remote Power Rack Shelf Web Interface
The date and time is a dynamic field and as changes are made to the values on the screen, the internal values are also changed. An event is added to the event log detailing the changes made. MicroTiles LED Installation and Setup Guide 020-102825-01 Rev. 1 (11-2019) Copyright 2019 Christie Digital Systems USA, Inc. All rights reserved. ©... -
Page 24: Setting The Temperature Units
Shelf, the breakers may interrupt the current flow. Reset the breakers to resume operation. If the breakers disconnect the current, the ON button is released for the affected Output. MicroTiles LED Installation and Setup Guide 020-102825-01 Rev. 1 (11-2019) Copyright 2019 Christie Digital Systems USA, Inc. All rights reserved. ©... -
Page 25: Installing The Led Wall Controller
3. Wait for 3 to 5 minutes after powering on the rectifiers. 4. Turn on the LED wall controller. MicroTiles LED Installation and Setup Guide 020-102825-01 Rev. 1 (11-2019) Copyright 2019 Christie Digital Systems USA, Inc. All rights reserved. ©... -
Page 26: Mounting The Octroller
Various lengths of CAT 6 unshielded, UTP, 24 AWG pre-terminated cables are available from Christie. Alternatively, a custom length of Ethernet cable can be created using the Christie Cat 6 cable spool (P/N: 161-120104-XX), rJ45 Connect kit (P/N: 161-122106-XX) and Ethernet crimping tool (P/N: 11-121105-XX). -
Page 27: Verifying The Hardware Installation
Verify that the canvas appears in the same shape as the installed array. Accessing the MicroTiles LED web user interface Learn how to access the web user interface. The MicroTiles LED web user interface is supported on the following browsers: • Google Chrome •... -
Page 28: Displaying A Test Pattern
As each LED module is installed on the chassis, check for damaged or missing LEDs. If any LEDs are non-functioning, replace the LED module. Related information Accessing the MicroTiles LED web user interface (on page 27) Securing the LED modules (on page 28) Removing LED modules (on page 28) - Page 29 Installation and setup 2. Tighten the tether screw. 3. For each LED module in the tile repeat steps 1 and 2. MicroTiles LED Installation and Setup Guide 020-102825-01 Rev. 1 (11-2019) Copyright 2019 Christie Digital Systems USA, Inc. All rights reserved. ©...
-
Page 30: Completing The Initial Configuration
For additional configuration settings, refer to MicroTiles LED User Guide (P/N: 020-102835-XX). Automatically mapping tiles in the array MicroTiles LED tiles are equipped with neighbor detection, which automatically determines the location of each tile within the canvas and the overall configuration of the canvas. -
Page 31: Adjusting The Brightness Levels Of The Seams Between Tiles
4. To change the seam brightness, move the Seam Brightness slider or change the value in the brightness percentage field. 5. To reset all seams to the default values, click Reset. MicroTiles LED Installation and Setup Guide 020-102825-01 Rev. 1 (11-2019) Copyright 2019 Christie Digital Systems USA, Inc. All rights reserved. ©... -
Page 32: Regulatory
• IEC 61000-3-2/EN61000-3-2: Limits for Harmonic Current Emissions • IEC 61000-3-3/EN61000-3-3: Limitations of Voltage Changes, Voltage Fluctuations, and Flicker MicroTiles LED Installation and Setup Guide 020-102825-01 Rev. 1 (11-2019) Copyright 2019 Christie Digital Systems USA, Inc. All rights reserved. ©... -
Page 33: Immunity
Regulation (EC) No. 1907/2006 on the registration, evaluation, authorization and restriction of chemicals (REACH) and the applicable official amendment(s). MicroTiles LED Installation and Setup Guide 020-102825-01 Rev. 1 (11-2019) Copyright 2019 Christie Digital Systems USA, Inc. All rights reserved. ©... - Page 34 Corporate offi ces Worldwide offi ces Christie Digital Systems USA, Inc. Africa United Kingdom Columbia Korea (Seoul) ph: 714 236 8610 ph: +27 (0)11 510 0094 ph: +44 (0) 118 977 8000 ph: +57 (318) 447 3179 ph: +82 2 702 1601 Christie Digital Systems Canada Inc.
Need help?
Do you have a question about the MicroTiles LED and is the answer not in the manual?
Questions and answers