
Subscribe to Our Youtube Channel
Related Manuals for Christie FHD554-XZ


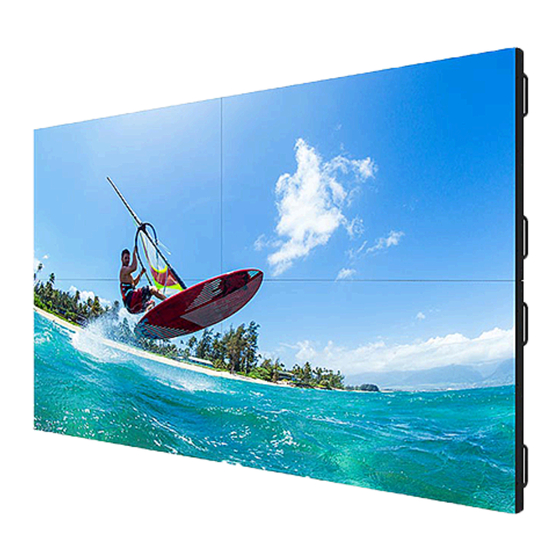
Summary of Contents for Christie FHD554-XZ
- Page 1 User Guide 020-001725-03 Extreme Series LCD Panels FHD554-XZ, FHD554-XZ-R, FHD554-XZ-H, FHD554-XZ-HR...
- Page 2 The warranty does not apply to any product where the serial number has been removed or obliterated. The warranty also does not apply to any product sold by a reseller to an end user outside of the country where the reseller is located unless (i) Christie has an office in the country where the end user is located or (ii) the required international warranty fee has been paid.
-
Page 3: Table Of Contents
Connecting signal to the display panel ................... 20 Connecting to an AC power source (for FHD554-XZ and FHD554-XZ-H) ........21 Installing and configuring the Remote Power Rack Shelf (for FHD554-XZ-R and FHD554-XZ-HR) .. 21 Required tools ......................... 21 Mounting the Remote Power Rack Shelf ................21 Inserting the power modules into the Remote Power Rack Shelf .......... - Page 4 Changing the image preset ....................38 Changing the contrast ......................38 Modifying the brightness ...................... 39 Sharpening the image ......................39 Extreme Series LCD Panels User Guide–FHD554-XZ, FHD554-XZ-R, FHD554-XZ-H, FHD554-XZ-HR 020-001725-03 Rev. 1 (07-2020) Copyright 2020 Christie Digital Systems USA, Inc. All rights reserved.
- Page 5 Recommended low-light image settings ................. 50 The display does not turn on ....................51 The remote control does not work ..................51 Extreme Series LCD Panels User Guide–FHD554-XZ, FHD554-XZ-R, FHD554-XZ-H, FHD554-XZ-HR 020-001725-03 Rev. 1 (07-2020) Copyright 2020 Christie Digital Systems USA, Inc. All rights reserved.
- Page 6 Overall dimensions ......................60 Regulatory ......................... 62 Safety ..........................62 Electro-magnetic compatibility ................... 62 Environmental ......................... 62 Extreme Series LCD Panels User Guide–FHD554-XZ, FHD554-XZ-R, FHD554-XZ-H, FHD554-XZ-HR 020-001725-03 Rev. 1 (07-2020) Copyright 2020 Christie Digital Systems USA, Inc. All rights reserved. ©...
-
Page 7: Unpacking The Panel
4. Remove the polybag before removing the display from the bottom tray carton. 5. Remove any additional packaging, such as protective stickers, from the display panel. Extreme Series LCD Panels User Guide–FHD554-XZ, FHD554-XZ-R, FHD554-XZ-H, FHD554-XZ-HR 020-001725-03 Rev. 1 (07-2020) Copyright 2020 Christie Digital Systems USA, Inc. -
Page 8: Inspecting The Display Panel
Conduct an inspection on the display panel and verify the panel functions as expected before unpacking. If any damage is identified, or the panel does not function as expected, contact Christie Technical Support. 1. Tear off the sticker for a small opening on the right bottom corner at the back of the display panel (A). -
Page 9: Handling And Mounting Guidelines For Extreme Narrow Bezel Series Panels
Learn the key features of the display panel. • FHD native resolution: 1920 x 1080 (16:9 native aspect ratio) • High brightness: FHD554-XZ and FHD554-XZ-R - up to 500 nits FHD554-XZ-H and FHD554-XZ-HR - up to 700 nits • 178-degree viewing angle •... -
Page 10: Parts List
• Trim Kit Short 554 ML25 For FHD554-XZ-R & FHD554-XZ-HR: • Remote Power Supply Unit Shelf Extreme Series LCD Panels User Guide–FHD554-XZ, FHD554-XZ-R, FHD554-XZ-H, FHD554-XZ-HR 020-001725-03 Rev. 1 (07-2020) Copyright 2020 Christie Digital Systems USA, Inc. All rights reserved. ©... -
Page 11: Product Documentation
• Trim Kit Short 554 ML25 Product documentation For installation, setup, and user information, see the product documentation available on the Christie website. Read all instructions before using or servicing this product. 1. Access the documentation from the Christie website: •... -
Page 12: Important Safeguards
Notice. If not avoided, the following could result in property damage. • Only clean the components with Christie approved products. Extreme Series LCD Panels User Guide–FHD554-XZ, FHD554-XZ-R, FHD554-XZ-H, FHD554-XZ-HR 020-001725-03 Rev. 1 (07-2020) Copyright 2020 Christie Digital Systems USA, Inc. All rights reserved. -
Page 13: Remote Power Rack Shelf Safety Warnings (For Fhd554-Xz-R & Fhd554-Xz-Hr)
Motors and fans may start without warning. • Use insulated hand tools while working on live power systems. Extreme Series LCD Panels User Guide–FHD554-XZ, FHD554-XZ-R, FHD554-XZ-H, FHD554-XZ-HR 020-001725-03 Rev. 1 (07-2020) Copyright 2020 Christie Digital Systems USA, Inc. All rights reserved. -
Page 14: Display At A Glance
Display at a glance Learn about the key display components. FHD554-XZ & FHD554-XZ-H FHD554-XZ-R & FHD554-XZ-HR Extreme Series LCD Panels User Guide–FHD554-XZ, FHD554-XZ-R, FHD554-XZ-H, FHD554-XZ-HR 020-001725-03 Rev. 1 (07-2020) Copyright 2020 Christie Digital Systems USA, Inc. All rights reserved. ©... -
Page 15: Input Panel
Power Switch—Turn the display panel on or off. (for FHD554-XZ & FHD554-XZ-H) Power Input—Connect the display panel to power here. FHD554-XZ & FHD554-XZ-H — 100 to 240 VAC; FHD554-XZ-R & FHD554-XZ-HR — 58 VDC Kensington Lock Slot—For use with a Kensington lock (sold separately) for securing the display panel. - Page 16 DP In 1, 2 —DisplayPort 1.2 and HDCP-compliant digital video input for connecting DisplayPort sources. HDMI 1, 2—Two HDCP-compliant digital video inputs for connecting HDMI sources. Extreme Series LCD Panels User Guide–FHD554-XZ, FHD554-XZ-R, FHD554-XZ-H, FHD554-XZ-HR 020-001725-03 Rev. 1 (07-2020) Copyright 2020 Christie Digital Systems USA, Inc.
-
Page 17: Remote Control Unit
• OPS—Selects the OPS source. Swap—Swaps the main and PIP source. P-Source—Selects the secondary sub-source. Navigation buttons Extreme Series LCD Panels User Guide–FHD554-XZ, FHD554-XZ-R, FHD554-XZ-H, FHD554-XZ-HR 020-001725-03 Rev. 1 (07-2020) Copyright 2020 Christie Digital Systems USA, Inc. All rights reserved. - Page 18 • SCALING—Selects each aspect ratio in sequence: Full Screen, Native, Letter Box and 4:3. • BRIGHT—Adjusts the brightness. • CONTRAST—Adjusts the contrast. • SOURCE—Selects each source in sequence. Extreme Series LCD Panels User Guide–FHD554-XZ, FHD554-XZ-R, FHD554-XZ-H, FHD554-XZ-HR 020-001725-03 Rev. 1 (07-2020) Copyright 2020 Christie Digital Systems USA, Inc. All rights reserved.
-
Page 19: Inserting Batteries In The Remote Control
Learn how to install and configure the display panel and the remote control. Christie recommends that the ambient temperature around a display panel or a video wall remain constant and below 40 degrees Celsius (104 degrees Fahrenheit). Ensure the display panel or video wall is kept away from heating and air conditioning vents. -
Page 20: Locking Or Unlocking The Remote Control
The wall must be capable of supporting three times the weight of the display panel or be reinforced. To ensure the mounting brackets clear any protrusions on the rear of the panel, Christie recommends using spacers with a minimum height of 6.35 mm (.25 in). -
Page 21: Connecting To An Ac Power Source (For Fhd554-Xz And Fhd554-Xz-H)
Christie recommends one of the pre-terminated power cables offered as Christie accessories, or that you create a custom cable using the Christie Main Power Cable Spool (P/N 154-122106-XX), Connector Kit (P/N 154-125109-XX), and Molex Crimping Tool (P/N 154-124108-XX). For more information on the Molex Crimping Tool, see the Molex documentation. -
Page 22: Inserting The Power Modules Into The Remote Power Rack Shelf
Connecting the LCD display panel power cables to the Remote Power Rack Shelf To power the FHD554-XZ-R and FHD554-XZ-HR panels, connect the cables between the LCD panels and the Remote Power Rack Shelf. 1. Connect the main power cable to the Remote Power Rack Shelf. -
Page 23: Changing The Voltage Of The Rectifiers
Changing the IP address of the Remote Power Rack Shelf In an environment where there are multiple Remote Power Rack Shelf devices, you must have a unique IP address for each device. Extreme Series LCD Panels User Guide–FHD554-XZ, FHD554-XZ-R, FHD554-XZ-H, FHD554-XZ-HR 020-001725-03 Rev. 1 (07-2020) Copyright 2020 Christie Digital Systems USA, Inc. -
Page 24: Changing The Time On The Remote Power Rack Shelf
2. Select Controller > Temperature Units. 3. Select whether the display units are Celsius or Fahrenheit. 4. Click Save. Extreme Series LCD Panels User Guide–FHD554-XZ, FHD554-XZ-R, FHD554-XZ-H, FHD554-XZ-HR 020-001725-03 Rev. 1 (07-2020) Copyright 2020 Christie Digital Systems USA, Inc. All rights reserved. -
Page 25: Resetting The Breakers
Creating an Ethernet connection Use a standard Ethernet cable with an RJ45 male connector. 1. Connect the Ethernet cable to the Ethernet port on the display panel. Extreme Series LCD Panels User Guide–FHD554-XZ, FHD554-XZ-R, FHD554-XZ-H, FHD554-XZ-HR 020-001725-03 Rev. 1 (07-2020) Copyright 2020 Christie Digital Systems USA, Inc. -
Page 26: Creating An Ir Extender Connection
Learn how to connect a control computer to a display panel using a DisplayPort source. 1. Connect the DisplayPort cable to the DisplayPort in port on the display panel. Extreme Series LCD Panels User Guide–FHD554-XZ, FHD554-XZ-R, FHD554-XZ-H, FHD554-XZ-HR 020-001725-03 Rev. 1 (07-2020) Copyright 2020 Christie Digital Systems USA, Inc. -
Page 27: Connecting An Hdmi Source
You can do this using an external video splitter, or by daisy-chaining up to 25 display panels together using the DP Out connector. If you are daisy-chaining the display panels together, consider the following: Extreme Series LCD Panels User Guide–FHD554-XZ, FHD554-XZ-R, FHD554-XZ-H, FHD554-XZ-HR 020-001725-03 Rev. 1 (07-2020) Copyright 2020 Christie Digital Systems USA, Inc. -
Page 28: Connecting An Rs232 Or An Ethernet Controller To A Video Wall In Landscape Orientation
1. Connect the controller to the top-left or bottom-left display panel. 2. Connect the remaining panels as illustrated. Extreme Series LCD Panels User Guide–FHD554-XZ, FHD554-XZ-R, FHD554-XZ-H, FHD554-XZ-HR 020-001725-03 Rev. 1 (07-2020) Copyright 2020 Christie Digital Systems USA, Inc. All rights reserved. -
Page 29: Connecting An Rs232 Or An Ethernet Controller To A Video Wall In Portrait Orientation
Always use screws to install OPS • Max power draw: 96W • Do not hot swap • Extreme Series LCD Panels User Guide–FHD554-XZ, FHD554-XZ-R, FHD554-XZ-H, FHD554-XZ-HR 020-001725-03 Rev. 1 (07-2020) Copyright 2020 Christie Digital Systems USA, Inc. All rights reserved. ©... - Page 30 Case 1. Without OPS module Case 2. With one OPS module installed Case 3. With one row OPS modules installed (only the bottom row) Extreme Series LCD Panels User Guide–FHD554-XZ, FHD554-XZ-R, FHD554-XZ-H, FHD554-XZ-HR 020-001725-03 Rev. 1 (07-2020) Copyright 2020 Christie Digital Systems USA, Inc. All rights reserved.
- Page 31 Case 4. With OPS modules installed in every odd row Case 5. All units with OPS module installed FHD554-XZ-R & FHD554-XZ-HR Case 1. Without OPS module Extreme Series LCD Panels User Guide–FHD554-XZ, FHD554-XZ-R, FHD554-XZ-H, FHD554-XZ-HR 020-001725-03 Rev. 1 (07-2020) Copyright 2020 Christie Digital Systems USA, Inc. All rights reserved.
- Page 32 Case 2. With one OPS module installed Case 3. With one row OPS modules installed (only the bottom row) Case 4. With OPS modules installed in every odd row Extreme Series LCD Panels User Guide–FHD554-XZ, FHD554-XZ-R, FHD554-XZ-H, FHD554-XZ-HR 020-001725-03 Rev. 1 (07-2020) Copyright 2020 Christie Digital Systems USA, Inc.
-
Page 33: Turning On The Display Panel
Image retention is not covered under warranty. To prolong the life of your display panel, follow these recommendations. • Operate the display panel within its rated ambient environment. Christie recommends an operating temperature of 5 to 40 degrees Celsius (41 to 104 degrees Fahrenheit), with a maximum relative humidity of 75%. -
Page 34: Changing The Position Of The On-Screen Display
1. Press MENU on the remote control or keypad. 2. Select OSD Settings > OSD Rotation. 3. Use the arrows to change the orientation of the OSD menu to match that of the display. Extreme Series LCD Panels User Guide–FHD554-XZ, FHD554-XZ-R, FHD554-XZ-H, FHD554-XZ-HR 020-001725-03 Rev. 1 (07-2020) Copyright 2020 Christie Digital Systems USA, Inc. -
Page 35: Changing The On-Screen Display Language
2. Select OSD Settings > Language. 3. Select a language, and then press Enter. The change takes effect immediately. Extreme Series LCD Panels User Guide–FHD554-XZ, FHD554-XZ-R, FHD554-XZ-H, FHD554-XZ-HR 020-001725-03 Rev. 1 (07-2020) Copyright 2020 Christie Digital Systems USA, Inc. All rights reserved. -
Page 36: Adjusting The Edges Of The Image Of The Display
1. Press MENU on the remote control or keypad. 2. Select Setup > Real Time Clock > Current Time. 3. Use the arrows to change date and time. Extreme Series LCD Panels User Guide–FHD554-XZ, FHD554-XZ-R, FHD554-XZ-H, FHD554-XZ-HR 020-001725-03 Rev. 1 (07-2020) Copyright 2020 Christie Digital Systems USA, Inc. -
Page 37: Scheduling When The Display Is On
1. Press MENU on the remote control or keypad. 2. Select Setup > DPTX > MST. 3. Use the arrows to enable MST. Extreme Series LCD Panels User Guide–FHD554-XZ, FHD554-XZ-R, FHD554-XZ-H, FHD554-XZ-HR 020-001725-03 Rev. 1 (07-2020) Copyright 2020 Christie Digital Systems USA, Inc. All rights reserved. -
Page 38: Changing The Aspect Ratio
A change to one may require a subtle change to the other in order to achieve the optimum setting. 1. Display a PLUGE (Picture Line-Up Generation Equipment) test pattern. Extreme Series LCD Panels User Guide–FHD554-XZ, FHD554-XZ-R, FHD554-XZ-H, FHD554-XZ-HR 020-001725-03 Rev. 1 (07-2020) Copyright 2020 Christie Digital Systems USA, Inc. -
Page 39: Modifying The Brightness
The image contains only black, gray and white (no color). Sharpening the image Learn how to sharpen the image on a display panel. Extreme Series LCD Panels User Guide–FHD554-XZ, FHD554-XZ-R, FHD554-XZ-H, FHD554-XZ-HR 020-001725-03 Rev. 1 (07-2020) Copyright 2020 Christie Digital Systems USA, Inc. All rights reserved. -
Page 40: Adjusting The Hue Of The Image
Changing the saturation Saturation and hue are interactive. A change to one may require a subtle change to the other in order to achieve the optimum setting. Extreme Series LCD Panels User Guide–FHD554-XZ, FHD554-XZ-R, FHD554-XZ-H, FHD554-XZ-HR 020-001725-03 Rev. 1 (07-2020) Copyright 2020 Christie Digital Systems USA, Inc. -
Page 41: Changing The Backlight
When off is selected, Calibration and Color Temperature settings are not available. Calibrating the image Learn how to calibrate the image on a display panel. Extreme Series LCD Panels User Guide–FHD554-XZ, FHD554-XZ-R, FHD554-XZ-H, FHD554-XZ-HR 020-001725-03 Rev. 1 (07-2020) Copyright 2020 Christie Digital Systems USA, Inc. All rights reserved. -
Page 42: Setting The Color Temperature
1. Press MENU on the remote control or keypad. 2. Select Picture > RGB Range. 3. Select an appropriate RGB range setting or select auto to let the monitor to detect it automatically. Extreme Series LCD Panels User Guide–FHD554-XZ, FHD554-XZ-R, FHD554-XZ-H, FHD554-XZ-HR 020-001725-03 Rev. 1 (07-2020) Copyright 2020 Christie Digital Systems USA, Inc. -
Page 43: Configuring The Display Settings
5. Select Input > Multi-Source Views > PIP. 6. Use the arrows to enable picture-in-picture (PIP) mode. To swap the main and PIP images, press SWAP on the remote control. Extreme Series LCD Panels User Guide–FHD554-XZ, FHD554-XZ-R, FHD554-XZ-H, FHD554-XZ-HR 020-001725-03 Rev. 1 (07-2020) Copyright 2020 Christie Digital Systems USA, Inc. -
Page 44: Configuring Advanced Settings
1. Press MENU on the remote control or keypad. 2. Select Adv. Setup > IRFM. 3. Use the arrows to enable this feature. Extreme Series LCD Panels User Guide–FHD554-XZ, FHD554-XZ-R, FHD554-XZ-H, FHD554-XZ-HR 020-001725-03 Rev. 1 (07-2020) Copyright 2020 Christie Digital Systems USA, Inc. All rights reserved. -
Page 45: Turning Off Local Dimming
Configuring EDID settings Select EDID (Extended Display Identification Data) of the HDMI and DisplayPort inputs 1. Press MENU on the remote control or keypad. Extreme Series LCD Panels User Guide–FHD554-XZ, FHD554-XZ-R, FHD554-XZ-H, FHD554-XZ-HR 020-001725-03 Rev. 1 (07-2020) Copyright 2020 Christie Digital Systems USA, Inc. All rights reserved. -
Page 46: Updating Multi-Display Control Settings
Division X—Specifies the horizontal position (column) of a display panel in a video wall. • Division Y—Specifies the vertical position (row) of a display panel in a video wall. Extreme Series LCD Panels User Guide–FHD554-XZ, FHD554-XZ-R, FHD554-XZ-H, FHD554-XZ-HR 020-001725-03 Rev. 1 (07-2020) Copyright 2020 Christie Digital Systems USA, Inc. -
Page 47: Obtaining The Temperature And Fan Status
3. Use the arrows to update any of the following. • Dynamic IP—Select Enable to enable DHCP for dynamic IP address assignment. Extreme Series LCD Panels User Guide–FHD554-XZ, FHD554-XZ-R, FHD554-XZ-H, FHD554-XZ-HR 020-001725-03 Rev. 1 (07-2020) Copyright 2020 Christie Digital Systems USA, Inc. All rights reserved. -
Page 48: Enabling Email Alerts
Learn how to load default network settings., 1. Press MENU on the remote control or keypad. 2. Select Communication > Load Default > Yes. Extreme Series LCD Panels User Guide–FHD554-XZ, FHD554-XZ-R, FHD554-XZ-H, FHD554-XZ-HR 020-001725-03 Rev. 1 (07-2020) Copyright 2020 Christie Digital Systems USA, Inc. All rights reserved. -
Page 49: Configure Snmp Settings
The number of hours the display has been in operation. • The current firmware version. • The serial number of the display. Extreme Series LCD Panels User Guide–FHD554-XZ, FHD554-XZ-R, FHD554-XZ-H, FHD554-XZ-HR 020-001725-03 Rev. 1 (07-2020) Copyright 2020 Christie Digital Systems USA, Inc. All rights reserved. ©... -
Page 50: Recommended Low-Light Image Settings
To attain the highest quality image, Christie recommends the following image settings for low-light environments. -
Page 51: The Display Does Not Turn On
Verify that the IR extender cable is correctly connected. The image geometry is incorrect The image is displayed with an incorrect aspect ratio. Extreme Series LCD Panels User Guide–FHD554-XZ, FHD554-XZ-R, FHD554-XZ-H, FHD554-XZ-HR 020-001725-03 Rev. 1 (07-2020) Copyright 2020 Christie Digital Systems USA, Inc. All rights reserved. -
Page 52: The Content Is Jittery Or Unstable
HDMI cable from source to display is either defective or too long. Resolution • Select a compatible resolution and vertical frequency. Extreme Series LCD Panels User Guide–FHD554-XZ, FHD554-XZ-R, FHD554-XZ-H, FHD554-XZ-HR 020-001725-03 Rev. 1 (07-2020) Copyright 2020 Christie Digital Systems USA, Inc. All rights reserved. -
Page 53: Computer Images Do Not Display Correctly
Clock and Phase settings need adjustment. Resolution • Select a compatible resolution and vertical frequency. • Adjust Clock and Phase settings. Extreme Series LCD Panels User Guide–FHD554-XZ, FHD554-XZ-R, FHD554-XZ-H, FHD554-XZ-HR 020-001725-03 Rev. 1 (07-2020) Copyright 2020 Christie Digital Systems USA, Inc. All rights reserved. ©... -
Page 54: Physical Specifications
Specifications Learn about the product specifications. Due to continuing research, specifications are subject to change without notice. Physical specifications Learn the physical specifications for the FHD554-XZ, FHD554-XZ-R, FHD554-XZ-H and the FHD554-XZ-HR panels. Model FHD554-XZ FHD554-XZ-R FHD554-XZ-H FHD554-XZ-HR Descriptions Dimensions (W x H x D) 1210.5 mm x 681.2 mm x 95.3 mm (without handle) -
Page 55: Power Requirements
AC 100-240V (50-60Hz), 4.2A, max 58 VDC max Power Consumption 205W (normal), 280W (maximum) 205W (normal), 265W (maximum) Power ratings for the Remote Power Rack Shelf (for FHD554-XZ-R & FHD554-XZ-HR) Descriptions Details Input voltage 120-230 VAC, 50/60 Hz 12A at 120VAC - 9.5A @ 230 VAC per rectifier (maximum four rectifiers... -
Page 56: Environmental Specifications
0°C ~ 40°C, 90% RH Storage Temperature -20°C ~ 60°C, 90% RH Heat output FHD554-XZ-H, FHD554-XZ-H — 699 BTU/hr (typical), 955 BTU/hr (maximum, non-OPS) FHD554-XZ-R, FHD554-XZ-HR — 699 BTU/hr (typical), 904 BTU/hr (maximum, non-OPS) Remote Power Rack Shelf (for FHD554-XZ-R & FHD554-XZ-HR) -
Page 57: Supported Timings
63.981 108.000 VESA DMT 1280x1024 75.025 79.976 135.000 VESA DMT 1280x1024 85.024 91.146 157.500 VESA DMT Extreme Series LCD Panels User Guide–FHD554-XZ, FHD554-XZ-R, FHD554-XZ-H, FHD554-XZ-HR 020-001725-03 Rev. 1 (07-2020) Copyright 2020 Christie Digital Systems USA, Inc. All rights reserved. ©... - Page 58 832x624 75.087 49.107 55.000 1024x768 59.278 48.193 64.000 1024x768 74.927 60.241 80.000 1152x870 75.062 68.681 100.000 Extreme Series LCD Panels User Guide–FHD554-XZ, FHD554-XZ-R, FHD554-XZ-H, FHD554-XZ-HR 020-001725-03 Rev. 1 (07-2020) Copyright 2020 Christie Digital Systems USA, Inc. All rights reserved. ©...
- Page 59 297.000 CEA-861-F Format 98 4096x2160 56.250 297.000 CEA-861-F Format 99 4096x2160 67.500 297.000 CEA-861-F Format 100 Extreme Series LCD Panels User Guide–FHD554-XZ, FHD554-XZ-R, FHD554-XZ-H, FHD554-XZ-HR 020-001725-03 Rev. 1 (07-2020) Copyright 2020 Christie Digital Systems USA, Inc. All rights reserved. ©...
-
Page 60: Overall Dimensions
Specifications Overall dimensions All dimensions are in millimeters. FHD554-XZ & FHD554-XZ-H Extreme Series LCD Panels User Guide–FHD554-XZ, FHD554-XZ-R, FHD554-XZ-H, FHD554-XZ-HR 020-001725-03 Rev. 1 (07-2020) Copyright 2020 Christie Digital Systems USA, Inc. All rights reserved. ©... - Page 61 Specifications FHD554-XZ-R & FHD554-XZ-HR Extreme Series LCD Panels User Guide–FHD554-XZ, FHD554-XZ-R, FHD554-XZ-H, FHD554-XZ-HR 020-001725-03 Rev. 1 (07-2020) Copyright 2020 Christie Digital Systems USA, Inc. All rights reserved. ©...
-
Page 62: Regulatory
(01/2016) on the control of pollution caused by electronic information products, hazardous substances concentration limits (GB/T 26572 - 2011), and the applicable product marking requirement (SJ/T 11364 - 2014). Extreme Series LCD Panels User Guide–FHD554-XZ, FHD554-XZ-R, FHD554-XZ-H, FHD554-XZ-HR 020-001725-03 Rev. 1 (07-2020) Copyright 2020 Christie Digital Systems USA, Inc.
Need help?
Do you have a question about the FHD554-XZ and is the answer not in the manual?
Questions and answers