Table of Contents
Advertisement
Quick Links
Advertisement
Table of Contents

Subscribe to Our Youtube Channel
Related Manuals for Christie FHD552-X


Summary of Contents for Christie FHD552-X
- Page 1 FHD552-X LCD Panel U s e r M a n u a l 020-000741-01...
- Page 3 FHD552-X LCD Panel U s e r M a n u a l 020-000741-01...
- Page 4 The warranty does not apply to any product where the serial number has been removed or obliterated. The warranty also does not apply to any product sold by a reseller to an end user outside of the country where the reseller is located unless (i) Christie has an office in the country where the end user is located or (ii) the required international warranty fee has been paid.
- Page 5 CAN ICES-3 (A) / NMB-3 (A) 이 기기는 업무용 (A 급 ) 으로 전자파적합등록을 한 기기이오니 판매자 또는 사용자는 이점을 주의하시기 바라며 , 가정 외의 지역에서 사용하는 것을 목적으로 합니다 . Environmental The product is designed and manufactured with high‐quality materials and components that can be recycled and reused. This symbol means that electrical and electronic equipment, at their end‐of‐life, should be disposed of separately from regular waste. Please dispose of the product appropriately and according to local regulations. In the European Union, there are separate collection systems for used electrical and electronic products. Please help us to conserve the environment we live in!
- Page 7 Addendum Translated copies of this document are provided on the CD in the back of this document. The CD may also contain additional product documentation. Read all instructions before using or servicing this product. 本 文档 的翻译副本在本文档背面的 C D 上提 供。 该 CD 中还 可能 包含 其他 产品 文 档...
-
Page 8: Table Of Contents
Setting Up a Video Wall ......... 28 FHD552-X LCD Panel User Manual... - Page 9 Overall Dimensions ..........68 FHD552-X LCD Panel User Manual...
-
Page 10: Introduction
Introduction About This Manual This User Manual describes how to install, set up and operate the FHD552-X LCD Panel. Target Audience The manufacturer has prepared this manual to help end users get the most out of the display. The manufacturer has made every effort to ensure that this manual is accurate as of the date it was printed. -
Page 11: Using This Manual
DANGER appears when a given action can cause severe injury or death. Using This Manual Use the following table to locate the specific information you need in this manual. If you need..Turn to page: General information about the FHD552-X LCD Panel Installation instructions First-time configuration instructions Advanced configuration instructions... -
Page 12: Description, Features And Benefits
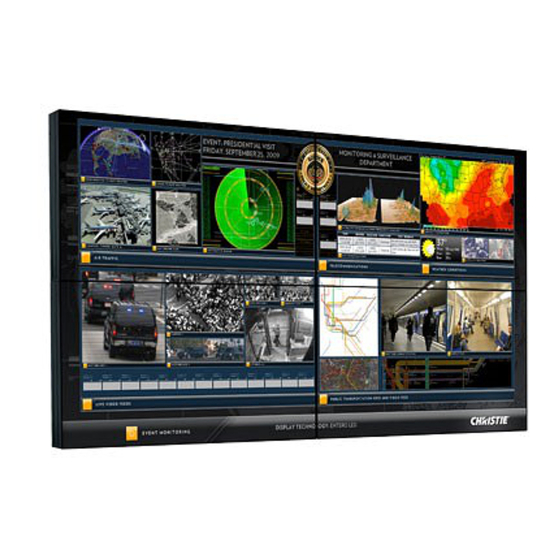
Introduction Description, Features and Benefits The FHD552-X LCD Panel is a cutting-edge direct-view LCD that, when tiled with multiple units, can create enormous images in multiple configurations. The display combines a simple and slim design with unparalleled image quality with configurable I/O to provide a perfect building block for large- format video walls, which are idea in digital signage and control-room applications. -
Page 13: Package Handling
LCD panel. Set the box in an upright position and pull out the white carton locks. Lift up the top cover carton. Remove the ESD bag before removing the display from the bottom tray carton. FHD552-X LCD Panel User Manual 020-000741-01 Rev. 1 (07-2014) -
Page 14: Handling And Care
Use a cloth dampened with water or methyl alcohol to clean the screen surface. It is recommended you keep the protective plastic sheet shipped with the panel to replace it each time the panels are packed and shipped. FHD552-X LCD Panel User Manual 020-000741-01 Rev. 1 (07-2014) -
Page 15: Controls And Functions
3. STATUS LED Lights orange to indicate that the display is in standby mode; blinks orange if no input signal is present; off if the main power switch is set to off. FHD552-X LCD Panel User Manual 020-000741-01 Rev. 1 (07-2014) - Page 16 MENU/EXIT MENU/EXIT Press this button to access the on-screen display (OSD) controls, or to exit the current menu and return to the previous one. FHD552-X LCD Panel User Manual 020-000741-01 Rev. 1 (07-2014)
-
Page 17: Input Panel
VESA-standard digital video output from the display to the next display in a video wall. 3. VGA Out (15-pin D-Sub) VESA-standard analog video output from the display to the next display in a video wall. FHD552-X LCD Panel User Manual 020-000741-01 Rev. 1 (07-2014) - Page 18 A female, 8-pin RJ-45 connector that connects to the previous display in a video wall. 18. RS485 Out A female, 8-pin RJ-45 connector that connects to the next display in a video wall. FHD552-X LCD Panel User Manual 020-000741-01 Rev. 1 (07-2014)
-
Page 19: Remote Control Unit
Controls and Functions Remote Control Unit The illustration below shows the display remote control, and the table that follows describes its functionality. FHD552-X LCD Panel User Manual 020-000741-01 Rev. 1 (07-2014) - Page 20 Turns off the sound BRIGHT Adjusts the brightness CONTRAST Adjusts the contrast AUTO Auto adjustment of VGA source SOURCE Selects each source, in sequence VOLUME- Decreases the sound volume VOLUME+ Increases the sound volume FHD552-X LCD Panel User Manual 020-000741-01 Rev. 1 (07-2014)
-
Page 21: Installation
You can lock the remote control buttons to prevent unauthorized persons from changing settings on the display. To do this, press ENTER, ENTER, EXIT, EXIT, ENTER and EXIT, in sequence. To unlock a locked remote control unit, use the same sequence of button presses. FHD552-X LCD Panel User Manual 020-000741-01 Rev. 1 (07-2014) -
Page 22: Quick Setup
Use a cart to move multiple panels at one time. • When the panel is sitting on a surface, do not tilt it more than 10° to avoid damaging the screen. FHD552-X LCD Panel User Manual 020-000741-01 Rev. 1 (07-2014) -
Page 23: Ambient Heat
(3) times the weight of the display, or be reinforced. We recommend that this be done by a custom installation specialist. Use only the approved wall-mount kit designed for your display. FHD552-X LCD Panel User Manual 020-000741-01 Rev. 1 (07-2014) -
Page 24: Connections To The Display
For more information about using this connection, refer to External Control on page 50. 2 Receive Data (to ctrl. system) 3 Transmit Data (from ctrl. system) 5 Ground to Automation/ Control System or PC FHD552-X LCD Panel User Manual 020-000741-01 Rev. 1 (07-2014) -
Page 25: Ir Extender Connection
Remote Control (3.5-mm, mini phono plug) Connecting Source Components to the Display Connect your video sources to the display as shown and described in the sections that follow. DisplayPort Source Connection FHD552-X LCD Panel User Manual 020-000741-01 Rev. 1 (07-2014) - Page 26 For Plug and Play to work correctly, you must turn on the display before you turn on the connected computer. HDMI or DVI-to-HDMI Cable BD/HD-DVD/ (sold separately) DVD/DTV STB DVI-D Cable Audio Cable (Sold Separately) Rear of the PC FHD552-X LCD Panel User Manual 020-000741-01 Rev. 1 (07-2014)
- Page 27 Connect a personal computer or other RGB source to the VGA input as shown below. D-Sub 15-pin Cable Audio Cable (Sold Separately) Rear of the PC Refer to Supported Timings on page 66 for a list of compatible input signals. FHD552-X LCD Panel User Manual 020-000741-01 Rev. 1 (07-2014)
-
Page 28: Setting Up A Video Wall
Maximum video wall size using a single analog source and VGA pass through connectors: • Maximum video wall size using multiple source signals from an external splitter or distribution amplifier: 5x5 FHD552-X LCD Panel User Manual 020-000741-01 Rev. 1 (07-2014) - Page 29 The external RS232 controller should be connected to the upper leftmost display, as shown in the illustration below. The remaining monitors should be connected via their RS485 connectors in the sequence shown below, using the RJ45 cables provided. FHD552-X LCD Panel User Manual 020-000741-01 Rev. 1 (07-2014)
-
Page 30: Operation
Follow the recommendations below to prolong the life of the display. Operate the Display Within Its Rated Ambient Environment • Operating temperature: 0°C to 40°C (32°F to 104°F) • Relative humidity: 85%, maximum. FHD552-X LCD Panel User Manual 020-000741-01 Rev. 1 (07-2014) - Page 31 41) to automatically turn off the display at preset times of the day. Set IRFM to ON To help prevent image retention, set IRFM (refer to Advanced Settings on page 42) to On. FHD552-X LCD Panel User Manual 020-000741-01 Rev. 1 (07-2014)
-
Page 32: Using The On-Screen Menus
User, Same Settings on All or Same Timer Mode Settings on Work Days (Monday ... Real Time Clock Friday) Power-On Timer Disable or Enable Power-OffTimer Note: Default settings appear in bold type. FHD552-X LCD Panel User Manual 020-000741-01 Rev. 1 (07-2014) -
Page 33: Image Settings
Use the controls in the Image Settings Menu to calibrate each display input to achieve optimum picture quality. Connect your test pattern source to the input that you are calibrating and proceed as follows. Perform the adjustments in the order listed here. FHD552-X LCD Panel User Manual 020-000741-01 Rev. 1 (07-2014) - Page 34 The white areas are a comfortable level of true white. • The image contains only black, gray and white (no color). Contrast On your external test pattern source, select a stepped, gray-bar pattern like the one shown below. FHD552-X LCD Panel User Manual 020-000741-01 Rev. 1 (07-2014)
- Page 35 “sweep” patterns at the top and bottom. Lower the sharpness setting to eliminate them. Saturation On your external test pattern source, select a color bar pattern like the one shown here. FHD552-X LCD Panel User Manual 020-000741-01 Rev. 1 (07-2014)
-
Page 36: Color Temperature
Color Temperature Select Color Temperature from the Image Settings menu to adjust the color temperature. Color temperature establishes the “color of gray” by adjusting the 75% white point to various color points. FHD552-X LCD Panel User Manual 020-000741-01 Rev. 1 (07-2014) - Page 37 30 IRE “window” pattern. If the gray areas contain traces of red, green or blue, decrease the Offset for that color. FHD552-X LCD Panel User Manual 020-000741-01 Rev. 1 (07-2014)
-
Page 38: Display Settings
When set to On, Auto Scan causes the Main or PIP input select functions (using the SOURCE button on the remote control unit or keypad, or the P-Source button on the remote control unit) to skip over unused inputs, saving time. FHD552-X LCD Panel User Manual 020-000741-01 Rev. 1 (07-2014) -
Page 39: Audio Settings
Select Bass from the Audio Settings menu and press to cut or boost the low audio frequencies. Treble Select Treble from the Audio Settings menu and press to cut or boost the high audio frequencies. FHD552-X LCD Panel User Manual 020-000741-01 Rev. 1 (07-2014) -
Page 40: Basic Settings
Select OSD Location from the Basic Settings menu and press to move the OSD menu to the desired location. OSD Zoom Select OSD Zoom from the Basic Settings menu and press to choose either a normal-sized or enlarged OSD menu. FHD552-X LCD Panel User Manual 020-000741-01 Rev. 1 (07-2014) -
Page 41: Osd Rotation
To set the same power-on and power-off times for every day of the week, set the Timer Mode to All Days. • To set the same power-on and power-off times for Monday through Friday, set the Timer Mode to Work Days. FHD552-X LCD Panel User Manual 020-000741-01 Rev. 1 (07-2014) -
Page 42: Advanced Settings
Steady flickering or several soft vertical stripes or bands across the entire image indicates poor pixel tracking. Proper pixel tracking helps ensure that the image quality is consistent across the screen, that aspect ratio is maintained and that pixel phase (see above) can be optimized. FHD552-X LCD Panel User Manual 020-000741-01 Rev. 1 (07-2014) - Page 43 Select Multi-Display Control from the Advanced Settings menu and press to configure your video wall. This sub-menu provides the following controls: • Monitor ID: This control lets you manually set the Monitor ID of each display in the video wall. FHD552-X LCD Panel User Manual 020-000741-01 Rev. 1 (07-2014)
-
Page 44: Factory Reset
Factory Reset To reset ALL display settings (including image settings) back to their factory defaults, choose Factory Reset from the Advanced Settings menu. This action is not reversable. Proceed with caution! FHD552-X LCD Panel User Manual 020-000741-01 Rev. 1 (07-2014) -
Page 45: System Status
Using the Picture-in-Picture (PIP) To use PIP, press the PIP button. The PIP window appears inside the main image window. 2. Press the ( Press PIP again to turn PIP off. FHD552-X LCD Panel User Manual 020-000741-01 Rev. 1 (07-2014) -
Page 46: Changing The Pip Position
Changing the PIP Size or Selecting Side-by-Side PIP Mode Select PIP Mode from the Display Settings menu and press to change the PIP window size or to enable “side-by-side” PIP. FHD552-X LCD Panel User Manual 020-000741-01 Rev. 1 (07-2014) -
Page 47: Swapping The Main And Pip Images
Operation Swapping the Main and PIP Images To swap the main and PIP images, press the SWAP button on the remote control. FHD552-X LCD Panel User Manual 020-000741-01 Rev. 1 (07-2014) -
Page 48: Maintenance And Troubleshooting
Troubleshooting Maintenance The FHD552-X LCD Panel does not require any routine maintenance. There are no user-serviceable or -replaceable parts. Unless you are a qualified, factory-trained technician, do not attempt to repair or replace any system component yourself. You will void the product warranty if you do... - Page 49 Phase (VGA sources) on page 42). Images from A Composite video • Both the Composite and S-Video • Disconnect the S-Video source. source do not display. inputs are connected to sources FHD552-X LCD Panel User Manual 020-000741-01 Rev. 1 (07-2014)
-
Page 50: External Control
[TYPE] is the command type: • 00 = return to host (response from the LCD panel) • 01 = read/action • 02 = write • [VALUE] is the parameter setting for the command. FHD552-X LCD Panel User Manual 020-000741-01 Rev. 1 (07-2014) -
Page 51: Command And Response Examples
S(0) …S(12) = the serial number in ASCII Request LCD panel 07 01 01 47 56 45 08 07 01 00 47 56 45 S(0)…S(5) 08 firmware version. S(0) …S(5) = the firmware version in ASCII FHD552-X LCD Panel User Manual 020-000741-01 Rev. 1 (07-2014) -
Page 52: Serial Command List
50 4F 57 Input Source Control (For advanced A/D boards – optional) On (soft power) Input 4D 49 4E Source Digital DVI S-Video Composite Video Component HDMI 1 HDMI 2 DisplayPort FHD552-X LCD Panel User Manual 020-000741-01 Rev. 1 (07-2014) - Page 53 Phase 50 48 41 value 0~100 Current Clock 43 4C 4F value Current Horizontal Position 48 4F 52 value Current Vertical Position 56 45 52 value Auto Adjust 41 44 4A FHD552-X LCD Panel User Manual 020-000741-01 Rev. 1 (07-2014)
- Page 54 53 57 41 Swap Scaling Native 41 53 50 Full Screen Pillar Box Letter Box Zoom In 5A 4F 4D Zoom Out Baud Rate 115200 42 52 41 Adjustmen 38400 19200 9600 FHD552-X LCD Panel User Manual 020-000741-01 Rev. 1 (07-2014)
- Page 55 COMP Key S-V Key AV Key SOURCE Key P-SOURCE Key PIP Key P-POSITION Key SWAP Key SCALING Key FREEZE Key MUTE Key BRIGHT Key CONTRAST Key AUTO Key VOLUME+ Key VOLUME- Key FHD552-X LCD Panel User Manual 020-000741-01 Rev. 1 (07-2014)
- Page 56 Wake Up from Sleep = Never Sleep Audio 0~100 Current Volume 56 4F 4C Value Mute Off 4D 55 54 Mute On Scheme User 53 43 4D Selection Sport Game Cinema Vivid FHD552-X LCD Panel User Manual 020-000741-01 Rev. 1 (07-2014)
-
Page 57: Using Video Wall Toolbox
6. Select your video wall size from the Select Displays Matrix: pull-down menu. 7. Press Auto Setup and the Video Wall Toolbox software automatically assigns the proper Monitor IDs to all displays in the video wall. FHD552-X LCD Panel User Manual 020-000741-01 Rev. 1 (07-2014) -
Page 58: Color Adjustment Screen
43). Color Adjustment Screen The Color Adjustment screen, shown below, provides the same image quality controls as the Image Settings OSD menus (refer to Image Settings on page 33). FHD552-X LCD Panel User Manual 020-000741-01 Rev. 1 (07-2014) - Page 59 External Control Remote Control Screen The Remote Control Screen, shown below, provides the same functionality as the hand-held remote control unit. FHD552-X LCD Panel User Manual 020-000741-01 Rev. 1 (07-2014)
- Page 60 To send a command in ASCII format: 1. Click the ASCII Command radio button. 2. Check Read or Write to select that command type. 3. Use the Monitor ID: pull-down menu to select the command destination. FHD552-X LCD Panel User Manual 020-000741-01 Rev. 1 (07-2014)
- Page 61 7. For Write commands, enter a parameter value to send with the command. 8. Enter 08 in the right-most text box. 9. Click Send. If the command executes successfully, the sent command and the response from the target display appear in the window. FHD552-X LCD Panel User Manual 020-000741-01 Rev. 1 (07-2014)
-
Page 62: Using Discrete Ir Codes
For example, here is the NEC control code for the POWER button on the display remote control unit: Binary 01000000 10101111 00011100 11100011 Function Cust. Code Cust. Code Command Command Byte 1 Byte 2 (Logical Inverse) FHD552-X LCD Panel User Manual 020-000741-01 Rev. 1 (07-2014) -
Page 63: Ir Control Code List
EXIT 40AF 14EB SCALING 40AF 43BC FREEZE 40AF 00FF MUTE 40AF 17E8 BRIGHTNESS 40AF 18E7 s CONTRAST 40AF 1EE1 AUTO 40AF 0FF0 SOURCE 40AF 1BE4 VOLUME - 40AF 1DE2 VOLUME + FHD552-X LCD Panel User Manual 020-000741-01 Rev. 1 (07-2014) -
Page 64: Specifications
Key Lock ELECTRICAL Power Supply AC 100V ~ 240V (50/60 Hz), 3.0 Amps, maximum Power Consumption (normal 170 W (typical), 213 W (max) operation) Power Consumption 0.5 W (standby mode) ENVIRONMENTAL FHD552-X LCD Panel User Manual 020-000741-01 Rev. 1 (07-2014) - Page 65 Requires Windows operating system DIMENSIONS Bezel Width 2.25 mm / 0.14 inch (Top/Left) 1.15 mm / 0.08 inch (Bottom/Right) Image to Image 3.8 mm (typical) Specifications are subject to change without notice. FHD552-X LCD Panel User Manual 020-000741-01 Rev. 1 (07-2014)
-
Page 66: Supported Timings
1152x864 67.5 1280x1024 63.981 60.02 79.976 75.025 91.146 85.024 157.5 O = Compliant timing. = Compliant timing for video wall. ● 480i means supported 480i@60Hz (YPbPr). 576i means supported 576i@50Hz (YPbPr). FHD552-X LCD Panel User Manual 020-000741-01 Rev. 1 (07-2014) - Page 67 56.25 148.5 ● 67.433 59.94 148.352 ● 67.5 148.5 ● O = Compliant timing. = Compliant timing for video wall. ● 480i means supported 480i@60Hz (YPbPr). 576i means supported 576i@50Hz (YPbPr). FHD552-X LCD Panel User Manual 020-000741-01 Rev. 1 (07-2014)
-
Page 68: Overall Dimensions
Specifications Overall Dimensions All dimensions are in millimeters. 52.45 52.45 684.2 684.2 FHD552-X LCD Panel User Manual 020-000741-01 Rev. 1 (07-2014) - Page 69 *000-104612-01* ASSY TECH DOCS FHD552-X Corporate offi ces Worldwide offi ces USA – Cypress Australia Eastern Europe and India Singapore ph: 714-236-8610 ph: +61 (0) 7 3624 4888 Russian Federation ph: +91 (080) 6708 9999 ph: +65 6877-8737 ph: +36 (0) 1 47 48 100 Canada –...
- Page 70 For the most current technical documentation, please visit www.christiedigital.com...
Need help?
Do you have a question about the FHD552-X and is the answer not in the manual?
Questions and answers