Table of Contents
Advertisement
Quick Links
Advertisement
Table of Contents

Subscribe to Our Youtube Channel
Related Manuals for Hisense Covidien HME2C26


Summary of Contents for Hisense Covidien HME2C26
- Page 1 User Manual LCD Monitor HME2C26...
- Page 2 HME2C26 Hisense LCD Monitor User Manual Read the User Guide thoroughly before using Hisense LCD monitor and keep it properly for future reference. RSAG2.025.5072(0100)SS-2 C Edition You can download the latest user guide from Hisense website: http://www.hisense.com/...
-
Page 3: Preface
Read the User Guide thoroughly before using the LCD monitor and keep it properly for future reference. Hisense shall not be liable for any accidents arising from violations of the safety precautions and use instructions of the User Guide. -
Page 4: Safety Information And Precautions
50-60 Hz, and an output voltage of 24 VDC. When the power adapter is damaged, contact Hisense or an authorized distributor. Do not use another type of power adapter. Connect this device to a grounded power supply to avoid electric shock. - Page 5 Safety Information and Precautions Final users must set a backup system when using this device, to avoid video loss. It takes about 30 minutes for the electronic components of the LCD monitor to achieve stable performance. It is recommended that you start the LCD monitor in advance to ensure display accuracy.
- Page 6 The information in this document is subject to change without notice. This document provides instructions on correctly installing and using the LCD monitor. Please keep it properly. If it is lost, contact Hisense. See the monitor certificate label for its production date.
- Page 7 Unauthorized changes or modifications may deprive users of the right to operate the device. Caution: Unless this device is provided by Hisense, it is best not to operate devices that can emit radio waves in the vicinity of this device, such as cellular phones, wireless transceivers, mobile radio transmitters, and radio remote control toys.
- Page 8 IEC 61000-3-3 Guidance and manufacturer's declaration - electromagnetic immunity Hisense LCD is suitable for use in specified electromagnetic environment and meets the following immunity test levels. Higher immunity levels may lead to loss or degradation of basic performance of Hisense LCD.
- Page 9 When they are used in close proximity to medical devices and/or systems, they may affect the basic safety and performance of medical devices and/or systems. The Hisense LCD has passed the immunity test in the following table and meets the relevant requirements of IEC 00112: 201.
- Page 10 Important Safety Precautions 1 kHz, sine wave Pulse LTE Band 13, 704-787 modulation 217 GSM 800/900, TETRA 800, Pulse 800-960 iDEN 820, modulation 18 CDMA 850, LTE band 5 1720 GSM 1800; CDMA 1900; Pulse 1845 GSM 1900; 1700-1990 modulation 217 DECT;...
-
Page 11: Table Of Contents
Contents Preface ..................................I Safety Information and Precautions ........................II Contents .................................. 1 Overview ................................. 2 Features ................................2 Technical Specifications ..........................3 Packing List ..............................4 Monitor Components and Connectors ......................... 5 Monitor Front View ............................5 Monitor Rear View ............................6 Monitor Connector View .......................... -
Page 12: Overview
Overview Thank you for choosing Hisense LCD. This product is a 26-inch LED-backlight color LCD. It is designed for trained medical personnel and can accurately display various images during operation. Features Real-time Picture Enhancement (RPE) It optimizes the definition and contrast of dynamic videos frame by frame to improve the reality and presence of the videos. -
Page 13: Technical Specifications
Overview Technical Specifications Model HME2C26 Name LCD monitor Size 26 inches (660.9 mm) Panel type Color LCD panel (IPS) Backlight Number (H) 1920 x (V) 1080 pixels Display area (H) 576 x (V) 324 (mm) Pixel pitch (H) 0.300 x (V) 0.300 (mm) monitor Contrast 1400:1 (typical) -
Page 14: Packing List
Note In case of missing or damaged components, please contact Hisense or our designated distributors in time. Please keep the original package. If you need to send this product back, please use the original packaging. Do not press heavy articles on this product during transportation. Do not place... -
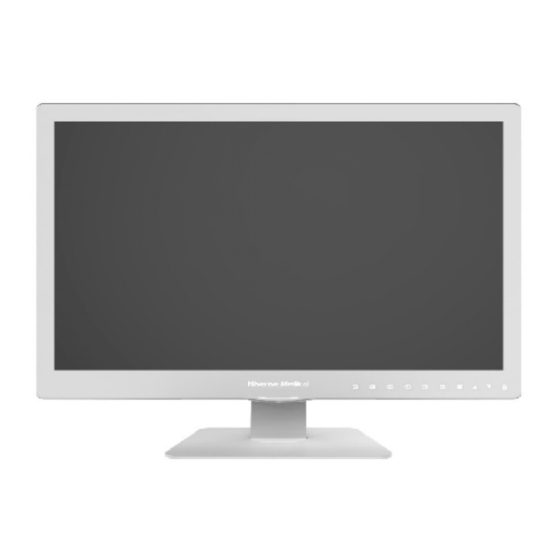
Page 15: Monitor Components And Connectors
Monitor Components and Connectors Monitor Front View Button indicator bar (displayed only after the screen is turned on and unlocked) Power switch Breath indicator Power indicator Button Description Power It is used to turn on or off the monitor. switch MODE It is used to select different display modes. -
Page 16: Monitor Rear View
Monitor Components and Connectors For instructions on using the buttons, see the "Operational Instructions and Function Adjustment" section. Power switch It is used to power on and off the LCD monitor. Power Indicator Description When the power is turned on, the green power indicator is on. When the power is turned off, the power indicator is off. -
Page 17: Monitor Connector View
Monitor Components and Connectors Monitor Connector View Equipote B-type Power ntial terminal terminal drive Interface Role Connector Description Remarks Connect to an equipotential Equipotential terminal plug power input Can only be used together with the power DIN4PIN interface adapter MDS-150AAS24 B Software upgrade interface B-type USB drive USB drive power supply Power supply interface for peripheral... -
Page 18: Definition Of Monitor Connector Pins
Monitor Components and Connectors Definition of Monitor Connector Pins VGA Port Schematic Diagram: VGA Port Definition Table: 15-pin VGA pin definition: Signal allocation Signal allocation Signal allocation Reserved Green Green SDA (used for DDC) Blue Blue Line synchronization Reserved Field synchronization SCL (used for DDC) ... - Page 19 Monitor Components and Connectors USB Interface Definition Table: USB interface pin definition USB port Pin Signal allocation Signal allocation +5 VDC 24 VDC Power Input Interface: 24 V interface pin definition Pin Signal allocation Pin Signal allocation +24 V +24 V B-type USB Interface Definition B-type interface pin definition Pin Signal allocation Pin Signal allocation...
-
Page 20: Installation
Installation Base Installation To install a base for the monitor, please use the base delivered with the Hisense monitor instead of bases of other brands. Install the Base Lay a piece of cushion cloth (or other soft materials) on a flat table that can bear enough weight and area to avoid damaging the LCD. -
Page 21: Vesa Bracket Installation
Installation Rear view Side view The base can adjust the tilting angle by 15° VESA Bracket Installation The monitor is suitable for the standard VESA 100 x 100 mm mounting arm frame. Caution: Do use a VESA-certified supporting arm. Caution: Use a supporting arm that can bear a weight of at least 10 kg. -
Page 22: Dismantling/Installation Of Connector Cover
Installation Dismantling/Installation of Connector Cover Dismantling: 1. Rotate the fixing screws counterclockwise to loosen them. 2. Slide the connector cover up and remove it. (The installation process is the opposite.) Cover plate... -
Page 23: Input Port Connection
Installation Input Port Connection Connect one or more video sources to the monitor's video input terminals: 1. DVI: ④/⑤ 2. VGA: ⑦ 3. SDI: ⑧ 4. YPbPr: ⑩, ⑪, and ⑫ Equipote B-type Power ntial terminal terminal drive Output Port Connection Connect one or more video receivers to the monitor's video output terminals: 1. -
Page 24: Power Supply Connection
Installation Power Supply Connection Connect the 24 VDC power adapter delivered with the monitor to the 24 VDC power input terminal of the monitor. Do use the DC power adapter delivered with the monitor. Do not use any other adapters. Do not inverse the direction of the power plug. Equipote B-type Power... -
Page 25: Operational Instructions And Function Adjustment
Operational Instructions and Function Adjustment Power-on/off Power-on: Move the IO power switch to I. Then, the power is turned on and the monitor is powered on. Power-off: Move the IO power switch to O. Then, the power is turned off and the monitor is powered off. - Page 26 Operational Instructions and Function Adjustment Option Definition Factory The optimal display mode preset in the factory DICOM Compliant with DICOM Part 14 User1 Compliant with Gamma, with support for custom parameter settings User2 Compliant with Gamma, with support for custom parameter settings User3 Compliant with Gamma, with support for custom parameter settings User4...
- Page 27 Operational Instructions and Function Adjustment Note If no signal is input in Single or Dual mode, the monitor enters the standby state. In Dual mode, if a window has signal, the screen of the window without signal turns black. INPUT1/INPUT2 is effective, both ▲UP and ▼DOWN are effective. The indicator When color is green.
- Page 28 Operational Instructions and Function Adjustment SWAP, ▲UP, and ▼DOWN are effective. The indicator color is When PIP is effective, green. Other buttons are locked and their indicator color is white. In PIP/PBP mode, press SWAP to switch the signal input content of the primary and secondary windows.
-
Page 29: Main Menu Operation
Operational Instructions and Function Adjustment Press ▼DOWN to call out the Contrast menu. Press ▲UP or ▼DOWN to adjust the contrast value. Press SWAP to exit the current menu. Note When the color of the ▼DOWN indicator turns green, the color of the SWAP and ▲UP ... - Page 30 Operational Instructions and Function Adjustment Saturation 0-100 Saturation, Color Gamut, and Sharpness Saturation sRGB and CGC can be adjusted only in Advanced User mode. Sharpness 0-20 0-100 Backlight Scale Full, Enlarged, Normal, 5:4, and 4:3 Freeze Freeze and Normal Frame Flip Pattern Normal, Rotation, and Mirror It can be adjusted only Auto...
- Page 31 The default value is Language Chinese. and Français Upper Left, Bottom Left, Upper Right, Bottom Location Right, and Center Time-out 10s, 20s, 30s, 60s, and 120s Hisense Enable and Disable LOGO Power Enable and Disable Saving User1 On and Off User2...
-
Page 32: Detailed Operation Description
Operational Instructions and Function Adjustment Detailed Operation Description Picture In the power-on state, you can adjust the display parameters in each mode of this monitor. Adjustment Procedure Press MENU to call out the User menu. Press ▲UP or ▼DOWN to select ... - Page 33 Operational Instructions and Function Adjustment Brightness It is used to adjust the brightness of the displayed image. The value range is 0-100. Contrast It is used to adjust the contrast of the displayed image. The value range is 0-100. ...
- Page 34 Operational Instructions and Function Adjustment lower-level menu. In each sub-menu, press ▲UP or ▼DOWN to select a specific item or adjust the value. Press SWAP to return to the previous menu or exit the main menu. Display Format Scale Full Freeze Frame Normal...
- Page 35 Operational Instructions and Function Adjustment Options are Normal, Mirror, and Rotation. Note Rotation is used to rotate the image by 180° along the horizontal direction. Mirror is used to rotate the image by 180° along the vertical direction. ...
- Page 36 Operational Instructions and Function Adjustment PIP/PBP Adjustment Procedure Press MENU to call out the User menu. Press ▲UP or ▼DOWN to select , and then press MENU to enter the PIP/PBP menu. Press ▲UP or ▼DOWN to select a target item and then press ...
- Page 37 Operational Instructions and Function Adjustment It is used to adjust the position of the secondary window in PIP mode. Options are PIP Position Upper Left, Bottom Left, Upper Right, and Bottom Right. It is used to adjust the transparency of the secondary window in PIP mode. The value Transparency range is 0-15.
- Page 38 Monitor Info Return Select Hisense LOGO It is used to set whether to display the Hisense LOGO upon power-on. Options are Enable and Disable. Note The Hisense LOGO is displayed only when the monitor is powered on. ...
- Page 39 Operational Instructions and Function Adjustment Power Saving It is used to set whether to enable or disable the power saving function. Options are Enable and Disable. Note Disable: When the monitor detects that the input port has no signal input, it keeps the backlight on. ...
-
Page 40: Troubleshooting
Troubleshooting Troubleshooting Before repair, check the following table for possible fault causes. If the fault persists after you follow the instructions in the User Guide, you can consider repair. Fault Symptom Solution Check whether the power plug is securely connected to the socket. ... -
Page 41: Maintenance Disclaimer
Hisense or our authorized distributor will not be liable for any damage or loss of data or other information stored in any media or any component of any product after the product is repaired by Hisense or our authorized distributor. -
Page 42: Safety Information
Consult Hisense. Use the power adapter and power cable provided by Hisense, and ensure that the LCD monitor is properly connected to ground. Do not modify or retrofit the LCD monitor by yourself. Failure to comply with cause interference and damage to the LCD monitor. -
Page 43: Compliance Information
Compliance Information Intended Use HME2C26 is a monitor for displaying images from cameras or other systems in medical environments. FCC B Class This device conforms to requirements of Federal Communications Commission (FCC). Its operation is restricted by the following two conditions: (1) This device must not generate harmful interference; and (2) This device must be able to resist any interference, including interference that may cause unnecessary operation. -
Page 44: Environmental Protection Information
Environmental Protection Information Environmental Protection Information Chinese Mainland RoHS The LCD monitor meets the environmental protection requirements of the Administrative Measures for Limiting the Use of Hazardous Substances in Electrical and Electronic Products. During its environmental-friendly service life, the LCD monitor does not cause leakage and precipitation of harmful substances and other problems affecting the health of users in the process of use, so it can be used safely. -
Page 45: Biological Hazards And Return
Biological Hazards and Return This device has specific structure, specifications, and manufacturing materials which are easy to wipe and clean, and is suitable for multiple purposes in hospitals and other medical environments where regular cleaning procedures are established. However, to prevent the spread of infectious agents, this device cannot be used in bio-polluted environments. -
Page 46: Cleaning And Disinfection
Cleaning and Disinfection Note When cleaning the monitor, disconnect the power cable from the main power supply. Do not scratch the monitor surface with any hard or frosted material. Wipe off dust, fingerprints, or oil spills with a soft cloth (dip in a small amount of mild detergent). ... -
Page 47: Legal Disclaimer
All trademarks and registered trademarks are owned by their owners. Copyright Statement This document is protected by copyright. All rights reserved. Without written permission of Hisense, this document or any part thereof shall not be copied or duplicated in any form or in any method, including photocopying, recording, or used in information storage and retrieval system. -
Page 48: Symbol Description
Symbol Description Symbols on the Device On the device or power supply, you can see the following symbols (this list may not include all symbols): This device meets the requirements of EU MDR2017/745. This device meets the requirements of Part 15 of FCC regulations (Class A or Class This device has been certified by Canadian and American UL regulations. - Page 49 Symbol Description Direct current (DC). Power-on. Power-off. Grounding device. EU authorized representative information. The terminal of the device places different parts of the system at the same potential. Humidity limit. Atmospheric pressure limit.
-
Page 50: Annex
Annex Annex A Allowed Signal Formats Analog Signal Signal Input Signal Format YPbPr ○ ○ 480/60p ○ 576/50i × ○ ○ 576/50p ○ ○ 720/59.94p ○ ○ 720/60p ○ ○ 720/50p ○ 1080/59.94i × ○ 1080/60i × ○ 1080/50i × ○... - Page 51 Annex polarity polarity Positive Positive 800 x 600 56 Hz 36.000 35.156 56.250 polarity polarity Positive Positive 800 x 600 60 Hz 40.000 37.879 60.317 polarity polarity Positive Positive 800 x 600 72 Hz 50.000 48.077 72.188 polarity polarity Positive Positive 800 x 600 75 Hz 49.500...
- Page 52 Annex Negative Positive 1360 x 768 50 Hz 69.500 39.489 49.922 polarity polarity Negative Positive 1360 x 768 60 Hz 84.625 47.649 59.936 polarity polarity Positive Negative 1360 x 768 60 Hz 72.000 47.368 59.960 polarity polarity 1920 x 1080 50 Negative Positive 141.375...
- Page 53 Annex Annex B Monitor Dimensions...
- Page 54 Qingdao Hisense Medical Equipment Co., Ltd. Address: North, 3F, Outsourcing Center of Software Park, No. 169, Songling Road, Laoshan District, Qingdao, P.R.China Hisense national customer service hotline: 4009940707 Hisense Group service supervision email: haixinfuwu@hisense.com...
- Page 55 Part No. PT00078344 1 800 633 8766 [T] Distributed by: Covidien llc, 1 763 514 4000 [T] 15 Hampshire Street, Mansfield, MA 02048 USA www.covidien.com 2017/12-2...
Need help?
Do you have a question about the Covidien HME2C26 and is the answer not in the manual?
Questions and answers