Table of Contents
Advertisement
Quick Links
Barcode positioning box: 35 cm in
length. The height should be scaled in
proportion to the length. The positioning
box is not printed. For details about the
coding rules, consult the purchasing
personnel.
RSAG2. 025. 5952SS C Version
LCD Monitor
Qingdao Hisense Medical Equipment Co., Ltd.
Address: North, 3F, Outsourcing Center of Software Park, No. 169, Songling Road, Laoshan District,
Qingdao, P.R.China
Hisense national customer service hotline: 4009940707
Hisense service quality supervision tel: 0532-83091111
Hisense service supervision email: haixinfuwu@hisense.com
Advertisement
Table of Contents

Related Manuals for Hisense HMC8C65TOA


Summary of Contents for Hisense HMC8C65TOA
- Page 1 RSAG2. 025. 5952SS C Version LCD Monitor Qingdao Hisense Medical Equipment Co., Ltd. Address: North, 3F, Outsourcing Center of Software Park, No. 169, Songling Road, Laoshan District, Qingdao, P.R.China Hisense national customer service hotline: 4009940707 Hisense service quality supervision tel: 0532-83091111 Hisense service supervision email: haixinfuwu@hisense.com...
- Page 2 HMC8C65TOA User Guide Read the User Guide thoroughly before using Hisense LCD monitor and keep it properly for future reference. Hisense website: www.hisense.com...
- Page 3 Read the User Guide thoroughly before using the LCD monitor and keep it properly for future reference. Hisense shall not be liable for any accidents arising from violations of the safety precautions and use instructions of the User Guide.
-
Page 4: Table Of Contents
Contents Features ..............................3 Technical Specifications ........................4 Safety Information and Precautions ....................5 Positions and Names of the LCD Monitor Control Parts ..............8 Remote Control ..........................10 Shortcut Functions of the Remote Control ..................11 Connection ............................12 Terminals of the LCD monitor .................... -
Page 5: Features
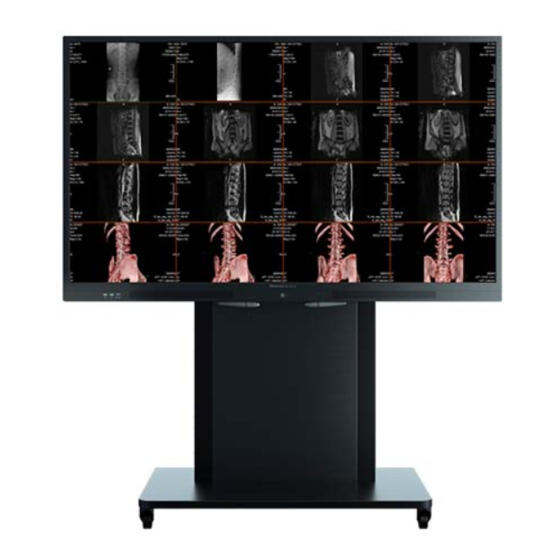
Features Overview Thank you for purchasing Hisense LCD monitor, which features a 65-inch size and LED backlight and is intended for professionally trained medical staff. It supports simultaneous viewing and interpretation of medical images by multiple persons at precision work, such as remote consultation, in-hospital consultation, multidisciplinary consultation, ward shift handover, and conference teaching and training. -
Page 6: Technical Specifications
Technical Specifications Model HMC8C65T0A Name LCD monitor Size 65 inches Backlight Resolution 3840x2160 Display area 1428.48 (H) x 803.52 (V) (mm) Pixel pitch 0.372 (H) x 0.372 (W) (mm) LCD monitor panel Contrast ratio 4000:1 (typ.) Horizontal: 178°; vertical: 178° (CR ≥ 10) Viewing angle Response time (ms) 8 (typ.) Max. -
Page 7: Safety Information And Precautions
If abnormal sound or smell is generated or if no image is displayed while sound can be heard, immediately disconnect the power supply and disconnect the power plug from the socket, and contact the customer services of Hisense. Ensure that the power cable and signal cable are not pressed down by any objects. - Page 8 Safety Information and Precautions Do not wipe the LCD monitor with any volatile oil or diluent because these solvents may cause deterioration of the housing or damage the paint coating. The LCD monitor may develop smudges after long-term contact with rubber or ethylene products. ...
- Page 9 Safety Information and Precautions water, oil, or smoke. temperature environment. Do not obstruct the air vents of the LCD monitor. Other Precautions It is recommended that the LCD monitor be moved by more than two persons for assembly, disassembly, and handling. Avoid impact and take special protective measures for the screen during movement.
-
Page 10: Positions And Names Of The Lcd Monitor Control Parts
Positions and Names of the LCD Monitor Control Parts Front view LCD monitor indicator, OPS indicator, Home Power button and remote control receive window button Name/Operation Function Power button It is used to power on and off the LCD monitor. It is green when the LCD monitor is in the power-on state and orange when it is in LCD monitor indicator... - Page 11 Positions and Names of the LCD Monitor Control Parts LCD monitor to work abnormally. 3. When the OPS module is installed, in the OPS computer channel, the external USB device communicates with the OPS computer. In other channels and on the home screen, the external USB device communicates with the LCD monitor.
-
Page 12: Remote Control
Remote Control Settings Go to the Settings menu Power button Mute Enter or exit the silence state Volume Down (-) Volume Up (+) Confirm an operation Move the pointer vertically Move the pointer horizontally Menu Back Bring up the function menu Return to the previous menu Menu Back... -
Page 13: Shortcut Functions Of The Remote Control
Shortcut Functions of the Remote Control Battery Replacement Procedure 1. Put the remote control with its back facing up and open the battery box. 2. Install two 1.5 V AAA alkaline batteries. Ensure that the positive (+) and negative (–) electrodes of the batteries match those of the battery box. -
Page 14: Connection
Connection Terminals of the LCD monitor OPS module computer Note: The rear view is for reference only. The actual product shall prevail. Some external devices may not be able to connect to the LCD monitor due to incompatibility. To solve this problem, use a proper signal cable or add an adapter cable that is compatible with the port. -
Page 15: Computer Connection
Connection Computer Connection DVI port DP port VGA port HDMI port Digital Digital Digital Digital Signal cable Signal cable Signal cable Signal cable (delivered with the (delivered with LCD monitor) the LCD monitor) DVI port DP port VGA port HDMI port Connected to the PC Connected to the PC Connected to the PC Connected to the PC... -
Page 16: Equipment Connection Through The Usb Port
OPS module computer, or OPS computer for short. You can contact Hisense to purchase an OPS computer as needed. The OPS port of the LCD monitor can be supplied with power 19±0.5 V and 4 A at most. - Page 17 Connection OPS Switch After the OPS computer is configured and installed, it is automatically started if the LCD monitor is powered on in the OPS computer channel or the signal source is switched from another channel to the OPS channel by setting Input Source in the Settings menu. If the OPS computer is not started, go to the soft menu and click OPS ON.
-
Page 18: Basic Operations
Basic Operations Power-on/off 1. Connect the LCD monitor power cable to a 220 V AC socket. 2. Press the power switch on the LCD monitor. After the LCD monitor is powered on, to set it to the standby state, press the power button of the remote control. -
Page 19: Wireless Screen Transmission
Back: Tap to return to the previous screen when an application is running. If the application is not tested by Hisense, the system may not respond to tapping this button. OPS: Tap to start the computer function module. -
Page 20: Image
Basic Operations touch mode (put your five fingers in any area of the touch screen and then lift them) to bring up the touch menu. Tap Settings to go to the LCD monitor menu. 2. Press ▲, ▼, ◄, and ► to select a menu item, and press OK to go to the next menu. 3. -
Page 21: General
Basic Operations Full Screen: The LCD monitor displays input image signals in full screen. Scale Screen: The LCD monitor displays full signals based on the actual proportion. When screen utilization reaches the maximum value, the upper/lower parts or the left/right sides of the screen may not display images. -
Page 22: Internet
Basic Operations Input Source: Select a signal source. The options include Wireless Screen Transmission, OPS, HDMI, DP, DVI, VGA, and USB. Auto Ambient Light: Enable or disable the ambient light self-adaptation feature. When this feature is enabled, the LCD monitor automatically adjusts backlight brightness as ambient light brightness changes. - Page 23 Basic Operations LCD monitor port Wall-mounted Network port network port Router Network port Network port output input Broadband: PPPoE In the Network Selection menu, select PPPoE as broadband, enter your user name and password, and tap OK. LCD monitor port Wall-mounted Network port telephone port...
-
Page 24: Sound
Basic Operations Network Diagnosis: Select this option to detect the current network connectivity of terminals in a conference room. Sound Sound Image SRS Effect: OFF General Auto Volume: OFF Internet Balance: 0 Sound About SRS Effect: Improve the surround sound effect and bass effect of the accompanying sound. Auto Volume: Enable or disable automatic volume adjustment for input signals. - Page 25 Basic Operations Locking: To lock the LCD monitor, press Volume Up -> Volume Down -> Volume Up -> Volume Down on the remote control, or press the Home button on the LCD monitor twice (at an interval less than 1 second). When the LCD monitor is locked, it displays the message "Locked", which will disappear 3 seconds later.
-
Page 26: Advanced Operations
Advanced Operations Operations of the USB Main Menu 1. Press the Settings button of the remote control, select a signal source, and press OK. 2. Press ▲/▼ to select a USB device, and press OK to access the USB device. 3. -
Page 27: Supported Image And Video Formats
Advanced Operations 2. Press ▲, ▼, ◄, and ► to select the image file you want to play. 3. Press OK to play the audio. 4. Press Back to exit image play return to the upper-level directory. Supported Image and Video Formats The following table lists the supported video formats. -
Page 28: Wall Mounting Instructions
After mounting is completed, contact professional mounting personnel or technical support personnel. Hisense shall not be liable for any loss of the equipment due to incorrect installation or misoperations. The screw driving depth for the wall-mounted holes on the rear metal housing ranges from 14.5 mm to 15 mm. -
Page 29: Warranty Card
Please attach the purchase invoice in the Address upper left corner and keep it properly. Seller's seal Service policies: (1) Hisense adheres to the Product Quality Law, Consumer Protection Law, and relevant national regulations. (2) The equipment provides a free two-year repair service. - Page 30 Customer first, fair service signature Address Date Inspection record Repaired by Hisense national customer service hotline: 4009940707 Hisense service quality supervision tel: 0532- 83091111 Hisense service supervision email: haixinfuwu@hisense.com Address: No. 204, Yan'an 3rd Road, South District, Qingdao, P.R.China Zip code: 266071...
-
Page 31: Troubleshooting
Troubleshooting Before repair, check the following table to see if you can identify the cause of the fault. If the fault persists after you follow the instructions, you can consider repair. Symptom Solution 1. Check whether the power cable is connected to the wall- mounted socket and whether the socket is powered on. -
Page 32: Environmental Protection Information (Lcd Monitor)
Environmental Protection Information (LCD Monitor) The LCD monitor meets the environmental protection requirements of the Administrative Measures for Limiting the Use of Hazardous Substances in Electrical and Electronic Products. During its environmental-friendly service life, the LCD monitor does not cause leakage and precipitation of harmful substances and other problems affecting the health of users in the process of use, so it can be used safely.
Need help?
Do you have a question about the HMC8C65TOA and is the answer not in the manual?
Questions and answers