
Related Manuals for Hisense 55SOA25PT


Summary of Contents for Hisense 55SOA25PT
- Page 1 Beyond An Immersive Experience 2021 User Manual Outdoor Series 55SOA25PT Issue Date: 03/09/2021 Copyright © 2021, All Rights Reserved.
-
Page 2: Table Of Contents
A/C installation ..........................11 7.2.1 Put A/C in the tray and fix it by rocker................... 11 7.2.2 Connect power cable to A/C as below ................... 11 Installation ..............................12 Caution before installation ........................ 12 8.1.1 Installation Place & Environment ....................12 Hisense B2B... - Page 3 Power-on procedure .......................... 16 9.2.1 External power supply ........................16 9.2.2 Switch off power ..........................16 9.2.3 Display status test .......................... 16 10 Thermal management ..........................17 10.1 Introduction ............................17 11 Media player .............................. 17 12 OS ................................17 Hisense B2B...
-
Page 4: Foreword
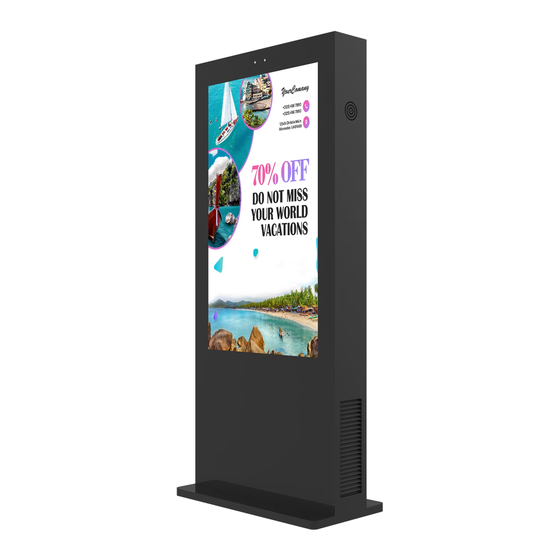
1 Foreword 1.1 Product overview The model 55SOA25PT is 55” outdoor totem with vertical screen, the sunlight readable LCD panel with IP65 enclosure is suited for any outdoor environment which can be widely used in commercial street, stadium, scenic spots, hospital, schools, bus station, etc 1.2 Content... -
Page 5: Power Voltage
There is air inlet & outlet in the rear of cabinet do not cover any object that will impact cooling performance. 2.8 Clean or Maintenance Shut down power before clean or maintenance. 2.9 Cleaning Use wet cloth to clean rather than liquid cleaners or aerosol cleaners direct on the monitor casing or glass. 2.10 Expert Engineer Required Hisense B2B... -
Page 6: Avoid Touching Electric Device
Customer can use or change different cable length as per need, but the power cord diameter shall no less than the standard cable. When connecting the external power supply, please note wire connection correspondingly per the marks, ensure reliable earthing, must take guidance of professional electrical engineers. Hisense B2B... -
Page 7: Overall Size(Mm
Power Cable 4 Overall size(mm) Hisense B2B... -
Page 8: Technical Parameter
3000cd/m2 Viewing angle 178° Contrast ratio 3000:1 IP rating IP65 Cooling system Air conditioner Working temp. -40℃~+50℃ Working Humidity 5%~100% Working Voltage 220V±10%,50HZ Consumption (max) 800W 6 Diagram 6.1 3D View Speaker Cabin Air inlet for air conditioner Hisense B2B... -
Page 9: View
6.2 2D View Installation hold Speaker Rear door Eyebolt Door for A/C 6.3 Door opening Step 1 Step 2 Step 3 6.4 Structure inside Hisense B2B... -
Page 10: Cable Entrance Hole
Android board Power Timer Switch Power Socket Reserved Space 6.5 Cable entrance hole 3 cable entrance hole for A/C power cable, external power cable and LAN cable Cable entrance hole for LAN & Power cable Hisense B2B... -
Page 11: C Installation
7 A/C Installation 7.1 A/C Removal 7.1.1 Open the A/C door Unscrew remove covere 7.1.2 Disconnect power cable to A/C 7.1.3 Take out A/C Turn the rocker down Draw out tray and take out Hisense B2B... -
Page 12: Draw Out Tray And Take Out A/C
7.1.4 Draw out tray and take out A/C Tray 7.2 A/C installation 7.2.1 Put A/C in the tray and fix it by rocker Rocker 7.2.2 Connect power cable to A/C as below Hisense B2B... -
Page 13: Installation
8.1 Caution before installation 8.1.1 Installation Place & Environment This is floor standing mount, ensure the concrete must be solid and we propose custom concrete foundation. No less than 300mm No less than 800mm to the rear of the cabinet Hisense B2B... -
Page 14: Custom Concrete Foundation
See size(mm) below to custom concrete foundation, the overall size should be larger than base plate size, recommended depth of concrete>400mm,podium>20mm,please make cable entrance hole in 8.2.2 Cable Pre-embedded cables and reserve 2m for LAN cable and power cable. Embedded cables in concrete Hisense B2B... -
Page 15: Installation Hole
After concrete foundation dry and solid, make 8x installation hole in ground by M16 drill. Drill 8.4 Lift product Use crane or other tool to lift up product to the concrete and align to installation hole in concrete, make sure the reserved cables pass through the entrance hole in base plate. Hisense B2B... - Page 16 Step 1: Install 4 eyebolt Cross like this Step 2: After installation, remove 4 eyebolts and replace it with rubber plug. Step 3: Anchoring by dynabolt dynabolt Dynabolt into concrete Hisense B2B...
-
Page 17: Power On Testing
After switch off, the display is inactive state, the default state is switch on, please shut down and switch off before maintenance Switch 9.2.3 Display status test The screen is in blue or playing content in normal condition and the internal fan start running. Hisense B2B... -
Page 18: Thermal Management
The product with air conditioner cooling, when inside temperature up to a certain degree the A/C will start working, please clean the mesh in air vent after long time running. Remove cover Take out and clean the mesh 11 Media player Android media player (2G+16G) with HDMI IN port. 12 OS Android OS. Hisense B2B...
Need help?
Do you have a question about the 55SOA25PT and is the answer not in the manual?
Questions and answers