Table of Contents
Advertisement
Quick Links
Advertisement
Table of Contents

Related Manuals for Hisense HME8C58


Summary of Contents for Hisense HME8C58
- Page 1 HME8C58 Hisense LCD Monitor User Guide Read the User Guide thoroughly before using Hisense LCD monitor and keep it properly for future reference. RSAG2.025.4879SS G version You can download the latest user guide from Hisense website: Hisense website: www.hisense.com...
-
Page 2: Preface
Read the User Guide thoroughly before using the LCD monitor and keep it properly for future reference. Hisense shall not be liable for any accidents arising from violations of the safety precautions and use instructions of the User Guide. -
Page 3: Safety Information And Precautions
It is recommended that you use the specified accessories of the LCD monitor, which can be used only with the spare parts and accessories that are manufactured or specified by Hisense. It takes about 30 minutes for the electronic components of the LCD monitor to achieve stable performance. - Page 4 To avoid hazards, do not place the LCD monitor on a soft pad. If the LCD monitor will not be used for a long time, disconnect its power cable. The LCD monitor contains hazardous high voltage inside, so do not disassemble it by yourself. If the LCD monitor is abnormal, contact Hisense or an authorized distributor.
-
Page 5: Table Of Contents
Contents Preface ..............................I Safety Information and Precautions ....................II Contents ..............................1 Overview ............................... 2 Features ............................2 Technical Specifications ........................ 3 Packing List ........................... 4 Installation ............................5 Mounting and Installing the Monitor ..................... 5 Front View of the LCD Monitor and Buttons ................6 Monitor Input and Output Interfaces ..................... -
Page 6: Overview
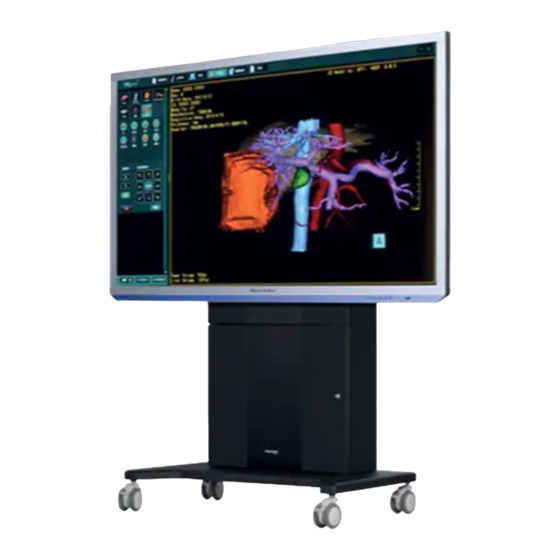
Overview Thank you for choosing Hisense Medical Operating Room Monitor, which is applicable to operating rooms, interventional radiology rooms, and control rooms. Hisense Medical HME8C58 is an 8M high-definition color monitor especially designed for medical imaging application. Features Hisense HME8C58 is a 58-inch professional high-definition operating room monitor that supports display with 8-megapixel resolution, fully complying with the DICOM standard and meeting the high-precision requirements for medical imaging. -
Page 7: Technical Specifications
Overview Technical Specifications Model HME8C58 Name LCD monitor Size 58 inches Diagonal length 1460 mm Size 1325 mm x 799 mm x 108 mm Backlight Screen size 1270.08 mm x 721.44 mm Screen ratio 16:9 Resolution 3840x2160 monitor Color 1.07 billion colors... -
Page 8: Packing List
Overview Packing List Accessory Quantity Remarks Monitor Power cable See the annex. DVI-DVI signal See the annex. cable DP-DP signal cable See the annex. VGA cable See the annex. User manual Note The listed accessories are for reference only. The actual accessory list varies with the monitor type and is subject to the packing list in the monitor packaging box. -
Page 9: Installation
To mount the equipment on a wall, ensure security during installation and use of the equipment. Hisense assumes no responsibility for any damage or personal injury caused by improper use or incorrect installation. Installation instruction... -
Page 10: Front View Of The Lcd Monitor And Buttons
Installation Install the monitor on the arm/bracket and use four M6 screws to securely fix the mounting arm/bracket to the panel. The maximum insertion depth and minimum insertion depth of a screw are 9.5 mm and 8.5 mm respectively. CAUTION ... - Page 11 Installation Film Clip 3, Film Clip 4, and Film Clip 5 modes. You can press the BACK button to cancel the current mode. Film Clip 1 Film Clip 2 Film Clip 3 Film Clip 4 Film Clip 5 SCREEN LOCK button. Press and hold this button for 3s to lock the screen. Press and hold the button for 3s again to unlock the screen.
-
Page 12: Monitor Input And Output Interfaces
Installation Monitor Input and Output Interfaces Power switch Interface Function Connector Description Software upgrade Select DEBUG 1, DEBUG 2, or DEBUG 3 based on chips for upgrade. interface signal input DVI IN 1 and DVI IN 2 interface DVI OUT 1 and DVI OUT 2 Note DVI signal loopthrough The external device must be a dual-link device to ensure a resolution above... -
Page 13: Connecting To Signal Sources
Installation Connecting to Signal Sources 1) Connect one end of the signal cable to the signal port of the monitor and fasten the end, and then connect the other end of the cable to the signal port of an external device. (When Input Source is set to Auto, the system automatically enters the Single View mode if one signal source is connected, enters the Double View mode if two signal sources are connected, enters the Triple View mode if three signal sources are connected, and enters the Quad View if four signal sources... - Page 14 Installation Signal Formats Supported by DP and DVI Definition Refresh Frequency 640x480 60 Hz 800x600 60 Hz 1024x768 60 Hz 1280x720 60 Hz 1600x1200 60 Hz 1920x1080 60 Hz 3840x2160 30 Hz 60 Hz (supported only by DP; The cable coming with the monitor or other cables that 3840x2160 meet the specifications must be used.) Signal Formats Supported by SDI...
-
Page 15: Operation Instructions
Operation Instructions Main Menu Operation Setting and Adjustment Settings Press the mechanical button MENU on the monitor to call out the settings Image mode Text menu. Backlight Press the ▲ or ▼ button to select the menu item to be adjusted and press ... - Page 16 Operation Instructions Full Screen: An image is displayed in full screen mode. The image may be deformed due to the difference between the image resolution and screen resolution. Scale Screen: There are black borders on both sides of the image in this mode, which is caused by the difference in resolution between the displayed image and the actual size of the screen.
- Page 17 Operation Instructions When four signal sources are connected, the monitor enters the Quad View mode. Four Window Four windows In Double/Triple/Quad View mode, select the window to be set and adjust the image Windows parameters and zoom scale. Available only in Double View mode. The left and right windows displayed can be Swap swapped.
-
Page 18: Troubleshooting
Troubleshooting Troubleshooting Before repair, check the following table for possible fault causes. If the fault persists after you follow the instructions in the User Guide, you can consider repair. Symptom Solution The power indicator does Check whether the power plug is securely connected to the socket. ... -
Page 19: Safety Statement
Adjust the position or direction of the affected equipment. Increase the distance between the LCD monitor and the affected equipment. Consult Hisense. Please use the power line provided by our company and ground it correctly. Do not modify or retrofit the LCD monitor by yourself. Failure to comply with cause interference... -
Page 20: Environmental Protection Information
Environmental Protection Information Environmental Protection Information The LCD monitor meets the environmental protection requirements of the Administrative Measures for Limiting the Use of Hazardous Substances in Electrical and Electronic Products. During its environmental-friendly service life, the LCD monitor does not cause leakage and precipitation of harmful substances and other problems affecting the health of users in the process of use, so it can be used safely. -
Page 21: Maintenance Disclaimer
Hisense or our authorized distributor will not be liable for any damage or loss of data or other information stored in any media or any component of any product after the product is repaired by Hisense or our authorized distributor. -
Page 22: Annex
Annex Display Size... - Page 23 Qingdao Hisense Medical Equipment Co., Ltd. Address: North, 3F, Outsourcing Center of Software Park, No. 169, Songling Road, Laoshan District, Qingdao, P.R.China Hisense national customer service hotline: 4009940707 Hisense Group service supervision email: service@hisense.com...
Need help?
Do you have a question about the HME8C58 and is the answer not in the manual?
Questions and answers