3Com 3C905C-TX-M User Manual
Etherlink pci network interface cards
Hide thumbs
Also See for 3C905C-TX-M:
- User manual (96 pages) ,
- Quick manual (12 pages) ,
- Quick manual (12 pages)
Table of Contents
Advertisement
Quick Links
Advertisement
Table of Contents
Troubleshooting

Related Manuals for 3Com 3C905C-TX-M


Summary of Contents for 3Com 3C905C-TX-M
-
Page 2: User Guide
Part No. 09-1743-000 Published June 1999 EtherLink ® Network Interface Cards User Guide 3C905C-TX-M For Complete PC Management 3C905B 3C900B... - Page 3 3Com Corporation. 3Com Corporation reserves the right to revise this documentation and to make changes in content from time to time without obligation on the part of 3Com Corporation to provide notification of such revision or change.
-
Page 4: Table Of Contents
3C905B-COMBO 3C905B-FX 3C900B Remote Wake-Up Remote Wake-Up Cable Remote Wake-Up Requirements 3C905C-TX-M NIC 3C905B and 3C900B-FL NICs Multiple NIC Installations and Remote Wake-Up Managed PC Boot Agent (MBA) Software Desktop Management Interface (DMI) 2.0 DynamicAccess LAN Agent Remote System Alerts... - Page 5 Windows NT 3.51 Verifying Successful Installation Windows 95 and Windows 98 Windows NT 4.0 Windows NT 3.51 Installing the 3Com NIC Diagnostics Program Updating the Network Driver and NIC Software Installing Multiple NICs Windows 95 and Windows 98 Windows NT 4.0...
- Page 6 BBS BIOS-Compatible PCs Non-BBS BIOS-Compatible PCs ROUBLESHOOTING THE Overview Accessing 3Com Support Databases Accessing the 3Com Knowledgebase Accessing the 3Com NIC Help System Accessing Release Notes and Frequently Asked Questions Troubleshooting the NIC Installation Problems/Error Messages Cleaning Up a Failed Installation...
- Page 7 Running the NIC Diagnostics Tests To Run the Network Test To Run the NIC Test To Run the Remote Wake-Up Test Viewing Network Statistics Using the 3Com Icon in the Windows System Tray PECIFICATIONS AND 3C905C-TX-M NIC Specifications 3C905B NICs Specifications 3C900B NICs Specifications...
- Page 8 World Wide Web Site 3Com Knowledgebase Web Services 3Com FTP Site 3Com Bulletin Board Service Access by Analog Modem Access by Digital Modem 3Com Facts Automated Fax Service Support from Your Network Supplier Support from 3Com Returning Products for Repair NDEX ORPORATION...
-
Page 10: About This Guide
Most user guides and release notes are available in Adobe Acrobat Reader Portable Document Format (PDF) or HTML on the 3Com World Wide Web site: http://www.3com.com/ You can download Acrobat Reader from the EtherCD or from Adobe Systems Incorporated Web site: http://www.adobe.com/... -
Page 11: Conventions
Screen displays Commands The words “enter” and “type” Words in italics Year 2000 Compliance For information on Year 2000 compliance and 3Com products, visit the 3Com Year 2000 Web page: http://www.3com.com/products/yr2000.html Description Information that describes important features or instructions Information that alerts you to potential loss of... -
Page 12: Introduction
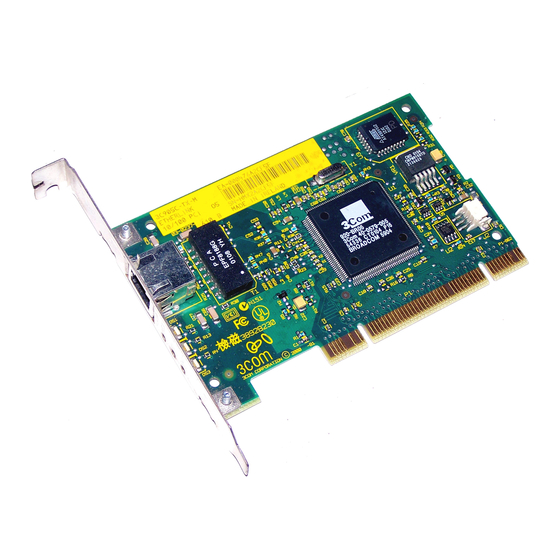
Unless specifically indicated, information in this user guide refers to all NIC models. 3C905C-TX-M The 3C905C-TX-M NIC connects your PCI-compliant PC to either a 10 Mbps Ethernet network or a 100 Mbps Fast Ethernet network. The 3C905C-TX-M NIC supports a suite of... - Page 13 Remote System Alerts T X D A T A A C T 1 0 0 The following table describes the features of the 3C905C-TX-M NIC. Features Supported RJ-45 connector for 10BASE-T or 100BASE-TX Remote Wake-Up DMI 2.0 Integrated boot ROM with Managed PC...
-
Page 14: 3C905B
3C905B The 3C905B NICs connect your PCI-compliant PC to either a 10 Mbps Ethernet network or a 100 Mbps Fast Ethernet network. The 3C905B NICs support a suite of DynamicAccess Technology features for desktop and network management, including: Remote Wake-Up Managed PC Boot Agent (MBA) Software (3C905B-TX-M only) DynamicAccess LAN Agent... -
Page 15: 3C905B-Combo
1: I HAPTER NTRODUCTION 3C905B-COMBO 3C905B-FX 1 0 0 L A C T 1 0 0 Boot ROM socket Remote Wake-Up connector Boot ROM socket Remote Wake-Up connector... -
Page 16: 3C900B
The following table describes the features of the 3C905B NICs. Features Supported RJ-45 connector for 10BASE-T or 100BASE-TX AUI and BNC connectors for 10BASE5 and 10BASE2 SC connector for 100BASE-FX Remote Wake-Up DMI 2.0 Boot ROM socket Integrated boot ROM with Managed PC Boot Agent (MBA) software Traffic prioritization... - Page 17 1: I HAPTER NTRODUCTION 3C900B-COMBO 3C900B-TPO The following table describes the features of the 3C900B NICs. Features Supported RJ-45 connector for 10BASE-T (10 Mbps only) BNC connector for 10BASE2 (10 Mbps only) AUI connector for 10BASE5 (10 Mbps only) ST connector for 10BASE-FL Remote Wake-Up DMI 2.0 Boot ROM socket...
-
Page 18: Remote Wake-Up
(RWU) connector to a 3-pin Remote Wake-Up connector on the PC motherboard. See Wake-Up Cable” For 3C905C-TX-M NICs, if your PC is compliant with PCI 2.2, Remote Wake-Up is automatically enabled through the PCI bus. The Remote Wake-Up cable is not required. -
Page 19: 3C905C-Tx-M Nic
1: I HAPTER NTRODUCTION 3C905C-TX-M NIC BIOS that supports Remote Wake-Up PCI 2.2-compliant bus or a 3-pin Remote Wake-Up connector on the PC motherboard and a 5-volt standby power supply unit rated at a minimum of 375 milliamperes 3C905B and 3C900B-FL NICs... -
Page 20: Desktop Management Interface (Dmi) 2.0
DMI 2.0-compliant management application. A network administrator can then use this information to configure and manage a client or server PC remotely. For instructions on installing the 3Com DMI Agent, see Appendix For more detailed information on DMI, see the 3Com DMI Agent User Guide located with the 3Com DMI Agent software on the EtherCD. -
Page 21: Remote System Alerts
EtherCD. Information is also available at: http://www.3com.com/dynamicaccess Remote System Alerts The 3C905C-TX-M NIC can be configured to continuously transmit a packet to an alert target management station. If the management station fails to receive the regularly scheduled packet, an alert can be triggered that signals a possible PC power loss or theft. -
Page 22: Onnecting The Nic
Overview This chapter describes how to install the NIC in your PC and connect it to an Ethernet or Fast Ethernet network. WARNING: Before handling the NIC, touch the bare metal case of your PC to discharge static electricity from your body. -
Page 23: Installing Multiple Nics
CD-ROM drive and create installation diskettes from the EtherCD. If you do not have access to a PC that has a CD-ROM drive, contact 3Com to order installation diskettes for EtherCD version 5.1: Toll-free number for the United States and Canada:... - Page 24 Before you start, make sure that you have two blank, formatted diskettes. Label the diskettes EtherDisk 1 and EtherDisk 2. EtherDisk 1 contains: NDIS 3/4/5 drivers NetWare client and server drivers Windows for Workgroup drivers NIC preinstallation program README.TXT file EtherDisk 2 contains: NDIS 2 driver PACKET driver...
-
Page 25: Running The Preinstallation Program
2: I HAPTER NSTALLING AND 9 Remove the disk and insert the disk labeled EtherDisk 2 when prompted, and then click OK. Files are copied. The diskette creation is complete. For instructions on using the installation diskettes to install the network driver, see the text file for your operating system in the HELP directory on the EtherCD. -
Page 26: Inserting The Nic In The Pc
7 Click Install NIC Driver. To install the network driver and the 3Com NIC Diagnostics program, click Install with Diagnostic Program. To install the network driver only, click Install without Diagnostic Program. Files are copied. A message box appears when the installation is complete. - Page 27 2: I HAPTER NSTALLING AND To install the NIC in the PC: 1 Make sure that you have run the preinstallation program, as described in the previous section. 2 Remove all jewelry from your hands and wrists. Use only insulated or nonconducting tools. 3 Turn off the power to the PC and unplug the power cord.
- Page 28 1 Remove slot cover 7 Secure the NIC with the screw you removed earlier. If you want to install the Remote Wake-Up cable, go to the next section, Cable” to continue the installation. If you do not want to connect the cable, continue with 8 Replace the PC cover and plug in the power cord.
-
Page 29: Connecting The Remote Wake-Up Cable
3C905B-TX-M 3C905B-COMBO 3C905B-FX 3C900B-FL If you have a 3C905C-TX-M NIC and your PC is compliant with PCI 2.2, Remote Wake-Up is automatically enabled through the PCI bus. You do not need to connect the Remote Wake-Up cable. To connect the Remote Wake-Up cable: WARNING: Make sure that the PC power cord is unplugged. -
Page 30: Connecting The Nic To The Network
On the 3C900B NIC, the RJ-45 port provides a 10 Mbps connection only. On the 3C905C-TX-M and 3C905B NICs, the RJ-45 port provides a 10 Mbps or 100 Mbps connection automatically, depending on the speed of the connected hub or switch. - Page 31 2: I HAPTER NSTALLING AND The following table shows the cable requirements and maximum network cable lengths for the RJ-45 port. Network Environment 10 Mbps (10BASE-T) 100 Mbps (100BASE-TX) To connect the RJ-45 port: 1 Plug the RJ-45 connector on the twisted-pair network cable into the RJ-45 port on the NIC backplate.
-
Page 32: Bnc Port
BNC Port The BNC port provides a 10 Mbps connection only. The following table shows the cable requirement and maximum network cable length for the BNC port. Port To connect the BNC port: 1 Connect the BNC connector on the thin Ethernet cable to the BNC port on the NIC. -
Page 33: Aui Port
2: I HAPTER NSTALLING AND AUI Port The AUI port provides a 10 Mbps connection only. The following table shows the cable requirement and maximum network cable length for the AUI port. Port 15-pin AUI To connect the AUI port: 1 Locate the 15-pin AUI port on the NIC and move the slide latch down to the open position. -
Page 34: Sc Port
SC Port The SC port on the 3C905B-FX NIC provides a 100 Mbps fiber-based connection only. The following table shows the cable requirements and maximum network cable lengths for the SC port. Port Cable Required Long-wavelength fiber-optic (1300 nm): To connect the SC port: 1 Remove the protective cover from the NIC’s SC connector. -
Page 35: St Port
2: I HAPTER NSTALLING AND ST Port The ST port on the 3C900B-FL NIC provides a 10 Mbps fiber-based connection only. The following table shows the cable requirements and maximum network cable lengths for the ST port. Port Cable Required Short-wavelength fiber-optic (850 nm): To connect the ST port:... - Page 36 Connecting the NIC to the Network 3 Connect the other end of the network cable to a 10BASE-FL Ethernet network hub or switch. Insert the cable that is connected to the transmit (10) connector on the NIC into the receive (RX) connector on the network hub or switch.
-
Page 38: Installing Nic Software In Windows
Update the network driver or NIC diagnostics program Install multiple NICs To obtain the latest shipping version of a driver, go to: http://www.3com.com/ The network driver can be used in both Microsoft and NetWare network environments. For instructions on using the installation diskettes (which can be created from the EtherCD) to install the network driver, see the text file for your operating system in the... -
Page 39: Windows 95
3: I HAPTER NSTALLING Before installing the network driver: Make sure that you have run the preinstallation program, as described in Make sure that the NIC is installed in the PC and that it is connected to the network. Make sure that you have the Windows installation files (Windows 95/98 only). -
Page 40: Windows 98
6 In the specified fields of the Identification tab screen, enter the following information, and then click OK: Computer Name — Identifies the PC on the network for other users. This entry must be a unique name of 15 characters or fewer, containing no spaces. Workgroup —... - Page 41 3: I HAPTER NSTALLING 2 Make sure that the EtherCD is inserted in the CD-ROM drive. 3 Click OK. The Insert Disk dialog box appears. 4 Open the pull-down menu and select: c:\windows\options\cabs 5 Click OK. Files are copied. If you are prompted for the EtherCD, click OK, make sure that the drive letter of the CD-ROM drive (for example, d:\) appears in the dialog box, and then click OK.
-
Page 42: Windows Nt 4.0
(for example, d:\ appears in the entry box, and then click OK. The Select OEM Option dialog box appears. 8 Make sure that the 3Com EtherLink PCI NIC is selected, and then click OK. The Adapters tab of the Network screen appears. -
Page 43: Windows Nt 3.51
3: I HAPTER NSTALLING Windows NT 3.51 To install the network driver: 1 Turn on the power to the PC. 2 In the Main window of the Program Manager, double-click the Control Panel icon and then the Network icon. 3 Click Add Adapter. The Add Network Adapter window appears. -
Page 44: Verifying Successful Installation
Device Manager tab. 3 Double-click Network adapters and make sure that the name of the 3Com EtherLink NIC appears. If a red X or a yellow exclamation point (!) appears next to the name of the NIC, the installation was not successful. -
Page 45: Installing The 3Com Nic Diagnostics Program
This program is for PCs running Windows 95, Windows 98, or Windows NT 4.0. The 3Com NIC Diagnostics program allows you to run tests that determine the status of your network, the NIC, and Remote Wake-Up. It also allows you to configure the NIC, view network statistics, and access support databases. -
Page 46: Updating The Network Driver And Nic Software
To start the 3Com NIC Diagnostics program: 1 Open the Windows Start menu. 2 Select Programs, and then 3Com NIC Utilities. 3 Click 3Com NIC Doctor. For instructions on using the program, see NIC Diagnostics Updating the Network Driver and NIC Software This section describes how to update your network driver and NIC diagnostic software. -
Page 47: Windows 95 And Windows 98
3: I HAPTER NSTALLING Windows 95 and Windows 98 To install multiple NICs in a PC running Windows 95 or Windows 98, install and configure each NIC individually, following these steps: 1 Run the preinstallation program before installing the NICs in the PC, as described in 2 Install the first NIC in your PC and connect it to the network, as described in CAUTION: Do not physically install the second NIC in... -
Page 48: Windows Nt 4.0
Windows NT 4.0 To install multiple NICs in a PC running Windows NT 4.0: 1 Install the NICs in your PC and connect each to the network. 2 Turn on the power to the PC and start Windows NT. 3 Double-click the My Computer icon, then the Control Panel icon, and then the Network icon. -
Page 50: Installing The Net Ware Lient And Server
The NetWare client driver enables PCs running DOS, Windows 3.x, or Windows for Workgroups to access resources on a NetWare 3.x, 4.x, or 5.x network. Use the 3Com intelligent auto install software (COMSLINK) to install the client software and drivers for Novell NetWare 3.x, 4.x, or 5.x. -
Page 51: Intelligent Auto Install Requirements
4: I HAPTER NSTALLING THE Intelligent Auto Install Requirements To use the intelligent auto install program: Make sure that your PC has only one EtherLink PCI NIC installed. Make sure that you are using NetWare 3.x, 4.x, or 5.x as your network operating system. -
Page 52: Installing The Netware Server Driver
Installing the NetWare Server Driver This section describes how to install the NetWare driver on a Novell server running NetWare 3.x, 4.x, or 5.x. The EtherLink PCI NICs do not support NetWare 3.xx or 4.xx servers that are not updated to the latest driver pack. The \NWSERVER\NW3.x directory contains the network driver file (3C90X.LAN) to be used for servers running NetWare 3.x. -
Page 53: Netware 3.12
Make sure that you have the latest NetWare Support Pack installed. that changes the LOADER.EXE file and provides the NBI.NLM, MSM.NLM, and ETHERTSM.NLM files. 3Com has provided the latest *.NLM files (at time of testing) on the EtherCD in the \NWSERVER directory. Importing the Server Driver To import the server driver into a NetWare 4.x server:... -
Page 54: Loading The Driver Manually
5 At the prompt, enter the command: NWSERVER For example: a:\nwserver The installation program gathers the files and prompts you for a NIC selection. 6 Press [Enter] to select the driver displayed and continue the installation. Loading the Driver Manually To update an existing server driver manually: 1 Copy all of the files from the \NWSERVER subdirectory on the EtherCD to the server's... -
Page 55: Loading The Driver Manually
PCI NIC. This address can be obtained by issuing a load command, where the driver identifies the slot numbers. Pressing Esc prevents loading the driver. Because of Novell's scheme for identifying PCI slots, it is not possible for 3Com to pre-identify the slot number. LIENT AND ERVER RIVERS... -
Page 56: Installing Multiple Nics
The values <slot1> and <slot2> are the numbers of the PCI slots in which the NICs are physically installed. To view the numbers of these PCI slots, use the 3Com Configuration and Diagnostic program for DOS. See the next section, for instructions. -
Page 57: Verifying The Pci Slot Number
4: I HAPTER NSTALLING THE Verifying the PCI Slot Number To verify the PCI slot number in which a NIC is installed: 1 Boot the NetWare server with the -na option. This prevents the AUTOEXEC.NCF file from loading. For example, enter: server -na 2 Issue the load command for the NIC LAN driver without a slot parameter. -
Page 58: Configuring The Nic
Overview This chapter describes how to configure the NIC. Before you change the NIC configuration settings, contact your system administrator. Default NIC Settings The table below lists the configuration settings for the NIC. The default setting is in bold in the Settings column. Option Description Network Driver... -
Page 59: Configuration Methods
The NIC can be configured using any of the methods listed in the table below. This chapter describes how to configure the NIC using the 3Com NIC Diagnostics program for Windows. For instructions on using the other two methods, see the file or appendix mentioned in the table. -
Page 60: Changing General Nic Configuration Settings
To change the NIC general configuration settings, such as network driver optimization, duplex mode, and media type: 1 Open the Windows Start menu. 2 Select Programs, and then 3Com NIC Utilities. 3 Click 3Com NIC Doctor. The 3Com NIC Diagnostics General screen appears. -
Page 61: Configuring The Managed Pc Boot Agent (Mba)
8 Click OK to save the changes and exit the program. Configuring the Managed PC Boot Agent (MBA) This section explains how to configure the 3C905C-TX-M and 3C905B-TX-M NICs’ Managed PC Boot Agent (MBA) boot ROM to boot from the network. -
Page 62: Enabling Or Disabling The Boot Rom Setting
1 Make sure that the NIC is installed and is connected to the network and that the NIC driver is installed. 2 Open the Windows Start menu. 3 Select Programs, and then 3Com NIC Utilities. 4 Click 3Com NIC Doctor. The 3Com NIC Diagnostics General screen appears. -
Page 63: Bbs Bios-Compatible Pcs
5: C HAPTER ONFIGURING THE BBS BIOS-Compatible PCs To enable a BBS BIOS-compatible PC to boot from the network using the MBA boot ROM: 1 Make sure that the NIC boot ROM setting is Enabled. See the previous section, Setting,” for instructions. 2 Set the MBA manually as the first boot device in the PC BIOS. -
Page 64: Non-Bbs Bios-Compatible Pcs
Configuring the Managed PC Boot Agent (MBA) Non-BBS BIOS-Compatible PCs To enable a non-BBS BIOS-compatible PC to boot from the network using the MBA boot ROM: 1 Make sure that the NIC boot ROM setting is Enabled. “Enabling or Disabling the Boot ROM in this chapter for instructions. -
Page 66: Troubleshooting The Nic
Accessing 3Com Support Databases In addition to the 3Com support databases listed in this section, check the README.TXT and the Help text files located in the HELP directory on the EtherCD for troubleshooting information. -
Page 67: Accessing The 3Com Nic Help System
“Installing the 3Com NIC Diagnostics for instructions. 2 Open the Windows Start menu. 3 Select Programs, and then 3Com NIC Utilities. 4 Select 3Com NIC Doctor Help. The main Help screen appears. 5 Click Help Topics to display a list of Help topics or click Find to search for a Help topic. -
Page 68: Troubleshooting The Nic Installation
Removes all 3C90x NICs from your system. Removes the 3Com NIC Diagnostics program. Installs the latest network driver. You can reinstall the 3Com NIC Diagnostics program after completing this procedure. See Diagnostics 1 Insert the EtherCD in the CD-ROM drive. -
Page 69: Troubleshooting The Network Connection
8 Reboot the PC. 9 Install the network driver, as described in the Network Driver Using the If you are prompted for 3Com files when Windows restarts, open the drop-down box and select the following path: \options\cabs To verify successful installation, see Installation”... -
Page 70: Troubleshooting Remote Wake-Up
Review the known problems and solutions found in the 3Com support following areas: databases 3Com Knowledgebase 3Com NIC Help system Release Notes and Frequently Asked Questions “Accessing 3Com Support chapter for instructions on using these databases. Download the Download and install the latest NIC driver from: latest NIC driver http://www.3com.com/... -
Page 71: Removing The Network Driver
Verify that the setting is enabled. 5 Check the Remote Wake-Up cable connection. If you have a 3C905C-TX-M NIC and your PC is compliant with PCI 2.2, the Remote Wake-Up cable is not required. Remote Wake-Up is automatically enabled through the PCI bus. -
Page 72: Windows Nt 3.51
6 Click OK to confirm the device removal. You are prompted to restart the PC. If you are physically removing the NIC from the PC, click No. Do not restart the PC until you shut down the system, turn the power off, and remove the NIC from the PC. -
Page 73: Removing The 3Com Nic Diagnostics Program
If you are reinstalling the NIC software, click Restart Now to restart the PC. Removing the 3Com NIC Diagnostics Program To remove the 3Com NIC Diagnostics program: 1 Start Windows. 2 Insert the EtherCD in the CD-ROM drive. The EtherCD Welcome screen appears. -
Page 74: Nic Diagnostics
Interpret the NIC LEDs. Run the NIC diagnostic tests. View network statistics. Use the 3Com icon in the Windows system tray. Interpreting the LEDs The EtherLink PCI NICs have light-emitting diodes (LEDs), as described in the following table, that can assist with network troubleshooting. - Page 75 7: R HAPTER UNNING State Meaning If drivers are installed, 100 LNK the 100BASE-TX (link) or 100BASE-FX connection is active. If drivers are not installed, the NIC is receiving power. Something is preventing the connection between the NIC and the hub or switch.
-
Page 76: Running The Nic Diagnostics Tests
Running the NIC Diagnostics Tests The 3Com NIC Diagnostics program for Windows contains tests that can check the status of the following items: Network Remote Wake-Up To run NIC diagnostic tests on a PC running DOS, Windows NT 3.51, Windows 3.x, or Windows for Workgroups, use the 3Com Configuration and... -
Page 77: To Run The Nic Test
3 Click Close. To Run the Remote Wake-Up Test At least two PCs on your network must contain a 3Com NIC with EtherDisk 4.x or later software to run the Remote Wake-Up Test. 1 Click Run Remote Wake-Up Test on the Diagnostics screen. -
Page 78: Viewing Network Statistics
1 Make sure that the NIC, the network driver, and the 3Com NIC Diagnostics program are installed. 2 Open the Windows Start menu. 3 Select Programs, and then 3Com NIC Utilities. 4 Click 3Com NIC Doctor. The 3Com NIC Diagnostics General screen appears. -
Page 79: Using The 3Com Icon In The Windows System Tray
HAPTER UNNING Using the 3Com Icon in the Windows System Tray If the 3Com icon is visible in the Windows system tray, double-click the icon to start the 3Com NIC Diagnostics program. If a red circle with a line through it appears over the 3Com icon, there is no connection between the NIC and the network. -
Page 80: Pecifications And
This appendix lists the specifications, standards conformance, cable requirements, and connector pin assignments for the EtherLink PCI NICs. 3C905C-TX-M NIC Specifications Hardware Bus interface PCI master Dimensions Power requirement Network Interface 10 Mbps Ethernet 10BASE-T 100 Mbps Ethernet 100BASE-TX Environment... -
Page 81: Appendix A: Specifications And Cabling Requirements
A: S PPENDIX PECIFICATIONS AND IEEE 802.1p/Q IEEE 802.1Q VLAN Tagging RMON Microsoft PC97 Microsoft PC98 Microsoft PC99 Net PC PCI 2.2 DMI 2.0 and 2.0s ACPI 1.0 Wired for Management 1.1a, 2.0 Pre-OS boot protocol support (PXE, BootP/DHCP, NCP, RPL) 3C905B NICs Specifications Hardware Bus interface... -
Page 82: 3C900B Nics Specifications
Environment Operating temperature Storage temperature Operating humidity Storage humidity Altitude Standards Conformance IEEE 803.3x flow control Microsoft PC98 PCI 2.1 DMI 1.0 and 2.0 3C900B NICs Specifications Hardware Memory 4 KB internal RAM Bus interface PCI Local Bus Specification, Revision 2.1 32-bit bus PCI master Supports bus master scatter-gather DMAs. -
Page 83: Cabling Requirements
A: S PPENDIX PECIFICATIONS AND Environment Operating 32˚ to 158˚ F (0˚ to 70˚ C) temperature Storage to 194˚ F ( – ˚ temperature Operating 10 to 90% noncondensing humidity Storage 10 to 90% noncondensing humidity Altitude 984 ft to 9,840 ft ( –... -
Page 84: 10Base-T Operation
Category Use 10BASE-T Operation 10BASE-T is the Institute of Electrical and Electronics Engineers (IEEE) 802.3 standard for Ethernet signaling over unshielded twisted-pair wire at 10 Mbps. Ethernet, as the most widely used network protocol, uses 10BASE-T as its primary cabling scheme. Ethernet characteristics include: A data rate of 10 Mbps. -
Page 85: 100Base-Tx Operation
A: S PPENDIX PECIFICATIONS AND 100BASE-TX Operation 100BASE-TX is the IEEE 802.3u standard for Fast Ethernet signaling over Category 5 UTP or STP wire at 100 Mbps. Based on an extension to the IEEE 802.3 Ethernet specification, Fast Ethernet characteristics include: A data rate of 100 Mbps. -
Page 86: I Dynamic Access Lan A
DynamicAccess LAN agent, access the DynamicAccess Technology User Guide on the EtherCD. You can also download it from: http://www.3com.com/dynamicaccess Client PC Requirements The DynamicAccess LAN agent can be installed on a PC running Windows 95, Windows 98, Windows NT 4.0, or Windows NT 3.51. -
Page 87: Installing The Dynamicaccess Lan Agent
B: I PPENDIX NSTALLING THE Operating System PC Requirements Windows 95 486/75 MHz CPU 16 MB RAM (32 MB recommended) 5 MB available hard drive space Windows 98 486/75 MHz CPU 16 MB RAM (32 MB recommended) 5 MB available hard drive space Windows NT 4.0 Pentium/100 MHz CPU 32 MB RAM... -
Page 88: Verifying Successful Installation
NIC are still intact. A 3Com DynamicAccess LAN agent entry appears as a protocol. A 3Com DynamicAccess LAN agent icon is installed in the Windows Control Panel. Configuring the DynamicAccess LAN Agent Contact your system administrator about using DynamicAccess technology at your site. -
Page 89: Removing Dynamicaccess Technology
B: I PPENDIX NSTALLING THE To configure the DynamicAccess LAN agent on a local PC: 1 Double-click the 3Com DynamicAccess icon in the Windows Control Panel. The Traffic Prioritization tab of the DynamicAccess Setup screen appears. 2 Select the tab containing the information you want to configure. -
Page 90: Nstalling The 3C Om Dmi Agent
3Com DMI Agent User Guide included with the 3Com DMI Agent software on the EtherCD. For more information on DMI, go to: http://www.3com.com/managedpc About the 3Com DMI Agent The 3Com DMI Agent allows you to obtain basic NIC information, including: Node address MAC address Driver version Additionally, depending on the features of your NIC, the 3Com DMI Agent allows you to view and configure... -
Page 91: System Requirements
NIC. For a description of each MIF that is supported by the 3Com DMI Agent, see the 3Com DMI Agent User Guide included with the 3Com DMI Agent software on the EtherCD. -
Page 92: Network Management Requirements
Intel LANDesk Client Manager Installing the 3Com DMI Agent This section describes how to install the 3Com DMI Agent on a PC running Windows 95, Windows 98, or Windows NT 4.0. For instructions on how to install the 3Com DMI Agent on a PC running Windows NT 3.51, see the 3Com DMI... - Page 93 To verify successful installation, use a DMI-compatible browser or a network management application that supports DMI 2.0 or 2.0s to verify that the 3Com NIC is present. See the 3Com DMI Agent User Guide or contact your system administrator for instructions.
-
Page 94: D Technical Support
3Com Corporation World Wide Web site. Online Technical Services 3Com offers worldwide product support 24 hours a day, 7 days a week, through the following online systems: World Wide Web site 3Com Knowledgebase Web Services... -
Page 95: 3Com Knowledgebase Web Services
3Com FTP Site Download drivers, patches, software, and MIBs across the Internet from the 3Com public FTP site. This service is available 24 hours a day, 7 days a week. To connect to the 3Com FTP site, enter the following... -
Page 96: Access By Digital Modem
U.K. U.S.A. Access by Digital Modem ISDN users can dial in to the 3Com BBS using a digital modem for fast access up to 64 Kbps. To access the 3Com BBS using ISDN, call the following number: 1 847 262 6000... -
Page 97: Support From 3Com
PPENDIX ECHNICAL Support from 3Com If you are unable to obtain assistance from the 3Com online technical resources or from your network supplier, 3Com offers technical telephone support services. To find out more about your support options, call the 3Com technical telephone support phone number at the location nearest you. -
Page 98: Returning Products For Repair
Venezuela North America Returning Products for Repair Before you send a product directly to 3Com for repair, you must first obtain an authorization number. Products sent to 3Com without authorization numbers will be returned to the sender unopened, at the sender’s expense. - Page 99 00800 3111206 0800 831416 0800 995014 900 983125 020 795482 0800 55 3072 0800 966197 1 800 NET 3Com (1 800 638 3266) Enterprise Customers: 1 800 876 3266 Fax Number +65 543 6348 +31 30 6029999 1 408 326 3355...
- Page 100 Program for DOS 59 3Com DMI Agent client PC requirements 90 installing 91 network management requirements 91 overview 89 3Com icon, in Windows system tray removing 78 showing 78 3Com Knowledgebase Web Services 94 3Com NIC Diagnostics program installing 44...
- Page 101 19 diagnostics tests, running 75 diskettes creating 23 obtaining 22 DMI (Desktop Management Interface), overview 19 3Com Configuration and Diagnostics Program 59 Novell client driver, installing 49 drivers NetWare client, installing 49 NetWare server, installing 51 Windows 95, installing 38...
- Page 102 78 frequently asked questions 66 full-duplex 57 half-duplex 57 Help system, accessing 66 installation 3Com DMI Agent 91 connecting to the network 29 diskettes creating 23 obtaining 22 DynamicAccess LAN agent 86 multiple NICs 45, 53...
- Page 103 17 test, running 76 troubleshooting 69 removing DynamicAccess LAN agent 88 removing NIC software 70 requirements 3Com DMI Agent 90 cabling 82 DynamicAccess LAN agent 85 PC 21 Remote Wake-Up 17 returning products for repair 97 RJ-45 port connector pin assignments 84 RMON (remote monitoring) 19 SC (fiber) port...
- Page 104 Windows NT 4.0 installing driver 41 multiple NIC installations 47 removing NIC software 71 verifying installation 43 Windows system tray, 3Com icon 78 workgroup keep-alive packet 20 World Wide Web (WWW) 93, 94 Year 2000 compliance 10 yellow exclamation point (!) in...
-
Page 106: Imited Warranty
January 1, 2000, and Customer notifies 3Com before the later of April 1, 2000, or ninety (90) days after purchase of the product from 3Com or its authorized reseller, 3Com shall, at its option... - Page 107 (48) hours of installation but no later than thirty (30) days after the date of purchase, and this is verified by 3Com, it will be considered dead- or defective-on-arrival (DOA) and a replacement shall be provided by advance replacement. The replacement product will normally be shipped not later than three (3) business days after 3Com’s...
-
Page 108: Fcc Classb Statement
Tested to comply with the FCC Standards for home and office use. NOTE: In order to maintain compliance with the limits of a Class B digital device, 3Com requires that you use quality interface cables when connecting to this device. Changes or modifications not expressly approved by 3Com could void the user’s authority to operate this equipment. -
Page 109: Fcc Declaration Of Conformity
ANSI C63.4-1992 Methods of Measurement Federal Communications Commission 47 CFR Part 15, subpart B 15.107 (e) Class B Conducted Limits 15.109 (g) Class B Radiated Emissions Limits 3Com Corporation, 5400 Bayfront Plaza, P.O. Box 58145, Santa Clara, CA 95052-8145 (408) 326-5000 NDUSTRY ANADA... - Page 110 TRADE SECRETS; TITLE: You acknowledge and agree that the structure, sequence and organization of the Software are the valuable trade secrets of 3Com and its suppliers. You agree to hold such trade secrets in confidence. You further acknowledge and agree that ownership of, and title to, the Software and Documentation and all subsequent copies thereof regardless of the form or media are held by 3Com and its suppliers.
-
Page 111: Product Registration
ENTIRE AGREEMENT: This Agreement sets forth the entire understanding and agreement between you and 3Com and supersedes all prior agreements, whether written or oral, with respect to the Software and Documentation, and may be amended only in a writing signed by both parties.
Need help?
Do you have a question about the 3C905C-TX-M and is the answer not in the manual?
Questions and answers