Table of Contents
Advertisement
Quick Links
Advertisement
Table of Contents

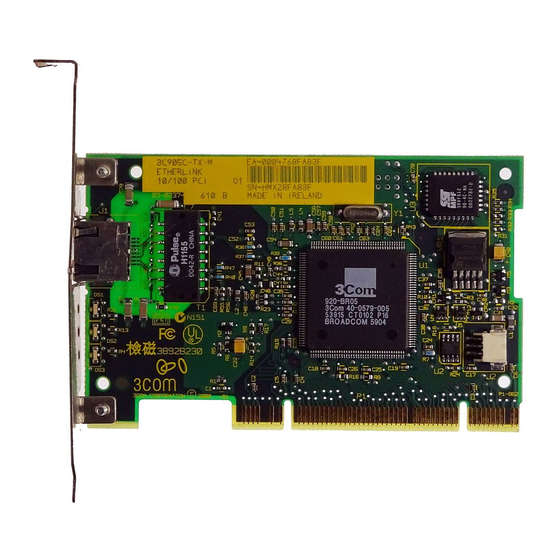
Summary of Contents for 3Com Etherlink 3C905C-TX-M
- Page 2 Artisan Scientific - Quality Instrumentation ... Guaranteed | (888) 88-SOURCE | www.artisan-scientific.com...
- Page 3 ETWORK NTERFACE ARDS UICK UIDE Introduction This guide explains how to use EtherCD 5.x to install the following 3Com ® EtherLink ® PCI network interface cards (NICs) in a PC running Microsoft Windows 95, Windows 98, or Windows NT 4.0:...
-
Page 4: Obtaining Installation Diskettes
Access a PC that has a CD-ROM drive and create driver installation diskettes from the EtherCD. See the user guide on the EtherCD for instructions. Contact 3Com to order installation diskettes for EtherCD version 5.1: Toll-free number from the United States and Canada:... - Page 5 rn_body.SML Page 3 Wednesday, June 9, 1999 7:56 AM Running the Preinstallation Program Installing Multiple NICs If you are installing multiple EtherLink PCI NICs in a PC or server, follow the instructions in “Installing Multiple NICs” in the user guide. Do not follow the instructions in this quick guide.
- Page 6 ARDS UICK UIDE 7 Click Install NIC Driver . To install the network driver and the 3Com NIC Diagnostics program, click Install with Diagnostic Program. To install the network driver only, click Install without Diagnostic Program . Files are copied. A message box appears when the installation is complete.
- Page 7 rn_body.SML Page 5 Wednesday, June 9, 1999 7:56 AM Installing the NIC in the PC If you are planning to install the Remote Wake-Up cable, choose an empty PCI slot that is close to the matching Remote Wake-Up connector on the PC motherboard. Remote Wake-Up is supported by the following NICs: 3C905C-TX-M 3C905B-TX...
- Page 8 rn_body.SML Page 6 Wednesday, June 9, 1999 7:56 AM ® PCI N THER ETWORK NTERFACE ARDS UICK UIDE 7 Secure the NIC with the screw you removed in step If you want to connect the Remote Wake-Up cable, see “Connecting the Remote Wake-Up Cable” in the user guide to continue the installation.
-
Page 9: Installing The Network Driver
rn_body.SML Page 7 Wednesday, June 9, 1999 7:56 AM Installing the Network Driver Installing the Network Driver This section describes how to install the network driver on a PC running Windows 95, Windows 98, or Windows NT 4.0. For other operating systems, see the user guide on the EtherCD. - Page 10 rn_body.SML Page 8 Wednesday, June 9, 1999 7:56 AM ® PCI N THER ETWORK NTERFACE ARDS UICK UIDE 6 In the specified fields of the Identification tab screen, enter the following information, and then click OK: Computer Name—Identifies the PC on the network for other users.
-
Page 11: Windows Nt
rn_body.SML Page 9 Wednesday, June 9, 1999 7:56 AM Installing the Network Driver 3 Click OK. The Insert Disk dialog box appears. 4 Open the pull-down menu and select: c:\windows\options\cabs 5 Click OK. Files are copied. If you are prompted for the EtherCD, click OK, make sure that the drive letter of the CD-ROM drive (for example, d:\) appears in the dialog box, and then click OK. -
Page 12: Verifying Successful Installation
(for example, d:\) appears in the entry box, and then click OK. The Select OEM Option dialog box appears. 8 Make sure that the 3Com EtherLink PCI NIC is selected, and then click OK. The Adapters tab of the Network screen appears. -
Page 13: Troubleshooting The Installation
If you encounter any of the problems or error messages in the table below, follow the steps under the Solution column to resolve the problem. For additional troubleshooting help, see the user guide on the EtherCD or go to the 3Com Knowledgebase: http://knowledgebase.3com.com Problem/Error Message Solution... - Page 14 UIDE Copyright © 1999, 3Com Corporation. All rights reserved. Unless otherwise indicated, 3Com registered trademarks are registered in the United States and may or may not be registered in other countries. 3Com, the 3Com logo, and EtherLink are registered trademarks of 3Com Corporation. EtherCD is a trademark of 3Com Corporation.


Need help?
Do you have a question about the Etherlink 3C905C-TX-M and is the answer not in the manual?
Questions and answers