
Related Manuals for 3Com 3C996B-T


Summary of Contents for 3Com 3C996B-T
-
Page 1: User Guide
User Guide Gigabit Server Network Interface Cards 3C996B-T and 3C996-SX http://www.3com.com/ http://support.3com.com/registration/frontpg.pl Published November 2001 User guide version 1.0.2... - Page 2 U.S.A. Copyright © 2001 3Com Corporation. All rights reserved. No part of this documentation may be reproduced in any form or by any means or used to make any derivative work (such as translation, transformation, or adaptation) without written permission from 3Com Corporation.
-
Page 3: Table Of Contents
Solaris Safety Precautions Pre-Installation Checklist Installing and Connecting the NIC Installing the NIC Connecting the Network Cables Installing and Using the 3Com Connection Assistant System Requirements Installation Windows XP Driver Setup Installing the Driver Software Windows XP 32-bit Windows XP 64-bit... - Page 4 Contents Windows 2000 Driver Setup Installing the Driver Software Verifying Successful Installation Modifying Configuration Parameters Removing the Driver Software Installing Advanced Server Features Uninstalling Advanced Server Features Configuring Advanced Server Features Configuring Teaming Configuring VLANs Advanced Server Control Suite Updating Mini-port (Core) Drivers Windows NT Driver Setup Installing the Driver Software Modifying Configuration Parameters...
- Page 5 Linux Driver Setup Installation Overview Installing the Source RPM Package Building the Driver From a TAR File Patching PCI Files (Optional) Unloading and Removing the Driver Optional Parameters Advanced Server Features Installing Advanced Server Features Configuring Teams UNIX and SCO OpenServer Driver Setup UnixWare 7 Driver Package Creation Driver Installation...
- Page 6 Contents 3Com Management Programs Overview Installing the Management Programs Removing the Management Programs Initializing the Management Programs Vital Sign Diagnostics Cable Analysis Load Balance/Virtual LANs Saving the Configuration Restoring the Configuration Load Balance/Virtual LAN Statistics Troubleshooting Hardware Diagnostics Checking Port LEDs...
- Page 7 Physical Characteristics Power Requirements Environmental Specifications Technical Support Online Technical Services World Wide Web Site 3Com KnowledgeBase Services 3Com FTP Site Support from Your Network Supplier Support from 3Com Returning Products for Repair Regulatory Information FCC Class A Verification Statement...
-
Page 9: Introduction
3Com Gigabit Server NIC Keep the NIC in its package until ready for installation. 3Com Installation CD with Gigabit Server driver software and online user guide. Quick start guide. Inform your network supplier of any missing or damaged items. If you need to return the NIC, you must use the original (or equivalent) packaging. -
Page 10: Load Balance
Other protocol packets will be sent and received through one primary NIC only. Failover for non-IP traffic is supported using 3Com,Broadcom,Alteon, and Intel NICs. The generic trunking mode requires the Ethernet switch to support some form of port trunking mode (for example, Cisco Systems Gigabit EtherChannel or other switch vendors’... -
Page 11: Advanced Server Features For Windows Nt
(Server and Enterprise Server). See “Windows NT Driver Setup” on page 37 for additional information. Failover and Load Balance Adapter teaming for failover (heterogeneous support for 3Com 10/100 server NICs, released Alteon AceNIC, Intel 82559 LAN on Motherboard (LOM), released Intel 10/100 server NICs, and released Intel 1000BaseSX server NICs). -
Page 12: Advanced Server Features For Linux
VLAN features. 3Com Management Programs The 3Com Management Programs is a graphical user interface that functions with the Windows 2000 Server operating systems (Server, Advanced Server, and Datacenter Server). See “3Com Management Programs” on page 85 for additional information. -
Page 13: Creating A Driver Disk
Advanced Server Features—Windows NT Driver Advanced Server Features—NetWare Driver Advanced Server Features—Linux Driver 1 Insert the 3Com Installation CD in the CD-ROM drive. Allow your operating system’s autorun feature to launch the Master Navigator. 2 Click NIC Software. 3 Click Installation Utilities. -
Page 15: Installing And Connecting The Nic
Installing and Connecting the NIC System Requirements Before installing the Gigabit Ethernet NIC, be sure your system meets the requirements listed for your operating system. Windows XP (64-bit) Itanium-based computer that meets Windows XP software requirements One open 32-bit or 64-bit PCI slot PCI v2.2 33/66 MHz or PCI-x v1.0 64 bit 133 MHz 256 MB RAM (minimum) Microsoft Windows XP (64-bit version) -
Page 16: Netware
Installing and Connecting the NIC NetWare Pentium-based computer that meets Novell NetWare 4.2/5.x/6.x software requirements One open 32-bit or 64-bit PCI slot PCI v2.2 33/66 MHz or PCI-x v1.0 64 bit 133 MHz 128 MB RAM (minimum) One of the following versions of Novell NetWare: Novell NetWare 5.0 or higher, with Support Pack 3 or the most recent NetWare 5 Support Pack Novell NetWare 4.2 with Support Pack 7 or the most recent Support Pack, including... -
Page 17: Safety Precautions
“System Requirements” on page 7. 2 Verify that your system is using the latest BIOS. 3 Review the information in the release.txt file on the 3Com Installation CD for important information not available at the time this manual was created. -
Page 18: Installing And Connecting The Nic
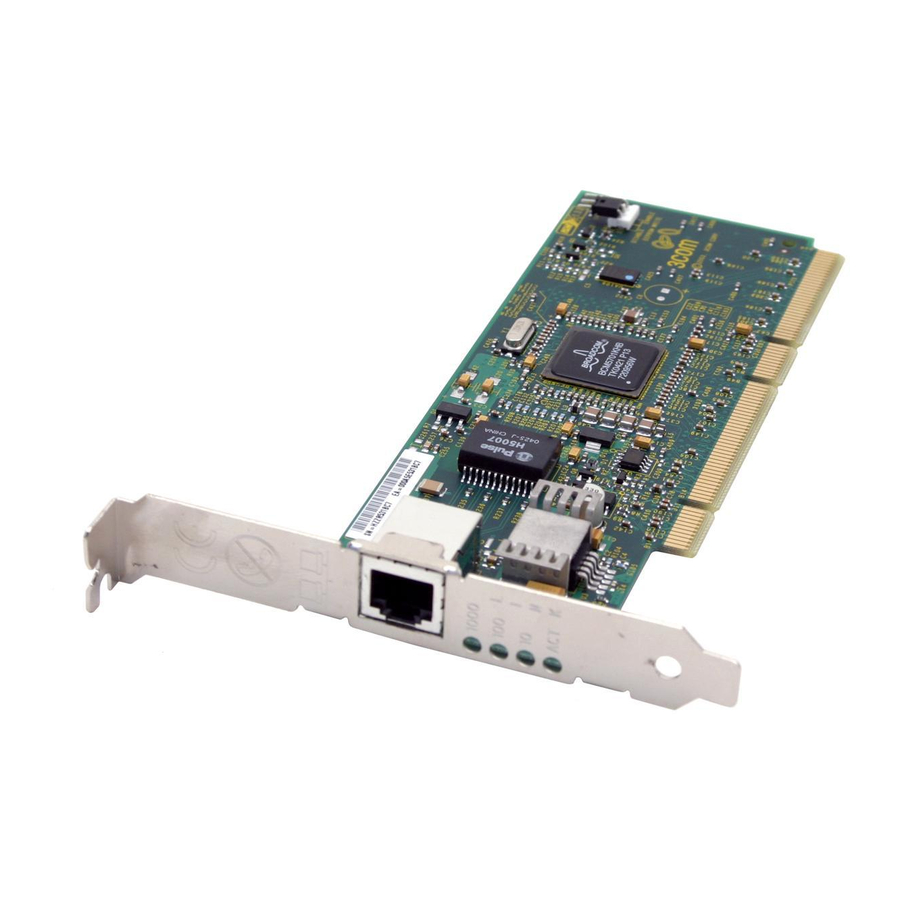
Installing and Connecting the NIC Installing and Connecting the NIC This manual covers two types of Gigabit Server NICs: server Ethernet NIC (3C996B-T): and server fiber NIC (3C996-SX): The procedure for installing a NIC in a system is identical for both NICs. Connecting the network cables is different for Ethernet and fiber NICs (see “Connecting the Network... - Page 19 NOTE: For optimal performance, select a PCI-X slot. For second best performance, select a 64-bit PCI slot. 3 Remove the blank cover plate from the slot that you selected (see item 1 in the figure, below). 4 Holding the PCI card by the edges, align the NIC’s connector edge with the PCI connector dock.
-
Page 20: Connecting The Network Cables
Installing and Connecting the NIC Connecting the Network Cables Choose your type of NIC (Ethernet or fiber) and follow the procedure. Ethernet NICs Gigabit Ethernet NICs have one RJ-45 connector for attaching the system to an Ethernet copper-wire segment. When automatic link negotiation is disabled, the port can be configured for 10 Mbps or 100 Mbps signaling and either half-duplex or full-duplex operation. -
Page 21: Installing And Using The 3Com Connection Assistant
A 3Com Connection Assistant icon appears on your Windows desktop. Double-click the icon to start the program. For help on using the 3Com Connection Assistant, see the online help included with the software. Installing and Using the 3Com Connection Assistant... -
Page 23: Windows Xp Driver Setup
1 Start Windows and log in. You must have Network Administrator privileges to install the driver software 2 Insert the 3Com Installation CD in the CD-ROM drive. 3 The main menu appears. Select NIC Software. 4 From the list on the left, select NIC Drivers. -
Page 24: Windows Xp 64-Bit
If you cannot use the 3Com Master Navigator on your system, use the following procedure to install the updated drivers. 1 Start Windows XP. The driver will be automatically installed. 2 Insert the 3Com Installation CD in the CD-ROM drive. If the main menu appears, click Exit. 3 Select Start/Control Panel/Network Connections. -
Page 25: Verifying Successful Installation
Verifying Successful Installation 1 Right-click My Network Places and select Properties from the menu. 2 Check connections in the LAN or High-Speed Internet window. Modifying Configuration Parameters Although the default values should be appropriate in most cases, you may change any of the available options to meet the requirements of your specific system. - Page 26 Windows XP Driver Setup The following options are available: 802.1p QOS Checksum Offload Flow Control Jumbo MTU Speed and Duplex Wake Up Capabilities – Disable (default) – Enable – None – Rx TCP/IP Checksum – Tx TCP/IP Checksum – Tx/Rx TCP/IP Checksum –...
-
Page 27: Removing The Driver Software
1 Start Windows XP I64 Server Edition and log in. You must have Network Administrator privileges to uninstall the driver software. 2 Insert the enclosed 3Com Installation CD into the CD-ROM drive. 3 Select Start/My Computer. 4 Right-click CD-ROM drive, and select Explore. Do not select Autoplay. -
Page 28: Uninstalling Advanced Server Features
The Advanced Server Features provides load balancing, failover, and VLAN configuration by creating teams (virtual NICs) that consist of multiple NICs. Configuring Teaming NOTE: All teaming configurations can be optionally performed using the 3Com Management Programs. Refer to “3Com Management Programs” on page 85 for additional information. - Page 29 Use this procedure to access the NIC properties for teaming configuration: 1 Click the Start menu, and then select Settings/Control Panel. 2 Select Network and Dial-up Connections, right-click 3Com Virtual NIC, and then select Broadcom Advanced Server Program Driver. The Advanced Server Features window appears.
-
Page 30: Configuring Vlans
Windows XP Driver Setup 4 If a team has no NICs assigned, you will be prompted to add a NIC or delete the team. Click OK. When team has been correctly configured, one Virtual Team NIC driver will be created for each configured team and will appear along with the other NICs in the Local Area Connection Properties window. -
Page 31: Advanced Server Control Suite
2 Double-click the Gigabit Ethernet NIC icon. The Advanced Server Features configuration window is displayed. If you do not see the Gigabit Ethernet NIC icon, you must install the 3Com Management Programs. For more information, see “3Com Management Programs” on page 85. -
Page 33: Windows 2000 Driver Setup
The Windows 2000 Found New Hardware wizard detects the new NICs and begins the driver installation. 2 Insert the 3Com Installation CD in the CD-ROM drive. 3 From the main menu, select NIC Software. 4 From the list on the left, click NIC Drivers. - Page 34 15 The Driver Files Search Results screen appears. Verify that the correct path to the driver software is shown (c:\winnt\inf\oem0.inf), and then click Next. If you acquired the NIC software on a floppy disk or from the 3Com Web site, click where the NIC driver files reside on your system.
-
Page 35: Verifying Successful Installation
Verifying Successful Installation 1 Right-click My Network Places and select Properties from the menu. 2 Check connections in the Network and Dial-up Connections window. Modifying Configuration Parameters Although the default values should be appropriate in most cases, you may change any of the available options to meet the requirements of your specific system. - Page 36 Windows 2000 Driver Setup The following options are available: 802.1p QOS Checksum Offload Flow Control Jumbo MTU Speed and Duplex Wake Up Capabilities – Disable (default) – Enable – None – Rx TCP/IP Checksum – Tx TCP/IP Checksum – Tx/Rx TCP/IP Checksum –...
-
Page 37: Removing The Driver Software
7 The Installed Devices on Your Computer screen appears. Click the network adapter card you want to uninstall (3Com 3C996 10/100/1000 Server NIC), and then click Next. 8 In the Uninstalled Devices window, click Yes, I want to uninstall this device, and then click Next. -
Page 38: Installing Advanced Server Features
The Advanced Server Features provides load balancing, failover, and VLAN configuration by creating teams (virtual NICs) that consist of multiple NICs. Configuring Teaming NOTE: All teaming configurations can be optionally performed using the 3Com Management Programs. Refer to “3Com Management Programs” on page 85 for additional information. - Page 39 Use this procedure to access the NIC properties for teaming configuration: 1 Click the Start menu, and then select Settings/Control Panel. 2 Select Network and Dial-up Connections, right-click 3Com Virtual NIC, and then select Broadcom Advanced Server Program Driver. The Advanced Server Features window appears.
-
Page 40: Configuring Vlans
Windows 2000 Driver Setup NOTE: All other NICs added to the team are reconfigured automatically to match the team configuration. When the basic configuration properties of a team are changed, this changes the configuration of all NICs in the team. However, when a NIC is removed from any failover teams, it will operate according to the parameters set for it before becoming a member of a failover team. - Page 41 2 Double-click the Gigabit Ethernet NIC icon. The Advanced Server Features configuration window is displayed. If you do not see the Gigabit Ethernet NIC icon, you must install the 3Com Management Programs. For more information, see “3Com Management Programs” on page 85.
-
Page 42: Advanced Server Control Suite
If you have installed the Broadcom Advanced Server Control Suite, all Load Balancing and VLAN configuration is done from the Advanced Server Control Suite window. You can access the Advanced Server Control Suite by installing 3Com Management Programs. See “3Com Management Programs” on page 85 from more details. - Page 43 Updating Mini-port (Core) Drivers 20 Open the Advanced Server Features driver properties. 21 Click Restore. 22 Type the filename you used during the save. Click OK. 23 Click OK twice to make the changes. 24 The virtual NIC appears in the Network and Dialup Connections window. Open the properties for the virtual NIC.
-
Page 45: Windows Nt Driver Setup
If you attempt to install the driver on a new Windows NT system without Service Pack 5 (or the latest service pack), the installation may not be successful. (3Com has tested and supports only Service Pack 6a.) Before installing a service pack, you must first install the MS Loopback Adapter driver. -
Page 46: Modifying Configuration Parameters
13 When the system returns to normal operation, verify that the NIC port LEDs operate as described in “Installing and Connecting the NIC” on page 7. NOTE: After installing the drivers, it is recommended that you install the 3Com Management Programs to make full use of all management features. For more information, see “3Com Management Programs”... - Page 47 3 Select the desired NIC from the Network Adapters window and click Properties. The Gigabit Ethernet Controller window opens. The possible NIC parameter types are: Flow Control – Disable (default) – Enable Speed and Duplex – Auto (default) – 10 Mb Half –...
-
Page 48: Updating The Driver Software
1 Start your Windows NT system and log in. You must have Network Administrator privileges to install the driver software. 2 Insert the 3Com Installation CD in the CD-ROM drive. 3 From the Welcome screen, select NIC Software. 4 Click Update NIC Driver. -
Page 49: Installing Advanced Server Features
1 Start your Windows NT system and log in. You must have Network Administrator privileges to install the driver software. 2 Insert the enclosed 3Com Installation CD into the CD-ROM drive. 3 From the Welcome screen, click Exit. You must exit the Master Navigator to install Advanced Server Features. -
Page 50: Configuring Teaming
Windows NT Driver Setup Configuring Teaming Teaming configuration is optional. Before configuring Failover Teaming, see “NIC Teaming” on page 101. Configuring Teaming consists of the following tasks: Accessing the Advanced Server Features Driver Properties Creating teams Adding NICs to the teams Assigning an IP address to the teams Rebooting the system Each of these tasks is described below, along with how to delete NICs from a failover... - Page 51 NOTE: All other NICs added to the team are reconfigured automatically to match the team configuration. When a basic team configuration properties are changed, this changes the configuration of all NICs in the team. However, after an NIC has been removed from any team, it will operate according to the parameters set for it before becoming a member of a team.
-
Page 52: Configuring Vlans
Windows NT Driver Setup Configuring VLANs VLAN configuration is optional. Before configuring VLANs, see the “VLANs Overview” on page 102. NOTE: NICs that are members of a team can also be configured to support VLANs. VLANs, however, cannot be configured for an Intel stand-alone LAN on Motherboard (LOM) or a team that includes a LOM. -
Page 53: Advanced Server Control Suite
If you have installed the Broadcom Advanced Server Control Suite, all Load Balancing and VLAN configuration is done from the Advanced Server Control Suite window. You can access the Advanced Server Control Suite by installing 3Com Management Programs. See “3Com Management Programs” on page 85 from more details. -
Page 54: Installing The Microsoft Loopback Adapter Driver
Failure to install the Loopback Adapter driver before installing a service pack can result in a corrupted operating system. 3Com has tested and supports only Service Pack 6a. To install the driver, do the following: 1 Start the Windows NT 4.0 fresh installation and proceed as usual. -
Page 55: Setting Up Server 2
Performing a Fresh Installation of Windows NT on a Backup Domain Controller CAUTION: If performed incorrectly, this procedure can destroy the primary domain controller security database. Use the rdisk /s command to make emergency repair diskettes to backup the server security databases on the two servers before attempting this procedure. -
Page 56: Stopping The Net Logon Service On Server 1
Windows NT Driver Setup Stopping the Net Logon Service on SERVER 1 1 Double-click the Control Panel. 2 Double-click Services. 3 In the Services dialog box, select Net Logon. 4 Click Stop. 5 Click Yes to stop the net logon service. This unlocks the security database. 6 Close the Services dialog box. -
Page 57: Updating Mini-Port (Core) Drivers
18 On SERVER-1, refresh the Server Manager dialog box. From the View menu, select Refresh. The Server Manager dialog box now shows SERVER-2 as PRIMARY and SERVER-1 as BACKUP. 19 Select SERVER-2. 20 From the Computer menu, select Synchronize with Primary Domain Controller. 21 Click Yes to start synchronization. - Page 58 Windows NT Driver Setup 15 Open the Advanced Server Features driver properties. 16 Click Restore. 17 Type the filename you used during the save, and then click OK. 18 Click OK again to make the changes. 19 Click Close to reset the IP address on the virtual NIC. 20 When the machine prompts you to restart, click Yes.
-
Page 59: Novell Netware Driver Setup
Novell NetWare Driver Setup Pre-Installation Requirements The NIC must be installed in the server. Install the latest support pack files. The NetWare support pack or patch file(s) needed for your server operating system are indicated below: NetWare OS NetWare 5.1 NetWare 4.2 NOTE: NetWare 5.x: If you are installing NetWare 5.x for the first time, you will need to install the NIC driver during the OS installation procedure. - Page 60 Novell NetWare Driver Setup 8 Repeat steps 6 through 8 for additional NICs. 9 After you are finished configuring the NICs, select Continue Installation. NOTE: You may want to change the autoexec.ncf file to add or delete keywords. The startup.ncf and autoexec.ncf files can be edited by invoking NWCONFIG from the NetWare 5.x server console, and by invoking LOAD INSTALL from the NetWare 4.x server console.
- Page 61 Parameter Options Description TxDescriptors = Default = 120 Pre-allocates ECB resources on the adapter for transmitting Min = 100 packets. Max = 400 RxFlow = Default = ON Allows enabling/disabling of RxFlow control. Selections are: ON, OFF TxFlow = Default = ON Allows enabling/disabling of TxFlow control.
-
Page 62: Installing Novell Netware Server 5.1
Novell NetWare Driver Setup Installing Novell NetWare Server 5.1 Be sure that the server has the latest support pack available installed. The latest support packs can be found at: http://support.novell.com/misc/patlst.htm. You may want to create an archive disk by copying all the files from the CDROM\NetWare\Driver directory onto a floppy disk. -
Page 63: Removing Drivers From Autoexec.ncf
# WARNING! # If you change the name of this server, you must update # all the licenses that are assigned to this server. Using # NWAdmin, double-click a license object and click # Certificate Assignments. If the old name of # this server appears, you must delete it and then add the # new server name. -
Page 64: Installing Advanced Server Features
Novell NetWare Driver Setup Installing Advanced Server Features 1 Load BASP.LAN just like a standard LAN driver with the same frame types loaded for the NIC in the team. BASP.LAN requires a special VSLOT parameter to specify the virtual slot. The virtual slot can be viewed as a team number. Example: LOAD BASP.LAN FRAME=ETHERNET_II NAME=BASP_1_EII VSLOT=1 2 After BASP.LAN is successfully loaded, a new screen appears. -
Page 65: Load Balance And Trunk Mode Selection
NICs respectively. Note that standby is valid only for load balance mode. Configuring VLANs NOTE: VLANs are not supported on all NICs. If a non-3Com NIC is a member of a failover team, VLANs may not be supported for that team. - Page 66 Novell NetWare Driver Setup 3 Bind BASP.LAN to the NIC in the team for each protocol. Example: BASP BIND BASP_1_V2_EII B57_1_EII BASP BIND BASP_1_V2_EII B57_2_EII Note that if there are multiple VLANs (each with one or more frame types) loaded on the virtual NIC, it is necessary to bind only one frame type on one VLAN on the virtual NIC to the same frame type on the physical NIC.
-
Page 67: Additional Command Line Keywords
Uninstalling Advanced Server Features Additional Command Line Keywords CHECKSUM=ON This enables BASP.LAN to offload TCP/UDP and IP checksums to the bound NIC if supported. This will improve performance if some or all NIC in the team support hardware checksums. Example: A team of two BCM5700 NICs with hardware checksums enabled. - Page 68 Novell NetWare Driver Setup # Note: The Time zone information mentioned above # should always precede the SERVER name. Set Bindery Context = 3Com file server name GOBRCM ipx internal net 1234ABCD load conlog maximum=100 ; Network driver LOADs and BINDs are initiated via ;...
- Page 69 VLAN=3 LOAD BASP.LAN FRAME=ETHERNET_II NAME=BASP_1_V4_EII VSLOT=1 VLAN=4 LOAD B57.LAN FRAME=ETHERNET_II NAME=B57_1_V_EII SLOT=1 LOAD B57.LAN FRAME=ETHERNET_II NAME=B57_2_V_EII SLOT=2 # Bind BASP.LAN to the NIC adapters in the team for each protocol # Note: BASP BIND is only used for the first VLAN all other VLANs are automatically # bound to the virtual adapter (VSLOT=1).
- Page 70 Novell NetWare Driver Setup NOTE: Bind B57_1_EII to BASP_1_E82 is also bound to BASP_1_E82. VLSOT range is from 1 to 4 (only four TEAMS can be configured.) Example of VLAN with Advanced Server Features: LOAD BASP.LAN FRAME=ETHERNET_II NAME=BASP_1_V100_EII VSLOT=1 VLAN=100 LOAD BASP.LAN FRAME=ETHERNET_II NAME=BASP_1_V100_EII VSLOT=1 VLAN=200 LOAD BASP.LAN FRAME=ETHERNET_II NAME=BASP_1_V100_EII VSLOT=1...
-
Page 71: Installing Advanced Server Features On Novell Netware Server 4.2 And 5.1
Installing Advanced Server Features on Novell NetWare Server 4.2 and 5.1 Installing Advanced Server Features on Novell NetWare Server 4.2 and 5.1 Use the following procedure to install Advanced Server Features on Novell NetWare Server 4.2 and 5.1: 1 Load BASP.LAN just like a standard LAN driver with the same frame types loaded for the NIC in the team. -
Page 72: Nic Driver Configuration Parameters For Novell Netware
Novell NetWare Driver Setup NIC Driver Configuration Parameters for Novell NetWare Parameter CheckSum = Frame = type name = text PDriver = RxBuffers = TxDescriptors = RxFlow = TxFlow = Slot = n Speed = n Link= RxTicks= TxPacketsPer= Node= Options Description Default = ON... -
Page 73: Linux Driver Setup
Linux Driver Setup Installation Overview The driver is distributed in three packaging formats: binary RPM, source RPM, and compressed tar archive. The binary RPM includes precompiled driver modules for kernels 2.2.14-6.1.1 (Red Hat 6.2) and 2.2.16-22 (Red Hat 7.0), and is the preferred installation method for systems running these kernel versions. -
Page 74: Patching Pci Files (Optional)
Linux Driver Setup Patching PCI Files (Optional) To use Red Hat’s kudzu hardware detection utility, a number of files containing PCI vendor and device information need to be patched with information on the BCM5700 chip. A patch file (pci.patch) is included for Red Hat 7. Apply the patch by typing the following: patch -N -pl -d /usr <... -
Page 75: Advanced Server Features
NIC drivers must support NIC Extension (NICE). In this distribution, only 3Com NICs are supported. Load balance mode works with all Ethernet switches without configuring the switch ports to any special trunking mode. Only IP traffic will be load balanced in both inbound and outbound directions. -
Page 76: Installing Advanced Server Features
Linux Driver Setup Installing Advanced Server Features The driver is released in two packaging formats, source RPM and compressed tar archive. The file names for the two packages are bcm5700-<version>.src.rpm and bcm5700- <version>.tar.gz respectively. Identical files to build the driver are included in both packages. -
Page 77: Configuring Teams
5 See “Configuring Teams” on page 69 to set up the teams. Makefile makefile baspcfg precompiled configuration utility bcmtype.h commonly use type header file blf.c Advanced Server Features module entry points blf.h ioctl interface blfcore.h core interface blfcore.o precompiled core object blfopt.h automatically generated header file from Make blfver.h... - Page 78 Linux Driver Setup NOTE: Forming multiple teams is possible by copying the sample files into “/etc/ basp/” and modifying this file as described in the sample file. The files must have unique filenames. Name the files “team-xxx” where “xxx” is a unique identifier for the team.
- Page 79 Startup Scripts 1 basp This script is intended to be installed in /etc/rc.d/init.d directory. After copying the script, run “chkconfig --add basp”. This script will be executed at runlevel 2, 3, 4 and 5. When basp runs, it will search the /etc/basp directory to list all the files with “team- ”...
-
Page 80: Configuration Scripts
Linux Driver Setup Configuration Scripts Both team-sample and team-gec are configuration scripts that follow the same syntax, as follows: TEAM_ID: this number uniquely identifies a team. TEAM_TYPE: 0 = SLB, 1 = Generic Trunking/GEC/FEC TEAM_NAME: ascii name of the team TEAM_PAx_NAME: ASCII name of the physical interface x, where x can be 0 to 7. - Page 81 Advanced Server Features Removing the Driver and Team Configuration To remove the RPM package, type: rpm -e basplnx-{version}.386.rpm To reboot the system, type: reboot...
-
Page 83: Unix And Sco Openserver Driver Setup
UNIX and SCO OpenServer Driver Setup UnixWare 7 Driver This procedure describes the installation procedure for the UnixWare 7 driver. The driver is released as a TAR file containing the set of object, configuration, and script files used to create the driver add-on package. Package Creation To create a package: 1 On a UnixWare system, create a directory for the package and copy the files on the... -
Page 84: Mac Address
UNIX and SCO OpenServer Driver Setup Line Speed FullDuplex1000* * 1000 Mbps (1 Gbps) full duplex fixed speed is only valid for fiber connections. For copper twisted-pair connections, 1 Gbps can only be set through autonegotiation with a 1 Gbps partner. -
Page 85: Driver Installation
Driver Installation To install the driver: 1 Install the SCO OpenServer driver from the media image or installation diskette using either: custom scoadmin. 2 Add the new network adapter using: netconfig. 3 Modify the hardware configuration in Advanced Options to change the Line Speed and Flow Control, if desired. -
Page 87: Solaris Driver Setup
Solaris Driver Setup The Solaris Release 8 driver is released in two formats: 1 BRCMbcme.pkg (datastream format) 2 BRCMbcme.tar.Z (compressed and TAR file system format) Driver Installation To install the Solaris driver: 1 Change to the directory in which BRCMbcme.pkg resides. 2 Perform one of the following two substeps: a pkgadd -d BRCMbcme.pkg b Copy BRCMbcme.tar.Z to /tmp... -
Page 88: Customizing The Driver Configuration
Solaris Driver Setup Customizing the Driver Configuration To customize the driver, edit /kernel/drv/bcme.conf and update the respective parameters in this file. These parameters are described below. ForceSpeedDuplex ForceSpeedDuplex configures the link (or instance) to a certain speed and duplex mode. By default, all instances are set to AutoNegotiate (0). -
Page 89: Maxjumboframesize
Customizing the Driver Configuration MaxJumboFrameSize MaxJumboFrameSize configures the Jumbo Frame feature of a link. The valid range of values for this parameter is 0 to 9000. If the value configured is less than 1500, the Jumbo Frame feature is disabled. Once this is configured, the ifconfig command is used to configure the desired MTU size. -
Page 90: Txmaxcoalescedframes
Solaris Driver Setup TxMaxCoalescedFrames TxMaxCoalescedFrames configures the number of Tx Maximum Coalesced Frames parameters. This determines upper boundary of the maximum number of Tx buffer descriptors that the device processes before it will generate an interrupt. The default value is 10: TxMaxCoalescedFrames=10;... -
Page 91: Ndd Command
ndd Command Driver configurations can also be temporarily changed with the ndd command. Any changes made with this command are temporary and will be lost when you reboot the system. To make permanent configuration changes, modify bcme.conf instead. NOTE: Refer to the parameter descriptions as required in “Customizing the Driver Configuration”... -
Page 93: 3Com Management Programs
NICs/controllers (“Load Balance/Virtual LAN”); and detailed performance statistics for each selected NIC/controller (“Statistics”). 3Com Management Programs suite is designed to run in one of the following 32-bit Windows operating systems: Microsoft Windows NT 4.0 Server and Enterprise Server... -
Page 94: Removing The Management Programs
3Com Management Programs Removing the Management Programs To remove the 3Com Management Programs software, do the following: 1 Select Start/Control Panel, then double-click Add/Remove Programs. 2 Select Management Programs and click Change/Remove. 3 Select Remove from the Modify, Repair, Remove menu and follow the prompts. -
Page 95: Diagnostics
Information Not Available. Diagnostics The Diagnostics screen allows you to view information for 3Com NICs. This function is used to test the physical NIC components. NOTE: Network connection will be lost when running these tests. -
Page 96: Cable Analysis
3Com Management Programs page 97 for information about using the DOS Diagnostic program B57DIAG.exe to run the PHY Loopback Test.) Test LED: Verifies that the NIC LED is working properly. Cable Analysis From the Cable Analysis screen, the user can monitor conditions of an Ethernet CAT5 cable connection within a cable plant in an Ethernet network. -
Page 97: Load Balance/Virtual Lans
Load Balance/Virtual LANs The Load Balance/Virtual LANs screen allows you to configure advanced features. Any available NIC can be configured as part of a team. Teaming is a method of grouping multiple NICs to a virtual NIC (bundling multiple NICs to appear as a single NIC). The benefit of this approach is load balancing. - Page 98 Load Balance Members and you can employ a failover NIC. You can define as many as 64 VLANs per team. VLANs can be created only when all members are 3Com NICs. If you try to create a VLAN with a non-3Com NIC, an error message displays.
-
Page 99: Saving The Configuration
Saving the Configuration 1 With the Team and VLAN configuration loaded, click Save As at the Load Balance/ Virtual Lan tab. 2 At the Save As screen, enter the path and filename of the new configuration file. A “bcg” extension will be placed on the filename. Click Save. 3 A configuration file will be placed in the directory. - Page 100 Frames involved in any collision are not counted. Custom Tab Descriptions of interface components of 3Com’s Management Programs/Custom tab window are described below. Number of Interrupts generated by this adapter—Number of interrupts generated by NIC.
-
Page 101: Troubleshooting
Troubleshooting Hardware Diagnostics Loopback diagnostic tests are available for testing the NIC hardware under Windows. These tests provide access to NIC internal/external diagnostics, where packet information is transmitted across the physical link. See “Diagnostics” on page 87. Checking Port LEDs The NIC has four LEDs, one for each port speed option (10 Mbps, 100 Mbps, and 1 Gbps), and one for Data Transfer. -
Page 102: Troubleshooting Checklist
Windows, NetWare, and Linux. Windows The Vital Sign screen of the 3Com Management Programs allows you to view vital NIC information, network status, and network connectivity. Active NICs are listed. 1 From the Vital Sign screen, select the NIC to be tested. -
Page 103: Netware
<size> is the size of the driver in bytes and <n> is the number of adapters configured using 'ifconfig'. Running Cable Analysis The following section describes how to run the cable diagnostics from the 3Com Management Programs. See “3Com Management Programs” on page 85 for setups and initialization. -
Page 104: Length
Troubleshooting Length The Length sub tab allows you to verify cable length and determine whether your configuration has the appropriate cable, which are calculated by cable loss and return loss algorithms. This utility allows you to determine whether the problem is with the adapter or in the cable plant. -
Page 105: Linux
To configure ICS, a user would need to select a network connection as “outside” connection, adapters. and another network connection as “inside” connection. 3Com has observed that ICS allows any available network connection to be “outside” and “inside,” regardless of the Advanced Server Features team configuration. -
Page 106: Linux
Troubleshooting Problem Solution Team configuration is not retained In configuring Advanced Server Features teams, the actual changes of the configuration is not when user goes back to edit. committed until the user click “OK” in “Network Properties” window. If a user chooses not click OK and instead goes back to the Advanced Server Features team configuration window, all the previous uncommitted changes will be lost and the user will need to re-enter the configurations. -
Page 107: Key Protocols And Interfaces
Management Task Force (DMTF). Microsoft implements CIM on Windows platforms such as Windows 2000. 3Com will support CIM on the Windows 2000 platform. The 3Com implementation of CIM will provide various classes to provide information to users through CIM client applications. Please note that CIM data provider will provide data only, and users can choose their preferred CIM client software to browse the information exposed by CIM provider. -
Page 108: Dmi
Windows 2000 and Windows NT 4.0 operating systems. A third party provided DMI 2.0 Service Provider software has to be installed prior to the installation of the 3Com DMI PCI Hot-Plug service software. This Service Provider software is available from either Intel Corporation, or Smart Technology Enabler Corporation. -
Page 109: Nic Teaming
NIC Teaming Teaming provides traffic load balancing and redundant NIC operation in the event that a network connection fails. When multiple Gigabit Ethernet NICs are installed in the same server, they can be grouped into teams. Each team, with up to 8 ports or 8 NICs, can be configured on the server. -
Page 110: Failover Teaming
Each Team supports up to 64 VLANs. Note that only 3Com NICs and Alteon AceNIC NICs can be part of a team with VLANs. With multiple VLANs on a NIC, a server with a single NIC can have a logical presence on multiple IP subnets. - Page 111 VLANs Overview 32-bit or 64-bit PCI Bus Master The PCI Interface on the Gigabit Ethernet NIC complies with PCI Local Bus Rev 2.2, is compatible with both 32-bit and 64-bit PCI buses. As a bus master, the NIC requests access to the PCI bus, instead of waiting to be polled. ASIC with Embedded RISC Processor The core control for the Gigabit Ethernet NIC resides in a tightly integrated, high- performance ASIC.
-
Page 113: Installing And Using The Managed Pc Boot Agent
NOTE: For detailed information on using, configuring, and troubleshooting the MBA, see the Managed PC Boot Agent User Guide, located with the MBA software on the 3Com Installation CD. MBA allows the PC to boot from the server rather than from its local hard drive. MBA is compliant with the Wired for Management, Preboot Execution Environment (PXE) specification. -
Page 114: Enabling Or Disabling The Boot Rom Setting
MBA software on the Installation CD. Enabling or Disabling the Boot ROM Setting To enable the boot ROM setting on the NIC: 1 Run b57util.exe from the \dos\utility directory in the 3Com Installation CD. 2 Enter: run b57util pxee <devnum>... -
Page 115: Specifications
Specifications 10/100/1000 BASE-T Cable Specifications Port Type 10BASE-T 100/1000BASE-T NOTE: 1000BASE-T signaling requires four twisted pairs of Category 5 balanced cabling, as specified in ISO/IEC 11801:1995 and ANSI/EIA/TIA-568-A (1995) and tested for additional performance using testing procedures defined in TIA/EIA TSB95. -
Page 116: Environmental Specifications
Specifications Environmental Specifications Condition Temperature Relative humidity Altitude Shock Vibration, peak to peak displacement Vibration, peak acceleration Operating Specification Storage Specification 0°C to 55°C –40°C to +85°C (–40°F to +185°F) (+32°F to +131°F) 5% to 85% (non-condensing) 5% to 95% (non-condensing) 40°C, 16 hour dwells at extremes 10°C/hour Up to 10,000 ft. -
Page 117: Technical Support
Information contained in this appendix is correct at time of publication. For the very latest, 3Com recommends that you access the 3Com Corporation World Wide Web site. Online Technical Services 3Com offers worldwide product support 24 hours a day, 7 days a week, through the following online systems: 3Com Web site... -
Page 118: Support From Your Network Supplier
3Com. Support from 3Com If you are unable to obtain assistance from the 3Com online technical resources or from your network supplier, 3Com offers technical telephone support services. To find out more about your support options, please call the 3Com technical telephone support phone number at the location nearest you. -
Page 119: Returning Products For Repair
North America Returning Products for Repair Before you send a product directly to 3Com for repair, you must first obtain a Return Materials Authorization (RMA) number. Products sent to 3Com without RMA numbers will be returned to the sender unopened, at the sender’s expense. - Page 120 Technical Support Country Austria Belgium Denmark Finland France Germany Hungary Ireland Israel Italy Netherlands Norway Poland Portugal South Africa Spain Sweden Switzerland U.K. Latin America U.S.A. and Canada Telephone Number Fax Number 0800 297468 0800 71429 800 17309 0800 113153 0800 917959 0800 1821502 00800 12813...
-
Page 121: Regulatory Information
This booklet is available from the U.S. Government Printing Office, Washington, D.C. 20402. Stock No. 004- 000-00345-4. NOTE: In order to maintain compliance with the limits of a Class B digital device, 3Com requires that you use quality interface cables when connecting to this device. Changes or modifications not expressly approved by 3Com could void the user’s authority to operate this equipment. -
Page 122: Fcc Declaration Of Conformity
ANSI C63.4-1992 Methods of Measurement Federal Communications Commission 47 CFR Part 15, subpart B 3Com Corporation, 5400 Bayfront Plaza, P.O. Box 58145, Santa Clara, CA 95052-8145 Model: Description:... - Page 123 100 LED 93 1000 LED 93 1000BASE-T signaling requirements 12 32-bit PCI bus master 103 3Com 10/100 server NICs 2, 3 3Com Connection Assistant 13 3Com Management Programs 4, 23, 26, 30, 34, 38, 45, 85 to 92 Cable Analysis 88...
- Page 124 107 requirements 107 Red Hat 6.2 65 7.0 65 kudzu 66 relative humidity 108 remote wake up 2 requirements, 3Com Connection Assistant 13 returning products for repair 111 RISC processor 103 RJ-45 connector 12 rx_flow_control 67 RxCoalescingTicks 81 RxCoalescingTicksDuringInt 82...
- Page 125 Test LED 88 TIA/EIA TSB95 12 troubleshooting 93 checklist 94 MBA boot ROM 105 trunking 101 Tx. Max Coalesce Frames Threshold hit 92 tx_flow_control 67 TxCoalescingTicks 81 TxCoalescingTicksDuringInt 82 TxMaxCoalescedFrames 82 TxMaxCoalescedFramesDuringInt 82 TxPacketDescCnt 81 UNIX 1, 8, 75 to 76 UnixWare 7 driver 75 vibration 108 virtual...
Need help?
Do you have a question about the 3C996B-T and is the answer not in the manual?
Questions and answers