
Related Manuals for Shell NewMotion Home Advanced 2.1


Summary of Contents for Shell NewMotion Home Advanced 2.1
- Page 1 Installation manual NewMotion Home Advanced 2.1 / 2.2 Installation manual – NewMotion Home Advanced 2.1 / 2.2 - 071NMEN13...
-
Page 2: Table Of Contents
Appendix A - EC Declaration of Conformity 5.2.2. Data cable (optional) 5.2.3. Earthing Appendix B - EC Declaration of Conformity - Cable 5.2.4. Required nominal input voltage at charge point 5.2.5. Electrical protection Installation manual – NewMotion Home Advanced 2.1 / 2.2 - 071NMEN13... -
Page 3: Preface
Alternating current supply. Electrical device that supplies electric power to an electrical load, delivered by alternating current Centimeter Consumer unit A distribution board designed for domestic installations Decibel Direct current Installation manual – NewMotion Home Advanced 2.1 / 2.2 - 071NMEN13... - Page 4 Transmission control protocol Unshielded twisted pair Volt Watt ZE-Ready ZE Ready is a mark registered by Renault. You can find all the information on the ASEFA and LCIE websites Installation manual – NewMotion Home Advanced 2.1 / 2.2 - 071NMEN13...
-
Page 5: Safety
Wear insulating gloves while installing wires and electrical components to avoid damages from static discharge. Wear S3 class antistatic safety shoes. Wear safety goggles/glasses while drilling holes to protect your eyes from dust or other particles that may damage your eyes. Installation manual – NewMotion Home Advanced 2.1 / 2.2 - 071NMEN13... -
Page 6: Residual Risks
The warning labels and information signs on the product must be followed. The warning labels and information signs must be kept legible and must be replaced if necessary. For this purpose, contact the manufacturer. Installation manual – NewMotion Home Advanced 2.1 / 2.2 - 071NMEN13... -
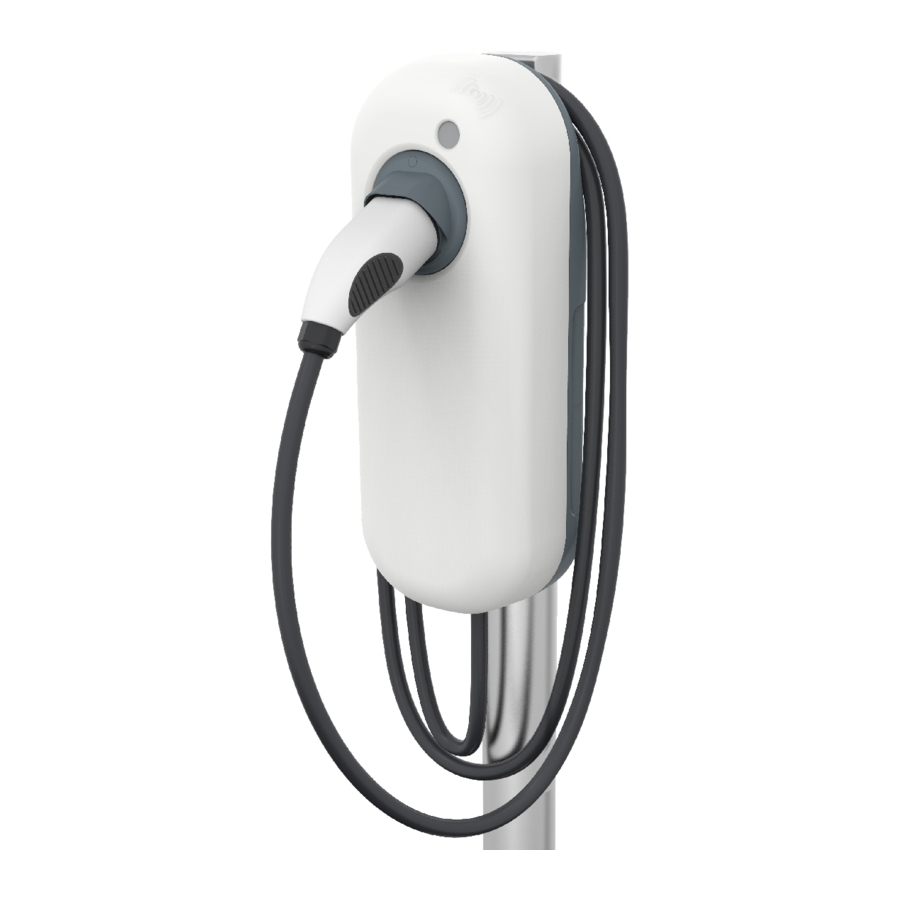
Page 7: Description Of The Product
6. Earthing pole 14. Connection DC fault detection module 7. Data cable inlet with grey rubber rommet 15. P1 port (DPM module) 8. Power cable clamps 16. Ethernet port Installation manual – NewMotion Home Advanced 2.1 / 2.2 - 071NMEN13... -
Page 8: Internal Connections For Tethered Cable
IP54 (for indoor and outdoor use) (protection class) Certificates IEC-61851-1 IEC-61851-22 EV-Ready 1.4 G & ZE-Ready 1.4 G IEC-62262 -> IK10 IEC-60529 -> IP54 IEC-62955 -> 6 mA DC fault protection Installation manual – NewMotion Home Advanced 2.1 / 2.2 - 071NMEN13... - Page 9 EV, the grid connection at your location and the electricity usage of your building ** Contact NewMotion for changing charge capacity *** Contact NewMotion for further information: +44 20 3868 1036 and press option 1 Installation manual – NewMotion Home Advanced 2.1 / 2.2 - 071NMEN13...
-
Page 10: Nameplate / Markings
Always store the product in environmental conditions that fall within the ranges as stated in chapter 3.3. Technical specifications. Place the product back in the shipping box or cover the product to minimize exposure to dust, moist and protect it from damages. Installation manual – NewMotion Home Advanced 2.1 / 2.2 - 071NMEN13... -
Page 11: Installation
6. M8 washer - big (4×) 11. M4 × 20 mm Torx bolt (1×) 12. RJ12 unshielded connector (4×) 5.1.2. Optional 1. Mounting pole 2. Concrete base 3. DPM module Installation manual – NewMotion Home Advanced 2.1 / 2.2 - 071NMEN13... -
Page 12: Installation Materials (Not Provided)
The charge point is supplied with a DC fault detection device certified according to IEC 62955. * The installer must select a suitable MCB to match the current setting of the charge point, taking into Installation manual – NewMotion Home Advanced 2.1 / 2.2 - 071NMEN13... -
Page 13: Charge Point Mounting
Data cable tester (RJ12 & RJ45). DPM module. Fill sand. Cellular signal strength measuring tool. Pencil. Plug for mounting in wall (if applicable). Power drill and drill bits. PZ3 screwdriver. RJ12 crimp tool. Installation manual – NewMotion Home Advanced 2.1 / 2.2 - 071NMEN13... - Page 14 Icon Description RJ45 crimp tool. Spirit level. Tape measure. This is optional. Torx screwdriver (T20). Voltage tester. Caliper. Installation manual – NewMotion Home Advanced 2.1 / 2.2 - 071NMEN13...
-
Page 15: Preparation
11. Pull the cover from the casing to open the charge point and access the internal components (see figure 7 3). 12. Check if all the connected wiring and internal components of the product are properly fastened. Installation manual – NewMotion Home Advanced 2.1 / 2.2 - 071NMEN13... -
Page 16: Mounting
1 . Secure the wall bracket to a wall at the appropriate height (± 90 cm) (see fi gure 11 ). NOTICE Make sure the wall is strong enough to withstand the weight of the charge point. Installation manual – NewMotion Home Advanced 2.1 / 2.2 - 071NMEN13... - Page 17 Use a caliper to measure the thickness of the power cable and determine the correct coloured grommet. 8 . Feed the power cable approx. 15 cm through the coloured grommet. Lubricate if necessary (see fi gure Installation manual – NewMotion Home Advanced 2.1 / 2.2 - 071NMEN13...
- Page 18 12 . Secure the casing to the wall using 2 provided M8 × 12 mm bolts, 3 M8 washers and 2 coach screws (not provided) (see fi gure 15 ). NOTICE Secure the supplied earthing cable between the casing and the bottom right screw, if required by local rules and regulations. Installation manual – NewMotion Home Advanced 2.1 / 2.2 - 071NMEN13...
-
Page 19: Pavement Mount
8 . Insert the coloured grommet matching the power cable thickness into the rear input hole (see fi gure NOTICE Use a caliper to measure the thickness of the power cable and determine the correct coloured grommet. Installation manual – NewMotion Home Advanced 2.1 / 2.2 - 071NMEN13... - Page 20 13 . Secure the casing to the pole using 4 provided M8 × 12 mm bolts and washers (see fi gure 21 ). NOTICE Secure the supplied earthing cable between the casing and the bottom right screw. Installation manual – NewMotion Home Advanced 2.1 / 2.2 - 071NMEN13...
-
Page 21: Soil Mount
3 . Secure the pole to the concrete base using 4 provided M8 × 35 mm Allen bolts and washers (see fi gure 23 ). 4 . Feed the power cable and optional data cable(s) through the pole (see fi gure 24 ). Installation manual – NewMotion Home Advanced 2.1 / 2.2 - 071NMEN13... - Page 22 Use a caliper to measure the thickness of the power cable and determine the correct coloured grommet. 10 . Feed the power cable approx. 15 cm through the coloured grommet. Lubricate if necessary (see fi gure Installation manual – NewMotion Home Advanced 2.1 / 2.2 - 071NMEN13...
- Page 23 14 . Secure the casing to the pole using 4 provided M8 × 12 mm bolts and washers (see fi gure 29 ). NOTICE Secure the supplied earthing wire between the casing and the bottom right screw. Installation manual – NewMotion Home Advanced 2.1 / 2.2 - 071NMEN13...
-
Page 24: Electrical Connection
Cables L2 and L3 are installed directly into the power meter for 3-phase connection only. Apply a torque of 2.4 Nm. NOTICE The L1 cable must always be connected to the grey terminal block. Installation manual – NewMotion Home Advanced 2.1 / 2.2 - 071NMEN13... -
Page 25: Tethered Charging Cable
6 . Secure the power cable in place with the cable clamp (see fi gure 32 ). 5 . 5 . 2 . Tethered charging cable 1 . Remove the front cable clamp (see fi gure 33 ). Installation manual – NewMotion Home Advanced 2.1 / 2.2 - 071NMEN13... - Page 26 6 . Insert the tethered cable wires into the contactors (see fi gure 35 7 . Connect the red car-communication wire (see fi gure 35 8 . Insert the earthing wire into the terminal (see fi gure 35 Installation manual – NewMotion Home Advanced 2.1 / 2.2 - 071NMEN13...
-
Page 27: Wired Network Connection (Optional)
5 . Repeat steps 2 – 4 on the other side of the cable. 6 . Check if you have properly installed the connectors on both sides using an RJ45 cable tester. Installation manual – NewMotion Home Advanced 2.1 / 2.2 - 071NMEN13... -
Page 28: Installation Dpm Module (Optional)
5 . 7 . 1 . Installing the DPM for Business module 1 . Mount the DPM module to a free slot on a DIN-rail in the consumer unit (see fi gure 39 ). Installation manual – NewMotion Home Advanced 2.1 / 2.2 - 071NMEN13... - Page 29 5 V pin (left) on the DPM module. The middle pin is not used. 5 . Plug the power supply into a working Schuko power socket (see fi gure 41 Installation manual – NewMotion Home Advanced 2.1 / 2.2 - 071NMEN13...
-
Page 30: Connecting The Charge Point To The Dpm Module
5. Secure the connector to the wires using an RJ12 crimping tool. 6. Check if you have properly installed the connectors on both sides using an RJ12 network cable tester. Installation manual – NewMotion Home Advanced 2.1 / 2.2 - 071NMEN13... -
Page 31: Connecting The Charge Point To A Smart Meter
If the smart meter on the consumer unit has SMR 4.0 or higher, you can connect the product directly to the P1 port on the smart meter, without using a DPM module. Only use this method if the DPM module is not supplied in the delivery of the charge point. Installation manual – NewMotion Home Advanced 2.1 / 2.2 - 071NMEN13... -
Page 32: Finishing Installation
4 . Secure the cover to the casing by hand with 6 provided M4 × 12 mm Torx bolts, using a T20 screwdriver (see fi gure 6 CAUTION Do not use an electrical screwdriver to secure the bolts, this can damage the cover or casing. Installation manual – NewMotion Home Advanced 2.1 / 2.2 - 071NMEN13... - Page 33 6. Secure the grey lid to the cover by hand with a provided M4 × 20 mm Torx bolt, using a T20 screwdriver (see figure 49). 6 CAUTION Do not use an electrical screwdriver to secure the bolts, this can damage the lid, cover or casing. Installation manual – NewMotion Home Advanced 2.1 / 2.2 - 071NMEN13...
-
Page 34: Commissioning
If you have ensured correct installation, but the problem persists, please contact NewMotion. NOTICE If adjustment of the maximum charge point power (default setting: 16 A) is needed, please contact NewMotion. Installation manual – NewMotion Home Advanced 2.1 / 2.2 - 071NMEN13... -
Page 35: Configuring The Dpm Module
3. Connect the connector into the dummy socket of the charge point. NOTICE By placing the connector back into the dummy socket of the charge point, it’s protected against water and dirt. Installation manual – NewMotion Home Advanced 2.1 / 2.2 - 071NMEN13... -
Page 36: Troubleshooting
Charge point is not The user can activate the charge point and authorise the charge card using the activated or an portal on https://my.newmotion.com. unauthorised charge card is being swiped Installation manual – NewMotion Home Advanced 2.1 / 2.2 - 071NMEN13... - Page 37 Ohms. If it is higher, install a proper grounding solution. For example: add an earthing rod directly connected to the charge point. If no result: - Charge point may be broken, please contact your local NewMotion Installation desk. Installation manual – NewMotion Home Advanced 2.1 / 2.2 - 071NMEN13...
- Page 38 Check if the customer is able to charge on different charge points. session but vehicle is delaying the charge session charging is delayed. This is normal. This can be a problem if the car is not charged overnight. Installation manual – NewMotion Home Advanced 2.1 / 2.2 - 071NMEN13...
- Page 39 However, if this happens too often or too long (longer than one hour), tell the customer to go to the car dealer to have the vehicle tested. Installation manual – NewMotion Home Advanced 2.1 / 2.2 - 071NMEN13...
-
Page 40: Maintenance
Comply with local legal regulations and provisions when recycling or disposing of the product, the individual components and the packaging. A product marked with the WEEE symbol must be sent for separate collection of electrical and electronic devices. Installation manual – NewMotion Home Advanced 2.1 / 2.2 - 071NMEN13... -
Page 41: Appendix A - Ec Declaration Of Conformity
Appendix A - EC Declaration of Conformity Installation manual – NewMotion Home Advanced 2.1 / 2.2 - 071NMEN13... -
Page 42: Appendix B - Ec Declaration Of Conformity - Cable
Appendix B - EC Declaration of Conformity - Cable Installation manual – NewMotion Home Advanced 2.1 / 2.2 - 071NMEN13... - Page 43 UK English - Original instructions | 071NMEN13 | 03/2021 Manufactured by: The New Motion B.V. Rigakade 20, 1013 BC | Amsterdam, The Netherlands +31880109500 | www.newmotion.com...
Need help?
Do you have a question about the NewMotion Home Advanced 2.1 and is the answer not in the manual?
Questions and answers