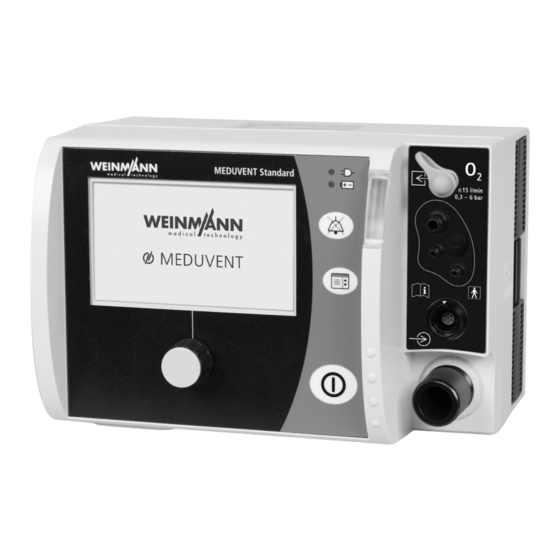
Weinmann MEDUVENT Standard Instructions For Use Manual
Ventilator
Hide thumbs
Also See for MEDUVENT Standard:
- Instructions for use manual (236 pages) ,
- Manual (119 pages) ,
- Step-by-step instructions (28 pages)

Related Manuals for Weinmann MEDUVENT Standard


Summary of Contents for Weinmann MEDUVENT Standard
- Page 1 MEDUVENT Standard Ventilator Instructions for Use Read these instructions for use before using the product. Ignoring the instructions for use can lead to severe injury or death.
-
Page 2: Table Of Contents
Performing the function check ............. 45 Checking the reusable breathing circuit ........52 Operation Switching on the device ............... 54 Navigating in the device .............. 55 Starting ventilation ..............56 Switching ventilation mode ............60 Changing ventilation parameters ..........61 MEDUVENT Standard... - Page 3 Disinfecting the reusable measuring circuit by immersion ... 100 Reprocessing parts mechanically ..........101 Steam-sterilizing parts (optional) ..........103 8.10 Preparing parts for reuse ............104 8.11 Cleaning and disinfection plan ........... 105 Description of the modes CPAP ..................109 IPPV ..................110 SIMV ..................111 MEDUVENT Standard...
- Page 4 Technical data, breathing circuits ..........144 15.5 Block diagram ................145 15.6 Technical data on electromagnetic compatibility (EMC) ....146 15.7 Calculating tidal volume on the basis of height ......152 15.8 Exported log files ..............153 15.9 Alarm delay times ..............155 MEDUVENT Standard...
- Page 5 Table of Contents Symbols and labels 16.1 Labels on the device ..............156 16.2 Labels on the accessories ............158 16.3 Labels on the packaging ............161 Warranty EC Declaration of Conformity on Medical Devices MEDUVENT Standard...
-
Page 6: Introduction
Patient groups MEDUVENT Standard is used in the treatment of infants, children, and adults with a body weight of 7 kg and more where spontaneous breathing has failed or is inadequate. In the case of volume-controlled ventilation, tidal volumes of 50 ml or more are possible. - Page 7 • Unwanted influencing of the cardiovascular system (e.g. reduced cardiac output, reduced venous return) • Drying of the airways • Hyperinflation of lung tissue (e.g. lung rupture) • Gastric insufflation during mask ventilation (e.g. aspiration of stomach contents) MEDUVENT Standard...
-
Page 8: Owner/Operator And User Qualification
You should also get yourself trained in the operation and use of this medical device. Follow the statutory requirements for operation and use (in Germany, particularly the Medizinprodukte- Betreiberverordnung [German regulation concerning the operators of medical devices]). MEDUVENT Standard... -
Page 9: Safety
If the device is used for too long, the patient might be ventilated with dry gas for too long. This might expose the patient to the risk of serious or life-threatening injury. ⇒ Do not use the device for sustained ventilation (longer than 24 hours). MEDUVENT Standard... - Page 10 This might expose the patient to the risk of serious or life-threatening injury. ⇒ Secure the device against falling while transporting the patient on a stretcher. ⇒ Always fix the breathing circuit in place while transporting the patient. MEDUVENT Standard...
- Page 11 This might expose the patient to the risk of serious or life-threatening injury and damage the device. ⇒ Only operate the device with a hygiene filter. ⇒ Replace the hygiene filter after operating the device in a very dusty atmosphere. MEDUVENT Standard...
- Page 12 ⇒ Use the device only in the following positions: • Display facing upward (when the device is standing on a table for example). • Display facing forward (when the device is mounted on a wall by a portable system for example). MEDUVENT Standard...
- Page 13 Disrupted or failed therapy due to use of bubble humidifiers! Using bubble humidifiers might cause moisture at the oxygen inlet and result in malfunctions and device failure. This might expose the patient to the risk of serious or life-threatening injury. ⇒ Do not use bubble humidifiers. MEDUVENT Standard...
- Page 14 ⇒ Wash your hands to remove any oil or grease before working on the oxygen supply. ⇒ Secure the oxygen cylinder against toppling over. ⇒ Tighten or loosen all screw fittings on the oxygen cylinder and on the pressure reducer by hand only. MEDUVENT Standard...
- Page 15 < 0 °C might result in a much reduced device operating time and thus to premature failure of therapy. This might expose the patient to the risk of serious or life-threatening injury. ⇒ Always use a fully charged rechargeable battery at low temperatures. MEDUVENT Standard...
- Page 16 ⇒ Do not stack the device with other medical electrical devices. ⇒ Do not operate the device in the direct vicinity of other medical electrical devices (exception: Other WEINMANN Emergency devices which have been tested to ensure that they can operate without problem alongside the device.
- Page 17 Reused disposables may cause infections and contamination if they come into contact with airways. This might expose the patient and the user to the risk of serious or life-threatening injury. ⇒ Do not reuse disposables. ⇒ Do not subject disposables to hygienic reprocessing. MEDUVENT Standard...
- Page 18 Dispensing respiratory gas with a slightly different oxygen concentration might put the therapy at risk. This might injure the patient. ⇒ Use a separate respiratory gas monitor to monitor the oxygen concentration administered to the patient. MEDUVENT Standard...
- Page 19 ⇒ Note that all application parts can warm up to ambient temperature. ⇒ Note that the applied respiratory gas can reach a temperature above 41 °C. ⇒ Shorten the application time at high ambient temperatures >41 °C. MEDUVENT Standard...
-
Page 20: Description
Indicates whether the device has been opened Security seal without authorization. SD card slot with splash guard For inserting an SD card. Connects the device to the measuring circuit Measuring circuit connection of the breathing circuit. Accessories connection Connects the device to the MEDUtrigger. MEDUVENT Standard... -
Page 21: Control Panel And Display
Protective cap for ventilation hose Protects the ventilation hose connection when it is connection not in use. Navigation knob Permits navigation in the menus. Loudspeaker (not seen) Emits audio alarms. 3.2 Control panel and display 3.2.1 Control panel 3-2 Control panel MEDUVENT Standard... - Page 22 In the start menu: Opens the operator menu. Menu button • During ventilation: Opens the user menu to change ventilation mode or patient group. On/Off button Switches the device on or off. Permits values for ventilation parameters to be Navigation knob selected and confirmed. MEDUVENT Standard...
- Page 23 Indicates the minute volume delivered by the device. Ventilation parameters which can be set to control Ventilation parameters ventilation. Indicates the level of ventilation pressure being Bar graph administered. Indicates the end-expiratory ventilation pressure Maximum value indicator reached. Pressure limiting Displays the set alarm limit. MEDUVENT Standard...
-
Page 24: Symbols In The Display
Emergency mode Infant (up to about 1 year old) Emergency mode Child Emergency mode symbol (between about 1 and 12 years old) Emergency mode Adult (from about 13 years old) Operation with concentrator oxygen Supply gas symbol Operation with 100 % oxygen MEDUVENT Standard... -
Page 25: Accessories
For a complete list, including the relevant article numbers, refer to the “Scope of supply and accessories“ chapter (see “14 Scope of supply and accessories”, page 133). Please refer to the instructions for use supplied with the accessories. MEDUVENT Standard... - Page 26 3 Description 3.4.1 Overview 3-4 Accessories MEDUVENT Standard...
- Page 27 Connects the MEDUtrigger to the device. Power supply unit and charger Supplies power to the device. Simulates a ventilated patient for presentation EasyLung for WEINMANN Emergency purposes and in the function check. Protects the device from viral and bacterial Hygiene filter contamination.
- Page 28 Connects the reusable breathing circuit to the mask Elbow or tracheal tube. MEDUtrigger Manually triggers mechanical breaths. Protects the patient end of the breathing circuit from Protective cap damage and dirt. Patient valve Switches between inspiration and expiration. MEDUVENT Standard...
- Page 29 The device controls the patient valve and the PEEP PEEP control tube by way of the PEEP control tube. Connects the measuring circuit to the measuring Measuring circuit connector circuit connection on the device. MEDUtrigger connection line Connects the MEDUtrigger to the device. MEDUVENT Standard...
- Page 30 Connects the device to the measuring circuit of the disposable breathing circuit. The disposable breathing Disposable breathing circuit adapter circuit adapter remains permanently connected to the device. The respiratory gas flows through the ventilation hose Ventilation hose from the device to the patient valve. MEDUVENT Standard...
-
Page 31: Rechargeable Battery And Battery Status Indicator
The message Battery empty appears in the display. The device can be used for at least another 5 minutes. • Rechargeable battery is defective. • No rechargeable battery. • Rechargeable battery not at suitable temperature. Green arrow: Rechargeable battery is charging MEDUVENT Standard... -
Page 32: Transport Options
3-7 Transport options (examples) Designation LIFE-BASE 3 NG LIFE BASE 1 NG XS LIFE-BASE light XS LIFE BASE 1 NG XL MEDUVENT Standard... -
Page 33: Preparation
This might expose the patient to the risk of serious or life- threatening injury. ⇒ Use only patient valves approved by WEINMANN Emergency. 4.1 Assembling the device The device is mounted on a portable system as standard and is ready for use. -
Page 34: Connecting A Power Supply
4.2 Connecting a power supply Failure of therapy or loss of power resulting from use of an incorrect power supply unit and charger! If you are using a portable system with the MEDUVENT Standard and MEDUCORE Standard/MEDUCORE Standard device combination, the devices might lose power when using the 50 W power supply unit and charger, and the therapy might fail prematurely. -
Page 35: Connecting The Breathing Circuit
An increased dead space might lead to hypoventilation. This might expose the patient to the risk of serious or life-threatening injury. ⇒ Use only approved accessories. ⇒ Pay attention to increased dead space volume when ventilating at low tidal volumes. MEDUVENT Standard... - Page 36 4 Preparation 4.3.1 Connecting the reusable breathing circuit 1. Connect the ventilation hose to the ventilation hose connection. 2. If present: Connect the MEDUtrigger. 3. Attach the measuring circuit connector to the measuring circuit connection. MEDUVENT Standard...
- Page 37 For mask ventilation: Connect the ventilation mask to the patient valve of the breathing circuit: • With/without elbow • With breathing system filter Result The reusable breathing circuit has been connected to the device and is ready for use. MEDUVENT Standard...
- Page 38 4 Preparation 4.3.2 Connecting the disposable breathing circuit 1. Connect the ventilation hose to the ventilation hose connection. 2. If present: Connect the MEDUtrigger. 3. Connect the flexible oxygen tube and pressure measuring tube. MEDUVENT Standard...
- Page 39 For mask ventilation: Connect the ventilation mask to the patient valve of the breathing circuit: • With/without elbow • With breathing system filter Result The disposable breathing circuit has been connected to the device and is ready for use. MEDUVENT Standard...
-
Page 40: Connecting The Oxygen Supply
This might injure the patient. ⇒ Check the pressure in the oxygen cylinder prior to ventilation. Requirement The oxygen cylinder has been filled. 1. Briefly open the oxygen cylinder valve and then close it again to blow off dirt particles. MEDUVENT Standard... - Page 41 3. Connect the oxygen inlet tube to the outlet of the pressure reducer. 4. Connect the oxygen inlet tube to the device's oxygen inlet. Result The device has been connected to the oxygen supply. MEDUVENT Standard...
-
Page 42: Converting The Device
3. Secure the disposable breathing circuit adapter using the screw supplied. Result The device has been converted for use with a disposable breathing circuit. The disposable breathing circuit adapter remains permanently connected to the device. MEDUVENT Standard... - Page 43 2. Remove the disposable breathing circuit adapter from the device. 3. Remove the protective cap from the disposable breathing circuit adapter. 4. Fit the protective cap over the open hole on the device. Result The device has been converted for use with a reusable breathing circuit. MEDUVENT Standard...
-
Page 44: Function Check
Perform a function check at the following intervals: Part concerned Interval • Before each use Device • After each hygienic reprocessing • After each repair • Before each use Breathing circuit (reusable • After each hygienic reprocessing breathing circuit) • After each disassembly MEDUVENT Standard... -
Page 45: Preparing For The Function Check
The function check has been prepared. 5.3 Performing the function check You can perform the function check with the following test lungs: • Testing bag WM 1453 • Testing bag WM 1454 • EasyLung for WEINMANN Emergency WM 28625 MEDUVENT Standard... - Page 46 The oxygen supply is shut off. • The function check has been prepared (see “5.2 Preparing for the function check”, page 45). • The device is switched on (see “6.1 Switching on the device”, page 54). 1. Select the Function check menu item. MEDUVENT Standard...
- Page 47 Connect the test lung to the breathing circuit. • Connect the MEDUtrigger. 3. Select Start. 4. If you want to test the oxygen supply: Select Yes. If you do not want to test the oxygen supply: Select No. The device skips the oxygen test. MEDUVENT Standard...
- Page 48 5 Function check 5. Set the oxygen supply rate (5-15 l/min) (see “6.7 Introducing oxygen”, page 63). 6. Select Start. 7. Stop the oxygen supply and close the oxygen cylinder (see “6.7 Introducing oxygen”, page 63). 8. Select Next. MEDUVENT Standard...
- Page 49 5 Function check 9. If an audio alarm is output: Select Yes. 10. If the alarm light is red: Select Yes. 11. Press all the controls except the On/Off button one after another. MEDUVENT Standard...
- Page 50 Keep hygiene filter at the ready Yellow Order hygiene filter. Replace hygiene filter (see 11.3, p. 124). 14. If the hygiene filter has been replaced: • Select Reset. • Enter the filter reset code specified in the operator menu. MEDUVENT Standard...
- Page 51 Guidance notes for the dealer or the flashes in the start scheduled service manufacturer. menu. For precise details on the individual tests in the function check, refer to the fcheck file (see “15.8.2 Recorded function checks (fcheck file)”, page 153). MEDUVENT Standard...
-
Page 52: Checking The Reusable Breathing Circuit
4. If the diaphragm is torn, corrugated, distorted or sticky: Replace the diaphragm. 5. Assemble the reusable breathing circuit (see “8.3.2 Assembling the reusable breathing circuit”, page 90). 6. Check the system for leaks with a new function check. Result The reusable breathing circuit has been checked. MEDUVENT Standard... -
Page 53: Operation
Increased breathing effort for the patient due to covered patient valve! Covering the patient valve might impair its function and place the therapy at risk. This might injure the patient. ⇒ Do not cover/seal the expiration opening of the patient valve. MEDUVENT Standard... -
Page 54: Switching On The Device
The self-test is successful when all of the steps have been completed. After the self-test, the device displays the start menu: 2. If one or more conditions are not met: Do not operate the device. Result The device is switched on and on standby. MEDUVENT Standard... -
Page 55: Navigating In The Device
Change marked Press the navigation item value item ventilation parameter. knob Activate user menu to Activate the switch ventilation Press the menu operator menu mode or patient group. button Mutes an alarm for 120 seconds. Alarm mute button MEDUVENT Standard... -
Page 56: Starting Ventilation
If the device is used without a hygiene filter in a contaminated environment, it might draw in contaminated or infected ambient air. This might expose the patient and the user to the risk of serious or life-threatening injury. ⇒ Only operate the device with a hygiene filter. MEDUVENT Standard... - Page 57 The device is switched on and, after the self-test, displays the start menu. 1. Connect the patient to the device by a ventilation mask or tracheal tube. 2. Set emergency mode: • Emergency Infant • Emergency Child • Emergency Adult MEDUVENT Standard...
- Page 58 6.3.2 Starting ventilation for a new patient Requirement • Function check has been carried out and passed (see “5 Function check”, page 44). • The device is switched on and, after the self-test, displays the start menu. 1. Select New patient. MEDUVENT Standard...
- Page 59 The device shows a preview of the ventilation parameters calculated. 4. If necessary: Adjust ventilation parameters. 5. Connect the patient to the device by a ventilation mask or tracheal tube. 6. Select Start. The device starts ventilation. Result Ventilation for a new patient has been started. MEDUVENT Standard...
-
Page 60: Switching Ventilation Mode
1. Briefly press the menu button The user menu opens. 2. Select the desired ventilation mode. The parameters of the new ventilation mode are displayed. 3. If necessary: Change the ventilation mode parameters. Result The ventilation mode has been switched. MEDUVENT Standard... -
Page 61: Changing Ventilation Parameters
Frequency /Vti: The product of freq. x Vti results in inspiratory minute volume MVi. • The ventilation parameters “frequency” and “tidal volume” can only be set in meaningful combinations. Combinations resulting in a value below 1.5 l/min or above 20 l/min (BTPS) cannot be set. MEDUVENT Standard... -
Page 62: Switching Patient Group
1. Briefly press the menu button The user menu opens. 2. Select and confirm another patient group. Result The patient group has been switched. The device switches to the pre-set ventilation mode for the selected patient group and starts ventilating. MEDUVENT Standard... -
Page 63: Introducing Oxygen
The device indicates the measured oxygen concentration in the display. If you want an oxygen concentration of 100 %, use the minute volume administered as a guide (MVi). Desired target oxygen concentration / % AMV 10 L/min BTPS AMV 15 L/min BTPS AMV 5 L/min BTPS MEDUVENT Standard... - Page 64 Oxygen reserve = volume of oxygen cylinder x pressure in oxygen cylinder Example Volume of oxygen cylinder 10 l Pressure in oxygen cylinder 200 bar 200 bar Fill level of oxygen cylinder 2000 l 400 l (oxygen reserve) MEDUVENT Standard...
-
Page 65: Switching The Device Off
03:42 00:26 02:13 Result Operating time has been calculated. 6.8 Switching the device off 1. Press and hold the On/Off button for at least 2 seconds. 2. Close the oxygen supply. Result The device is completely switched off. MEDUVENT Standard... -
Page 66: Disconnecting The Oxygen Supply
5. If necessary: Replace the ventilation mask or tracheal tube. 6. If necessary: Replace the disposable breathing circuit. 7. If necessary: Stow the accessories on the portable system. 8. If necessary: Place the device and accessories in storage (see “12 Storage”, page 131). MEDUVENT Standard... -
Page 67: Operator Menu
2. Select access code with the navigation knob and confirm. The operator menu is protected by an access code which on delivery is 0000. WEINMANN Emergency recommends changing this code as soon as the device is put into operation. Result The operator menu has been activated and settings can be made. -
Page 68: Menu Structure
Child pMax pMax Manual Adult Reset Height Vt per kg body weight PEEP warning Reset Changing the access code S-IPPV Options SIMV Manual Enable Export log files Import/Export Export configuration Import configuration Software update Device information Battery information MEDUVENT Standard... -
Page 69: Device Settings
Here you can reset the counter filter counter. Here you can change the Change filter reset code required to reset the 0000 code filter counter. 100 % Here you can set the Supply gas O 100 % 93 % supply gas type. MEDUVENT Standard... - Page 70 Here you can set the Indonesian (id ID) Language language of the display Italian (it IT) texts. Dutch (nl NL) Polish (pl PL) Brazilian Portuguese (pt BR) Portuguese (pt PT) Russian (ru RU) Swedish (sv SE) Thai (th TH) Chinese (zh CN) MEDUVENT Standard...
-
Page 71: Patient Presets
Here you can preset the maximum pMax Manual 20 mbar – 60 mbar 30 mbar inspiratory pressure in manual mode. Reset to Here you can reset the settings for this factory patient group to their factory settings. settings MEDUVENT Standard... - Page 72 Here you can reset the tidal volume height Reset per kg body weight to the factory setting. Here you can preset the PEEP at which PEEP warning 1 mbar – 21 mbar 11 mbar the device generates a warning. MEDUVENT Standard...
-
Page 73: Changing The Access Code
2. Select the new access code with the navigation knob and confirm with OK. 3. Click OK to confirm that you really want to change the access code. Result The access code for activating the operator menu has been changed. MEDUVENT Standard... -
Page 74: Options
The operator menu is activated (see “7.1 Activating the operator menu”, page 67). • The latest software version has been installed on the device (see “7.8 Updating software”, page 79). 1. Select the Options menu item. 2. Select the Enable menu item. MEDUVENT Standard... - Page 75 6. To exit the operator menu, select Back. Result An option has been enabled for use and activated/deactivated. 7.6.2 Description of options S-IPPV See “9.4 S-IPPV”, page 112. SIMV See “9.3 SIMV”, page 111. Manual See “9.5 Manual”, page 114. MEDUVENT Standard...
-
Page 76: Importing/Exporting Data
The device saves the current configuration to the SD card. • Import configuration The device imports a configuration from the SD card. Result Data has been imported/exported. The device places a green check mark against the executed action MEDUVENT Standard... - Page 77 ⇒ Only remove the SD card when no log files are being exported and the device software is not being updated. 2. Briefly press on the SD card. The SD card is ejected slightly. MEDUVENT Standard...
- Page 78 ⇒ Close the SD card cover to assure IP protection. ⇒ Connect the breathing circuit or close the protective caps to assure IP protection. 4. Close the splash guard to protect the device from ingress of moisture. Result The SD card is removed. MEDUVENT Standard...
-
Page 79: Updating Software
67). 1. If necessary: Download software from the Login area of the WEINMANN Emergency website to the SD card. 2. If the software is available as a ZIP file: Unzip the software. The folder contains the software in a file named WM35756-x.x.hex. - Page 80 SD card. The file contains information about the software update performed. This helps you in the context of quality management. You can open the file with a word processing program as well as print it out and sign it. MEDUVENT Standard...
-
Page 81: Device Information
Last passed function Here you can find out the last time a function check was check passed. Here you can find out which software version is currently Version numbers Software version installed on the device. MEDUVENT Standard... -
Page 82: Battery Information
Here different states of the rechargeable battery are Status word displayed in encoded form. Here the rechargeable battery voltage measured by the Battery voltage device is displayed. Device data Line voltage Here the line voltage measured by the device is displayed. MEDUVENT Standard... -
Page 83: Hygienic Reprocessing
Breathing circuit Read this chapter in full before starting hygienic reprocessing. If you have any questions regarding hygienic reprocessing, contact the manufacturer, WEINMANN Emergency, or a technician specifically authorized by the manufacturer. Disrupted and failed therapy due to incorrect use of... - Page 84 Droplets inside the reusable measuring circuit might falsify the results delivered by it. This might expose the patient to the risk of serious or life-threatening injury. ⇒ After hygienic reprocessing of the reusable measuring circuit, allow all the tubes in the breathing circuit to dry thoroughly. MEDUVENT Standard...
- Page 85 Reused disposables might cause infections if they come into contact with airways. This might expose the patient and the user to the risk of serious or life-threatening injury. ⇒ Do not reuse disposables. ⇒ Do not subject disposables to hygienic reprocessing. MEDUVENT Standard...
-
Page 86: Intervals
⇒ When cleaning/disinfecting the filter compartment, only moisten it, do not wet it. 8.1 Intervals Part Interval After infection transport or After every use At least 1x weekly exceeding filter service life (at least every 6 months) All parts (except hygiene filter) Hygiene filter MEDUVENT Standard... -
Page 87: Preparing For Hygienic Reprocessing
The patient is disconnected from the breathing circuit. 1. Open the protective sleeve. 2. Open the hook and loop fasteners in the protective sleeve. 3. Detach the protective cap from the patient end of the reusable breathing circuit. MEDUVENT Standard... - Page 88 5. Detach the following tubes from the patient valve: • PEEP control tube (1) • Pressure measuring tube (2) • Flexible oxygen tube (3) 6. Detach the elbow from the patient valve. 7. Disconnect the patient valve from the ventilation hose. MEDUVENT Standard...
- Page 89 8 Hygienic reprocessing 8. Remove the patient valve. 9. Detach the band of the protective cap from the check valve diaphragm holder. Result The reusable breathing circuit has been disassembled. MEDUVENT Standard...
- Page 90 2. Install the patient valve. When doing so: • The side of the PEEP control diaphragm marked “TOP” must be facing up toward the control cover. • The arrow on the control cover must be pointing toward the patient. MEDUVENT Standard...
- Page 91 When doing so: The tubes must be firmly attached to the patient valve. 6. Place all the tubes of the measuring circuit and the connecting cable of the MEDUtrigger in the protective sleeve. 7. Close off the patient end of the reusable breathing circuit with a protective cap. MEDUVENT Standard...
-
Page 92: Cleaning Parts Manually
2x until they • PEEP control tube are visibly clean. • Pressure measuring Cleaning is only permissible in conjunction with tube disinfection by immersion or steam sterilization. • Flexible oxygen tube • Measuring circuit connector MEDUVENT Standard... - Page 93 When doing so: • Keep uneven surfaces and grooves (e.g. top and bottom of the MEDUtrigger, knob, ventilation hose connection) moist throughout the time to take effect and brush off particularly thoroughly. • Brush hoses/tubes with a special lumen brush. MEDUVENT Standard...
- Page 94 8. Thoroughly rinse parts immersed in the cleaning solution in water of potable quality. 9. Wipe down remaining parts with a damp cloth to remove residues of the cleaning product. 10. Wipe the MEDUtrigger dry with a dry cloth. MEDUVENT Standard...
- Page 95 8 times with water of potable quality with the aid of the disposable syringe. When doing so: Flush only in one direction. 9. Allow the reusable measuring circuit to dry completely. 10. If necessary: Allow the ventilation hose to dry completely. MEDUVENT Standard...
-
Page 96: Disinfecting Parts By Wiping
2. For the cleaning products, dose and exposure time for the individual parts, refer to the cleaning and disinfection plan (see “8.11 Cleaning and disinfection plan”, page 105). 3. Prepare the solution for disinfection as specified by the disinfectant manufacturer. MEDUVENT Standard... - Page 97 6. Check the parts for residues and residual soiling. 7. If visible soiling remains: Repeat disinfection by wiping. Depending on the disinfectant, it might be necessary to wipe over with a neutralizing product afterward. Result The parts have been disinfected by wiping. MEDUVENT Standard...
-
Page 98: Disinfecting Parts By Immersion
3. Prepare the solution for disinfection by immersion as specified by the disinfectant manufacturer. 4. Immerse parts in the solution for disinfection by immersion. When doing so: • All cavities must be filled. • There must be no air bubbles. • All surfaces must be wetted. MEDUVENT Standard... - Page 99 5 minutes to remove all disinfectant residues. 6. Allow the parts to dry completely. 7. Check the parts for residues and residual soiling. 8. In the case of visible soiling: Repeat cleaning and disinfection. Result The parts have been disinfected by immersion. MEDUVENT Standard...
-
Page 100: Disinfecting The Reusable Measuring Circuit By Immersion
Flush measuring tubes only in one direction. 4. Draw the solution for disinfection by immersion through the tube into the disposable syringe until both are completely full. 5. Detach the disposable syringe from the tube. MEDUVENT Standard... -
Page 101: Reprocessing Parts Mechanically
70 °C Reusable breathing circuit Ventilation hose Cleaning: ® neodisher MediClean forte (Dr. Weigert): Patient valve 0.5 %, 55 °C, 10 minutes Elbow Thermal disinfection: 90 °C, 5 min Protective cap (corresponds to A0 value 3000) MEDUVENT Standard... - Page 102 It must be possible for the flow to pass fully through all parts and lumina. • The water must be able to drain off. 3. Add cleaning product in accordance with the instructions for use for the washer-disinfector. MEDUVENT Standard...
-
Page 103: Steam-Sterilizing Parts (Optional)
The parts intended for steam sterilization are visibly clean. • The parts intended for steam sterilization are disinfected. 1. For parts approved for steam sterilization, refer to the cleaning and disinfection plan (see “8.11 Cleaning and disinfection plan”, page 105). MEDUVENT Standard... -
Page 104: Preparing Parts For Reuse
34). 6. Perform a function check (see “5 Function check”, page 44). 7. Place parts in storage in accordance with the storage conditions (see “15 Technical data”, page 138). Result The parts are ready for use again. MEDUVENT Standard... -
Page 105: Cleaning And Disinfection Plan
Wipe down with Wash with (new) (Schülke) ® Hook and loop neodisher Derval SOLO and Not permitted Dose: Not permitted strap with clip MediClean forte Ottalin PERACET 50 ml/l (Dr. Weigert) at up to 70 °C Exposure time: 15 min MEDUVENT Standard... - Page 106 Disposable; do not reuse, dispose of properly (see 13, p. 132) (see 11.1, p. 122)) Oxygen inlet tube Pressure reducer Portable system Ventilation mask Follow the manufacturer's instructions for use Tracheal tube Breathing system filter MEDUVENT Standard...
- Page 107 Wash at 60 °C in an industrial washing machine Cleaning product: Derval SOLO (RKI) (Kreussler) Protective Dose: Not permitted Not permitted Not permitted Not permitted sleeve 2 ml/l disinfectant: Ottalin PERACET (Kreussler) Dose: 2 ml/l Exposure time: 10 min, type AB MEDUVENT Standard...
- Page 108 2x until they are 4 min at (corresponds to visibly clean 132 °C A0 value 3000) The applicable instructions are those in the instructions for use from the manufacturers of the individual components or parts. Follow these instructions for use. MEDUVENT Standard...
-
Page 109: Description Of The Modes
The patient is able to breathe spontaneously without any restriction at the set pressure level. The CPAP mode is used exclusively on patients with adequate spontaneous breathing. The pressure is generally set at the end of expiration (PEEP). MEDUVENT Standard... -
Page 110: Ippv
This mode is used on patients who have no spontaneous breathing. However, a spontaneously breathing patient can breathe deeply and freely during expiration. The set maximum pressure limit (pMax) ensures the safety of the patient. MEDUVENT Standard... -
Page 111: Simv
During spontaneous breathing, the mandatory mechanical breath is synchronized with the patient’s breathing. The mandatory minute volume and the mandatory respiratory rate remain unchanged. The set maximum pressure limit (pMax) ensures the safety of the patient. MEDUVENT Standard... -
Page 112: S-Ippv
This might expose the patient to the risk of serious or life-threatening injury. Description Abbreviation S-IPPV Synchronized Intermittent Positive Long form Pressure Ventilation Type Volume-controlled Requirement S-IPPV option has been activated Ventilation parameters pMax PEEP Freq. MEDUVENT Standard... - Page 113 Since the setting for respiratory rate is lower, the patient can trigger mandatory mechanical breaths spontaneously. A trigger window extending throughout the expiratory time is available for this synchronization. MEDUVENT Standard...
-
Page 114: Manual
For dispensing the maximum possible oxygen concentration in the inspiratory gas (O i) during resuscitation, a feed-in value is shown on the display. This value depends on tidal volume, and indicates how much oxygen is to be fed into the device. MEDUVENT Standard... - Page 115 To attain the shortest hands-off time during resuscitation, keep the MEDUtrigger pressed down in the ventilation pause during CPR 30:2 until two inspiratory breaths have been administered. Press the trigger button again to trigger up to another two mechanical breaths. MEDUVENT Standard...
-
Page 116: Alarms And Faults
• Multiple alarms of identical priorities: The device displays the alarms in rotation. • Technical alarms predominate. They cannot be muted. Technical alarms are generated if no ventilation by the device is possible. MEDUVENT Standard... -
Page 117: Alarm Messages
(see “15 Technical data”, page 138). Operate device within permitted temperature range Device temperature low Device temperature < -20 °C (see “15 Technical data”, page 138). MEDUtrigger removed from device MEDUtrigger disconnected Reconnect MEDUtrigger to device. during manual ventilation MEDUVENT Standard... - Page 118 Tracheal tube incorrectly Position tracheal tube correctly. positioned Vt low / Stenosis Route tubes so that they are not Tubes kinked or trapped kinked or trapped. Patient valve defective Replace patient valve. Hygiene filter blocked Check and replace hygiene filter. MEDUVENT Standard...
- Page 119 Implausible ventilation parameters Adjust ventilation parameters. Vt not achievable pMax set too low Modify setting for pMax. Oxygen inlet is not sealed or no Seal oxygen inlet with cap or feed Oxygen inlet leakage oxygen is being fed in. in oxygen. MEDUVENT Standard...
-
Page 120: Faults
10.2 Faults If you are not able to clear faults at once with the aid of the table, you should contact the manufacturer, WEINMANN Emergency, or your authorized dealer to have the device repaired. To avoid serious damage, do not continue using the device. - Page 121 (see 7.7, p. 76). Press the menu button to call up the operator menu directly and export the log files (see 7.7, p. 76). Switch the device off and have it Device defective repaired. MEDUVENT Standard...
-
Page 122: Maintenance
⇒ Note that the range of the rechargeable battery will gradually decrease due to aging. ⇒ Pay attention to the battery wear indicator in the function check. ⇒ If the rechargeable battery is worn out, replace it. MEDUVENT Standard... -
Page 123: Maintaining The Breathing Circuit (Reusable)
1. Check all parts of the reusable breathing circuit for external damage and to ensure that labeling is complete. 2. If necessary: Replace damaged or incorrectly labeled parts. 3. Replace PEEP control diaphragm and check valve diaphragm (maintenance set WM 15779). MEDUVENT Standard... -
Page 124: Replacing The Hygiene Filter
A contaminated hygiene filter might cause the patient or user to suffer serious or life-threatening injury. ⇒ Always wear suitable personal protective equipment when removing a contaminated hygiene filter. ⇒ Dispose of a contaminated hygiene filter when carrying out hygienic reprocessing and do not reuse it. MEDUVENT Standard... - Page 125 As a result, the system will not be leak-tight, and contamination or infection might occur which might cause the patient or user serious or life-threatening injury. ⇒ Check the filter compartment and filter for soiling, foreign bodies and damage. MEDUVENT Standard...
-
Page 126: Replacing Rechargeable Battery
This might expose the patient to the risk of serious or life-threatening injury. ⇒ Always operate the device with the rechargeable battery charged. You as the operator can replace the rechargeable battery yourself. MEDUVENT Standard... - Page 127 2. Remove the 6 screws. 3. Remove the battery compartment cover. 4. Remove the rechargeable battery from the device. 5. Unplug the battery's electrical connector. Result The rechargeable battery has been removed. MEDUVENT Standard...
- Page 128 11 Maintenance 11.4.2 Installing the rechargeable battery 1. Attach the battery's electrical connector. To do so, plug the battery connector into the socket. 2. Insert the rechargeable battery. Pay attention to the cable routing when doing this. MEDUVENT Standard...
- Page 129 3. Fit the battery compartment cover. 4. Tighten the 6 screws on the battery compartment cover. 5. Reset the date and time in the operator menu (see “7 Operator menu”, page 67) Result The rechargeable battery has been installed. MEDUVENT Standard...
-
Page 130: Sending In The Device
(see “8 Hygienic reprocessing”, page 83). 3. Send the device, and if necessary its accessories, to WEINMANN Emergency or to a technician specifically authorized by WEINMANN Emergency. If you send in parts that are obviously contaminated, they will be disposed of at your expense by WEINMANN Emergency or by a technician authorized by WEINMANN Emergency. -
Page 131: Storage
2. If necessary: Disconnect the device from line power. 3. Hygienically reprocess the device and accessories (see “8 Hygienic reprocessing”, page 83). 4. Store the device and accessories in a dry location. Result The device and accessories are stored in a dry location. MEDUVENT Standard... -
Page 132: Disposal
Power supply unit and charger 13.2 Rechargeable battery Do not dispose of used rechargeable batteries in household waste. Contact WEINMANN Emergency or a public waste disposal authority. 13.3 Breathing circuit/oxygen inlet tube Dispose of the breathing circuit and the oxygen inlet tube in a proper manner applicable to plastics at the end of their useful lives. -
Page 133: Scope Of Supply And Accessories
MEDUVENT Standard instructions for use WM 67781 14.2 Accessories and other parts Parts can be ordered separately, if required. A current list of parts can be obtained on the Internet at www.weinmann- emergency.com or through your specialist dealer. Article Part... - Page 134 Adapter cable for 12 V on-board power supply/ WM 28356 ODU connector EasyLung test lung WM 28625 Rechargeable battery for MEDUVENT Standard WM 35775 SD card WM 29791 Wall mounting for power supply unit and charger WM 15846 Breathing system filter...
- Page 135 Set of 25 disposable CPAP/NIV masks with air cushion, WM 15831 size S (child), with retaining ring for headgear Set of 25 disposable CPAP/NIV masks with air cushion, WM 15832 size M (adult), with retaining ring for headgear MEDUVENT Standard...
- Page 136 Silicone ventilation mask, size 3 (child) WM 11113 Silicone ventilation mask, size 4 (adult) WM 11114 Silicone ventilation mask, size 5 (adult) WM 11115 14.2.3 Options Article Part number S-IPPV mode option WM 35815 SIMV mode option WM 35816 MEDUVENT Standard...
-
Page 137: Spare Parts
This might expose the patient to the risk of serious or life-threatening injury. ⇒ Use only original WEINMANN Emergency spare parts or spare parts approved by WEINMANN Emergency. Spare parts can be ordered separately, if required. -
Page 138: Technical Data
8 hours temperature to standby at 20 °C Cooling-down time from maximum storage temperature to standby at 8 hours 20 °C Electrical connection (rated voltage) 12 V Max. power consumption 60 W Current consumption 0.15 A to 4 A MEDUVENT Standard... - Page 139 8 (U/U2 + Cat. S) Secured in emergency vehicle, ship, airplane, and helicopter as Type of emergency vehicle well as portable at the site of the emergency 4.3" TFT color display Display Resolution 480 pixels x 272 pixels MEDUVENT Standard...
- Page 140 150 l/min (in BTPS) Mechanical pressure relief/emergency Pressure limitation to < 100 hPa air valve 1:2 (fixed), in Manual mode 1:1 Respiratory rate 5 min to 40 min ± 1 min Inspiratory time 0.5 s to 4 s MEDUVENT Standard...
- Page 141 40 % – 30 % remaining in the dead space volume of the lung. ± 15 percent by volume (if the operating gas used matches the Accuracy of the O i display operating gas set in the operator menu) MEDUVENT Standard...
- Page 142 22 mm outer cone 22 mm outer cone Patient valve connections 15 mm inner cone Hygiene filter service life 24 h in operation or 6 months service life Hygiene filter separation rate > 99 % Subject to design modifications. MEDUVENT Standard...
-
Page 143: Technical Data, Rechargeable Battery
* A charging cycle corresponds to a 100 % rechargeable battery charge regardless of the current battery status. Example: If you charge the rechargeable battery twice from 50 % to 100 %, the device counts one charging cycle. MEDUVENT Standard... -
Page 144: Technical Data, Power Supply Unit And Charger
0.90 ml/hPa (ml/cmH • Disposable breathing circuit Internal volume of complete breathing system: • Reusable breathing circuit Approx. 573 ml Approx. 573 ml • Disposable breathing circuit Materials used PC, silicone, TPE, PA, PP, TPR, PE, PU, polyisoprene MEDUVENT Standard... -
Page 145: Block Diagram
Air inlet filter/temper- inlet Patient Volume and Ventilation Blower ature measurement valve temperature sensor hose PEEP Motor temperature outlet measurement Patient Protection filter/ Cooling Pressure relief sensor valve 100 hPa outlet Cooling air check valve inlet MEDUVENT Standard... -
Page 146: Technical Data On Electromagnetic Compatibility (Emc)
⇒ Do not stack the device with other medical electrical devices. ⇒ Do not operate the device in the direct vicinity of other medical electrical devices (exception: Other WEINMANN Emergency devices which have been tested to ensure that they can operate without problem alongside the device. - Page 147 Guidelines and manufacturer declaration - emission of electromagnetic interference MEDUVENT Standard is designed for operation in an electromagnetic environment as described below. The customer or user of the MEDUVENT Standard device should ensure that it is operated in such an environment.
- Page 148 Guidelines and manufacturer declaration – electromagnetic immunity MEDUVENT Standard is designed for operation in the electromagnetic environment described below. The customer or user of the MEDUVENT Standard device should ensure that it is used in such an environment. Interference IEC 60601 test...
- Page 149 Guidelines and manufacturer declaration – electromagnetic immunity MEDUVENT Standard is designed for operation in the electromagnetic environment described below. The customer or user of the MEDUVENT Standard device should ensure that it is used in such an environment. Interference IEC 60601 test...
- Page 150 If the field strength measured at the site where MEDUVENT Standard is used exceeds the above compliance levels, MEDUVENT Standard should be monitored to provide evidence of function in accordance with intended purpose.
- Page 151 MEDUVENT Standard has been tested for immunity to the radio services listed below. If the field strength measured at the site where MEDUVENT Standard is used exceeds the above compliance levels, MEDUVENT Standard should be monitored to provide evidence of function in accordance with intended purpose.
-
Page 152: Calculating Tidal Volume On The Basis Of Height
Source: TRAUB, S.L.; JOHNSON, C.E.: Comparison of methods of estimating creatinine clearance in children. In: American journal of hospital pharmacy 37, 1980, No. 2, p. 195–201. Source: DEVINE, Ben J. Gentamicin therapy. The Annals of Pharmacotherapy, 1974, 8th year, No. 11, p. 650-655 MEDUVENT Standard... -
Page 153: Exported Log Files
15.8.1 Setup and content of log files When you have exported the log files to an SD card, there is a folder named MEDUVENT Standard SNXXXX on the SD card. The following files are located in this folder: File name... - Page 154 Check of patient valve for leaks volplausible Check of volume administered Check of check valve diaphragm in patient checkvalvetight valve Check flow measurement sensors flowoutplausible (flowout and flowo2) against one another Check of the airway pressure sensor pawaccurate (pneumatic) MEDUVENT Standard...
-
Page 155: Alarm Delay Times
• At 5/min Up to 24 s • At 40/min Triggers after 2 breaths • At 5/min Up to 24 s • At 40/min Triggers after 2 breaths PEEP high • At 5/min to 8/min • At 40/min MEDUVENT Standard... -
Page 156: Symbols And Labels
Do not sit on device Do not climb on device Follow instructions for use. UL label with certification code (see “15.1 Technical data, device”, page 138) Inlet opening for ambient air Input voltage (12 V – 15 V) MEDUVENT Standard... - Page 157 Connection for MEDUtrigger Follow instructions for use. Safety check label (STK, only applies to Germany): Indicates when the next safety check in accordance with §11 of the Medizinprodukte-Betreiberverordnung [German regulation concerning the operators of medical devices] is required. MEDUVENT Standard...
-
Page 158: Labels On The Accessories
Maintenance label: Indicates when the next maintenance is due. Type BF applied part Oxygen inlet 0.3 bar – 6 bar / 15 l/min O 16.2 Labels on the accessories 16.2.1 Labels on the breathing circuit 16-2 Labels on the breathing circuit MEDUVENT Standard... - Page 159 Material designation: Polycarbonate >PC< Steam sterilization at 134 °C 134 °C Additionally for reusable breathing circuit only Indicates the date of the next maintenance (position: on service label). Additionally for disposable breathing circuit only Disposable item, do not reuse MEDUVENT Standard...
- Page 160 CE marking (confirms that the product complies with the applicable European directives) Degree of protection against: • Ingress of solid objects IP54 • Ingress of dust • Ingress of water with harmful effect Type of protection against electric shock: Protection class II device Date of manufacture MEDUVENT Standard...
-
Page 161: Labels On The Packaging
16.3 Labels on the packaging 16.3.1 Labels on the packaging of the breathing circuit (reusable) Symbol Description Article number Manufacturer with date of manufacture Limits of the storage temperature range Limits of the storage humidity range Follow instructions for use. Latex-free Latex MEDUVENT Standard... -
Page 162: Warranty
17 Warranty 17 Warranty Starting from the date of purchase, WEINMANN Emergency offers the customer a limited manufacturer’s warranty on a new original WEINMANN Emergency product or replacement part installed by WEINMANN Emergency in accordance with applicable warranty terms and conditions for the particular product and the warranty periods listed below. - Page 164 Manufacturer Center for Production, Logistics, Service WEINMANN Emergency WEINMANN Emergency Medical Technology GmbH + Co. KG Medical Technology GmbH + Co. KG Frohbösestraße 12 Siebenstücken 14 22525 Hamburg 24558 Henstedt-Ulzburg GERMANY GERMANY T: +49 40 88 18 96-120 E: customerservice@weinmann-emt.de...
Need help?
Do you have a question about the MEDUVENT Standard and is the answer not in the manual?
Questions and answers