Table of Contents
Advertisement
CPAP Units:
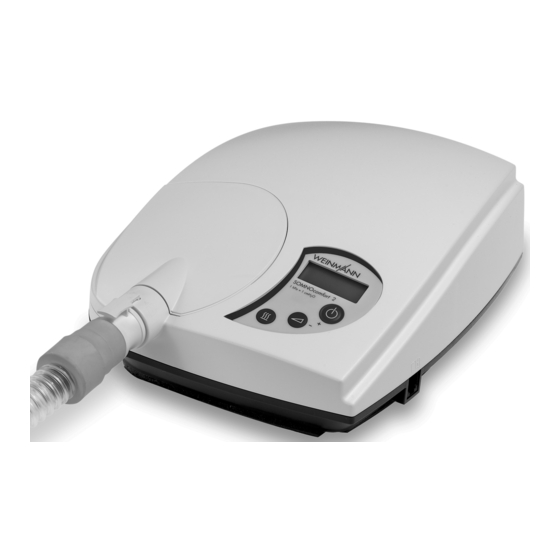
SOMNOcomfort 2
SOMNOcomfort 2
SOMNOcomfort 2 with SOMNOaqua
SOMNOcomfort 2e
SOMNOcomfort 2e
SOMNOcomfort 2 e with SOMNOaqua
autoCPAP Units:
SOMNObalance
SOMNObalance, white
SOMNObalance, white with SOMNOaqua
SOMNObalance, anthracite
SOMNObalance, anthracite with SOMNOaqua
SOMNObalance e
SOMNObalance e
SOMNObalance e with SOMNOaqua
Servicing and Repair Instructions
WM 24400 / WM 24465
WM 24450 / WM 24420
WM 24405
WM 24455
WM 27400
WM 27440
WM 27410
WM 27450
WM 27420
WM 27460
Advertisement
Table of Contents

Related Manuals for Weinmann homecare SOMNOcomfort 2


Summary of Contents for Weinmann homecare SOMNOcomfort 2
- Page 1 CPAP Units: SOMNOcomfort 2 SOMNOcomfort 2 WM 24400 / WM 24465 SOMNOcomfort 2 with SOMNOaqua WM 24450 / WM 24420 SOMNOcomfort 2e SOMNOcomfort 2e WM 24405 SOMNOcomfort 2 e with SOMNOaqua WM 24455 autoCPAP Units: SOMNObalance SOMNObalance, white WM 27400 SOMNObalance, white with SOMNOaqua WM 27440 SOMNObalance, anthracite...
-
Page 2: Table Of Contents
© Copyright Weinmann GmbH & Co. KG. The content and presentation are copyright protected and may only be used by authorised Weinmann Service Partners in the course of their service operations. The content must not be reproduced or passed on to third parties. The complete documents... -
Page 3: Introduction
Repair and servicing work must be performed by servicing and repair of SOMNOcomfort 2 and Weinmann or knowledgeable, well trained SOMNOcomfort 2e as well as SOMNObalance specialists. and SOMNObalance e. This will enable you to... -
Page 4: Overview
1. Overview SOMNOcomfort 2/SOMNOcomfort 2e/SOMNObalance/SOMNObalance e 1 Bacteria filter 12 Head gear 2 Power supply cable 11 Mask 3 Power supply 5 Cover 4 Humidifier 10 Exhalation system 8 Adapter 9 Breathing tube 6 Serial interface 7 Unit outlet 13 Humidifier activated 14 Service symbol 15 Softstart time 16 Automatic switch on/off... - Page 5 Legend 1 Bacteria filter (accessory) Used to protect the patient from bacteria, particularly if the unit is being used by a number of patients. 2 Power supply cable Connects the power supply to the mains supply. 3 Power supply Used to supply power to the unit. 4 Humidifier Used to heat and humidify the air flow created by the therapy unit.
- Page 6 23 Carry case For carrying the therapy unit. 24 DC adapter (accessory) For operating the therapy unit via a DC socket (12 - 24 V). 25 O connection valve (accessory) For introducing oxygen into the mask. 26 Supply connection This is the connection for the external power supply or DC adapter. 27 Rating plate Provides information about the unit, e.g.
- Page 7 Markings on the packaging Symbol Meaning SOMNOcomfort 2/SOMNOcomfort 2e/SOMNObalance/SOMNObalance e: Unit serial number Unit of protection class II Permitted temperature for storage: - 40˚C to + 70˚C % 0-95 Permitted humidity for storage: max. 95% relative humidity. Overview...
-
Page 8: Description Of The Equipment
2. Description of the equipment 2.1 Intended use SOMNOcomfort 2 and SOMNOcomfort 2e SOMNOcomfort 2 and SOMNOcomfort 2e are CPAP-Therapy units for the treatment of sleep related respiratory disorders. • SOMNOcomfort 2/SOMNOcomfort 2e Important! creates continuous positive airway pressure SOMNOcomfort 2/SOMNOcomfort 2e can (CPAP). -
Page 9: Functional Description Somnocomfort 2 And Somnocomfort 2E
2.3 Functional description SOMNOcomfort 2 and SOMNOcomfort 2e SOMNOcomfort 2 and SOMNOcomfort 2e operate according to the principle of an electrically driven flow generator, with the pressure level being controlled electronically. • A fan draws in ambient air via a filter and increase can be adjusted between 5 and conveys it to the unit outlet. -
Page 10: Servicing
3. Servicing 3.1 Intervals Servicing every 2 years or 5000 operating hours (SOMNOcomfort 2/SOMNObalance only) Following components to be wiped down with disinfectant: • Unit housing • Filter compartment cover – (see chapter 4., page 13) • Cover • Power supply •... -
Page 11: Filter Change
3.2 Filter change 1. In order to prevent water from entering the SOMNOcomfort 2/SOMNOcomfort 2e/ SOMNObalance/SOMNObalance e, detach the humidifier from the unit. When doing so, please refer to the included instructions for use. 2. Remove the filter compartment cover on the rear of the unit. -
Page 12: Reset Service Symbol
3.3 Reset service symbol After every servicing and hygienic preparation the display’s service symbol will have to be reset in order to reset the service indicator back to 0 hours. 1. To delete the service symbol, ensure the unit is switched off and press and hold softstart button until the setting option for Automatic... -
Page 13: Cleaning And Disinfecting Instructions
4. Cleaning and disinfecting instructions 4.1 Cleaning and disinfecting while in use Attention! You will find appropriate instructions in Chapter 5. “Cleaning and disinfecting instructions” of the instructions for use SOMNOcomfort 2/SOMNOcomfort 2e/SOMNObalance/SOMNObalance e. The following describes the cleaning and disinfecting procedures while repairing or transferring the unit to another patient. -
Page 14: Cleaning And Disinfecting The Humidifier While In Use
4.4 Cleaning and disinfecting the humidifier while in use You will find corresponding instructions in chapter 4. “Disinfecting and cleaning instructions” of the instructions for use SOMNOcomfort 2(e). 4.5 Cleaning and disinfecting the humidifier, new patient If the unit is to be disinfected and cleaned in order to transfer it to a new patient, the following steps should be taken: •... -
Page 15: Final Test
5. Final test 5.1 General Important! • Operating hours A final test is required after each and every repair. • Humidity level Please maintain a record of all maintenance and • Softstart time and initial pressure service work that you perform. We suggest that you maintain this record on a service record form, as •... -
Page 16: Checking The Power Supply
5.2.3 Checking the power supply 1. Connect the power supply to an available power source. – If the LED lights up, the power supply is in order. 2. Replace the power supply if necessary. 5.2.4 Checking the housing – Check the housing’s general condition. If the housing is damaged in any way, replace the respective part of the housing (see also Chapter 7.12, Page 31 and Chapter 7.13,... -
Page 17: Checking Proper Functionality Of The Therapy Unit
5.2.6 Checking proper functionality of the therapy unit 1. Switch on the therapy unit. 2. Close the opening of the mask, e.g. using your thumb or hand and hold it closed. 3. If the mask test is activated on SOMNObalance/SOMNObalance e, switch it off using button . -
Page 18: Checking Proper Function Of The Humidifier
13. In order to switch to the “A” setting, push the on/off button – The therapy unit will now switch on automatically when breathing into the mask (pressure > 0,5 hPa), – If the mask is removed, the unit should switch off after approx. -
Page 19: Troubleshooting
6. Troubleshooting Malfunction Cause Rectification Check connections between the power supply cable and the unit, wall outlet respectively. No power. Check the power source with another device (e.g. lamp) if necessary. If necessary, replace power supply cable. Fuse defective. Replace fuse (Chapter 7.8, Page 27). Flat cable connection of the Check connection to main circuit board No mechanical sound, ready... - Page 20 Malfunction Cause Rectification Check using another humidifier, if necessary replace heating rod (see instructions for use Humidifier defective. SOMNOcomfort 2/SOMNOcomfort 2e/ SOMNObalance/SOMNObalance e). Humidifier water will not warm Replace main circuit board (Chapter 7.6, Main circuit board defective. Page 25). Humidifier connection line 49 Reattach (Chapter 7.6, Page 25) or replace line.
-
Page 21: Repair Information And Repair Instructions
(see “5. Final test” on page 15). knowledge of and adherence to the • When replacing components or single parts, instructions for use and the servicing and use genuine Weinmann replacement parts repair instructions. only. • Perform repairs described in this servicing and •... -
Page 22: Sequence Of Repairs
7.3 Sequence of repairs The following schematic is intended to help you determine the order of required repair steps. Opening the unit Replace Remove main Replace fuse housing circuit board lower part Replace front Remove the Remove baffle panel foil display Remove Replace... -
Page 23: Opening The Unit
7.4 Opening the unit Attention! Do not open the unit unless the power is disconnected. 1. Remove the covering cap. 2. Place the unit upside down on a non-slip surface. 3. Remove the six screws 4. Remove the lower part of the housing with SOMNOcomfort 2/SOMNOcomfort 2e a swivelling motion away to the side. -
Page 24: Closing The Unit
7.5 Closing the unit 1. Hold the lower part of the housing to the upper part at an angle 2. Attach connector to the main circuit board SOMNOcomfort 2/SOMNOcomfort 2e . When doing so the connector’s nub has to point towards the lock. 3. -
Page 25: Replacing The Main Circuit Board
7.6 Replacing the main circuit board 1. Open the unit (chapter 7.4, page 23). Remove the main circuit board 1. Pull the plug from the main X200 X400 SOMNOcomfort 2/SOMNOcomfort 2e circuit board. X200 X400 Flat cable Lock 2. Remove the flat cables from front panel foil SOMNObalance/SOMNObalance e and display: X200... -
Page 26: Replacing The Front Panel Foil
3. Reattach the flat wires of front panel foil and SOMNObalance/SOMNObalance e display to the main circuit board: X200 – Pull the lock. X400 – Insert the flat cable into the connector. – Push the lock back in. 4. Connect plugs to the main X200 X400... -
Page 27: Replacing The Fuse
7.8 Replacing the fuse 1. Open the unit (chapter 7.4, page 23). SOMNOcomfort 2/SOMNOcomfort 2e 2. Remove the defective fuse and replace with a SOMNObalance/SOMNObalance e new one. Ensure the correct amperage is used. Use fuses mentioned in the Replacement parts list only. -
Page 28: Replacing The Baffle Box
3. Remove the decoupling tube including the insert. 4. Loosen the screw 5. Remove the display Attaching the display 1. Glue new foam to the display 2. Insert the new display. 3. Tighten the screw using the spring 4. Attach the decoupling tube. –... - Page 29 Attaching the baffle box 1. Place foam on the box, soft side up. must be able to see the screw heads of the box through the holes in the foam. 2. Insert box and foam into the housing. Make sure the foam is spread out evenly. 3.
-
Page 30: Replacing The Fan
7.11 Replacing the fan Remove the fan 1. Open the unit (see “7.4 Opening the unit” on page 23). 2. Remove the box (see “7.10 Replacing the baffle box” on page 28 steps 3. Remove the four screws. 4. Remove the box cover and the attached foam part. -
Page 31: Replacing The Housing, Lower Part
7.12 Replacing the housing, lower part 1. Open the unit (chapter 7.4, page 23). 2. Loosen the lock and pull the connection plug from the lower part of the housing in an upward motion. 3. Place the connecting line with the plug pointing into the socket of the new downwards... - Page 32 13. Insert a fine dust filter followed by a coarse dust filter 14. Reattach the filter compartment cover 15. Check that everything is working properly (chapter 5., page 15). Repair information and repair instructions...
-
Page 33: Replacement Parts
8. Replacement parts 8.1 Replacement parts list Note: The item numbers of the following table are identical to the numbers used in the body text of this servicing and repair instructions. Item-No. Name Ordering-No. Power supply cable WM 24133 Power supply WM 24480 Cover, white WM 24424... - Page 34 Item-No. Name Ordering-No. Main circuit board SOMNOcomfort 2 WM 24430 Main circuit board SOMNOcomfort 2e WM 23530 Main circuit board SOMNObalance WM 27490 Main circuit board SOMNObalance AT WM 27488 Main circuit board SOMNObalance e WM 27480 Main circuit board SOMNObalance e AT WM 27489 Foam, circuit board WM 27418...
-
Page 35: Replacement Parts Required For Servicing
Item-No. Name Ordering-No. Breathing tube with adapter, white WM 24396 Breathing tube with adapter, dark-grey WM 24397 Set of 10 breathing tubes WM 15689 Fuse WM 13422 Adapter, pressure gland WM 24448 Spring for display WM 24402 8.2 Replacement parts required for servicing Servicing set 10,000 operating hours or 4 years Set WM 15687 (for SOMNOcomfort 2/SOMNOcomfort 2e/SOMNObalance/SOMNObalance e, white) -
Page 36: Tools, Testing Equipment And Disinfectants
GMH 3110 To be ordered from: WM 23930 with pressure sensor 0-25 hPa of the manufacturer Weinmann. Type GMSD 25 MR • Remote cable 2 m Can be ordered from: required to adjust pressure... -
Page 37: Technical Data
10. Technical data 10.1 Specifications for SOMNOcomfort SOMNOcomfort 2 SOMNOcomfort 2e SOMNOcomfort 2 SOMNOcomfort 2e with SOMNOaqua with SOMNOaqua Product category according to 93/42/EEC Dimensions WxHxD in cm 21 x 9 x 27 21 x 14 x 27 Weight approx. 1.7 kg approx. - Page 38 SOMNOcomfort 2 SOMNOcomfort 2e SOMNOcomfort 2 SOMNOcomfort 2e with SOMNOaqua with SOMNOaqua Short-term constant pressure level measured as per prEN ISO 17510:2004 at: Δp = 0,5 hPa Δp = 0,5 hPa 18 hPa Δp = 0,5 hPa Δp = 0,5 hPa 14 hPa Δp = 0,4 hPa Δp = 0,4 hPa...
-
Page 39: Specifications For Somnobalance
10.2 Specifications for SOMNObalance SOMNObalance SOMNObalance e SOMNObalance SOMNObalance e with SOMNOaqua with SOMNOaqua Product category according to 93/42/EEC Dimensions WxHxD in cm 21 x 9 x 27 21 x 14 x 27 Weight approx. 1.7 kg approx. 1.9 kg (without water) Temperature range –... -
Page 40: Pneumatic Diagram
SOMNObalance SOMNObalance e SOMNObalance SOMNObalance e with SOMNOaqua with SOMNOaqua Heating of respiratory air 2,5 °C 2,5 °C depending on heating level Short-term constant pressure level measured as per prEN ISO 17510:2005 at: Δp = 0,7 hPa Δp = 0,7 hPa 18 hPa Δp = 0,6 hPa Δp = 0,6 hPa... -
Page 41: Safety Distances For Somnocomfort 2 And Somnocomfort 2E
80 MHz - 800 MHz 800 MHz – 2.5 GHz 0,01 0,04 0,04 0,08 0,11 0,11 0,22 0,35 0,35 0,70 1,10 1,11 2,20 3,50 3,50 7,00 Additional technical specifications available from manufacturer WEINMANN upon request. Subject to design modifications. Technical data... -
Page 42: Service Record
11. Service record Weinmann _______________ Manufacturer: Serial number _______________ Commission date SOMNOcomfort 2 Unit type: _______________ Total operating hours SOMNOcomfort 2e _______________ Operator SOMNObalance SOMNObalance e Parameters set before servicing: _______________ hPa _______________ Pressure Softstart time _______________ hPa _______________ Softstart initial pressure... - Page 43 Cleaning, disinfection, sterilisation Measure taken see also done Cleaning and disinfecting during repairs Chapter 4.2, Page 13 Cleaning and disinfecting: new patient Chapter 4.3, Page 13 Cleaning and disinfecting the humidifier: new Chapter 4.5, Page 14 patient Notes: Service performed according to servicing and repair instructions SOMNOcomfort 2/ SOMNOcomfort 2e/SOMNObalance/SOMNObalance e (WM 16988): Company: Date:...
- Page 44 Weinmann Geräte für Medizin GmbH+Co. KG P.O.Box 540268 • D-22502 Hamburg Kronsaalsweg 40 • D-22525 Hamburg T: +49 (0)40-5 47 02-0 +49 (0)40-5 47 02-461 E: info@weinmann.de www.weinmann.de Center for Production, Logistics, Service Weinmann Geräte für Medizin GmbH+Co. KG Siebenstücken 14...
Need help?
Do you have a question about the homecare SOMNOcomfort 2 and is the answer not in the manual?
Questions and answers