Table of Contents
Advertisement
Quick Links
Advertisement
Table of Contents

Subscribe to Our Youtube Channel
Related Manuals for Mecmesin Multitest 0.5dV


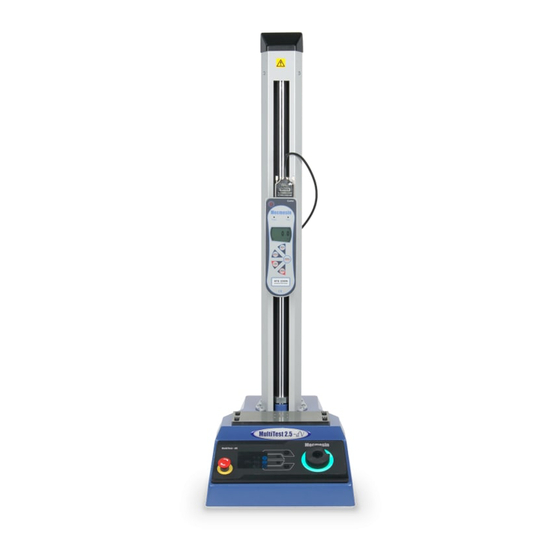
Summary of Contents for Mecmesin Multitest 0.5dV
- Page 1 Number 022-780 Multitest 0.5dV, 1dV & 2.5dV Service and Repair Manual Issue Number: 02 Page 1 of 32 PDF copy stored in approved Paper copy printed from approved PDF source by: location by: (click on signature for validation) Name Signature...
-
Page 2: Table Of Contents
Number 022-780 Multitest 0.5dV, 1dV & 2.5dV Service and Repair Manual Issue Number: 02 Page 2 of 32 1. Contents Contents .................... 2 Change History ................. 3 Warnings and Cautions ..............4 Preparation for working inside the base casting ........ 5 Transformer removal and Replacement .......... -
Page 3: Change History
Number 022-780 Multitest 0.5dV, 1dV & 2.5dV Service and Repair Manual Issue Number: 02 Page 3 of 32 2. Change History Iss. Date Effective Author Document / Mechanical Change S.No. clarification Change 11/01/16 Initial Draft Instruction 11/03/16 2548 Motor mounting changed 4 x unknown serial No. -
Page 4: Warnings And Cautions
Number 022-780 Multitest 0.5dV, 1dV & 2.5dV Service and Repair Manual Issue Number: 02 Page 4 of 32 3. Warnings and Cautions General anti-static precautions should be observed whilst following this service instruction. Anti-static precautions must be taken when performing any... -
Page 5: Preparation For Working Inside The Base Casting
Number 022-780 Multitest 0.5dV, 1dV & 2.5dV Service and Repair Manual Issue Number: 02 Page 5 of 32 4. Preparation for working inside the base casting Ensure that the test stand is switched-off and disconnected from the mains supply Support the test stand safely in an inverted... -
Page 6: Transformer Removal And Replacement
Number 022-780 Multitest 0.5dV, 1dV & 2.5dV Service and Repair Manual Issue Number: 02 Page 6 of 32 5. Transformer removal and Replacement Remove the base plate as per 4, Instructions 1 to 4 Locate the transformer as identified in the photograph... -
Page 7: Mains Filter Replacement
Number 022-780 Multitest 0.5dV, 1dV & 2.5dV Service and Repair Manual Issue Number: 02 Page 7 of 32 6. Mains Filter Replacement Remove the base plate as per 4, Instructions 1 to 5 Locate the rear panel as identified in the photograph... -
Page 8: Rear Panel Replacement
Number 022-780 Multitest 0.5dV, 1dV & 2.5dV Service and Repair Manual Issue Number: 02 Page 8 of 32 7. Rear Panel Replacement Remove the base plate as per 4, Instructions 1 to 5 Locate the rear panel as identified in the photograph. - Page 9 Number 022-780 Multitest 0.5dV, 1dV & 2.5dV Service and Repair Manual Issue Number: 02 Page 9 of 32 Disconnect from the VIC board the rear panel USB 4 way loom (x10) and the RJ11 6 way loom (X3) Disconnect the digital I/O loom (352-248) rear panel (I/O) from PL1...
-
Page 10: Motor Replacement
Number 022-780 Multitest 0.5dV, 1dV & 2.5dV Service and Repair Manual Issue Number: 02 Page 10 of 32 8. Motor Replacement Remove the base plate as per 4, Instructions 1 to 5 The motor/gearbox unit, complete with an encapsulated encoder (also known as the ‘tachometer’), is attached to the base... - Page 11 Number 022-780 Multitest 0.5dV, 1dV & 2.5dV Service and Repair Manual Issue Number: 02 Page 11 of 32 Disconnect motor encoder loom (352- 191-V01) from J2. Remove the 3-off M6x12 socket cap head motor retaining screws Lift the motor out of the base casing.
-
Page 12: Vic Pcb Replacement
Number 022-780 Multitest 0.5dV, 1dV & 2.5dV Service and Repair Manual Issue Number: 02 Page 12 of 32 9. VIC PCB Replacement Warning: General anti-static precautions should be observed whilst handling the PCB Remove the base plate as per 4, Instructions 1 to 5... -
Page 13: Front Panel Replacement
Number 022-780 Multitest 0.5dV, 1dV & 2.5dV Service and Repair Manual Issue Number: 02 Page 13 of 32 10. Front Panel Replacement Remove the base plate as per 4, Instructions 1 to 5 General anti-static precautions NOTE: should be observed. -
Page 14: Emergency Stop Replacement
Number 022-780 Multitest 0.5dV, 1dV & 2.5dV Service and Repair Manual Issue Number: 02 Page 14 of 32 11. Emergency Stop Replacement General anti-static precautions should be observed. NOTE: Depress the release lug on rear of Emergency Stop button to release loom connection - take care - excessive force can break the lug. -
Page 15: Shroud Removal And Replacement
Number 022-780 Multitest 0.5dV, 1dV & 2.5dV Service and Repair Manual Issue Number: 02 Page 15 of 32 12. Shroud Removal and Replacement Remove the base plate as per 4, Instructions 1 to 5 Remove the 3-off plastic snap action rivets retaining the top cap to the shroud and lift off the cap. - Page 16 Number 022-780 Multitest 0.5dV, 1dV & 2.5dV Service and Repair Manual Issue Number: 02 Page 16 of 32 Lift the shroud until it comes clear of the columns/crossheads Refitting of the Shroud is the reverse of the above procedure...
-
Page 17: Ballscrew Coupling Replacement
Number 022-780 Multitest 0.5dV, 1dV & 2.5dV Service and Repair Manual Issue Number: 02 Page 17 of 32 13. Ballscrew Coupling Replacement Remove the shroud as per Section 12. Remove M8 x 20 socket cap head screws retaining top crosshead to columns... - Page 18 Number 022-780 Multitest 0.5dV, 1dV & 2.5dV Service and Repair Manual Issue Number: 02 Page 18 of 32 Lower top crosshead back into position taking care to locate on both columns and limit switch rod. Ensure that the top half of the...
-
Page 19: Ballscrew, Top And Moving Crosshead Assembly Replacement
Number 022-780 Multitest 0.5dV, 1dV & 2.5dV Service and Repair Manual Issue Number: 02 Page 19 of 32 14. Ballscrew, Top and Moving Crosshead Assembly Replacement Remove the shroud as per Section 12. Slacken fixed top collet on Microswitch rod (note the relative positions of the fixed collet) Remove the top crosshead as per Section 13. -
Page 20: Limit Switch Assembly Replacement
Number 022-780 Multitest 0.5dV, 1dV & 2.5dV Service and Repair Manual Issue Number: 02 Page 20 of 32 15. Limit Switch Assembly Replacement General anti-static precautions should be observed. NOTE: Remove the base plate as per 4, Instructions 1 to 5... - Page 21 Number 022-780 Multitest 0.5dV, 1dV & 2.5dV Service and Repair Manual Issue Number: 02 Page 21 of 32 Cut any cable ties securing the limit switch PCB cable. Disconnect the limit switch cable from the VIC board. Remove the 2-off M4 x 12 taptite...
- Page 22 Number 022-780 Multitest 0.5dV, 1dV & 2.5dV Service and Repair Manual Issue Number: 02 Page 22 of 32 Withdraw the limit switch/rod assembly from the test stand Refitting of the Limit Switch is the reverse of the above procedure Adjust top and bottom (short) locking collars to “Factory” set limits as listed in the table below.
-
Page 23: Fault Finding And Cure
Number 022-780 Multitest 0.5dV, 1dV & 2.5dV Service and Repair Manual Issue Number: 02 Page 23 of 32 16. Fault finding and cure. Quick Reference Guide Fault Section Stand will not turn on Over travelled is displayed on screen Opto on limit switch fails to work... - Page 24 Number 022-780 Multitest 0.5dV, 1dV & 2.5dV Service and Repair Manual Issue Number: 02 Page 24 of 32 vi. Check the emergency stop switch loom – perform a continuity test. vii. Perform a continuity test on Micro-switches SW1 and SW2 to ensure that they work viii.Clean the internal face of the two limit switch PCB optos U1 &...
- Page 25 Number 022-780 Multitest 0.5dV, 1dV & 2.5dV Service and Repair Manual Issue Number: 02 Page 25 of 32 8) Stand fails load test: i. Check that all the bolts securing the columns and crosshead assembly have been correctly tightened and that the motor mounting bolts are tight.
-
Page 26: Fault Messages
Number 022-780 Multitest 0.5dV, 1dV & 2.5dV Service and Repair Manual Issue Number: 02 Page 26 of 32 17. Fault messages “Software Timeout” – The software has previously crashed “Software Timeout Over travel detected” – The hard limit switch has been “Motor 0: overtemp”... - Page 27 Number 022-780 Multitest 0.5dV, 1dV & 2.5dV Service and Repair Manual Issue Number: 02 Page 27 of 32 Dimensions - dV Stand. Multitest-dV Multitest 0.5-dV Multitest 1-dV Multitest 2.5-dV...
-
Page 28: Dimensions - Anvil Plate
Number 022-780 Multitest 0.5dV, 1dV & 2.5dV Service and Repair Manual Issue Number: 02 Page 28 of 32 18. Dimensions - Anvil plate 408-253-F98 ANVIL PLATE Further information; 10-32 UNF (420-055) M6 x 20 (420-054) 5/16 UNC (420-172) -
Page 29: Rear Connector Pin-Outs
Number 022-780 Multitest 0.5dV, 1dV & 2.5dV Service and Repair Manual Issue Number: 02 Page 29 of 32 19. Rear connector pin-outs The pin-out for the 25 way I / O connector on the back of the MultiTest-dV is:- 14 - Digital Output 1... -
Page 30: Spare Parts List
Number 022-780 Multitest 0.5dV, 1dV & 2.5dV Service and Repair Manual Issue Number: 02 Page 30 of 32 20. Spare Parts List PCB’s supplied will not be accepted back for credit due to obvious handling and storage problems. Changes made to this list also need to be incorporated into the Spare Price Parts List Item Part No. - Page 31 Number 022-780 Multitest 0.5dV, 1dV & 2.5dV Service and Repair Manual Issue Number: 02 Page 31 of 32 410-836 LABEL-DV EXPANSION REAR PANEL 410-837 LABEL-DV GAUGE REAR PANEL 420-035 SCREW TAPTITE PAN POSI M3x6 420-064 SCREW CAP HEAD SKT M6x16 420-094 WASHER INT.
-
Page 32: Dial Led Status Summary
Number 022-780 Multitest 0.5dV, 1dV & 2.5dV Service and Repair Manual Issue Number: 02 Page 32 of 32 420-063 SKT GRUB SCREW M4x4MM 420-236 M12x1 NUT LOCKING PITCH 420-246 WASHER FLAT M12 (1.5mm THK) 420-297 M4x24 DOWEL PIN 424-010 M6 LKG.COLLAR 890214...
Need help?
Do you have a question about the Multitest 0.5dV and is the answer not in the manual?
Questions and answers