
Related Manuals for Mecmesin Helixa


Summary of Contents for Mecmesin Helixa
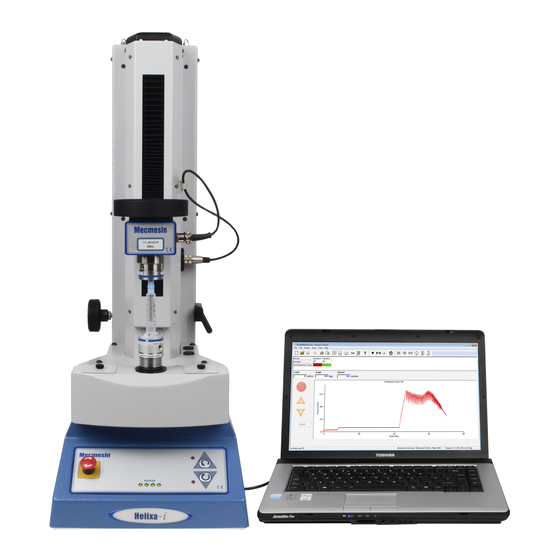
- Page 1 Assembly and Installation of the Helixa Precision Torque Tester Helixa-xt Helixa-i 431-439-05 June 2015...
- Page 2 The 24-month end-user warranty for the Helixa-xt console itself is with a third party. Please contact your local Mecmesin agent for assistance with this warranty.
-
Page 3: Table Of Contents
Fitting the console to a Helixa-xt Connecting the console power lead and RS232 lead Switching on the Helixa-xt system Connecting other devices The touch screen console Operators and Master users Mecmesin iii Assembly and Installation of the Helixa Precision Torque Tester... - Page 4 Helixa-i : Installing and Connecting with the Emperor™ software Helixa-i: Installing Emperor Software on Your PC 6.1.1 Minimum system requirements 6.1.2 Access to data folders Connecting the power lead and USB lead Switching on the Helixa-i system Starting Emperor Precision Alignment...
-
Page 5: Items Supplied With The Test Stand
1. Items Supplied with the Test Stand 1.1 Helixa-i test stand • The Helixa test stand • Appropriate mains cables for test stand and console (Helixa-xt) • 4 × rubber feet • 4 × bench-securing lugs • 4 × attachment screws for either feet or lugs •... -
Page 6: Installation
Section 1 lists items that should be included with your test stand. Please contact Mecmesin or your authorised distributor if any items are missing or damaged. 2.2 Lifting the test stand The unpackaged weight of the test stand is given in the Specification table at the back of this manual. -
Page 7: Mains Power Supply
2.5 Mains power supply Mecmesin test stands can be used on 110–120 or 220–240 V ac 50-60 Hz supplies. The rear fuse carrier will be set for your local requirement, but is reversible, so should you replace a fuse, the correct local voltage must be selected. The voltage that is selected is the one... -
Page 8: Assembly And Stand Controls
The Helixa is supplied with rubber feet. Lay the stand carefully on its back, and fit the four rubber feet to the base of the stand. Please note: The Helixa is heavy and it is recommended that two persons move the stand for this operation. Handle the Helixa only by its base and column, not the crosshead or spindle deck. -
Page 9: Fitting A Torque Cell To The Crosshead
Align the electrical connector of the HTC with the socket on the test stand. Gently push the connector to locate, then tighten the knurled locking ring to secure it. connect the torque cell secure the cable, and adjust free length Mecmesin 5 Assembly and Installation of the Helixa Precision Torque Tester... -
Page 10: Swapping Helixa Torque Cells (Htcs)
Main Screen and switch off the stand before unplugging the HTC. When the new cell has been connected, switch the stand on again, and after a few seconds the new HTC will be automatically recognised. The Helixa will read in the new cell’s range, serial number and calibration status. -
Page 11: Jog Buttons
Jog buttons are used to position the main spindle’s rotation, so that samples can be secured. These buttons are replicated in the Emperor software, either on the console (Helixa-xt) or the controlling PC (Helixa-i). The two sets of buttons function in different ways. -
Page 12: The Counterbalance Mechanism
4. The Counterbalance Mechanism The Helixa moving crosshead is counterbalanced by a system of weights. In this way, the entire weight of the crosshead, HTC, fixture and sample part to be held, can be finely counterbalanced. This may be required so as not to interfere with measuring the torque on (for example) a rising screw thread, or conversely, to apply a specific downwards force during torque testing, by the addition of weights to the top mass platen. -
Page 13: Adding Counterbalance Weight, And Applying Top-Load
Using an Allen key, release the grub screw through the hole in the weights, visible at the base of the long central slot. Release the lever to move the crosshead using the wheel on the left of the column. Mecmesin 9 Assembly and Installation of the Helixa Precision Torque Tester... -
Page 14: Helixa-Xt : Fitting The Control Console
Retighten each knob firmly so that the console does not move when the screen is pressed. Adjust the console height Adjust tilt and swing 10 Mecmesin Assembly and Installation of the Helixa Precision Torque Tester... -
Page 15: Connecting The Console Power Lead And Rs232 Lead
Plug the power adaptor into a suitable socket. Plug the data cable into the 9-way socket labelled ‘PC’ on the rear of the Helixa. Normally it will not be necessary to remove the data cable from socket COM1, but should this be required, return the console to the front screen display before removing the RJ50 connector. -
Page 16: The Touch Screen Console
• touch and drag a window element by its title bar—such as the floating keyboard itself. keyboard keyboard icon The –xt console showing the floating keyboard icon bottom right, and keyboard 12 Mecmesin Assembly and Installation of the Helixa Precision Torque Tester... -
Page 17: Operators And Master Users
Note: both the username and password are case-sensitive. For details of access levels and how to create user accounts, see Emperor™ Programming for Mecmesin-xt Force and Torque Test Systems. Mecmesin 13 Assembly and Installation of the Helixa Precision Torque Tester... -
Page 18: Helixa-I : Installing And Connecting With The Emperor™ Software
• Click on the CD drive that contains the Emperor software CD • Navigate to the Emperor folder • Right click on the Set-up.exe file, and Run as Administrator 14 Mecmesin Assembly and Installation of the Helixa Precision Torque Tester... -
Page 19: Connecting The Power Lead And Usb Lead
PC and the D-connector end into the 9-way socket labelled ‘PC’ on the rear of the Helixa. Helixa rear panel. Plug the USB cable into the socket marked ‘PC’. 6.3 Switching on the Helixa-i system Switch on the test stand using the main switch located on the rear panel. Four green power lights (LEDs) on the front panel will illuminate. - Page 20 For full details, see the manual: Emperor Force and Torque Testing Software, Operator Manual. 16 Mecmesin Assembly and Installation of the Helixa Precision Torque Tester...
-
Page 21: Precision Alignment
Drive spindle belt retraction point adjustment covers drive spindle cover disc and ‘O’-ring self-centering main drive spindle The supplied T-bar Allen key is used for making adjustments. Mecmesin 17 Assembly and Installation of the Helixa Precision Torque Tester... - Page 22 6. Carefully lower the crosshead until the alignment tool engages fully to self-align the main drive spindle: 18 Mecmesin Assembly and Installation of the Helixa Precision Torque Tester...
- Page 23 12. Push the crosshead and alignment tool carefully into the main spindle once more, to confirm correct alignment. 13. Move the crosshead to the top and remove the alignment fixture from the HTC. Mecmesin 19 Assembly and Installation of the Helixa Precision Torque Tester...
-
Page 24: Appendix A System Specifications
127 mm (without bellows) 111 mm (with bellows) Weight 28 kg (Helixa-i) 32 kg (Helixa-xt) Static weights Rear counterbalance 40 N (maximum) Torque cell mass platen 60 N (maximum) 20 Mecmesin Assembly and Installation of the Helixa Precision Torque Tester... - Page 25 +10° to +35° C (50° to 95°F) Humidity Normal industry and laboratory conditions, non-condensing Noise emissions Less than 70 db(A) Mecmesin reserves the right to alter equipment specifications without prior notice. E&OE Mecmesin 21 Assembly and Installation of the Helixa Precision Torque Tester...
-
Page 26: Appendix Bec Declarations Of Conformance
Appendix B EC Declarations of Conformance 22 Mecmesin Assembly and Installation of the Helixa Precision Torque Tester... - Page 27 Mecmesin 23 Assembly and Installation of the Helixa Precision Torque Tester...
-
Page 28: Appendix C Microsoft® Windows® Embedded Standard 7 Licensing
Appendix C Microsoft® Windows® Embedded Standard 7 Licensing Each Helixa-xt system supplied with a console controller has Microsoft® Windows® Embedded Standard 7 Operating System pre-installed and licensed by Mecmesin. Each is supplied with the following as proof of licensing: • End User Licence Agreement (EULA) •... - Page 30 Mecmesin : a world leader in affordable force and torque testing solutions Since 1977, Mecmesin has assisted thousands of companies achieve enhanced quality control in design and production. The Mecmesin brand represents excellence in accuracy, build, service, and value. In production centres and research labs worldwide, designers, engineers, operators, and quality managers endorse Mecmesin force and torque testing systems for their high performance across countless applications.
Need help?
Do you have a question about the Helixa and is the answer not in the manual?
Questions and answers