Table of Contents
Advertisement
Quick Links
Advertisement
Table of Contents
Troubleshooting

Related Manuals for Avid Technology FastServe Playout


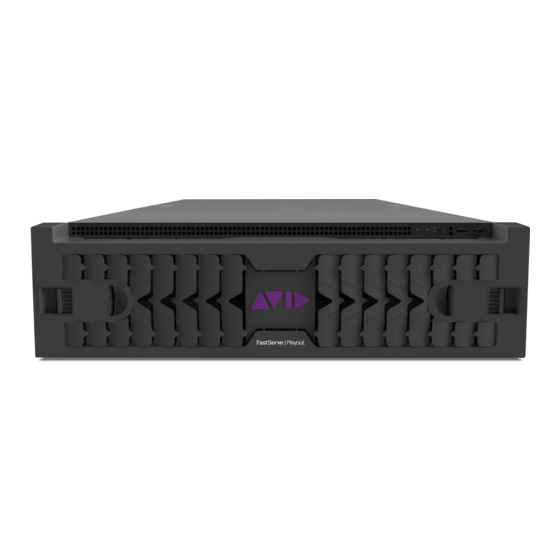
Summary of Contents for Avid Technology FastServe Playout
- Page 1 Avid FastServe | Playout Setup Guide Version 2018.5...
- Page 2 Legal Notices Product specifications are subject to change without notice and do not represent a commitment on the part of Avid Technology, Inc. This product is subject to the terms and conditions of a software license agreement provided with the software. The product may only be used in accordance with the license agreement.
- Page 3 The warlib C++ Library is distributed in the hope that it will be useful, but WITHOUT ANY WARRANTY; without even the implied warranty of MERCHANTABILITY or FITNESS FOR A PARTICULAR PURPOSE. See the GNU Lesser General Public License for more details. Portions copyright © 2012 Avid Technology, Inc.
- Page 4 Fauxlder, TL In Tune, TL MasterMeter, TL Metro, TL Space, TL Utilities, tools for storytellers, Transit, TransJammer, Trillium Lane Labs, TruTouch, UnityRAID, Vari-Fi, Video the Web Way, VideoRAID, VideoSPACE, VTEM, Work-N-Play, Xdeck, X-Form, Xmon and XPAND! are either registered trademarks or trademarks of Avid Technology, Inc. in the United States and/or other countries. Footage Arizona Images —...
-
Page 5: Table Of Contents
Contents Symbols and Conventions ............8 Chapter 1 Avid FastServe | Playout Server Overview . - Page 6 FastServe | Playout Engine Linux Installation ..........27 Network Configuration.
- Page 7 Connector Pinouts and Connections ........... 59 VDCP Commands Supported by FastServe | Playout.
-
Page 8: Symbols And Conventions
Using This Guide Congratulations on your purchase of an Avid FastServe | Playout server. This guide contains all the installation, configuration, and setup instructions you need to install and setup the Avid product. Symbols and Conventions Avid documentation uses the following symbols and conventions: Symbol or Convention Meaning or Action A note provides important related information, reminders,... -
Page 9: Avid Fastserve | Playout Server Overview
Avid FastServe | Playout Server Overview This guide covers everything you need to know to unpack, install and configure your FastServe | Playout server hardware and software. This chapter provides an overview of the FastServe | Playout server, starting with how to unpack and inspect your server. -
Page 10: Unpacking Your Server
Avid recommends that you keep all packaging materials for at least 90 days. If you need to return a server to Avid Technology, Inc., the server and all components must be repackaged in its original packaging material to ensure that there is no damage during shipment. -
Page 11: Inspecting Components For Damage
Inspecting Components for Damage Once you have verified that all of your components have been shipped, you must verify that they are not damaged. To inspect components for damage: 1. Visually inspect all of the hardware components listed in the previous section to make sure that none of them were damaged during shipment. -
Page 12: Server Front Panel And Led Control Panel
Front of the Server Regarding media drives, each media drive has a blue and red LED on the bottom front of the drive. The left LED (blue) is lit when a drive has power and flashes when the drive is in use. The right LED (red) is lit when an error is detected with the drive and the drive needs to be replaced. -
Page 13: Drive Array
The following table describes the LED Control Panels shown in the previous figure. LED Control Panel Letter Description Description Red System error LED Illuminates red when an error is detected with the server (fan, power supply, temperature, voltage). Power LED Illuminates green when the server is powered on. -
Page 14: Power Supplies
Avid FastServe | Playout - Rear Panel Each of these components is described in the topics below. Power Supplies There are two power supplies accessible from the rear of the FastServe | Playout server. If a failure occurs on either one of the power supplies, you can pull the failed power supply out of the server, and install a replacement power supply without turning off the FastServe | Playout server. -
Page 15: Usb Ports
USB Ports There are two USB ports located on the rear of the Avid FastServe | Playout server. VGA Port There is one VGA port located on the rear of the Avid FastServe | Playout server. LTC Input There is one LTC Input located on the rear of the Avid FastServe | Playout server. Serial Port There is one Serial port located on the rear of the Avid FastServe | Playout server. -
Page 16: Reference
Reference There is one Reference input and one Reference loop port located on the rear of the Avid FastServe | Playout server. If the server is the last device in your reference loop, terminate the remaining Ref Loop through a connector with an 75 ohm-rated terminator. - Page 17 upper upper upper upper left right left right OUT1 OUT2 lower lower lower lower left right left right For UHD channels, the default routing is as follows: Channel 1 Channel 2...
- Page 18 For HD channels, the default routing is as follows: Out 1 Out 2 Out 3 Out 4...
- Page 19 Out 5 Out 6 Out 7 Out 8 1 x Video + Alpha, 6 X HD video Ch. 1 video & alpha 6 HD Outputs alpha...
- Page 20 OSD Output The below connectors provide OSD output (On Screen Display / Dirty channel) for the associated output channel:...
-
Page 21: Installing The Fastserve | Playout System
Installing the FastServe | Playout System This chapter describes how to install a FastServe | Playout server on your site. Topics in this chapter include: • Electrostatic Discharge Precautions • Installing FastServe | Playout Hardware in a Rack • Installing the Drives in the Server •... -
Page 22: Rack-Mount Requirements
Rack-mount Requirements • Elevated Operating Ambient — If installed in a closed or multi-unit rack assembly, the operating ambient temperature of the rack environment might be greater than room ambient. Therefore, consider installing the equipment in an environment compatible with the maximum ambient temperature (Tma) specified by the manufacturer. -
Page 23: Cabling The Server
When you are installing drives in the Avid FastServe | Playout server, begin the installation at the bottom of a column of drives. Make sure the first drive you install is level and flat as you insert it into the server. Do not force a drive into a slot. -
Page 24: Connecting The Power Cords
FastServe | Playout UHDS Server - Rear Panel Connecting the Power Cords Your FastServe | Playout server has two power supplies. If your local power distribution is not compatible with the supplied cords, you must provide your own IEC power cables that are compatible with your country's power system. -
Page 25: Connecting A Keyboard, Monitor, And Mouse
The Server includes four network interface cards (NIC) for communication with the control hosts and the general network. To connect the Ethernet: 1. Your Ethernet switch should be rack mounted. Leave adequate room at the front for cables and at the back for air circulation. -
Page 26: Connecting Ltc - Xlr
Connecting LTC - XLR To connect LTC to the server: Connect directly to the server using the Reference and LTC Breakout cable. Connecting SDI Video Outputs The Output connections vary according to the current settings. The FastServe | Playout server currently supports up to two UHD channels or eight HD channels. To connect SDI video output cables on the chassis: 1. -
Page 27: Installing Your Avid Fastserve | Playout Engine
Installing Your Avid FastServe | Playout Engine This chapter contains the tasks you must perform to prepare an environment for FastServe | Playout installation and to install the Avid FastServe | Playoutengine. Topics in this chapter include: • FastServe | Playout Engine Linux Installation •... -
Page 28: Network Configuration
Network Configuration Before installing the FastServe | Playout engine on the server, configure the machine’s network properties. To configure the FastServe | Playout server for the network: 1. Login to your Linux operating system as “root”. There is no password. 2. -
Page 29: Update Of The Network File
Open the remaing ifcfg files and set the onboot parameter to no (for all ifcfg-ethY files that are not used by the system). Update of the Network file After assigning the IP address, edit the network file and set the host name. To edit the network file and change the host name: 1. -
Page 30: Installation Of Middleware (Mw)
Installation of MiddleWare (MW) Obtain the latest MiddleWare for the given system (libdvg) from the Avid support or your system administrator. To install the MiddleWare: 1. Copy the installation files to: /data/public. 2. Install the MiddleWare: rpm -ivh libdvg-813.1-7.el7.centos.x86_64.rpm Configuring DVG Modules If a FastServe | Playout 8 playout channel workflow is planned, then you need to modify the default settings in the modprobe.conf on Linux. -
Page 31: Burning Fastserve | Playout Firmware
Burning FastServe | Playout Firmware This procedure is performed on a very low hardware level and if done inadequately or by an unexperienced personnel can lead to the corruption of the hardware! First step is to make sure that all components that use DVG boards, such as Avid Video Engine, are stopped. - Page 32 If you want to display contents of a different DVG board, change the board number index (usually from 0 to 3) in the Linux command: ./dvgflash -board [insert board number index here] -reconf -list 4. To delete the firmware which is currently burned into a DVG board (in our example board 0), type the following: ./dvgflash -board 0 -delete 1 The last number is an index of the firmware burned to the board (see green rectangle in the...
-
Page 33: Installation Of The Fastserve | Playout Server On Linux (Centos 7)
Installation of the FastServe | Playout Server on Linux (CentOS 7) This topic discusses how to install the FastServe | Playout engine on the CentOS 7 operating system. To install the FastServe | Playout engine on Linux: 1. Launch the FastServe | Playout installer on any Windows computer. 2. - Page 34 5. In the General settings window, set the following options: 6. For first-time installations, select the Reinstall database options in the Component settings window.
-
Page 35: Installing Fastserve | Playout On A Different Server From The Same Pc
In general, WebSettings, VideoEngine, and Commander are obligatory components. In case WatchFolder workflows are used, WatchFolder has to be installed as well. If you are upgrading your system, the “Reinstall database” option is not necessary. For more information, see the latest ReadMe on the Avid Knowledge Database. Installing FastServe | Playout on a Different Server from the Same PC The FastServe | Playout installer is a Windows-based setup executable. - Page 36 To uninstall FastServe | Playout from your local PC: 1. Run the FastServe | Playout installer and choose the “Remove” option. 2. In the following window, make sure that the field for IP addresses of Linux machines remains empty. You only want to uninstall the local version of FastServe | Playout. 3.
-
Page 37: Fastserve | Playout Components On Linux
To avoid a situation, where the FastServe | Playout software could be removed from the system during an on-air production, remove it using one of the following methods: 1. Method: Disconnect from the network and make sure that you cannot connect to your Linux machine. -
Page 38: Installation Of Avid Shared Components (Nexis Client)
• AppStarter – this component is responsible for starting the software after system reboot, as well as after unexpected closing. Location of this component: /data/AppStarter. • WebSettings – this is the engine responsible for delivering the web configurator, accessible to users via web browsers by providing the machine IP and port 8080, e.g.: http://IP:8080. -
Page 39: Verification Of The Watchfolder Behavior
Paste the following information at the top of the file: [Clips_WF] path = /Clips_WF browsable =yes writable = yes guest ok = yes read only = no public = yes writable = yes printable = no 5. Save the file and quit. Restart the Samba process using the following command: Service smb restart 6. - Page 40 4. Copy your previously prepared clips to the /Clips_WF folder (copy them directly into the folder /Clips_WF or to any subfolder inside this folder). 5. On a control PC with the Windows operating system, install FireBird 2.5.0. (x64) and FlameRobin to browse the contents of the database. 6.
- Page 41 9. In the Database Registration Info window, enter the required parameters: a. Display name - for better identification please use “VIDEO_ENGINE”. b. Database path - it is always: VIDEO_ENGINE.db. c. User name - enter the user name (example: sysdba). d. Password - enter the password for the above user (example: letmein). e.
-
Page 42: Stopping Components From Autostarting
Contents of your entire database are displayed (all video clips that are registered in your database): Check if the clips which were prepared for testing are present in the database. If they are visible, it means that they have successfully registered via WatchFolder. Stopping Components from Autostarting Sometimes for some debugging or low-level maintenance, it is recommended to stop VideoEngine from autostarting. -
Page 43: Configuration Of 8 Channels Playout And Their Ocip Ports
Configuration of 8 Channels Playout and their OCIP Ports By default, FastServe | Playout is configured for 8 HD playout channels. It is also required to configure the OCIP ports. To configure OCIP ports: 1. Go to the WebSettings > VECommander tab and expand the Automation protocols section. 2. -
Page 44: Installation Of Windows Fastserve | Playout [Fsp]
Installation of Windows FastServe | Playout [FSP] For a FastServe | Playout Windows based controller it is necessary to install the Windows version of VideoEngine. To install Windows FastServe | Playout: 1. Locate the VEServerWin installer. Double-click on it to start the installer. 2. -
Page 45: Fastserve | Playout Components On Windows
FastServe | Playout Components on Windows The FastServe | Playout server is comprised of a few crucial components. Most important ones are listed below: • VideoEngine – which is embedded into Maestro / FastServe | Playout controller and used for local preview of clips. -
Page 46: Maintaining And Troubleshooting Your Server
Maintaining and Troubleshooting Your Server This chapter contains information on how to perform preventative maintenance on your FastServe | Playout system, as well as how to troubleshoot your server when problems or failures occur. For more information see the following sections: •... -
Page 47: Check Bios Configuration
Check BIOS Configuration In the event that you need to reimage your FastServe | Playout server, you should check your BIOS settings before re-installing the Centos 7 software. To check if BIOS is configured correctly: 1. Turn on or restart your FastServe | Playout server. 2. -
Page 48: Kernel Installation
To load the Centos 7 Restore image: 1. In the BIOS boot options, set USB at the top of the boot order. Boot > Legacy > Boot Type Order > USB. 2. Press F10 to save the configuration and exit BIOS. 3. -
Page 49: Post-Installation Requirements
To update Kernel: Navigate to /data/public and update the kernel: Cd /data/public rpm -ivh kernel-3.10.0-693.5.2.el7.Avid.x86_64.rpm Post-Installation Requirements If you have problems with your CentOS 7.4 system after the re-imaging (the keyboard connected locally does not work and it looks like the inputs to the machine are not working properly), then boot your FastServe | Playout server to the rescue kernel and go to point 3 and then reboot to “normal”... -
Page 50: Replacing Failed Dvg Boards
6. Insert the replacement power module into the power supply cage until it clicks into place. 7. Reconnect all peripheral devices and the AC power cords into the server. The server will automatically power up without having to turn on the Power switch. Replacing Failed DVG Boards In the event that you have one or more DVG board failures, you can replace them. - Page 51 7. To remove a DVG board, do the following: a. Remove the PHY data Harness (black cable) from the DVG board. b. Release the Hold Down Bracket using the thumbscrews, and then slide it out of the chassis. c. Remove the remaining cables. Before removing more than one card, it is recommended to observe how the cables are connected.
-
Page 52: Replacing Failed Phy Boards
1)Power + PHY data Harness 2)REF (MCX RG179 -BNC CBL) 3)Data socket Replacing Failed PHY Boards In the event that you have one or more SDI PHY physical interface failures, you can replace them. First, you must identify which interface has failed. Then, once you know which interface it is, you need to figure out when you can replace it. - Page 53 7. To remove a PHY interface, do the following: a. Remove the PHY-DVG Mini SAS Cable (black cable) from the PHY interface. b. Remove power socket from the PHY interface. c. Remove the thumbscrews from the rear panel of the PHY interface.
-
Page 54: Replacing Failed Raid Controller
8. Release the PHY interface and then slide it out of the chassis. Replacing Failed RAID Controller In the event that you have one or more RAID controller failures, you can replace them. The system should be taken offline and powered down before replacing boards. Before you begin, you must obtain replacement RAID controller for your FastServe | Playout server. - Page 55 6. To remove a RAID controller, do the following: a. Remove the thumbscrews from the top of the bracket. b. Remove all Mini SAS disk cables (black cables). c. Remove the other side of these cables from the front (disk) part of the server.
-
Page 56: Replacing System Drives In The Chassis
d. Release the RAID controller by sliding it out of the chassis. Replacing System Drives in the Chassis Before you begin, make sure you have replacement system drives available for your FastServe | Playout server. The system should be taken offline and powered down before replacing boards. To replace failed system drive: 1. -
Page 57: Accessing The Knowledge Base
6. Disconnect 1) power and 2) SATA plugs from the drive: 7. Slide out the system drive. Accessing the Knowledge Base The Avid Customer Support Knowledge Base (Knowledge Base) provides additional information that is frequently updated. Some locations on the Knowledge Base require you to log in as a registered user, but you can access most of the information in the Knowledge Base without registering and logging in. -
Page 58: Specifications And Notices
Specifications and Notices This section provides information on the dimensions and weight, the environmental, the electrical, acoustic, audio, video and the power cord specifications for the Avid FastServe | Playout Server (UHDS models). This section also provides a detailed listing of all technical system specifications and connector pinouts for the FastServe | Playout server. -
Page 59: Power Specifications
Power Specifications The following table lists the Power specifications. Power Specifications Component Voltage Frequency Watts (max) FastServe | Playout Server 100 to 240 V 47 to 63 Hz 2x 1500 W System Watts; running load (UHDS model) Dual/Redundant, software and 100 % CPU hot-swap AC power usage. -
Page 60: Vdcp Commands Supported By Fastserve | Playout
VDCP Commands Supported by FastServe | Playout The following commands are implemented in Avid FastServe | Playout server for the VDCP protocl. Supported Optional VDCP Commands Command Description 1x.00 - STOP The STOP command will return the selected port to the IDLE state. The STOP command can be issued to a port in any state. - Page 61 Supported Optional VDCP Commands(Continued) Command Description 3x.02 - NEXT The NEXT command is used to transfer any remaining IDs in groups of up to ten. It has the same format as LIST commands and NEXT is called repeatedly until all IDs have been transferred. See the LIST command 3X.11 for more details.
- Page 62 Supported Optional VDCP Commands(Continued) Command Description 3x.18 - ID’S ADDED LIST This request allows a controller to inquire about items that were added to the disk system by another signal port. The command returns to the controller a list of the IDs that have been added to the disk system since the last ID’s ADDED request, or unreported ID’s from before the last IDs ADDED request if not all were read.
- Page 63 Supported Optional VDCP Commands(Continued) Command Description 3x.18 - ID’S ADDED LIST This request allows a controller to inquire about items that were added to the disk system by another signal port. The command returns to the controller a list of the IDs that have been added to the disk system since the last ID’s ADDED request, or unreported ID’s from before the last IDs ADDED request if not all were read.
-
Page 64: Appendix A Special Configurations
Special Configurations DNxHR Performance Configuration Assuming that the server is set up to work in the UHD mode, and a DNxHR codec is used for playout, then the Avid Video Engine needs to be configured in a specific way. To configure Video Engine for DNxHR: 1. -
Page 65: Appendix B Safety And Regulatory Information
Safety and Regulatory Information This document contains safety and regulatory information for Avid FastServe | Live Edit or FastServe | Ingest hardware. Environmental Compliance Disposal of Waste Equipment by Users in the European Union This symbol on the product or its packaging indicates that this product must not be disposed of with other waste. - Page 66 7. Do not block any ventilation openings. Install in accordance with the manufacturer's instructions. 8. Do not install near any heat sources such as radiators, heat registers, stoves, or other equipment (including amplifiers) that produce heat. 9. Protect power cords from being walked on or pinched particularly at plugs, convenience receptacles, and the point where they exit from the equipment.
-
Page 67: Led Safety Notice
Pour ne pas compromettre la protection contre les risques d'incendie, remplacer par un fusible de meme type et de meme caractéristiques nominales. LED Safety Notice Avid hardware might contain LED or Laser devices for communication use. These devices are compliant with the requirements for Class 1 LED and Laser Products and are safe in the intended use. In normal operation the output of these laser devices does not exceed the exposure limit of the eye and cannot cause harm. -
Page 68: Fcc Notice
• KN32 Class A • KN35 • CISPR32 Class A • VCCI Class A • IEC/EN/UL60950-1 • CAN/CSA-C22.2 No. 60950-1-07 This equipment has been tested to comply with USA and Canadian safety certification in accordance with the specifications of UL Standards: IEC/UL60950-1 and Canadian CAN/CSA-C22.2 No. 60950-1-07. -
Page 69: Australian Compliance
Cet appareil numérique de la classe A respecte toutes les exigences du R?glement sur le matériel brouilleur du Canada. Australian Compliance Japan EMC Regulations Class A Equipment This is a Class A product. In a domestic environment this product may cause radio interference in which case the user may be required to take corrective actions. - Page 70 Avid Technical Support (USA) Product Information 75 Network Drive Visit the Online Support Center at For company and product information, Burlington, MA 01803-2756 USA www.avid.com/support visit us on the web at www.avid.com...
Need help?
Do you have a question about the FastServe Playout and is the answer not in the manual?
Questions and answers