
Related Manuals for Zepro Z 2500-130 Series


Summary of Contents for Zepro Z 2500-130 Series
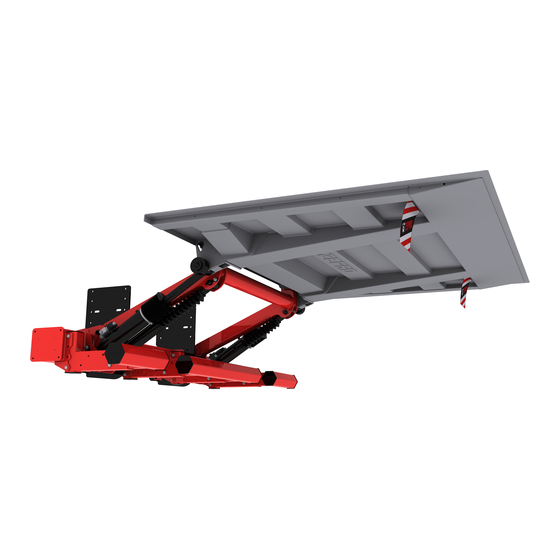
- Page 1 Installation Instructions Tail Lift Z 2500-130/150 ZEPRO Tel.: +46 (0)10-459 05 00 E-mail: zeprotech@hiab.com zepro.com 75981TL 2020-01-24...
-
Page 3: Table Of Contents
6.12 Sealing strip (vertical) .................29 6.13 Platform ......................30 6.14 Purging the cylinders ..................36 6.15 Transport lock .....................36 Temporary operation of lift................37 7.1 Connection ....................37 7.2 Operation ....................37 7.3 Disconnection .....................37 Hydraulic unit and control card ................. 38 8.1 Accessing the hydraulic unit and control card ..........39 8.2 Connecting controller .................40 www.zepro.com... - Page 4 14.9 CE marking ....................70 14.8 Warning flags .....................70 15 Lubrication and fluid level check ............... 71 15.1 Lubrication ....................71 15.2 Fluid level check ..................71 16 Testing and verification ..................72 16.1 Static load test ....................72 16.2 Dynamic load test..................73 16.3 Test of safety functions ................73 17 Disassembly ..................... 74 www.zepro.com...
- Page 5 Contents Z 2500-130/150 18 Specifications ....................75 18.1 Weights ......................75 18.2 Maximum power consumption - Minimum recommended conductor cross sectional area ........76 18.3 Battery maintenance ..................76 18.4 Loading diagram ..................77 18.5 Tightening torque ..................78 www.zepro.com...
-
Page 6: Introduction
The page header, at the top of the page, shows which chapter the visited page belongs to, and what product the installation instructions apply to. Chapter Product Introduction Z 2500-130/150 Page footer: The page footer, at the bottom of the page, shows the current page number and the company name. Page no. Company www.zepro.com www.zepro.com... -
Page 7: Ce Marking
Position control devices so that the operator is in the safest possible location and has a clear view of the load, the tail lift and the surrounding area. Follow the driver’s instruction manual when using the control device and its functions. www.zepro.com... -
Page 8: Identification
Max. lifting capacity x 1 (kg) Max lifting height -130 = 1300 mm -150 = 1500 mm Cylinder model, MA = Double acting Adjustable Tilt Single acting Single speed Lift DA = Double acting Adjustable Tilt Double acting Single speed Lift www.zepro.com... -
Page 9: Safety Rules
Image 1. Piston rods, cylinder covers and damage the hoses/cables and significantly im- boots must not be painted/coated pair durability. Image 2. Hydraulic hoses must not be painted/coated Image 3. Cables must not be painted/coated www.zepro.com... -
Page 10: Transport Plug
40 mm. the cylinder must be at least 40 mm WARNING! The platform must not be tilted down more than 10° from the horizontal. 10º Image 6. The platform must not be tilted down more than 10° from the horizontal www.zepro.com... -
Page 11: Third-Party Equipment Must Not Be Attached
Third-party equipment must not be attached WARNING! You must not attach third-party equipment (electric or hydraulic) to Zepro tail lifts. Attaching third-party equipment may interfere with the lift system and the safety functions. Risk of injury and damage. If it is necessary to install other equipment, check the vehicle manufacturer’s body instructions and use the at-... -
Page 12: Installation Workflow
Installing the control device cables • Installing the main power cable Installing the platform • Installing the platform • Installing seals and end stops • Installing the armstops Installing cylinders • Adjusting tilt cylinder • Test running Attaching decals www.zepro.com... -
Page 13: Calculating The Installed Dimensions
The H dimension is the height from the ground (unloaded) to the vehicle floor level. The H dimension must not be greater that the maximum lifting height of the lift. The platform must always be able to reach ground level. www.zepro.com... - Page 14 Calculating the installed dimensions Z 2500-130/150 Image 7. Z 2500-130 1002 Image 8. Z 2500-150 1010 1524 min. 750 - max. 930 1509 617-817 1966 2411 Image 9. ZAEHD 150/200 www.zepro.com...
-
Page 15: Rear Beam Cut-Outs
2. Cut along the markings. 3. Grind away any burrs or sharp edges. A max Image 10. Rear beam cut-outs www.zepro.com... -
Page 16: Installation
Zepro’s instruction booklet before installation. WARNING! Image 11. Measure and mark the midpoint of Zepro tail lifts are only approved for installation the rear beam of the vehicle. with Zepro installation kits. Support frame Measure and mark the midpoint of the rear beam of the vehicle. - Page 17 · the vehicle body is installed to reinforce the truck chassis. 15. Remove the mounting jig. Image 16. Install the chassis bracket with at least six M14x45 10.9 bolts www.zepro.com...
- Page 18 Do not place the lift under load until: · the correct number of bolts have been installed and torque-tightened. · the vehicle body is installed to reinforce the truck chassis. 20. Remove the mounting jig. www.zepro.com...
-
Page 19: Control Power Cable
(CS) on the vehicle instrument panel. Connect to the on-board electrical system via a 10 A (24 V), 15 A (12 V) fuse according the customer’s wishes. See the connection diagram "9.5 Lift without incli- nometer" on page 45. www.zepro.com... -
Page 20: Control Devices
If there is a need for a controller on the opposite side, a fur- ther controller must therefore be fitted. Fitting on the other side involves increased risk of injury. Image 20. Installing control device www.zepro.com... -
Page 21: Warning Lighting/Foot Controller
1st boom is in motion. Leave enough "slack" to the first cable tie so that the cable is not at risk of being damaged when the lift is operated. Image 22. Installing cabling Image 23. Installing cabling www.zepro.com... - Page 22 44 and section "9.7 Connecting control device" on page 47. WARNING! Make sure that the control card is disconnected from power before connecting peripheral equipment. Risk of damage. Image 24. Quick connector location www.zepro.com...
-
Page 23: Main Power Cable
2. Check that the hydraulic unit is effectively earthed. Certain commercial vehicle manufacturers provide special earth connection points. 3. Connect the main power cable to the hydraulic unit, see "9 Electrical and hydraulic drawings" on page 41 Image 25. Protect the cable against sharp edg- es and use cable grommets www.zepro.com... -
Page 24: Installation Of Main Fuse On Vehicles Without Connection Point
28 and Image 29. 5. Install the fuse box cover, see Image 30. Image 27. Place fuse Image 26. Screw the and connect wiring fuse holder into place Image 28. Correct installation Image 29. Incorrect installation Image 30. Cover fuse box www.zepro.com... -
Page 25: Cable Lead-Through
4. Install the cable lead-through’s protective cover with the three supplied bolts, see Image 31. Tightening torque: 8 Nm. Image 32. The cable lead-through’s five bolts 350 mm. Image 33. The outer sheathing on cable connected to the control card must be stripped 350 mm. www.zepro.com... -
Page 26: Underrun Protection
Image 36. Fit the beam end caps 2x M12x100 8.8 80 Nm 2x M12x80 8.8 2x M12x100 8.8 80 Nm 80 Nm 2x M12x80 8.8 80 Nm Image 37. Installing underrun protection www.zepro.com... - Page 27 25 mm. See Image 40. Each of the individual parts of the underrun protection must have a surface area of at least 350 . See Image 40. Min. area: 350 cm Max. 25 mm Max. 25 mm Image 40. Statutory dimensions www.zepro.com...
-
Page 28: Armstops
When installing on Image 42. The angle sensor allows autotilt function the right arm, the sensor’s cable input must be facing downwards. when the angle of the lift arm is horizontal or lower. Left Right Image 43. Installing the angle sensor www.zepro.com... -
Page 29: Sealing Strip (Horizontal)
Image 44. Installing a sealing strip 2. Fit the rubber strip to the track. 3. Secure the rubber strips by swaging the tracks together at the bottom. NOTE. To fit an upper edge seal, create a 45° mitre against the vertical strips. www.zepro.com... -
Page 30: Platform
2. Lubricate the metal bushings on the upper bearing of the arms. Ensure that the small holes on the inside of the bushings are filled with grease. See illustration. Use Zepro lubricant or the equivalent. NOTE! Lubricate the bushings NOTE. - Page 31 Adjustment must always take place with full hy- draulic pressure in the tilt cylinders. Lock screws, 3 pcs. 3. Loosen the three lock screws on the cylinder fitted to the platform, see illustration. Image 48. Adjusting the tilt angle www.zepro.com...
- Page 32 8. Tighten the bolts using a torque wrench. Tightening torque: 80 Nm. 9. Adjust the two cylinders alternately so that the platform meets the vehicle body, see Image 51 (B). Image 53. Fitting the tilt cylinder to the platform www.zepro.com...
- Page 33 30 mm. Image 54. Adjusting the tilt angle 11. Fit the cylinder boots. Image 55. ~ 10 mm Lift model 2500-130 142 ±5 2500-150 252 ±5 Image 55. Installing boots www.zepro.com...
- Page 34 2. Install the angle sensor/Inclinometern on the platform using the included screws, nuts and washers and secure the cable with cable ties, see Image 58 and Image 59. Image 56. Angle sensor and mounting Image 57. Inclinometer and mounting Image 58. Installing the angle sensor Image 59. Installing the Inclinometer www.zepro.com...
- Page 35 5. Tighten the lock screw in the end stop (5). See illustration. Image 61. The tightening torque for lock screws is between 3-5 Nm Test all functions. Adjusting collar Lock screw Bolt End stop Washer Image 62. Tilt cylinder www.zepro.com...
-
Page 36: Purging The Cylinders
The valves are non-return valves that let fluid in from the cylinders but not out before they are actuated by the flow from the lowering valve. The platform is thus hydraulically locked during transport. www.zepro.com... -
Page 37: Temporary Operation Of Lift
Ctrl 2 CSPWR Jumper Ctrl 6 Di 6 Ctrl 3 Di 5 Radio Di 4 Lock Di 3 Di 2 Ctrl 5 Di 1 Ctrl 4 Ai 1 Spiral Ai 2 Lock Image 64. Temporary connection of lift control card www.zepro.com... -
Page 38: Hydraulic Unit And Control Card
"8.1 Accessing the hydraulic unit and control card" on page 39. OIL TANK TANK CAP VALVE HOUSING SOLENOID MOTOR CONTROL CARD Image 65. Hydraulic unit and control card www.zepro.com... -
Page 39: Accessing The Hydraulic Unit And Control Card
Do not pull out the hydraulic unit more than necessary; make sure it is not pulled completely out of the frame, as this can entail a risk of personal injury and damage to the equipment. Image 66. Remove the protective cap Image 67. Release latch control card Image 68. Connection socket Image 69. Releasing hydraulic unit www.zepro.com... -
Page 40: Connecting Controller
5. Fold in and secure the control card, see section "8.1 Accessing the hydraulic unit and control card" on page 39. WARNING! Ensure that no cables are trapped or in any other way damaged when the control card is folded out or removed. Image 70. Installing cabling with cable ties www.zepro.com... -
Page 41: Electrical And Hydraulic Drawings
Electrical and hydraulic drawings Z 2500-130/150 9 Electrical and hydraulic drawings Z2500-130/150 MA with electrical autotilt www.zepro.com... -
Page 42: Z2500-130/150 Ma
Electrical and hydraulic drawings Z 2500-130/150 Z2500-130/150 MA www.zepro.com... -
Page 43: Z2500-130/150 Da
Electrical and hydraulic drawings Z 2500-130/150 Z2500-130/150 DA www.zepro.com... -
Page 44: Connecting Warning Lighting And Foot Controls
Electrical and hydraulic drawings Z 2500-130/150 Connecting warning lighting and foot controls 9.4.1 Lift with inclinometer www.zepro.com... -
Page 45: Lift Without Inclinometer
Svart Ctrl 2 CSPWR Grön Ctrl 6 Di 6 Röd Ctrl 3 Di 5 Radio Di 4 Grå Lock Di 3 Orange Di 2 Ctrl 5 Lila Di 1 Ctrl 4 Rosa Ai 2 Spiral Ai 1 Lock Hydraulaggregat www.zepro.com... -
Page 46: Connecting Cabin Switch And Open Platform Alarm
Electrical and hydraulic drawings Z 2500-130/150 Connecting cabin switch and open platform alarm www.zepro.com... -
Page 47: Connecting Control Device
Ai 1 CD14 B Spiral Ai 2 Black (+) Lock Blue CD11 Brown CD12 Yellow Blue Grey Lock Black (+) White (-) Brown Brown CD10 Yellow Yellow Blue Black (+) Black (+) (White (-), (White (-), if available) if available) www.zepro.com... -
Page 48: Functional Description Z 2500 Ma Autotilt (Standard)
Signal to Cs usually comes from the cab switch. In individual cases, where the cab switch is not used, the (+) signal coming in to Cs is jumpered from (CS PWR) on nearby terminal. See also the electrical diagram: "9.1 Z2500-130/150 MA with electrical autotilt" on page 41. www.zepro.com... -
Page 49: Functional Schematic Drawing
* Only required at start of travel; it is ignored after breakover of sensor until repositioned. ** 0.5 second delay of output signal. *** Not connected See also the electrical diagram: "9.1 Z2500-130/150 MA with electrical autotilt" on page 41. www.zepro.com... - Page 50 * Only required at start of travel; it is ignored after breakover of sensor until repositioned. ** 0.5 second delay of output signal. *** Not connected See also the electrical diagram: "9.1 Z2500-130/150 MA with electrical autotilt" on page 41. www.zepro.com...
-
Page 51: Limitation Of Controller Use (Tilt Up/Down And Opening/Closing)
Image 71. The use of controllers 3, 4 and 6 is limited by the platform angle 10.4 Quick Opening Zone 90º 10º Image 72. Quick opening is active when the plat- form angle is approx. 90º-10º See also the electrical diagram: "9.1 Z2500-130/150 MA with electrical autotilt" on page 41. www.zepro.com... -
Page 52: Foot Controls And Warning Lights
The voltage on the inclinometer output varies with inclinometer angle. Below are some examples of different angles and approximate voltages. ~3,2V ~3.2V 90º ~2.5V ~2,5V 45º 0º ~1,8V ~1.8V Image 74. Approximate voltage at various angles See also the electrical diagram: "9.1 Z2500-130/150 MA with electrical autotilt" on page 41. www.zepro.com... -
Page 53: Functional Description Z 2500 Ma
Cs is jumpered from (CS PWR) on nearby terminal. Controller Two-hand but- Activated in connection with opening and closing of vehicle body. Used for quick opening. See also the electrical diagram: "9.2 Z2500-130/150 MA" on page 42. www.zepro.com... -
Page 54: Functional Schematic Drawing Ma, Config 14
Ctrl 4 Ctrl 5 Ctrl 6 * Only required at start of travel; it is ignored after breakover of sensor until repositioned. ** 0.2 second delay of output signal. See also the electrical diagram: "9.2 Z2500-130/150 MA" on page 42. www.zepro.com... - Page 55 -10º Ctrl 5 Ctrl 6 * Only required at start of travel; it is ignored after breakover of sensor until repositioned. ** 0.2 second delay of output signal. See also the electrical diagram: "9.2 Z2500-130/150 MA" on page 42. www.zepro.com...
-
Page 56: Restriction In Use Of Control Device
Image 76. Quick opening can be activated when the platform angle is 90º-45º If the control buttons are kept pressed, the quick-opening function is active down to -10 °. See also the electrical diagram: "9.2 Z2500-130/150 MA" on page 42. www.zepro.com... -
Page 57: Functional Description Z 2500 Da
Cs is jumpered from (CS PWR) on nearby terminal. Controller Two-hand but- Activated in connection with opening and closing of vehicle body. Used for quick opening. See also the electrical diagram: "9.3 Z2500-130/150 DA" on page 43. www.zepro.com... -
Page 58: Functional Schematic Drawing, Config 16
Di6. Ctrl 5 Ctrl 6 * Only required at start of travel; it is ignored after breakover of sensor until repositioned. ** 0.2 second delay of output signal. See also the electrical diagram: "9.3 Z2500-130/150 DA" on page 43. www.zepro.com... - Page 59 -10º Ctrl 5 Ctrl 6 * Only required at start of travel; it is ignored after breakover of sensor until repositioned. ** 0.2 second delay of output signal. See also the electrical diagram: "9.3 Z2500-130/150 DA" on page 43. www.zepro.com...
-
Page 60: Restriction In Use Of Control Device
Image 78. Quick opening can be activated when the platform angle is 90º-45º If the control buttons are kept pressed, the quick-opening function is active down to -10 °. See also the electrical diagram: "9.3 Z2500-130/150 DA" on page 43. www.zepro.com... -
Page 61: Connection Unit
Active output (approved input signal from control device and sensors), the lift is operated. LED 1 LED 2 Display Flashing light Image 79. The control card is equipped with an alphanumerical display with a flashing light and 2 red LEDS www.zepro.com... - Page 62 Off/On, the lift will be locked again as soon as any button on the remote control is pressed. NOTE. The lift remains locked if it loses power and is then started up again, and the number 6 flashes on the control card’s display. Unlocking is performed as described above. www.zepro.com...
- Page 63 Off/On on the CS is operated. 1-6 segments indicate sensors. Sensor indication On - signal in. Off - no signal in. Segment (See electrical and hydraulics diagrams for information about the location of the sensors). www.zepro.com...
- Page 64 C on the control device. The system will then browse through the list so that all faults detected by the system can be seen. When the CS is switched off, the system will browse through a list containing the five most recent faults detected before the display goes off. www.zepro.com...
- Page 65 Control power Sensor power Output not connect- Displayed only af- ed/cable breakdown Which output is not connected/ ter the respective has cable breakdown. output/function has been active. Contact support if the lift does not Internal fault function. www.zepro.com...
- Page 66 The lift is working, but the voltage range outside the ‘heart-marked’ area is only rec- ommended for operation for short periods. The lift is working within the voltage range for optimum function and service life. 8-15V 10-14V 0-7V 16-36V 18-30V 20-28V 0-16V 32-36V www.zepro.com...
-
Page 67: Marking And Decals
Marking and decals Z 2500-130/150 Marking and decals 14.1 Summary The illustrations below show the positions of the various decals. Image 80. Marking and decals www.zepro.com... -
Page 68: Load Diagram
A “work area” decal must be attached to the platform so that any drivers parking behind the vehicle know that 5 m clearance is needed for the platform to open and that sufficient space should be left for loading and unloading. Image 83. Work area www.zepro.com... -
Page 69: Driver's Instructions
The location of the warning tape often coin- cides with the contour markings. In such a case, the warning tape can be omitted. Image 86. Warning tape www.zepro.com... -
Page 70: Ce Marking
14.9 CE marking The marking below represents the manufacturer’s guarantee that the lift is designed and supplied in ac- cordance with the EU Machinery Directive. This is the Image 88. CE marking customer’s guarantee of high quality and safety. www.zepro.com... -
Page 71: Lubrication And Fluid Level Check
Check the fluid level in the tank during service, top up if necessary. The marking on the hydraulic tank indicates the type of hydraulic fluid used. Mineral hydraulic fluid, product no. 21963 (1 litre), or biodegradable synthetic fluid, product no. 22235 (1 litre). 9 10 Image 89. Lubrication points www.zepro.com... -
Page 72: Testing And Verification
Static load (Test load 1.25 x tail lift loading capacity). For tail lifts with load centre of 1000 Capacity Load 1500 kg Load 2000 Distance out in platform (L) 2500 kg 2120 mm 1560 mm Deformation Max. 15 mm Drift Max 2º Image 90. Testing and verification www.zepro.com... -
Page 73: Dynamic Load Test
That all safety and operating decals are installed in their respective position. • That the mechanical lock of the platform functions correctly (where applicable). • That the instructions for using the tail lift have been left in the driver’s cabin. • That the CE declaration of conformity has been completed. www.zepro.com... -
Page 74: Disassembly
• Support the support frame from beneath, for example with a car jack. • Remove the support frame from the vehicle chassis by loosening the bolts and carefully lowering the support frame to the ground with a car jack. www.zepro.com... -
Page 75: Specifications
3-part underrun protection complete Z 2500-150 45 kg Chassis bracket complete par Z 43 kg Lift cylinder Z 2500-130 12.5 kg each Lift cylinder Z 2500-150 15.5 kg each Tilt cylinder Z 2500-130 26 kg each Tilt cylinder Z 2500-150 27.5 kg each www.zepro.com... -
Page 76: Maximum Power Consumption
When installing the lift and when carrying out service and repair work, when the lift is operated repeatedly without the vehicle being started and used, the battery charger must be used between operations to maintain the battery’s charge level. NOTE. The battery charger must not be connected when operating the lift. Risk of damage. www.zepro.com... -
Page 77: Loading Diagram
Specifications Z 2500-130/150 18.4 Loading diagram Image 92. Loading diagram www.zepro.com... -
Page 78: Tightening Torque
18.5 Tightening torque NOTE! All specified torque values apply for use with a screw or impact wrench with torque control. Torque distribution max ± 5%. 80 Nm 80 Nm 120 Nm 280 Nm 80 Nm Image 93. Tightening torque www.zepro.com... - Page 80 BUILT TO PERFORM Zepro, Del and Waltco are Hiab brands for tail lifts. Hiab is a world-leading supplier of equipment, intelligent services and digital solutions for on-road load handling. As an industry pioneer our company commitment is to increase the efficiency of...
Need help?
Do you have a question about the Z 2500-130 Series and is the answer not in the manual?
Questions and answers