
Related Manuals for Seeley Climate Wizard CW-P15


Summary of Contents for Seeley Climate Wizard CW-P15
- Page 1 INSTALLATION, OPERATION & MAINTENANCE Climate Wizard CW-P15 Indirect Evaporative Coolers ILL2364-A ILL2250-A ILL2250-A (English) (CW-P15) ILL3510-A Original English Instructions...
-
Page 3: Table Of Contents
MagIQtouch Controller Control System Locating the Wall Control Running the Control Cable to the Wall Control Mounting the Wall Control MagIQcool Control Operation Control Parameters Wall Control Operation Turning Cooler On Manual Mode SEELEY INTERNATIONAL - INSTALLATION MANUAL CW-P15 859740-G |... -
Page 4: Important Safety Instructions
IMPORTANT SAFETY INSTRUCTIONS READ AND SAVE THESE INSTRUCTIONS CAUTION: In order to avoid a hazard due to FOR FUTURE REFERENCE. inadvertent resetting of the thermal cut-out, this appliance must not be supplied through an FOR EUROPE external switching device, such as a timer, or connected to a circuit that is regularly switched This appliance can be used by children aged on and off by the utility. -
Page 5: Employer And Employee Responsibilities
• Check the proposed cooler location, to ensure that it is structurally capable of supporting the weight of the cooler, or Seeley International provides the following information as a provide an adequate alternate load bearing structure. guide to contractors and employees to assist in minimising risk •... -
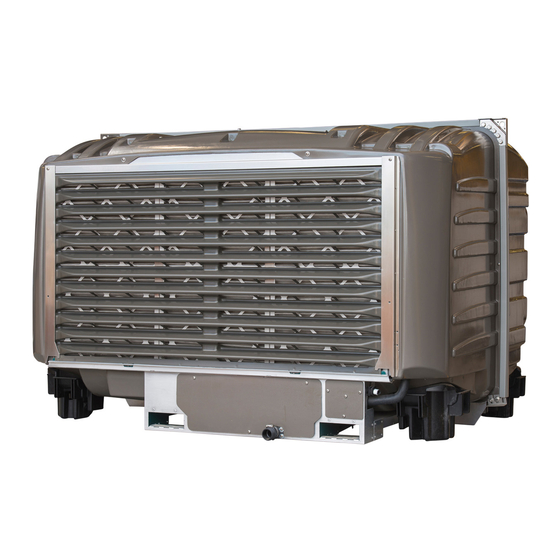
Page 6: Cooler Views
COOLER VIEWS NOTE: THE SUPPLY MOUNT FACE IS OFFSET BY 25MM FROM THE EXHAUST MOUNT FACE 25mm ILL2253-A ILL2250-A Top View Isometric ILL2250-A 500mm DUCT FLANGE 500mm DUCT FLANGE DIMENSIONS FROM EXHAUST MOUNT FACE: HOLE CENTRES HOLE CENTRES 530mm SQUARE 530mm SQUARE 358mm 828mm... -
Page 7: Exploded View
COOLER VIEWS EXPLODED View SEELEY INTERNATIONAL - INSTALLATION MANUAL CW-P15 859740-G |... -
Page 8: Cooler Specifications
COOLER SPECIFICATIONS SPECIFICATION CW-P15 Electrical Supply - 1~ (Aus/Eur) 220-240V 50/60Hz 11 amps 200-240V, 60Hz, 11 amps, Electrical Supply - 1~ (USA) FLA 11A, MCA 13.3A, MOPD 15A 1/2” male BSP or NPT male connection. Min. 100kPa, Max 800kPa, 20L/min Water Supply (Min. -
Page 9: Cooler Contents
Fitting Inlet with O Ring 402604 ½ inch BSP x ½ inch BSP Australia/Europe Fitting Inlet 402628 ½ inch BSP x ½ inch NPT USA ILL3506-A 800103 O-Ring, Inlet, 25ID ILL3509-A ILL3509-A SEELEY INTERNATIONAL - INSTALLATION MANUAL CW-P15 859740-G |... -
Page 10: Replacement, Optional Or Spare Part Components
COOLER CONTENTS REPLACEMENT, OPTIONAL or SPARE PART COMPONENTS ITEM PART NO. ILLUSTRATION DESCRIPTION 094298RP MagIQtouch Controller 116631 Climate Wizard Controller ILL3508-A 116792 MagIQtouch Switch Plate Controller Kit 116808 MagIQtouch MS1 Industrial BMS kit ILL3510-A ILL2364-A 094694 Control Cable 20m (65’) 864402 Control Cable 40m (131’) Air Filter Box - Type Cardboard 6 Pack (Disposable) Size 394 x 495 x 44... - Page 11 Rinse Plug ILL3595-A 863771 Cavitation Plate ILL3592-A 671192RP PCBA, Cooler Control CW-P15 Mk2 Aust/EUR 670744RP PCBA, Pressure Sensing CW-P15 ILL3600-A 671284 PCBA, EMC Filter, 1 Phase ILL3596-A 134246 Roofstand Kit 0-10º ILL3594-A SEELEY INTERNATIONAL - INSTALLATION MANUAL CW-P15 859740-G |...
-
Page 12: Installation
INSTALLATION UNPACKING THE COOLER Moving the cooler using Forklift Tyne slot openings. Inspect for transport damage prior to installation. The cooler will be delivered wrapped in plastic film with timber dunnage, all of which will need to be removed before installation. -
Page 13: Mounting/Support
50 x 50 x 3mm (2” x 2” x 1/8”) RHS, Galvanized or Painted steel. See dimensions on page 6 to design frame. Alternatively, FLEXIBLE an adjustable Roofstand is available for order via Seeley to suit CONNECTION TO cooler size and accommodating 0 to 10º degree roof pitches. -
Page 14: Electrical Supply Installation
INSTALLATION ELECTRICAL SUPPLY INSTALLATION It is a requirement of Seeley International that all coolers Please Note! There are specific models to match regional be wired with a dedicated circuit and circuit breaker to the voltages and frequencies which are not interchangeable. -
Page 15: Single Phase Euro/Aust Cooler Wiring Enclosure
RJ 12 for • Inlet solenoid • Circulation Pump communications • 3 pin probe • Drain Pump (Tornado) • Motors, supply & exhaust • Chlorinator ILL2270-A • MS1 BMS Controller or MagIQcool Wall Control SEELEY INTERNATIONAL - INSTALLATION MANUAL CW-P15 859740-G |... -
Page 16: Water Supply Installation
WATER SUPPLY FILTRATION Seeley International requires an inlet filter to be installed on the water supply line, external to the Climate Wizard cooler to prevent any debris from entering and damaging cooler components. -
Page 17: Control Schemes
ILL3508-A Switch Plate controller and the M1 BMS Industrial Controller are Salinity Control all compatible for use with the Climate Wizard CW-P15 cooler. Water Conductivity sensing: These make it possible for the cooler to be controlled • Measures water conductivity for 10 seconds in every minute... -
Page 18: Wall Control Installation
WALL CONTROL INSTALLATION MAGIQTOUCH CONTROLLER MOUNTING THE WALL CONTROL Refer to Installation Manual MagIQtouch Controller, Item 1D Fixing the wall control bracket to a plasterboard wall included in Installation Components. Use the bracket as a template. Drill the 16mm (5/8”) hole for the wall control cable Drill the 5mm (3/16”) holes for... -
Page 19: Magiqcool Control Operation
- Drain 3 days after COOL off ‘setpoint’ temperature. Auto re-start after Power failure: - Manual re-start when power OFF - Auto restart Temperature units: - Display 0°C - Display 0°F ILL1710-A * = Default Value SEELEY INTERNATIONAL - INSTALLATION MANUAL CW-P15 859740-G |... -
Page 20: Delayed Start And Stop
‘room’ temperature. control system. You can then take the wall control to the roof and control the cooler from there. The short test leads are available from Seeley Spare Delayed Start and Stop Parts Distributors The cooler can be programmed to start at a specific time (P/No: 1.5m - 862873). -
Page 21: Outlet Ducting Installation
OUTLET DUCTING INSTALLATION Assemble supply duct and exhaust hood as shown below using supplied M8 bolts and washers. ILL2275-B SEELEY INTERNATIONAL - INSTALLATION MANUAL CW-P15 859740-G |... -
Page 22: Commissioning
COMMISSIONING CLIMATE WIZARD COOLING APPLICATIONS TESTING THE CIRCULATION PUMP Climate Wizard is designed to be used in 3 different types of (This action requires a MagIQcool Controller). Refer to Pg17. applications: Test the pump by turning the cooler on at the MagIQcool controller, in “COOL”... -
Page 23: Maintenance Instructions
MAINTENANCE INSTRUCTIONS CORE REMOVAL Steps: (label on cooler:) WARNING Disengage orange clamps to remove cores. Engage ALL FOUR orange clamps before operation of unit. Refer to service manual for further information. SEELEY INTERNATIONAL - INSTALLATION MANUAL CW-P15 859740-G |... -
Page 24: Regular / Programmed Maintenance
MAINTENANCE INSTRUCTIONS REGULAR / PROGRAMMED MAINTENANCE • Un-clip two retainer clips. Note! All maintenance must be done by a trained, licensed technician, in accordance with National and Local Regulations (eg AS/NZS 3666.2 etc). Some activities may require 2 persons to comply with local Health and Safety regulations. -
Page 25: Cleaning, Replacing And Checking The Water Management Probe
Refer to replacing the drain pump section. To expose the strainer for cleaning. Note! There is no need to disconnect the pump electrical ILL1963-A • Reverse above process to re-assemble. cables. ILL1963-A SEELEY INTERNATIONAL - INSTALLATION MANUAL CW-P15 859740-G |... -
Page 26: Infrequent / Programmed Maintenance
MAINTENANCE INSTRUCTIONS INFREQUENT / PROGRAMMED MAINTENANCE • Disengage the handle extension attached to the rear core clamp from the front clamp lever. Replace cores Purpose: To remove and replace the cores that may have become inefficient over time due to deposits and degradation of the flocked surfaces. - Page 27 ILL3549-A • Locate the rear core clamp handle extension and use it to swing the rear clamp into position. ILL3548-A ILL3549-A ILL3545-A ILL3550-A SEELEY INTERNATIONAL - INSTALLATION MANUAL CW-P15 859740-G |...
-
Page 28: Breakdown Maintenance
MAINTENANCE INSTRUCTIONS • Lock the handle extension into the front core clamp handle. • Open the electronics cover and electronics enclosure. • Unplug the motor power boot-lace wire terminations from the terminal blocks • Pull the cable through the cable gland in the electronics enclosure and through the two cable glands in the plastic housings. -
Page 29: Accessing Solenoid, Chlorinator, Probe Or Drain Pump
• When fitting the fans back on to the motor shaft, align the flat ILL3561-A on the shaft with the grub screw. Push the fan into the Venturi up to a dead stop on the shaft. The fan and the Venturi should be aligned. ILL3534-A SEELEY INTERNATIONAL - INSTALLATION MANUAL CW-P15 859740-G |... -
Page 30: Cable Removal
MAINTENANCE INSTRUCTIONS • Back-off the cable gland through which the solenoid cable is HIGH VOLTAGE CABLE - (LHS port) Electronics routed. Control Box • Remove the metal electronics cover and the electronics enclosure lid. Core Block Pump, Drain Pump, Supercool (if applicable) Earth Lead... -
Page 31: Replace The Chlorinator, Probe And Tornado Pump
• Pull out the drain Pump. ILL3576-A • Tape the three terminals together in a staggered formation to make it easier for the cable to be pulled through the conduit without snagging. SEELEY INTERNATIONAL - INSTALLATION MANUAL CW-P15 859740-G | ILL3572-A... -
Page 32: Replace The Circulation Pump
MAINTENANCE INSTRUCTIONS REPLACE THE CIRCULATION PUMP • Remove any cable ties that bundle the excess cable length. Purpose: To replace a faulty circulation pump Method: • Turn off Power to the cooler. • Remove the utilities cover to gain access to the inside of the housing. -
Page 33: Replace Control Electronics
• Replace the screw and rubber hose with hose clamp. • Restore mains power to cooler. • Fill tank and check for leaks. ILL3585-A ILL2921-A • Reinstate wiring. SEELEY INTERNATIONAL - INSTALLATION MANUAL CW-P15 859740-G |... -
Page 34: User Maintenance Instructions
USER MAINTENANCE INSTRUCTIONS OPERATING AND FAULT CODE DIAGNOSIS TRI-COLOURED LED There are 2 methods for confirming the cooler operation and This LED indicates the status of the cooler and indicates Fault diagnosing faults on the cooler. Codes (if applicable). A. LED Display Cooler Fault MagIQcool... - Page 35 -1 is deducted from register. If the register >=3 then the cooler will continue to operate with a warning symbol displayed on the wall control. Check the water supply to the cooler is sufficient. SEELEY INTERNATIONAL - INSTALLATION MANUAL CW-P15 859740-G |...
-
Page 36: Maintenance Schedule
MAINTENANCE SCHEDULE INSTALLATION INSTALLER: DATE: It is a condition of your warranty cover that the items in the schedule below are checked (and action taken as required) once every 3 months from the date of installation by a qualified, licensed technician, and that the schedule is properly filled out (i.e. name, signature, date, action taken). - Page 37 No.1 ......................No.2 ......................No.3 ....................... No.4 ....................... No.5 ....................... No.6 ....................... No.7 ....................... No.8 ....................... SEELEY INTERNATIONAL - INSTALLATION MANUAL CW-P15 859740-G |...
- Page 38 MAINTENANCE SCHEDULE SERVICE ITEM CHECK/ADJUST CLEAN REPLACE Electrical Connections and Component Operation Electrical wiring Fan motor PCBs & Control box Drain valve Water inlet solenoid Water probes Chlorinator Water pump Water Distribution System Water distribution system - hoses and spreaders Water level Cabinet and Accessories Cabinet integrity / leaks...
-
Page 39: Trouble Shooting
Fault in the building BMS or the MagIQtouch Refer to the building BMS system manual and/or the MagIQtouch MS1 functioning MS1 BMS controller BMS Installation and Operation manual supplied with the cooler, as appropriate. SEELEY INTERNATIONAL - INSTALLATION MANUAL CW-P15 859740-G |... -
Page 40: Installation Checklist
INSTALLATION CHECKLIST Telephone: ............Owner Name: ........... Address: .............................. Installer: ............Dealer: .............. Model No: ............Date Installed: ..........Software Ver: ............ Serial No: ............Installation □ The cooler is adequately supported, secure and level. □ The water pipes were flushed of any foreign materials before connection the cooler was made. □... -
Page 41: How To Register Your Product Warranty (Australia Only)
(i.e. names, signature, date, and action taken) when the item is completed. ANY FAILURE TO CARRY OUT THE REQUIRED MAINTENANCE AND SERVICING REQUIREMENTS, AND ANY FAILURE TO PROPERLY FILL OUT THE MAINTENANCE SCHEDULE, WILL VOID YOUR WARRANTY. SEELEY INTERNATIONAL - INSTALLATION MANUAL CW-P15 859740-G |... -
Page 42: Warranty Terms And Information (Australia Only)
Warranty Details (Australia only) In this warranty: We or us means Seeley International Pty Ltd (Seeley) ABN 23 054 687 035, and our contact details are set out at the end of this warranty; You means you, the original end-user purchaser of the Goods;... - Page 43 The warranty granted in clause 1 covers the costs of parts and labour but you will be responsible for: the cost of travel incurred for a Seeley International service agent to get to and from the location of the Goods if the location of the Goods is either: (i) outside the metropolitan areas of the capital cities;...
- Page 44 PRIVACY NOTICE Seeley International Pty Ltd ABN 23 054 687 035 will use the personal information you provide us with to provide warranty support for the product you have purchased and to inform you about other products and services. If you choose not to supply us with the information requested, we may be unable to provide you with warranty support.
- Page 45 SEELEY INTERNATIONAL - INSTALLATION MANUAL CW-P15 859740-G |...
- Page 46 CW-P15 Indirect Evaporative Cooler 859740-G...
- Page 48 Seeley International Pty Ltd, 112 O’Sullivan Beach Road, Lonsdale, SA 5160, Australia MANUFACTURED BY: Seeley International Pty Ltd, 77 North Street, Albury, New South Wales 2640, Australia (for Australia, Europe and South Africa) Seeley Acquisition Co., Ltd. doing business as Coolerado, 4430 Glencoe Street,...
Need help?
Do you have a question about the Climate Wizard CW-P15 and is the answer not in the manual?
Questions and answers