
Related Manuals for Seeley Breezair EXT


Summary of Contents for Seeley Breezair EXT
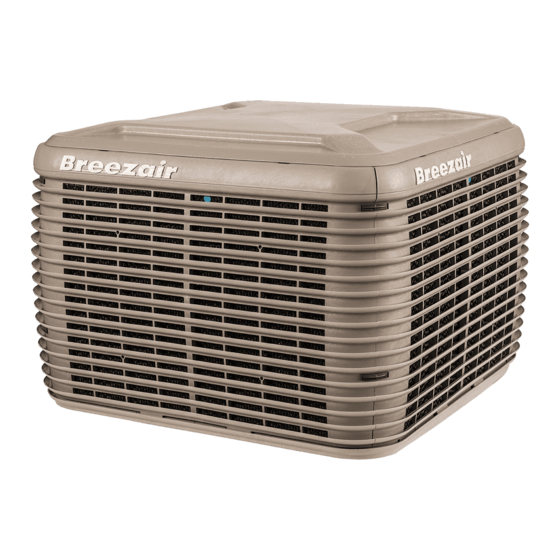
- Page 1 INSTALLATION & OPERATION MANUAL EXT Evaporative Coolers (English) ILL1672-A Original English Instructions...
-
Page 2: Table Of Contents
CONTENTS IMPORTANT SAFETY INSTRUCTIONS Read And Save These Instructions For Future Reference. Warnings Employer And Employee Responsibilities Installer And Maintenance Contractors - Risk Assessment Some Points To Consider Other Important Requirements QUICK GUIDE INSTALLATION Pack Out Kit Contents Cooler Location Access For Servicing And Maintenance Installing The Roof Jack Conveying The Cooler To The Roof... -
Page 3: Important Safety Instructions
Seeley International provides the following information as a guide to contractors and employees to assist in minimising risk • Are there any special conditions to consider i.e. excessive whilst working at height. -
Page 4: Quick Guide
QUICK GUIDE STEP 1 STEP 2 STEP 3 SAFETY COOLER LOCATION INSTALL ROOFJACK Read & understand the safety section. Check cooler location. Consider Install 24G metal roof jack and regulations. Discuss with customer. seal before mounting. page 4 page 5 page 1 ILL3363- STEP 7... - Page 5 QUICK GUIDE STEP 4 STEP 5 STEP 6 LEVEL ROOF JACK CONVEY COOLER MOUNT COOLER Position, level, secure and seal the roof Convey the cooler to the roof. Mount cooler to the dropper. jack. Check tank (reservoir) is level. Note! Always use 2 people when handling manually.
-
Page 6: Pack Out Kit Contents
INSTALLATION PACK OUT KIT CONTENTS The ideal location for the cooler is in a central position on the roof (away from sleeping areas and where people spend most of their time) so that the duct runs are of approximately the same length. -
Page 7: Installing The Roof Jack
INSTALLATION CONVEYING THE COOLER TO THE ROOF Lifting and installing the cooler is made easier by removing the EXQ/EXVQ pad frames first. They can be replaced at the very end of the 3.5' (1.0m) installation procedure. REAR ALL COOLERS ALL COOLERS 3.5' (1.0m) 3.5' (1.0m) FRONT... -
Page 8: Securing The Leg Supports
INSTALLATION SECURING THE LEG SUPPORTS WEATHERSEAL AND LATCH (Model dependant, refer to Dealer.) The telescopic leg supports (with feet attached) slide up and Where fitted, the Weatherseal latch performs two functions. down inside the four corner posts. By removing the screw from In the locked position it acts as a latch, preventing movement the lower end of the corner post you enable the leg support to during transport. -
Page 9: Water Requirements
INSTALLATION WATER REQUIREMENTS OVERFLOW & BLEED OFF FEATURE A special "bleed-off" fitting is supplied with the cooler. It has a Installation of the cooler water supply must conform to 3-fold function: it acts as an overflow, a drain and a bleed-off. local plumbing rules, regulations and standards. -
Page 10: Setting The Water Level
Where this condition is allowed to exist, Seeley International (Americas) accepts no responsibility for any ILL820-B damage or injury that might occur. -
Page 11: Electrical Requirements
(not first to the cooler). regulations and standards. NOTE! Option 2 will not support the optional Salinity Manager/ Important! It is a requirement of Seeley International that Auto-Drain feature. all Breezair coolers be connected to a dedicated circuit to the distribution board, with a separate circuit breaker and NO INTERFIERA CON LAS CONEXIONES ELÉCTRICAS DE FÁBRICA. - Page 12 INSTALLATION The main power termination box is made in two sections to Wiring to the cooler must be rated at cooler rated amperes facilitate easy wiring connections. Knock-outs are provided for or higher, and must be protected by a suitable fuse or circuit ½"...
-
Page 13: Motor Power (Amps)
INSTALLATION MOTOR POWER (AMPS) PULLEY ADJUSTMENT Important: Install all the pad frames except the one on the The motor pulley is adjustable in order to set the motor amperes motor side. at the correct (nameplate) level, and thus provide the owner with full machine cooling capacity. -
Page 14: Belt Tension
INSTALLATION BELT TENSION RESETTING THE PUMP CIRCUIT BREAKER Disconnect power supply at the main panel. Belt tension is important! If it is too tight there will be Remove the junction box from the blower housing. excessive belt and bearing wear. If it is too loose there will be Invert the junction box and locate the circuit breaker. -
Page 15: Bleed Off
INSTALLATION BLEED OFF See previous heading "Overflow and Bleed-Off feature" under "Water Installation". Adjusting the bleed rate is necessary to reduce the salt deposit on the pads. Salt deposit can NEVER be entirely eliminated, only the rate of deposit can be changed. The bleed feature causes some salt concentrated water in the tank (reservoir) to be drained away. -
Page 16: Cooler Operation
COOLER OPERATION HELLO AND CONGRATULATIONS ON PURCHASING A SEELEY EVAPORATIVE COOLER At Seeley International we manufacture evaporative coolers from the highest quality materials, and we have designed the product to provide many years of economical, trouble-free cooling. USING YOUR COOLER Evaporative air coolers always function on 100% fresh outside air. -
Page 17: Maintenance
Note! It is important that only new Seeley International factory Working at heights requires additional safety precautions. authorised replacement parts be used in this cooler. Failure to... -
Page 18: Residential Maintenance Schedule
MAINTENANCE RESIDENTIAL MAINTENANCE SCHEDULE REQUIREMENTS FOR ALL COOLERS (EVERY 2 YEARS) Maintenance Schedule servicing should be performed before the summer season. We require that the following components and the operation thereof, be inspected after the first year of use, and serviced every 2 years for residential purpose. COMPONENT CHECKS Service Year Service Item... -
Page 19: Additional Requirements For Coolers With Bleed System
MAINTENANCE GENERAL INSTALLATION CHECKS Service Year Action Check electrical connections, isolation switches etc. Check water supply, isolation valves etc. Check duct, roof penetrations, support frames etc. GENERAL OPERATION CHECKS Service Year Action Ensure no water leaks (internal/external) Check water level set point Check water fill time Check water distribution accross pads Check weatherseal operation... - Page 20 MAINTENANCE RESIDENTIAL SERVICE RECORD Service No. Service Date Service Technician Service Company No.1 ..................................No.1B ..................................No.2 ..................................No.2B ..................................No.3 ..................................No.3B ..................................No.4 ..................................No.4B ........
-
Page 21: Commercial / Industrial Maintenance Schedule
MAINTENANCE COMMERCIAL / INDUSTRIAL MAINTENANCE SCHEDULE REQUIREMENTS FOR ALL COOLERS (EVERY 3 MONTHS OR TWICE PER YEAR) Maintenance Schedule servicing should be performed before and after the summer season. We require that the following components and the operation thereof, be inspected after the first 3 months of use, then serviced a minimum of twice a year for commercial/industrial purpose. -
Page 22: Additional Requirements For High Operation Hours (Every Year)
MAINTENANCE COMMERCIAL/INDUSTRIAL MAINTENANCE SCHEDULE CONT. Service Year / Quarter COMPONENT CHECKS Service Item Action Check / Adjust Replace (if required) Fan Grub Screw Check / Adjust (LCQI/TBQI/LCSI/TBSI models) Check / Adjust Electronics Box & Cables Replace (if required) Check condition and correct fitting of all General Product Condition components. -
Page 23: Commercial Service Record
MAINTENANCE COMMERCIAL / INDUSTRIAL MAINTENANCE SCHEDULE CONT. COMMERCIAL SERVICE RECORD Service No. Service Date Service Technician Service Company No.1 ..................................No.1A ..................................No.1B ..................................No.1C ..................................No.1D ..................................No.2 .................. -
Page 24: Commissioning
COMMISSIONING SETTING THE WATER LEVEL REFITTING THE PAD FRAMES Refit the pad frames by locating the bottom edge in the tank Turn on the mains water supply to the cooler. (reservoir) groove, then push the top in under the lid. Turn the cooler on at the controller, in “COOL”... -
Page 25: Commissioning The Cooler
COMMISSIONING THE COOLER COMMISSIONING COMPLETION CHECKLIST FLUSHING CHILLCEL PADS □ PADS FLUSHED - To prevent initial start-up odours from the cooling pads, it is a requirement to flush water through them COOLER and drain the tank. Operate in COOL mode, lowest speed for 5 minutes, then drain the tank. -
Page 26: Trouble Shooting
TROUBLE SHOOTING Symptom Cause Action Inadequate cooling Under-sized cooler. Replace with larger cooler. Under-sized ducts. Carry out cooling load design to determine correct size unit, ducting and outlets required. Clogged or dirty cooling pads. Clean or replace pads. Dry pads or lack of water while cooler is operating. Check water distribution system for possible obstruction in hoses. -
Page 27: Exploded View
EXPLODED VIEW BREEZAIR EXT EVAPORATIVE COOLER BREEZAIR EXT EVAPORATIVE COOLER ITEM DESCRIPTION ITEM DESCRIPTION J-NUTS & SPEED NUTS V-BELT POST, CORNER JUNCTION BOX ITEM DESCRIPTION ITEM DESCRIPTION SCROLL (Blower Housing) PAD FRAME J-NUTS & SPEED NUTS V-BELT FLOAT VALVE CHILLCEL COOLING PAD... - Page 28 1002 S 56TH AVENUE, SUITE # 101 PHOENIX, ARIZONA 85043, USA It is the policy of Seeley International to introduce continuous product improvement. Accordingly, specifications are subject to change without notice. Please consult with your dealer to confirm the specifications of the model selected.
Need help?
Do you have a question about the Breezair EXT and is the answer not in the manual?
Questions and answers