
Subscribe to Our Youtube Channel
Related Manuals for Teldat Regesta PLC


Summary of Contents for Teldat Regesta PLC
- Page 1 Manual Teldat S.A. Regesta PLC Installation Manual Copyright© Teldat Dm684-I Version 1.3 03/2020 Teldat S.A. Regesta PLC...
- Page 2 This publication is subject to change. Teldat S.A. offers no warranty whatsoever for information contained in this manual. Teldat S.A. is not liable for any direct, indirect, collateral, consequential or any other damage connected to the deliv- ery, supply or use of this manual.
- Page 3 Chapter 2 Regesta PLC Router ....... . 4 Features........
- Page 4 Radio Information ....... . . 32 RF GSM/WCDMA specifications ......Regesta PLC...
- Page 5 Related Documents Teldat S.A. I Related Documents Teldat Dm748-I Software Updating Teldat Dm781-I Cellular Interface Regesta PLC...
- Page 6 1 About this Manual Teldat S.A. Chapter 1 About this Manual This is the installation manual for the Regesta PLC router and contains information on how to correctly install this device in a working environment. 1.1 Supported devices The information provided in this installation manual only applies to the Regesta Compact PLC router, models 2G / 1.2 Who should read this manual?
- Page 7 1 About this Manual Teldat S.A. Fax: +34 918 076 566 Email: support@teldat.com Regesta PLC...
- Page 8 Chapter 2 Regesta PLC Router 2.1 Features The Regesta PLC router family is a range of IP routers especially designed to operate in hostile and extreme envir- onments. Thanks to their ruggedized mechanics and special characteristics, which allow them to bear extreme tem- peratures, these routers are particularly suited for: industrial environments, industrial telecontrol, distribution installa- tions for electricity, gas, water, etc.
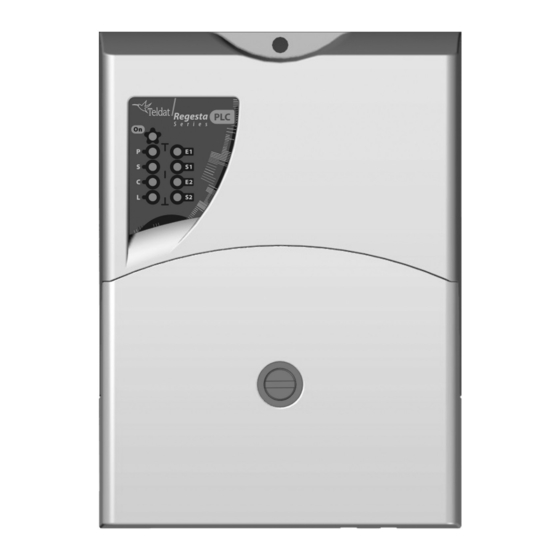
- Page 9 2.1.2 Hardware monitoring The quickest way to monitor the state of the Regesta PLC hardware is through the LEDs on the front panel. The LEDs provide visual information on the state of the hardware components, indicating connectivity, data flow, etc.
- Page 10 3 Components and Power Supply Teldat S.A. Chapter 3 Components and Power Supply The following chapter provides detailed information on the chassis of the Regesta PLC and its components. This in- formation includes: • Components • Assembly instructions • Power supply •...
- Page 11 Port is in active state, shows interface activity: Green • Steady: Data is not being transferred. • Flashing: Data is being transferred. Ethernet (LAN) in- Ethernet port 2 is disabled or connection is not established. terface 2 Ethernet connection (link) established: Green Regesta PLC...
- Page 12 For further information on how to remove/install the protective casing, please, see Removing/Installing the connector cover on page 10. The following figure shows the connector panel. This panel includes all Regesta PLC router connectors. Connector Panel Fig. 3: The connector panel components are as follows:...
- Page 13 Installing a DIN rail mount ac- cessory on page 12. Flat area where the product information label is placed. This label contains inform- ation on the device model, MAC, serial number, etc. 3.2 Assembly Regesta PLC...
- Page 14 3.2.1 Removing/Installing the connector cover The Regesta PLC includes a protective case for the connectors. The main function of the protective case is to protect against accidental electrical discharge, which can prove dangerous. Thus, direct contact with the connectors is avoided while the device is operating.
- Page 15 To replace the protective case, follow the steps below. First, slide the case down into the correct position on the device: To lock the case into place, move the fastening mechanism to a horizontal position and push down. You should hear a little click. Regesta PLC...
- Page 16 3.2.2 Installing a DIN rail mount accessory The Regesta PLC can be installed on a standard DIN rail. A special kit is needed to mount the device on a DIN rail. This kit must be ordered from the router provider. The DIN rail kit allows the device to be installed in several different positions.
- Page 17 3.2.3 Wall mounting The Regesta PLC has 3 holes for mounting the device on the wall. To ensure it is properly fastened, screws must be inserted through the holes and secured to the wall. Before mounting the device on the wall, remove the protective casing.
- Page 18 Fig. 12: Holes for wall mounting. 3.3 Power source The Regesta PLC is powered with an external AC source. Nominal power voltages are 100-240 V AC. Note Before connecting the router, please take time to read the following instructions carefully! 3.3.1 Workplace conditions.
- Page 19 3.4 RST button The Regesta PLC has a button that can be accessed from the outside and is labeled “RST” . It is located on the con- nector panel and has two functions. • To trigger a reboot.
- Page 20 3.5.1 Ethernet ports The Regesta PLC incorporates up to two 10/100 BaseT Ethernet ports with automatic MDI/MDIX to connect to a loc- al area network (LAN). Two LEDs, labeled "E1" and "E2", indicate the physical connection state. The LAN2 (E2) port is optional and the device may not include said port.
- Page 21 The RF1 connector is connected to the module’s MAIN connector and the RF2 connector to the AUX connector. Installing these antennas in the Regesta PLC router is necessary to improve the quality of the signal received and transmitted by the WWAN module (GPRS, UMTS, HSDPA, HSUPA, etc.).
- Page 22 3.5.3 Connecting the serial ports The Regesta PLC includes a RJ45 and a 7 pin pluggable connector to provide serial ports. Depending on the model, the 7 pin pluggable connector may be inoperative. 3.5.3.1 Console connector as serial port (CONF connector) The console port can be converted into an RS-232 asynchronous DCE serial port.
- Page 23 (4) 7 pin pluggable connector, only 4 pins on the left. 3.5.4 PLC interface The Regesta PLC incorporates a Power Line Communication (PLC) interface. This interface allows the device to communicate with several compatible PLC devices through the power line. PLC signal injection is made inside the device through the power supply connector.
- Page 24 3.6 Installing the SIM card The Regesta PLC has a Wireless WAN interface that, in order to operate, may require at least one SIM card to be in- serted into the device. Some carriers in certain countries provide services (CDMA) that do not require SIM cards.
- Page 25 (3) Fully insert the SIM card using the guides; the SIM's notch must be on the right side (as shown). (4) Return the tray to its original position. (5) While pressing on the tray, push the fastening towards the word LOCK until it is firmly in place. Inserting the SIM Fig. 20: Regesta PLC...
- Page 26 4 Compliance Teldat S.A. Chapter 4 Compliance 4.1 Manufacturer information Teldat Brand Manufacturer Teldat S.A. Country Spain Postal Address Isaac Newton, 10 Parque Tecnológico de Madrid, 28760 Tres Cantos, Madrid, Spain International Phone +34 91 807 65 65 Regesta PLC...
- Page 27 4 Compliance Teldat S.A. 4.2 Safety warnings Connecting Connecting Regesta PLC...
- Page 28 0.1% weight by weight (w/w). This declaration will be updated whenever- any changes occur or other chemical substances are added to the REACH Candidate List. Information is cur- rentlyprovided to consumers upon request. Regesta PLC...
- Page 29 In accordance with Article 6(3) of 1999/5/EC R&TTE, we inform you that national restrictions and requirements may apply when it comes to authorization. These can evolve with time. Teldat S.A. recommends that you check with local authorities for the latest status of national regulations.
- Page 30 A.2 Updating the software The Regesta PLC router can be updated to new releases. Please contact your distributor for further details on new releases. There are various ways to update one of our routers: For further information, please see manual Dm 748-I Software Updating.
- Page 31 A.2.1.1 Connecting through the local console (CONF connector) The Regesta PLC has a RJ.45 female connector on the front panel known as CONF., which provides access to the device local console. To configure this, connect the CONF. port to an asynchronous terminal (or to a PC with termin- al emulation).
- Page 32 [192.168.1.2, 192.168.1.254] and with mask 255.255.255.0. For example, 192.168.1.2, 255.255.255.0. • Connect the IP terminal Ethernet interface to the Regesta PLC LAN connector through the Ethernet cable (RJ45) provided. • Initiate a Telnet session from the IP terminal to IP address 192.168.1.1 (Regesta PLC default address).
- Page 33 PROTOCOL PRIME 1.3.6 (Upgradeable PRIME 1.4). ROLE Configurable Base Node and Service Node. COMMUNICATIONS Single phase injection through CENELEC A band. TECHNOLOGY ATMEL ATPL230A chipset. Terminal Block 2 Poles 5mm pitch, is the same as power supply. CONNECTOR Regesta PLC...
- Page 34 Terminal block 4 pin pluggable, on the device's connector panel (optional). A.4.6 RS-485 Serial interface STANDARDS 2-4 wires RS-485/RS-422 configurable through software. Bus termination config- urable through software. SPEED From 300 to 115200 bps. CONNECTOR Terminal block 3 pin pluggable, on the device's connector panel (optional). Regesta PLC...
- Page 35 LENGTH x WIDTH x HEIGHT 140 x 80 x 190 mm. WEIGHT 750 gr. A.4.9 Environmental specifications TEMPERATURE OPERATING NORMALLY: -25 ºC to +60 ºC STORED: -25º to +70 ºC RELATIVE HUMIDITY On: 5 % to 93 % Regesta PLC...
- Page 36 Appendix B Radio Information B.1 RF GSM/WCDMA specifications The Regesta PLC model provides WCDMA, GSM, GPRS and EDGE network connectivity over several radio fre- quency bands under 3GPP Standards. This product is supplied without antennas. The choice of antennas is left to the discretion of the operator, who is re- sponsible for ensuring they comply with local regulations.
Need help?
Do you have a question about the Regesta PLC and is the answer not in the manual?
Questions and answers