
Related Manuals for Dräger BiliLux


Summary of Contents for Dräger BiliLux
- Page 1 Instructions for use BiliLux LED phototherapy light WARNING Software 1.n To properly use this medical device, read and comply with these instructions for use.
- Page 2 This page has been left blank intentionally. Instructions for use BiliLux...
-
Page 3: Table Of Contents
Assembly and preparation ................31 Unpacking ................... 31 Proper assembly ................. 31 Placing the BiliLux phototherapy light on an incubator hood ....32 Installing the BiliLux with optional spring arm ........32 Installing the BiliLux with optional trolley ..........34 Installing the optional radiometer ............ - Page 4 Positioning the BiliLux ................. 43 Adjusting light distance and coverage for the patient ......47 Starting therapy .................. 48 Using the BiliLux radiometer (option) ..........49 Exporting a phototherapy report ............50 Checking device status ............... 51 Ending phototherapy ................52 Using the MEDIBUS.X interface for data transfer .......
- Page 5 Radiometer option requirements ............75 14.9 Device combinations ................76 14.10 EMC Declaration ................. 76 15 List of accessories ..................83 15.1 Device ....................83 15.2 Accessories ..................83 15.3 Optional components ................83 Index ......................85 Instructions for use BiliLux...
- Page 6 This page has been left blank intentionally. Instructions for use BiliLux...
-
Page 7: Information About This Document
Babytherm , BiliLux , Caleo Dräger ® MEDIBUS Actichlor Ecolab BruTab 6S Brulin Dispatch Clorox Buraton, Mikrozid, Schülke & Mayr Perform, acryl-des Descogen Antiseptica Dismozon Bode Chemie Klorsept Medentech Oxycide Ecolab USA Virkon DuPont Eyemax Maxtec Instructions for use BiliLux... - Page 8 This page has been left blank intentionally. Instructions for use BiliLux...
-
Page 9: Safety-Related Information
Reprocessing personnel Task Requirement Reprocessing Specialist knowledge in the reprocessing of medical devices 2.1.2.3 Service personnel Task Requirement Installation Experience in the servicing of medical devices Basic service work (inspection, mainte- nance according to the "Maintenance" chapter) Instructions for use BiliLux... -
Page 10: Information On Safety Instructions And Precautionary Statements
The following warning signs and signal words indicate precautionary statements and differentiate the possible consequences of noncompliance. Symbol Signal word Consequences of non-compliance WARNING May result in death or serious injury. CAUTION May result in moderate or minor injury. NOTICE May result in property damage. Instructions for use BiliLux... -
Page 11: Basic Safety Instructions
Modifications to the product Modifications to the product may lead to malfunctions and unforeseen risks. This may result in injury to the patient or the user or in property damage. ► Do not modify this product. Instructions for use BiliLux... - Page 12 The user of the medical device is responsible for choosing a suitable patient monitoring system that provides appropriate information on medical device performance and patient condition. The responsibility for selecting the best level of patient monitoring lies solely with the user of the medical device. Instructions for use BiliLux...
-
Page 13: Device Compatibility Safety
► Do not use the device adjacent to or stacked with other equipment unless verification of normal operation in such a configuration can be achieved. ► If other devices are used with the BiliLux, refer to their manufacturer’s instructions for use. -
Page 14: Electrical Safety
Electromagnetic fields are generated by, e.g.: – Cellular phones – High-frequency electrosurgical equipment – Defibrillators – Shortwave therapy equipment ► Maintain the separation distances. Observe the following section: "Recommended separation distances" on page 81. Instructions for use BiliLux... -
Page 15: Explosion And Fire Protection
► Ensure that no oxygen sources are in use during maintenance or cleaning. Drug storage precautions Photo effects of radiation can degrade the efficacy of drugs. ► Do not store infusion liquids or other drugs in the radiation area. Instructions for use BiliLux... -
Page 16: Mechanical Safety
► For optimum stability, always lower the trolley to its lowest position before moving the device. ► For optimum stability, always lock all trolley wheels. ► Do not leave the device unattended when parking on an incline. 2.10 Device failure In case of device failure, contact DrägerService. Instructions for use BiliLux... -
Page 17: Application
3 months of age who weigh less than 10 kg (22 lb). The BiliLux phototherapy light is not indicated for home use or for use inside an incubator. It is also not indicated for the following patients: –... - Page 18 This page has been left blank intentionally. Instructions for use BiliLux...
-
Page 19: Overview
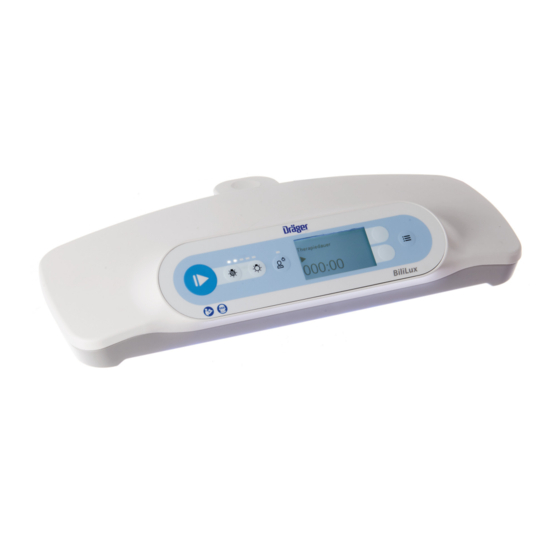
Overview BiliLux phototherapy light 4.1.1 Top view BiliLux A Control panel B Quick-connect plug (for connection to optional spring arm) 4.1.2 Bottom view A Blue phototherapy LED lights B White observation LED lights C Rating plate Instructions for use BiliLux... -
Page 20: Bililux With Optional Spring Arm
C Quick-connect plug (for connection to optional spring arm) D RS-232 communication port E Receptacle for radiometer cable F USB port BiliLux with optional spring arm A Quick-connect for phototherapy light B Release knob for phototherapy light C Spring arm... -
Page 21: Bililux With Optional Trolley
Overview BiliLux with optional trolley A Spring arm B Tightening knob for spring arm C Trolley pole D Height adjustment knob E Cable holder (optional) F Trolley base with locking castors Instructions for use BiliLux... -
Page 22: Radiometer (Optional)
BiliLux phototherapy light The BiliLux phototherapy light can be placed directly on an incubator hood. It has slip-resistant feet on the bottom that help to hold it in place. The phototherapy light houses the 20 blue lights that provide therapy as well as 2 white lights used for observation. -
Page 23: Abbreviations
The BiliLux with spring arm consists of the phototherapy light, an adjustable spring arm, and mounting provisions that allow the BiliLux to be used with various Dräger warming therapy devices and ceiling supply units. When mounted on the arm, the phototherapy light can be rotated and positioned for optimum effectiveness. -
Page 24: Definitions
Electromagnetic interfer- ence Caution Do not reuse Follow instructions for use Part number Protect patient’s eyes Lot number Power On Quantity of contents Power Off Manufacturer AC power Date of manufacture Storage temperature Use by date Instructions for use BiliLux... - Page 25 Calibration due date Menu key Key used to start/pause Therapy on therapy Key to increase irradiance Therapy paused Key to decrease irradiance Follow operating instruc- tions Earth (ground) / Functional Protective earth (ground) earth Store button Instructions for use BiliLux...
- Page 26 This page has been left blank intentionally. Instructions for use BiliLux...
-
Page 27: Operating Concept
Buttons whose functions are defined on the currently selected screen. LED indicators LED indicators for irradiance of phototherapy light. Each bar represents an increment of 20%. One bar indicates 20% irradiance and five bars indicates 100% irradiance. On/Off LED indicator for observation light. Instructions for use BiliLux... -
Page 28: Displaying Bililux Screens
Allows export of the phototherapy report to a USB screen flash drive. Phototherapy report Configuration screen Allows the user to adjust date, time, and language. 15-XXX-2016 10:52 English Device status screen Displays LED usage in hours, firmware version, and inspection dates. 00045 00045 1.01 Instructions for use BiliLux... -
Page 29: Adjusting The Bililux With Spring Arm
Adjusting the BiliLux with spring arm 1 Move the bottom arm in the horizontal direction (A) as needed to bring the BiliLux closer or further from the warming therapy device. 2 Move the top arm up or down (B) as needed. - Page 30 This page has been left blank intentionally. Instructions for use BiliLux...
-
Page 31: Assembly And Preparation
Special instructions for installing the BiliLux on the Caleo incubator and Babytherm radiant warmer If installing the BiliLux on top of the Caleo incubator hood, ensure that the incubator is in the level position. If tilting is necessary, remove the phototherapy light from the hood before tilting. -
Page 32: Placing The Bililux Phototherapy Light On An Incubator Hood
If installing the BiliLux with optional spring arm on a Caleo incubator or a Babytherm radiant warmer, attach it to the 38 mm pole (see "Attaching the BiliLux to a 38 mm pole" on page 32). Do not attach to any of the DIN or Fairfield rails. - Page 33 Assembly and preparation 6.4.2 Attaching the BiliLux to a GCX rail 1 Attach the pivot rail (A) to the GCX rail. 2 Attach the rail clamp for the phototherapy light (B) to the pivot rail. 3 Insert the post (C) on the bottom of the spring arm into the rail clamp (B). Ensure that the arm is seated properly, and then tighten the adjustment screw (D) on the rail clamp to secure the arm.
-
Page 34: Installing The Bililux With Optional Trolley
(E) until it audibly clicks into place. Installing the BiliLux with optional trolley The BiliLux with trolley consists of the phototherapy light, a spring arm, and a trolley. 1 Remove the screw and two washers attached to the bottom of the trolley pole. -
Page 35: Installing The Optional Radiometer
Plug the radiometer cable into the receptacle (A) on the rear of the phototherapy light. Keep the radiometer in a convenient place until needed. On trolley versions, you may attach the radiometer to the trolley metal pole via the magnets on the radiometer rear cover. Instructions for use BiliLux... - Page 36 This page has been left blank intentionally. Instructions for use BiliLux...
-
Page 37: Getting Started
3 Switch on the device using the on/off switch located on the rear of the phototherapy light (B). The screen briefly shows the startup screen which contains the BiliLux firmware version and the current date and time. The screen then proceeds to the therapy screen. The device is ready for use immediately after startup. -
Page 38: Functional Check Procedure
7 Press the key several times and confirm that the available BiliLux screens are displayed in succession (see Displaying BiliLux screens on page 28). 8 Press the variable function buttons next to the screen, and verify that they initiate the functions described on the screen (see Configuration on page 55). - Page 39 3 Press the Store button on the radiometer or the Store button on the radiometer screen. Confirm that the Last stored information at the bottom of the screen is updated. For detailed information, see "Using the BiliLux radiometer (option)" on page 49. 7.2.5 Spring arm check (if equipped) 1 Check the spring arm adjustment: ...
- Page 40 Inspect the device for loosened fasteners (if equipped), and tighten if necessary. Quick-connect plug to spring arm Height adjustment knob on trolley Tightening knob for spring arm on trolley Cable clips on spring arm Instructions for use BiliLux...
-
Page 41: Operation
Only approved accessories, such as the BiliLux light shield curtain, may be placed on top of the device. ► If the phototherapy light is used with an incubator, do not cover the light with an incubator cover or any other cover that is not an approved accessory for the device. - Page 42 Take note of any effects and take proper precautions. ► Avert eyes from blue lights in the phototherapy light to prevent effects such as eye irritation, headache, and nausea. Instructions for use BiliLux...
-
Page 43: Positioning The Bililux
8.1.1 Positioning the BiliLux phototherapy light Position the phototherapy light on the incubator hood with the long side of the light parallel to the long side of the hood. The four corners of the light have slip-resistant feet on the bottom that help to keep the light in place. - Page 44 Operation 8.1.2 Positioning the BiliLux with spring arm and BiliLux with trolley at an incubator 1 If the device is equipped with a trolley, adjust the height of the trolley as desired using the adjustment knob. If equipped with spring arm without trolley, proceed to step 4.
- Page 45 (Fig 1). If the phototherapy light is positioned directly under a radiant warmer, for example when in use with the BiliLux light shield curtain, switch off the radiant warmer and closely monitor the patient’s temperature (Fig 2).
- Page 46 (12 in) Fig. 1 Proper positioning of phototherapy light with radiant heater switched ON Dräger > 30 mm (12 in) Fig. 2 Proper positioning of phototherapy light with BiliLux light shield curtain and radiant heater switched OFF Instructions for use BiliLux...
-
Page 47: Adjusting Light Distance And Coverage For The Patient
30 cm/11.81 in _____ ..40 cm/15.75 in - - - - - 50 cm/19.69 in Irradiance setting (%) For effective therapy, position the light over the patient so that it covers as much body surface as possible. Instructions for use BiliLux... -
Page 48: Starting Therapy
Therapy duration 008:48 008:48 Therapy will continue until one of the following occurs: – Therapy is paused or ended by the user. – The device is turned off via the on/off switch. – The device loses power. Instructions for use BiliLux... -
Page 49: Using The Bililux Radiometer (Option)
Risk of patient injury Incorrect use of the radiometer may lead to patient injury. ► Do not use the BiliLux radiometer as the sole means in making clinical decisions. It is up to the clinician to determine appropriate means of verifying that the provided irradiance levels are clinically effective. -
Page 50: Exporting A Phototherapy Report
Therapy duration after phototherapy is ended Changes to the irradiance setting in % (entered in report after the new setting remains unchanged for more than 1 minute) Time/date changes Instructions for use BiliLux... -
Page 51: Checking Device Status
Operation The BiliLux can record up to three phototherapy sessions in one report, with each session holding up to 30 entries. A fourth session will automatically overwrite the oldest session. A session will end if one of the following occurs: –... -
Page 52: Ending Phototherapy
► Only connect with the approval of the respective device manufacturer. ► Service personnel must check the leakage current. ► If permissible values are exceeded, disconnect the devices from the MEDIBUS.X interface. Instructions for use BiliLux... -
Page 53: Shutting Down The Device
With a BiliLux phototherapy light placed directly on an incubator hood, secure the power cable and remove the device from the incubator hood. With a BiliLux with optional spring arm, secure the power cable and fold the spring arm to a compact position. - Page 54 This page has been left blank intentionally. Instructions for use BiliLux...
-
Page 55: Configuration
The year can be adjusted until it reaches 2099. It then reverts to 2000. 4 When all changes are complete, press the key to save the settings and to exit the configuration screen. 15-XXX-2016 10:52 English Instructions for use BiliLux... -
Page 56: Adjusting The Language
Magyar (Hungarian) Français (French) Norsk (Norwegian) Español (Spanish) Slovenčina (Slovak) Italiano (Italian) Suomi (Finnish) Nederlands (Dutch) Dansk (Danish) Svenska (Swedish) Ελληνικά (Greek) Русский (Russian) Română (Romanian) Português (Portuguese) Български (Bulgarian) Polski (Polish) Lietuvių (Lithuanian) Türkçe (Turkish) Instructions for use BiliLux... -
Page 57: Troubleshooting
Tighten the knob on the maintain set height. trolley is not tightened trolley until secure. sufficiently. The spring arm does not The joints of the spring Tighten the joints on the maintain set position. arm are loose. spring arm. Instructions for use BiliLux... - Page 58 This page has been left blank intentionally. Instructions for use BiliLux...
-
Page 59: Reprocessing
► Observe the manufacturer's instructions for cleaning agents, disinfectants, and reprocessing devices. WARNING Risk of infection Users and service personnel can become infected with pathogens. ► Disinfect and clean device or components before any maintenance measures and also before returning the medical device for repair. Instructions for use BiliLux... -
Page 60: Classifications For Reprocessing
Classification of medical devices Medical devices and their components are classified according to the way they are used and the resulting risk. Classification Explanation Non-critical Components that come only into contact with skin that is intact Instructions for use BiliLux... -
Page 61: Reprocessing List
The manufacturers of the surface disinfectants have verified at least the following spectra of activity: – Bactericidal – Yeasticidal – Virucidal or virucidal against enveloped viruses Observe the specifications of the surface disinfectant manufacturers. Other surface disinfectants are used at one’s own risk. Instructions for use BiliLux... - Page 62 Non-critical medical devices 11.5.3.1 Surface disinfection with cleaning WARNING Risk due to penetrating liquid Penetrating liquid may cause the following: damage to the device, electric shock, device malfunctions. ► Ensure that no liquid penetrates the device. Instructions for use BiliLux...
-
Page 63: After Reprocessing
1 Assemble and prepare the device so that it is ready for use, see chapter "Assembly and preparation". 2 Check the operational readiness, see chapter "Getting started". 3 Perform a complete functional check before returning the device to service, see "Functional check procedure" on page 38. Instructions for use BiliLux... - Page 64 This page has been left blank intentionally. Instructions for use BiliLux...
-
Page 65: Service
If the device is assembled incorrectly, or parts/assemblies are not reinstalled after cleaning or maintenance, the essential performance and/or basic safety of the device may be compromised. ► Assemble the device according to the instructions for use. Instructions for use BiliLux... -
Page 66: Overview
– Device startup – Electrical and control panel functional check – Trolley and spring arm functional check (if equipped) 3 Check that the product is in good condition: – All labels are complete and legible Instructions for use BiliLux... -
Page 67: Maintenance
Users or service required personnel 1) When the spring arm no longer maintains its position The BiliLux LED panel does not need to be exchanged during the expected service life of the device. CAUTION Risk of injury The use of LED lights that are not approved by the manufacturer can affect the safety and effectiveness of the phototherapy. -
Page 68: Repair
4 Verify that the spring arm moves freely and remains in any position. 5 Reattach the covers on the spring arm joints. 12.7 Repair Dräger recommends that all repairs are performed by DrägerService and that only authentic Dräger repair parts are used. Instructions for use BiliLux... -
Page 69: Disposal
Dräger on the Internet at www.draeger.com. Use the Search function with the keyword "WEEE" to find the relevant information. If access to Dräger's website is not possible, contact the local Dräger organization. Instructions for use BiliLux... - Page 70 This page has been left blank intentionally. Instructions for use BiliLux...
-
Page 71: Technical Data
106 cm (41.7 in) Length, spring arm fully extended 1.5 kg (3.3 lb) Weight (without options/accessories) BiliLux trolley (with spring arm) 132 cm (52 in) Height (trolley at lowest position and spring arm fully folded) 213 cm (83.9 in) Height (trolley at highest position, lower arm fully extended, and upper arm at 45°... - Page 72 45.2 cm (17.8 in) 115° 155° 14.2.2 Trolley dimensions 126 cm (49.6 in) MAX 84 cm (33.1 in) MIN 49.5 cm (19.49 in) 35.1 cm 12.0 cm (4.7 in) MAX (13.82 in) 48.4 cm (19.1 in) Instructions for use BiliLux...
-
Page 73: Environmental Requirements
Baud rate 9600 Parity even Data bits Stop bits For a detailed description of the interface protocol, please see these manuals: MEDIBUS.X, Rules and Standards for Implementation (9052607) and MEDIBUS.X, Profile Definition for Data Communication V1.n (9052608) Instructions for use BiliLux... -
Page 74: Irradiance
(400-550 nm) Eλ 85.5 50.1 33.4 mean [µW/cm /nm] (460-490 nm) Values are typical. 14.7.1 Spectral irradiance distribution graph 400 410 420 430 440 450 460 470 480 490 500 510 520 530 540 550 Wavelength (nm) Instructions for use BiliLux... -
Page 75: Radiometer Option Requirements
Radiometer calibration graph The radiometer is calibrated for measurement of light with the relative spectrum shown in the graph. 400 410 420 430 440 450 460 470 480 490 500 510 520 530 540 550 Wavelength (nm) Instructions for use BiliLux... -
Page 76: Device Combinations
For example, selecting wireless communication media that operate at 2.4 GHz will likely cause difficulty with the networking components. Low-level Instructions for use BiliLux... - Page 77 (without trans- former) to the public low- voltage power supply net- work that supplies build- ings used for domestic purposes. Harmonic emissions Class A (IEC 61000-3-2) Voltage fluctuations/flicker Complies emissions (IEC 61000-3-3) Instructions for use BiliLux...
- Page 78 60% dip for 5 60% dip for 5 interruptions, it is cycles cycles recommended that the BiliLux be pow- 30% dip for 25/30 30% dip for 25/30 ered from an unin- cycles cycles terruptible power (50 Hz/60 Hz) at 0 °...
- Page 79 150 kHz to 80 MHz any part of the Bili- Lux, including cables, than the recommended sep- aration distance calculated from the equation applica- ble to the frequency of the transmitter. Recommended separation dis- tance 1.2 P Instructions for use BiliLux...
- Page 80 If abnormal performance is observed, additional measures may be necessary, such as reorienting or relocating the device. 2) Over the frequency range 150 kHz to 80 MHz, field strengths should be less than [V ] V/m. Instructions for use BiliLux...
- Page 81 Technical data 14.10.5 Recommended separation distances The BiliLux is intended for use in the electromagnetic environment in which radiated RF disturbances are controlled. The customer or user of the BiliLux can help prevent electromagnetic interference by maintaining a minimum distance between...
- Page 82 2) The carrier shall be modulated using a 50% duty cycle square wave signal. 3) As an alternative to FM modulation, 50% pulse modulation at 18 Hz may be used because, while it does not represent actual modulation, it would be worst case. Instructions for use BiliLux...
-
Page 83: List Of Accessories
Some articles are not available worldwide because they are not approved in all countries of the world. Technical documentation is available on request. 15.1 Device Description Part number BiliLux LED phototherapy system MU20100 15.2 Accessories Description Part number Phototherapy mask Eyemax 2, disposable, micro, 20... - Page 84 This page has been left blank intentionally. Instructions for use BiliLux...
-
Page 85: Index
......73 hyperbilirubinemia ....17, 24 Instructions for use BiliLux... - Page 86 ....10 quick-connect ..... 19, 20 Instructions for use BiliLux...
- Page 87 USB port ......20 Warning ......10 Instructions for use BiliLux...
- Page 88 This page has been left blank intentionally. Instructions for use BiliLux...
- Page 89 This page has been left blank intentionally. Instructions for use BiliLux...
- Page 90 These Instructions for use only apply to BiliLux SW 1.n with the Serial No.: If no Serial No. has been filled in by Dräger, these Instructions for use are provided for general information only and are not intended for use with any specific machine or unit.
Need help?
Do you have a question about the BiliLux and is the answer not in the manual?
Questions and answers