Table of Contents
Advertisement
Pocket Guide
Evita XL
Software version 7.n
The Evita XL Pocket Guide is not a replacement or
substitute for the Instructions for Use.
Any use of the device requires full understanding and
strict observation of the Instructions for Use.
The user must be familiar with the device according to
the national and local laws and recommendations.
There will be no exchange of the Pocket Guide when
the product is updated/upgraded.
Advertisement
Chapters
Table of Contents

Subscribe to Our Youtube Channel
Related Manuals for Dräger Evita XL


Summary of Contents for Dräger Evita XL
- Page 1 Pocket Guide The Evita XL Pocket Guide is not a replacement or substitute for the Instructions for Use. Evita XL Any use of the device requires full understanding and strict observation of the Instructions for Use. Software version 7.n The user must be familiar with the device according to the national and local laws and recommendations.
- Page 2 This page has intentionally been left blank. Pocket Guide Evita XL...
-
Page 3: Table Of Contents
Preparation......How to start the Evita XL .... - Page 4 This page has intentionally been left blank. Pocket Guide Evita XL...
-
Page 5: System Overview
System Overview System Overview NOTE The Evita XL Pocket Guide is not a replacement or substitute for the Instructions for Use. Any use of the device requires full understanding and strict observation of the Instructions for Use. Control panel A Touch-sensitive screen... -
Page 6: Front Connections
C Flow sensor flap (thermal cover) D Expiratory valve with expiratory connector port (GAS RETURN) E Latch for expiratory valve F Nebulizer connection G Inspiratory connector port (GAS OUTPUT) H Locking screw for protective cover (behind it: O sensor) Pocket Guide Evita XL... -
Page 7: Back Panel
(optional) ILV socket for the connecting cable for independent lung ventilation with two ventilators Connection for oxygen (O K Connection for medical compressed air (AIR) L Temp socket for temperature sensor (optional) Pocket Guide Evita XL... -
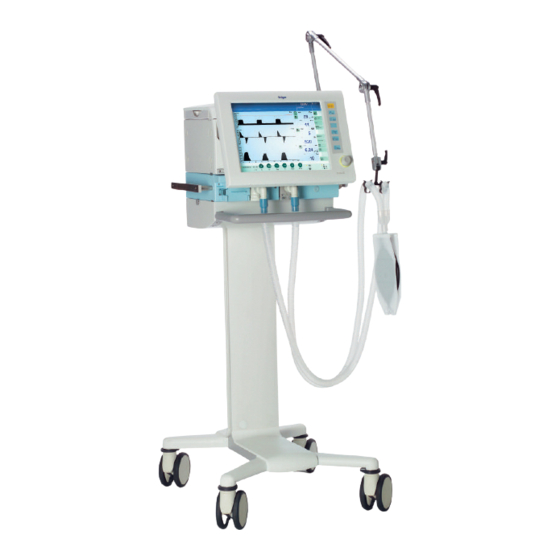
Page 8: Trolley
System Overview Trolley A Evita XL B Handle C Trolley column D Hose hook, 2x E Humidifier holder (optional) F Universal bracket with standard rail (optional) G Dual castors with locking brakes, 4x Pocket Guide Evita XL... -
Page 9: Preparation
Preparation NOTE The Evita XL Pocket Guide is not a replacement or substitute for the Instructions for Use. Any use of the device requires full understanding and strict observation of the Instructions for Use. How to start the Evita XL... -
Page 10: Installing Expiratory Valve, Flow Sensor
Connect Y-piece (D), with the rubber sleeve of the Y-piece on the inspiratory side. Insert the Y-piece in the opening of the hinged arm (E). Connect test lung. Push connector socket (A) all the way to the left. Pocket Guide Evita XL... -
Page 11: Switching On Evita Xl
Wait for this test to be completed. Evita XL then displays the "Start" screen. Evita XL will start ventilation with the pre-configured set- Standby is displayed in the header bar of the screen tings unless values are changed or Standby mode is ac- (A). -
Page 12: Entering The Humidification Type
HME/ Filter (C) = Heat and Moisture Exchanger Touch the Check tab (A). Evita XL displays the date and result (B) of the last De- Touch button corresponding to the type of humidifi- vice Check and Airtight Check. cation used. The button turns yellow. - Page 13 (optional) Device Check procedure Testing the DC power pack (batteries) Evita XL guides the operator through each test step in a question-and-answer dialog format. Questions are dis- Changeover test to battery operation played in the information field in the header bar and Pull out the power plug.
-
Page 14: Operating Concept
D Field for device status with type of humidification E Therapy bar with therapy controls for the ventilation parameters of the active ventilation mode and its ad- ditional settings F Monitoring area with waveforms, loops, trends, and measured values Pocket Guide Evita XL... -
Page 15: Dialog Windows And Therapy Controls
– Settings are made and confirmed by turning and pressing the rotary knob. C Button for closing the dialog window D Tab – touch the relevant tab to open a page E Setting assistance field Pocket Guide Evita XL... - Page 16 For therapy controls: to select = touch, the therapy control turns yellow, to set = turn rotary knob, to confirm = press rotary knob, the therapy control turns pale green or dark green. Pocket Guide Evita XL...
-
Page 17: Operation
Operation Operation NOTE The Evita XL Pocket Guide is not a replacement or substitute for the Instructions for Use. Any use of the device requires full understanding and strict observation of the Instructions for Use. Selecting the patient Evita XL determines the tidal volume V... -
Page 18: Starting Ventilation
Touch a therapy control in the therapy bar. If necessary, set the ventilation parameters. Evita XL opens the Ventilator Settings dialog window. Confirm the ventilation mode by pressing the rotary knob. The color of the tab changes to dark green. -
Page 19: Setting The Ventilation Parameters
The ventilation modes can be combined with additional Additional ventilation parameters derived from the ven- settings to optimize ventilation. tilation parameter are calculated by Evita XL and dis- played in the setting assistance field (B). When the limit set for the parameter has been reached, Evita XL displays a message. -
Page 20: Bronchial Suctioning
CPAP/ PSupp PPS (optional) Bronchial suctioning Preoxygenation lasts for a maximum of 180 seconds. During this time, Evita XL waits for the disconnection necessary for suctioning. If no disconnection is detected within 180 seconds, Evita XL terminates the oxygenati- Before suctioning on procedure. -
Page 21: Niv - Non-Invasive Ventilation
If the lower alarm limit for minute volume or the upper Set ventilation mode and ventilation parameters. alarm limit for apnea monitoring is switched off, Evita XL displays a permanent message in the header bar. If the upper alarm limit for inspiratory tidal volume is switched off, Evita XL displays a message in the header bar for 15 seconds. -
Page 22: Standby Mode (Sw 6.12 Or Higher)
Standby (A) is displayed in the header bar of the screen. Standby Plus (B) is also displayed on the screen. When the mask is put back on, Evita XL detects the pa- tient's inspiration and continues ventilation with the pre- vious settings. The Mask Ventilation application mode is active again. -
Page 23: Switching Off Evita Xl
Resuming ventilation Evita XL is switched off. Check ventilation settings (A). Touch Start button (B). Press rotary knob to confirm. The main screen is displayed, Evita XL starts ventilati- Press Start/Standby key. Evita XL starts ventilation. Pocket Guide Evita XL... -
Page 24: Alarms
Alarms Alarms NOTE The Evita XL Pocket Guide is not a replacement or substitute for the Instructions for Use. Any use of the device requires full understanding and strict observation of the Instructions for Use. On-screen alarm messages In the event of an alarm, the relevant alarm message appears in the alarm message field (A). -
Page 25: Displaying Alarm Information
Touch the Alarm Reset button (A) in the header bar and confirm using the rotary knob. Evita XL saves the alarm message, which can be dis- played in the Data dialog window on the Logbook pa- Acknowledging Apnea ventilation !! alarm message... -
Page 26: Setting Alarm Limits
Press rotary knob to confirm. of power supply. Continue turning rotary knob until the value is re- Connect Evita XL directly to another power supply or placed by dashes (--) in the display (D). continue ventilation with an alternative system (e. -
Page 27: Alarm Messages
Alarm messages NOTE The Evita XL Pocket Guide is not a replacement or substitute for the Instructions for Use. Any use of the device requires full understanding and strict observation of the Instructions for Use. The following alarm messages are an extract from all possible alarms only. - Page 28 Disconnect patient from the de- The ventilation function may be vice and continue ventilation im- affected. This may lead to devi- mediately with another ations in the O concentration independent ventilator. Call and tidal volume. DrägerService. Pocket Guide Evita XL...
- Page 29 The measured minute volume Check that the patient circuit con- leak MV is 20 % higher than nections are leakproof Check leak the minute volume measured on that the tube is correctly fitted. the exspiration side. Pocket Guide Evita XL...
- Page 30 Pressure meas. error !!! Fluid in expiratory valve. Replace expiratory valve, then clean and dry. Pressure measurement mal- Disconnect patient from the de- function. vice and continue ventilation im- mediately with another independent ventilator. Call DrägerService. Pocket Guide Evita XL...
- Page 31 Alarm messages Message Priority Cause Remedy Standby activated !!! Evita XL has been switched to Acknowledge Standby with Standby. 'Alarm Reset' button and confirm. Tidal volume high !!! The upper alarm limit of the ap- Check condition of patient. Check plied inspiratory tidal volume V pattern of ventilation.
-
Page 32: Waveforms And Logbook
Waveforms and logbook Waveforms and logbook NOTE The Evita XL Pocket Guide is not a replacement or substitute for the Instructions for Use. Any use of the device requires full understanding and strict observation of the Instructions for Use. Displaying waveforms Selecting other real-time waveforms Touch Curve only tab (C). -
Page 33: Sensor Calibration
Sensor calibration Sensor calibration NOTE The Evita XL Pocket Guide is not a replacement or substitute for the Instructions for Use. Any use of the device requires full understanding and strict observation of the Instructions for Use. Flow sensor calibration... -
Page 34: Cleaning And Disinfection
Cleaning and disinfection NOTE The Evita XL Pocket Guide is not a replacement or substitute for the Instructions for Use. Any use of the device requires full understanding and strict observation of the Instructions for Use. Components which can be... -
Page 35: Accessories
Accessories Accessories NOTE The Evita XL Pocket Guide is not a replacement or substitute for the Instructions for Use. Any use of the device requires full understanding and strict observation of the Instructions for Use. Product Number Description Spirolog 8403735... - Page 36 - adult, reusable reusable Cuvette, pediatric, 6870280 Cuvette for CO measurement - pediatric, reusable reusable Cuvette, adult, MP01062 Cuvette for CO measurement - adult, disposable disposable Cuvette, pediatric, MP01063 Cuvette for CO measurement - pediatric, disposable disposable Pocket Guide Evita XL...
- Page 37 This page has intentionally been left blank. Pocket Guide Evita XL...
- Page 38 HEADQUARTERS Dräger Medical AG & Co. KG Starting 2010-09: Dräger Medical GmbH Moislinger Allee 53–55 23558 Lübeck, Germany www.draeger.com Manufacturer: REGION NORTH AMERICA Draeger Medical, Inc. Dräger Medical AG & Co. KG 3135 Quarry Road Starting 2010-09: Telford, PA 18969, USA Dräger Medical GmbH Tel +1 215 721 5400 23542 Lübeck, Germany...
Need help?
Do you have a question about the Evita XL and is the answer not in the manual?
Questions and answers