Table of Contents
Advertisement
Advertisement
Table of Contents

Related Manuals for OPTEX FA FASTUS CDX-L15A


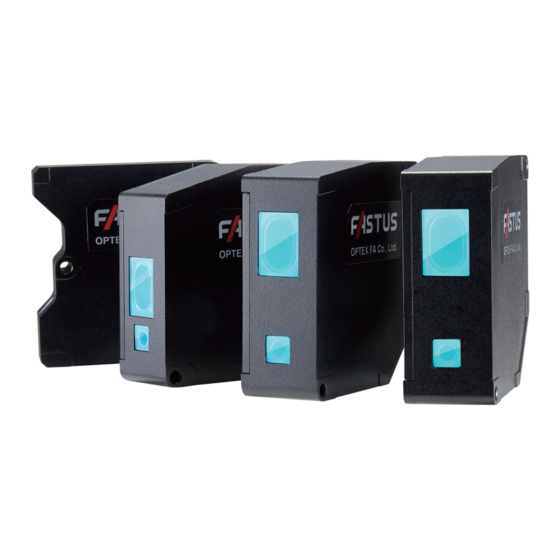
Summary of Contents for OPTEX FA FASTUS CDX-L15A
- Page 1 *FASTUS is a product brand of Optex FA. High-Accuracy Laser Displacement Sensor CDX Series User’s Manual Before using this product, please read this manual carefully. Keep this manual at hand so that it can be used whenever necessary. Store the manual in a safe location.
-
Page 3: Introduction
• Trademarks and registered trademarks appearing in this manual are the property of their respective owners. • The copyright of this user’s manual is owned by Optex FA Co., Ltd. All the contents contained herein are protected by copyright law. Unauthorized copying of this manual is strictly prohibited. -
Page 4: Safety Precautions
Safety Precautions This manual uses the following symbols to display safety precautions for ensuring safe operation of the CDX Series high-accuracy laser displacement sensor. Precautions listed here describe important information about safety. Make sure to follow them accordingly. Safety Symbols „... - Page 5 Doing so may cause a fire. Repairing the product is dangerous and should in no way be performed by the customer. Contact an Optex FA sales representative for repairs. What to do if water enters the product If water or any other liquid enters the product or the cable, immediately stop operating the product and turn off the power.
- Page 6 Before using this product, fully examine the applicable environmental laws and regulations, and operate the product in conformity to such laws and regulations. Optex FA does not assume any responsibility for damages or losses occurring as a result of noncompliance with applicable laws and regulations.
-
Page 7: Precautions When Using This Product Outside Of Japan
If using these products internationally, we ask that you fill out the suitable applications when exporting these products. Optex FA has prepared products to which limits on resolution have been added to enable their non- applicability to the Export Trade Control Order. -
Page 8: Table Of Contents
Contents Introduction .......................... i Safety Precautions ......................ii Precautions When Using This Product Outside of Japan ..........v Expressions Used in This Manual ................... viii Product Overview System Configuration ..................1-2 Included Items ....................1-3 Cables ........................ 1-4 Names and Functions of Parts ................1-6 Mounting the Head ..................... - Page 9 Configuration of Settings When Using with CDA Series Connecting ......................3-2 List of Setting Items .................... 3-4 Ethernet Communication Communication Specifications ................4-2 List of Commands for Reading/Writing Settings/Measured Values ....4-3 Acquiring Measured Values with Time Data ............. 4-11 Obtaining Received Light Waveforms and Configuring Mask Settings ....
-
Page 10: Expressions Used In This Manual
Expressions Used in This Manual This section explains the expressions used in this manual. Caution Indicates an item that requires special attention during operation MEMO Indicates information that is useful to know during operation Included Screens „ Screens included in this manual are subject to change without prior notice for product improvement purposes. -
Page 11: Product Overview
Product Overview This section explains precautions regarding the configuration of the CDX Series and usage as well as preparations that must be performed before use. Be sure to read this section thoroughly before using the product. -
Page 12: System Configuration
1-1 System Configuration In addition to being usable as a standalone device, the product can be used connected to a CDA Series displacement sensor control unit. CDX Series Head extension cable Branch connector 2. Web Settings Screen and Function Details 4. -
Page 13: Included Items
1-2 Included Items Before using this product, confirm that the following items are contained in the package. Sensor ×1 Branch connector ×1 Connector cap ×1 (attached to the connector) M4×50 mm mounting screws ×2 Washer, M4 nut ×2 Instruction Manual ×1 Included Items... -
Page 14: Cables
1-3 Cables Head extension cable (green M12-8 pole connector on both ends) DSC-1208-G02MA (2 m) DSC-1208-G05MA (5 m) DSC-1208-G10MA (10 m) Caution Up to two extension cables can be connected to each other for use. When connecting CDA Series products, the maximum extension length is 10 m (including the head extension cable plus the CDA cable). - Page 15 CDA cable (Green 4-pole M12 connector — Green 4-pole M8 connector) DSL-1204-G02M Cable length: 2 m *Robot cable specification DSL-0804-G02M Extension cable length: 2 m *Robot cable specification DSL-0804-G05M Extension cable length: 5 m *Robot cable specification Caution The maximum length for the head extension cable plus the CDA cable is 10 m. Branch connector (with cap) SYL-1208-G0M *Identical to connector shipped with the product.
-
Page 16: Names And Functions Of Parts
1-4 Names and Functions of Parts Number Name Function Status LED Lights up or flashes according to the operation status of the sensor. Laser OFF: Flashes blue Alarm status: Flashes red (when reception of light cannot be confirmed) *When measuring a transparent target, the LED will flash twice if there is no specified surface. Control output: Lights up orange (when any output is ON) Lights up green (when any output is OFF) Communication LED Lights up green when Ethernet communication is established. -
Page 17: Mounting The Head
1-5 Mounting the Head Caution Please note the following when handling the sensor head cable or extension cable. Subjecting the cable to excessive stress may cause the cable to break. • Do not pull on the cable with forces of 30 N or more. 10 mm or more •... - Page 18 In order to enable highly accurate and stable detections, mount the sensor as follows for the appropriate targets. With height differences With material/color differences With rotating measurement targets Mounting the Head...
- Page 19 With holes or recesses When mounted on a wall Attach the sensor head so that the window (emitting/receiving surfaces) is parallel to the detection target. Adjust the target so that the spot aligns with the detection position, and check whether the status LED lights up orange or green.
- Page 20 Mounting the Head 1-10...
-
Page 21: Web Settings Screen And Function Details
Web Settings Screen and Function Details The CDX Series of products includes a Web server function that allows settings to be viewed and configured using a Web browser. This section explains how to configure the settings and explains in detail more about each function. -
Page 22: Checking The Ip Address On Cdx Series Products
2-1-1 Using CDX Seeker CDX Seeker is a dedicated tool for searching for CDX Series products within a network and verifying/ configuring the IP address settings of any products found. Access the Optex FA website to download the software for free. - Page 23 Once the software is launched, a search for all CDX Series products on the network will begin automatically. Number Item Description Broadcast display When operation is being carried out correctly, “BCAST” will flash. Product Displays the CDX Series product model. Version Displays the CDX Series firmware version Mac address...
-
Page 24: Connection Using A Web Browser
2-2 Connection Using a Web Browser All of the following Web browsers can be used for the CDX Series Web settings screen. Supported Web browsers Browser name Version Internet Explorer Version 11 or higher Google Chrome Chrome 49 or newer Launch the browser and enter the verified or configured IP address in the address bar. -
Page 25: Screen Flow Chart
2-3 Screen Flow Chart This section provides a rough screen configuration and the switching method. Number Name Part Change language Switches the language used onscreen. (Initially set to “English.”) Measurement results Displays the measurement results for each channel. Shows the settings in a list. Click an item to move to the screen for setting or checking that item. -
Page 26: Monitor Screen
2-4 Monitor Screen Displays the operating status. This screen also allows users to check measurement results, judgment results, and trend graphs. Some settings, such as applying/releasing a hold and changing thresholds, can be changed from this screen. 2-4-1 Offset input Clear By setting a reference dimension as the offset value and then using the offset function while measuring a reference workpiece, users are able to set the current measured value as an offset value (reference value). - Page 27 2-4-3 sec/div Changes the graph’s display scale. When you change “sec/div” the magnification rate of the horizontal axis changes. Change “X1” and similar parts for each channel to change whether these parts are displayed and to change the magnification rate of the vertical axis. Monitor Screen...
-
Page 28: Measurement Screen
2-5 Measurement Screen Received light waveform Configures the basic settings for measurement. The CDX Series receives the reflected light of the laser it emits and uses that reception position to measure the distance to the workpiece. This screen allows users to check the received light waveform that represents the receiving status of the sensor. - Page 29 2-5-1 Mask Sets a mask range on the light-receiving waveform inside the measurement range where measurement should not be performed. Use the mask to exclude ambient noise or workpieces that should not be measured. Areas covered by the mask are displayed in blue. Measurement is not performed for these areas. The mask can be set in up to four locations.
- Page 30 2-5-3 Measurement range (at 12.5 μs) *[CDA menu: Crop (12.5 μs)] When the sampling period is set to the fastest setting of 12.5 μs, the measurement range will become narrower. Select the measurement range at this time. Measurement range CDX-L [W]15 CDX- [W] 30 CDX- [W] 85 CDX- [W]150...
- Page 31 2-5-6 Synchronization mode Sets the measurement function used to synchronize two sensor heads for measurement. • None: This function will not be used. • Synchronous: Synchronize multiple sensors for measurement. • Anti interfere1/2: Alternates between two sensors for measurement. Use this setting when the second laser is installed in an interference position.
- Page 32 [Channel setting] With the CDX Series, up to four channels (Ch 1 through Ch 4) can be set within the sensor, with each channel capable of independently configured measurement operations and output judgment. The following items can be configured independently using Ch 1 through Ch 4. MEMO When using a CDA Series shared displacement sensor amplifier, only Ch 1 on the CDX Series will be configurable.
- Page 33 2-5-10 Peak number *[CDA menu: Peak No.] Specifies which surface (peak number) of a target to measure. • No. 1 to No. 8: Specify each peak. • Default value: 1 Caution For example, when measuring two overlapping panes of glass, if the back of the first pane of glass (second reflective surface) and the front of the second pane of glass (third reflective surface) are close together, the sensor will not be able to recognize the surface and instead recognize the entire target as one reflective surface.
- Page 34 2-5-12 Median filter *[CDA menu: Median] Applies a median filter to prevent variation by cutting sudden changes in the measured value. • OFF: No median filter is used. • 7/15/31: Applies the median filter the specified number of times. • Default value: 31 Ex.: With a 7-point median filter: Number of measurements Measured value...
- Page 35 2-5-14 Edge measurement Compares the currently measured value with the measured value prior to the specified sampling count. This allows gradual changes to be ignored for detection while measuring extreme height differences. This function will not be used when set to “0.” When using this function, median filters and the count for performing moving average are ignored.
- Page 36 • Bottom: The minimum value during the sampling period (see figure below) will be output. Internal measurement Bottom hold value measurement value Measurement value Sampling period Hold • Sample Hold The measured value during hold input will be output. Sample hold measurement value Internal measurement value Measurement value...
- Page 37 • Auto Bottom: The minimum value from when the hold reset input is detected until the present will be output. Internal measurement value Auto bottom hold measurement value Measurement value Hold reset • Peak-to-Peak: The value of the maximum value - the minimum value from when the hold reset input is detected until the present will be output.
-
Page 38: I/O Setting Screen
2-6 I/O Setting Screen Configure the settings related to input/output. Judgment settings can be configured for channels 1 through 4 with the CDX Series. Because CDX Series products do not have an output signal line, judgment results are obtained via Ethernet or through a CDA Series product. - Page 39 2-6-2 Action Select the operation of the external input terminals. • None: The input terminal will not be used. (Input will be ignored.) • Laser Off: Laser emission is stopped during input. • Hold/Reset: Used as hold set/hold reset input when hold operation is in use. •...
- Page 40 2-6-5 Upper Limit/Lower Limit Sets the judgment threshold for turning the output ON or OFF. GO output will be turned ON between the upper and lower thresholds. ▼ Upper Limit • Input range: ±2000.000000 (mm) • Default value: [+0.200000] (15 mm type) [+0.500000] (30 mm type) [+2.000000] (85 mm type) [+4.000000] (150 mm type)
- Page 41 2-6-8 Offset Adds to (or subtracts from) the value obtained through multiplication by the span value. When offset input is received, the addition or subtraction is performed internally so that the measured value becomes the value set here. • Input range: –2000.000000 to +2000.000000 [Unit: mm] •...
- Page 42 2-6-10 On delay Sets the time from when the measured value exceeds the threshold until the output actually turns ON. Cancelling output until this time has elapsed prevents the control input/output from turning ON/OFF repeatedly in a short time (chattering). Measurement value Example: Upper...
- Page 43 2-6-11 Off delay Sets the time from when the output turns ON until the output turns OFF when the measured value falls below the threshold. Ensuring that the output always lasts the same length of time will prevent problems resulting from situations where detection is impossible because the ON time is too short.
- Page 44 • Hold: Maintains the value from directly before the alarm occurred. Actual displacement Clamp value Measurement results • Delay Clamp: Enforces the “Clamp” operation for the specified time during the “Hold” operation. Actual displacement Clamp value Measurement results • Default value: Clamp 2-6-14 Clamp value Sets the value to display when an alarm occurs if “Clamp”...
- Page 45 2-6-15 Alarm delay When “Delay Clamp” is set under “Alarm,” the “Hold” period is set by the number of samplings. Alarm hold count: 0 Alarm hold count: 3 Actual displacement Clamp value Clamp value Measurement results • Input range: 0 to 4095 (Number of samplings) •...
-
Page 46: Device Screen
2-7 Device Screen Configure the common device settings. Select “Factory Reset” on this screen to return the settings to their factory defaults. In addition, setting data for device can be saved as a file and written to other CDX Series products. 2-7-1 Mounting Selects the installation method for the sensor head. - Page 47 2-7-2 Direction Select the increase/decrease direction of the measured value with the measurement as 0. • Near: The closer the sensor and the target are to each other, the higher the measured value will be. • Far: The farther the sensor and the target are from each other, the higher the measured value will be. •...
-
Page 48: Communication Screen
2-8 Communication Screen Configures the settings related to communication. Caution These settings cannot be configured with CDA Series products. [Ethernet setting] 2-8-1 MAC Address Displays the unique number that has been registered to the unit. This unique number is used for identification on the network. - Page 49 2-8-3 IP address Sets the IP address of the CDX Series product. • Default value: 192.168.0.10 2-8-4 Subnet mask Sets the subnet mask for the CDX Series product. • Default value: 255.255.255.0 2-8-5 Default gateway Sets the default gateway for the CDX Series product. •...
-
Page 50: Storage Screen
2-9 Storage Screen Sets the “Storage function” operation for saving results of measurement with the CDX Series. Saved values are saved within the CDX Series as CSV data. Saved data will be listed on this screen, and the data can be downloaded to the PC by clicking each file name. Caution These settings and functions cannot be configured or used with CDA Series products. - Page 51 2-9-3 Quota This is the number of data entries to save until the storage function is stopped when the storage function is in use. • Input range: 1 to 100,000 • Default value: 1000 2-9-4 Rate Sets the interval during which data should be saved for all measured data. Not all measurement data is saved.
- Page 52 2-9-7 Trigger channel Sets the target output when the trigger for starting storage is set. Storage starts once the selected output meets the necessary conditions. • Options: Ch1 / Ch2 / Ch3 / Ch4 • Default value: Ch1 2-9-8 Start position Specifies by how much the start of storage should be shifted when the start condition is satisfied.
-
Page 53: Information Screen
2-10 Information Screen This screen allows the sensor head status to be checked. The following items cannot be written. 2-10-1 Sensor status Displays the sensor head status. • Firmware version: Displays the version of the unit firmware. • Temperature: Displays the internal temperature of the sensor head. [Unit: °C] •... -
Page 54: Display Settings
2-10-3 Documents Manuals and other material that can be used as references when using the sensor are available for download. 2-10-4 Display Settings Allows display settings for measured values to be changed. • No. of display digits: Sets the number of digits to display. •... -
Page 55: Configuration Of Settings When Using With Cda Series
Configuration of Settings When Using with CDA Series The CDX Series can be connected to CDA Series displacement sensor amplifier units. For details on CDA Series products, see the CDA Series user's manual. This section explains CDX Series settings related to use of the CDA Series. -
Page 56: Connecting
3-1 Connecting Caution • CDX Series products do not support CC-link communication. • Do not connect/disconnect CDA Series or CDX Series products when a power supply is connected. Connecting/ disconnecting the device while the power is on may lead to malfunctions. MEMO To extend the cable, connect an extension cable (2 m type) between the cable and the CDA Series head connector. - Page 57 Caution • When connecting or removing, do not use tools to turn the CDA Series head's connector fixing screw. If this screw is removed, the CDA will need to be repaired. • Avoid installing the CDA Series on a DIN rail while the CDA is connected to a cable. Doing so may apply unnecessary force to the cable.
-
Page 58: List Of Setting Items
3-2 List of Setting Items Caution CDX Series products do not support CC-link communication. 3-2-1 Measurement settings The settings and parameters are listed here. For details on individual settings, see "2 Web Settings Screen and Function Details" (Page 2-1). Caution •... - Page 59 Output Item name Selection / Input item Output — Upper Limit [+0.20] (15 mm type) [+0.50] (30 mm type) [+2.00] (85 mm type) [+4.00] (150 mm type) (–99.99 to +99.99) [mm] Output — Lower Limit [‒0.20] (15 mm type) [‒0.50] (30 mm type) [–2.00] (85 mm type) [–4.00] (150 mm type) (–99.99 to +99.99) [mm] Output —...
- Page 60 3-2-2 Initializing settings Follow the procedure shown below to initialize the CDX Series settings with CDA Series operations. When performing initialization, all the CDX Series settings are returned to their default values. MEMO • There is no message or other confirmation when you execute the initialization. Exercise caution when initializing the settings.
-
Page 61: Ethernet Communication
Ethernet Communication Using Ethernet communication, CDX Series products allow users to obtain measurements and to check or change settings. This section explains the communication specifications and the details for various commands. -
Page 62: Communication Specifications
4-1 Communication Specifications This section explains the specifications for Ethernet communication performed through commands. Protocol TCP/UDP (multicast, broadcast) Port number 5011(command transmission)/5010 (continuous transmission) Byte order Big endian Communication Specifications... -
Page 63: List Of Commands For Reading/Writing Settings/Measured Values
4-2 List of Commands for Reading/ Writing Settings/Measured Values Reading of measured values and reading/writing of various settings are performed in the following format. Read „ • Sent command Command (2 bytes) • Reply command Reply (4 bytes) Writing „ •... - Page 64 Legend table Class Command Name Parameter Note 0x0C10 Sampling period 0x00: 12.5 Unit: sec Command name Supplementary explanation (if applicable) Command (2 bytes, hexadecimal form) Individual parameters, formats, R: Read only or initial values for a command R/W: Read/write possible 4-2-1 Acquiring measured results Sensor status/measurement result „...
- Page 65 Measurement value „ Class Command Name Parameter Note 0x0D60 Channel output 1 — Measurement value 0x0D64 Channel output 2 — Measurement value 0x0D68 Channel output 3 — Measurement value 0x0D6C Channel output 4 — Measurement value 4-2-2 Checking/writing settings Measurement „...
- Page 66 Light distribution and Mask settings „ Class Command Name Parameter Note 0x0C44 Waveform mask ON/OFF 0x00: OFF 0x01: ON 0x0C60 Mask start position (1) [nm] (positive near side with the The mask position ignores the value of measurement center as 0) the span/shift/offset setting.
- Page 67 Measurement/output settings (settings per output) „ Command Class Name Parameter: Note (Always 0x0280 0x0300 0x0380 Channel usage 0x00: Not used 0x01: Use 0x0204 0x0284 0x0304 0x0384 Measurement method 0x00: Displacement 0x01: Thickness 0x02: Velocity 0x0208 0x0288 0x0308 0x0388 Peak number 0x00: No.
-
Page 68: Device Settings
Command Class Name Parameter: Note 0x0260 0x02E0 0x0360 0x03E0 Alarm 0x00: Clamp 0x01: Hold 0x02: Delay clamp 0x0264 0x02E4 0x0364 0x03E4 Clamp value at alarm (Numeric input) Unit: mm detection 0x0268 0x02E8 0x0368 0x03E8 Number of alarm (Numeric input) Unit: delay measurements Number of samplings 0x026C... - Page 69 Communication „ Class Command Name Parameter Note 0x0CB0 Input terminal setting 0x00: External Input 0x01: CDA 0x0018 MAC Address (first 6 bytes) 0x0010 IP address Setting the IP address to “0.0.0.0” will initiate DHCP mode and automatically acquire the IP address. 0x0020 Subnet mask 0x0024...
- Page 70 4-2-4 Information Class Command Name Parameter Note 0x0004 Firmware version 0x0008 Software version 0x0120 Temperature Unit: °C 0x0124 Total operating time of sensor Unit: sec 0x0128 Operating time of laser List of Commands for Reading/Writing Settings/Measured Values 4-10...
-
Page 71: Acquiring Measured Values With Time Data
4-3 Acquiring Measured Values with Time Data When measuring thickness, controlling feedback, or performing similar operations, the measurement results of the CDX Series are used when highly accurate time is necessary. When this command is used, the CDX Series attaches the timestamp to the measured value and then outputs the value. -
Page 72: Obtaining Received Light Waveforms And Configuring Mask Settings
Obtaining Received Light Waveforms and Configuring Mask Settings Received waveforms can be obtained with the following commands. The data includes continuously output receiving light level from each point in order starting from close to the sensor head. Read „ • Sent command •... -
Page 73: Setting/Reading Individual Sensor Descriptions
4-5 Setting/Reading Individual Sensor Descriptions CDX Series products allow for writing and reading of individual descriptions. Descriptions are limited to 30 bytes of characters. Read „ • Sent command • Reply command Individual sensor description (30 bytes) Writing „ • Sent command Write data (30 bytes) •... -
Page 74: Continuously Transmitting/Receiving Measured Values Automatically
Continuously Transmitting/Receiving Measured Values Automatically Use this function to continuously transmit measured values automatically from the CDX Series. MEMO The CDX Series only transmits data from communication port “5010” when this function is used to continuously transmit measured values. Writing (starting/stopping continuous transmission) „... - Page 75 4-6-1 Continuous transmission data details When the transmission channel setting is finished, continuous transmission starts on the specified port. • Measured values are transmitted approximately once every 1 ms, and 1 ms worth of data is transmitted each time. For example, if the sampling rate is set to 12.5 μs, 80 data entries (1 ms/12.5 μs) are transmitted as a batch each time.
- Page 76 Sensor status (4 bytes) „ Explanation of bits *1: Explanation of bits … … *2: Explanation of bits Timestamp (4 bytes) „ This is the timestamp for the leading data among all the measurement data to be transmitted. A value between 0 and 999999999 (nsec) is used as the timestamp, which counts down one second at a time to 0.
- Page 77 Measured value (4 bytes) „ 1 ms worth of data is transmitted as a batch. For example, if the sampling period is 500 μs and the data of channels 1, 2, and 3 is being transmitted, the measured values are transmitted as shown below. Channel 1 Channel 2 Channel 3...
-
Page 78: Error Messages
4-7 Error Messages The CDX will send an error in the following format when an error occurs. • Reply command Error details Error name Error details Details Command error 0x00E1 A command that does not exist was specified. Address error 0x00E2 The specified address is out of range. -
Page 79: Specifications
Specifications The following shows the specifications, characteristics, and dimensions of CDX Series products. - Page 80 5-1 Specifications Model CDX-L15 CDX-LW15 CDX-30 CDX-W30 Measurement range* With specular reflection installation: 15 ± 1 mm With diffuse reflection installation: 30 ± 5 mm With specular reflection installation: 25.5 ± 3 mm Light source Red laser, wavelength: 655 nm, max. output: 0.39 mW Laser class IEC/JIS CLASS 1...
- Page 81 Model CDX-85 CDX-W85 CDX-150 CDX-W150 Resolution* 0.1 μm 0.2 μm Repeatability* 0.1 μm 0.2 μm Sampling period 12.5 μs / 25 μs / 50 μs / 100 μs / 200 μs / 500 μs / 1 ms / Auto Temperature drift ±0.01% of FS / °C (at –10 to +40°C), ±0.03% of FS / °C (at +40 to +50°C) Indicators Link indicator (green) / Power indicator (orange/green/blue/red)
-
Page 82: Dimensions
5-2 Dimensions 15 mm type „ (Unit: mm) 59.8 Link indicator (green) 2-ø4.3 Optical axis of receiver Power indicator (orange/green/blue/red) 90° Optical axis of emitter 15± 1 Measurement range 8-pole M12 plug connector 30 mm type „ 66.6 2-φ4.3 Link indicator (green) Power indicator (orange/green/blue/red) Optical axis... - Page 83 85 mm type „ 66.6 Link indicator (green) ø Power indicator Optical axis of receiver (orange/green/blue/red) 20° Optical axis of emitter 85 ±20 Measurement range Specular reflection installation 86.1 77.7 4.2 9.9 8-pole M12 plug connector Optical axis of receiver 20°...
-
Page 84: Characteristics
5-3 Characteristics 5-3-1 Spot size 15 mm type „ φ50 m φ30 m φ50 m (19.8) (21.2) (22.6) Distance (mm) 30 mm type „ φ140 m φ30 m φ140 m Distance (mm) Characteristics... - Page 85 85 mm type „ ø120 m ø70 m ø120 m Distance (mm) 150 mm type „ ø300 m ø120 m ø300 m Distance (mm) Characteristics...
- Page 86 5-3-2 Mutual interference diagram 15 mm type „ Mutual interference area Optical axis of emitter 66.5 55.5 36.5 30 mm type „ Mutual interference area Optical axis of emitter 21.5 Characteristics...
- Page 87 85 mm type „ Mutual interference area Optical axis of emitter 150 mm type „ Mutual interference area Optical axis of emitter Characteristics...
- Page 88 5-3-3 Light axis area 15 mm type „ Light axis area 66.5 55.5 21.5 30 mm type „ Light axis area 15.5 Characteristics 5-10...
- Page 89 85 mm type „ Light axis area 15.5 150 mm type „ Light axis area 60.5 Characteristics 5-11...
-
Page 90: Index
Index Hold set/Hold reset ............ 2-6 Hysteresis ..............2-20 Action............... 2-19 Addressing mode............. 2-28 Alarm ............... 2-23 Included Items ............1-3 Alarm delay.............. 2-25 Initialization button ............. 1-6 Alarm recovery ............2-25 Input terminal setting ..........2-19 Auto Bottom ............. 2-17 IP address ............... - Page 91 Quota ............... 2-31 Rate ................. 2-31 Repeat ..............2-32 Sample Hold ............2-16 Sampling period............2-9 sec/div ............... 2-7 Sensor status............2-33 Sensor time ............. 2-27 Serial No ..............2-34 Setting data storage ..........2-27 Setting data writing ..........2-27 Span ................
- Page 92 Attention: Not to be Used for Personnel Protection. Never use these products as sensing devices for personnel protection. Doing so could lead to serious injury or death. These sensors do not include the self-checking redundant circuitry necessary to allow their use in personnel safety applications. A sensor failure or malfunction can cause either an energized or de-energized sensor output condition.
Need help?
Do you have a question about the FASTUS CDX-L15A and is the answer not in the manual?
Questions and answers