Table of Contents
Advertisement
Quick Links
Advertisement
Table of Contents

Related Manuals for IGEA Cliniporator EPS02


Summary of Contents for IGEA Cliniporator EPS02
- Page 1 User Manual...
- Page 2 MU-EPS02ect_UK - Rev. 3.5_September 2019 Software Rev. 2.6 © IGEA...
-
Page 3: Table Of Contents
Cliniporator model EPS02 – User manual CONTENT INTRODUCTION ..........................5 General Information ........................5 Intended Purpose of the Device ....................5 Indications for Use ........................6 Type of User and Patient ......................6 ... - Page 4 Cliniporator model EPS02 – User manual General Information ........................59 Power Supply Specifications ....................59 Environmental Conditions ......................59 EN 60601-1 Classification......................59 Medical Device Directive Classification 93/42/EEC and 2007/47/EEC......59 ...
-
Page 5: Introduction
Before using the electrodes, it is necessary to consult the instruction sheets provided with them. IGEA reserves the right to implement modifications or updates which will improve the performance of devices without changing the images or instructions found in this manual. -
Page 6: Indications For Use
1.4 Type of User and Patient This device shall be operated by trained medical/scientific staff instructed on electroporation and on the correct use of the device. Please contact IGEA or its authorised distributors to receive proper training. There are multiple types of patients, but in any case they are always patients suffering from pathologies which can be treated with electroporation, especially patients with tumours and/or metastasis who can benefit from electrochemotherapy. -
Page 7: General Description
Cliniporator model EPS02 – User manual 2 GENERAL DESCRIPTION 2.1 System Components C L I N I P O R A T O R consists of a main unit characterised by: a control section called PC Panel made up of a terminal PC equipped with touch-screen on which the application that manages the system is installed, ... -
Page 8: Description Of The Cliniporator Device
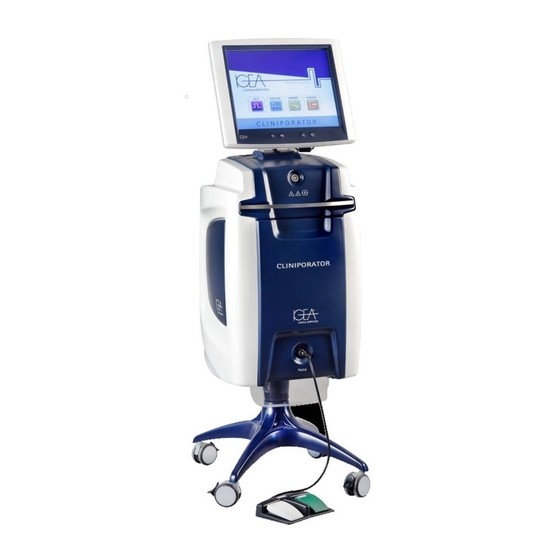
Cliniporator model EPS02 – User manual 2.2 Description of the CLINIPORATOR Device Figure 3 – C L I N I P O R A T O R The main elements of C L I N I P O R A T O R shown in Figure 3 are described below. - Page 9 Cliniporator model EPS02 – User manual User interaction with C L I N I P O R A T O R is similar to that of a PC; the operator dialogues with the device using the PC panel ( Figure 4 ) equipped with touch-screen display. Data are entered by means of a virtual keyboard represented and controlled on the display, while the mouse functions by moving the finger on the screen just like a mouse pointer.
- Page 10 Cliniporator model EPS02 – User manual The lower part of CLINIPORATOR contains the power unit which performs every activity that is closely related to administering and measuring the treatment. The rear panel contains the elements shown in Figure 5, described in the following table: ...
-
Page 11: Safety Instructions
3.1 Warnings 1. The device should only be used by a staff who received proper training and was instructed to correctly use the equipment. Please contact IGEA or its authorised distributors to receive proper training. 2. For electrical safety reasons C L I N I P O R A T O R needs grounding. Use only power supply cords provided by the manufacturer or authorised suppliers. -
Page 12: Cautions
5. The safety and effectiveness of the treatment are not guaranteed if electrodes different from the ones approved and supplied by IGEA manufacturer or by an authorised dealer are used. 6. Unless there is a reasonable doubt that an area has been treated ineffectively, repeating a treatment on the same area is not advisable since it is not believed to increase treatment effectiveness. -
Page 13: Contraindications And Warnings
Cliniporator model EPS02 – User manual 17. Avoid heavy shocks to the equipment during transport. 18. Avoid scratching the LCD screen of the Console. Follow the cleaning instructions described in section 8.3. 19. Before carrying out any cleaning of the system or of its parts, turn it off and disconnect the cord from the mains. -
Page 14: Side Effects
Cliniporator model EPS02 – User manual Warnings When the electroporation is associated to the delivery of drugs, refer to the specific documentation related to the used drugs. The delivery of impulses can be associated with strong muscular contractions, therefore it is recommended to evaluate the use of an anesthesia with TOF (Train Of Four) = 0, especially in the treatment of deep, visceral or open-skinned lesions. -
Page 15: Small Bibliography
Cliniporator model EPS02 – User manual 3.5 Small Bibliography Seyed Jafari SM, Jabbary Lak F, Gazdhar A, Shafighi M, Borradori L, Hunger RE. Application of electrochemotherapy in the management of primary and metastatic cutaneous malignant tumours: a systematic review and meta-analysis. Eur J Dermatol 2018, 28(3):287-313. -
Page 16: Installation And Start Up
Unexpected movements of the electrode could cause harm to the patient. 4.2 System Installation C L I N I P O R A T O R must be installed only by specialized IGEA staff. The parameters which allow the operators to access the system (username and password) are entered during the installation procedure. -
Page 17: Operating The C L I N I P O R A T O R Device
Cliniporator model EPS02 – User manual 4. pull out the red selector by using the slotted screwdriver, 5. place the voltage selector so that the indication of the select voltage is in the upper part, 6. place the selector back in monobloc and close the cover, 7. -
Page 18: System Start Up
Cliniporator model EPS02 – User manual 4.6 System Start up WARNING! Start the device, wait for the completion of the automatic checks that the device performs at power up and check that is functioning correctly, before preparing the patient for treatment. In particular, before subjecting... -
Page 19: Selftest Screen
Figure 20. WARNING If the device shuts down unexpectedly during the selftest it could result in a fault. If the device is rebooted and the problem persists, contact IGEA Customer Service. - Page 20 Cliniporator model EPS02 – User manual During the selftest phase, any issues are flagged by an error message (an example is shown in Figure 11). Figure 11 - Example of an error during the selftest After pressing the confirmation button second message is displayed inviting the operator to insert a USB pen drive to save the error data by pressing the button...
- Page 21 Cliniporator model EPS02 – User manual In the event that a USB pen drive is detected, a message appears informing the user of the beginning of the data copy and advises him not to remove the external media. Figura 14 – USB pen drive scan The message in Figure 15 appears when the Export phase is completed successfully.
- Page 22 Cliniporator model EPS02 – User manual In the case of a pen drive that is not found or faulty, the message in Figure 17 appears, confirming that the shutdown procedure of Figure 16 is activated. Figura 17 – Messaggio di warning per pen drive non trovata If an error is detected during the saving of the data, the message of Figure 18 is shown informing the user of the failure to save and...
-
Page 23: Login Screen
(see section 4.9). Press the button to display a dialogue box with information on software distribution and on IGEA manufacturer (Figura 21 – Informations screen); by pressing the confirmation button the information window closes. Figura 21 – Informations screen... -
Page 24: Unit Shutdown
Cliniporator model EPS02 – User manual 4.9 Unit shutdown To shut down the device, press the red stop button in Figure 20. A dialogue box appears (Figure 22) allowing the confirmation or interruption of the process. Figure 22 - Shutdown screen When the system has completed the shutdown process it shows the screen in Figure 23. -
Page 25: Treatment Performance
System Time Setting In the top-right area of the main menu ( Figure 24) the current date and time are shown. The date cannot be modified. If the date is incorrect, please contact Igea Customer Service. However, the time can be modified. - Page 26 Cliniporator model EPS02 – User manual Figure 25 – Time setting screen A dialogue window is displayed (Figure 26) with the message that the device will automatically shut down after pressing the confirmation button Figure 26 – Automatic shut down following time change...
-
Page 27: Entering Patient Data
Cliniporator model EPS02 – User manual Entering Patient Data By selecting the ECT button from the Main Menu the user can access the Patient Data screen in Figure 27 . The Patient Data screen comprises a section dedicated to the patient's data, a section for notes, the “Logout”... -
Page 28: Electrode Recognition
Cliniporator model EPS02 – User manual Electrode Recognition Before delivering treatment, it is necessary to follow the automatic recognition of the electrode or the electrodes that are intended to be used. After selecting ECT from the Main Menu, the user has access to the Electrode Selection (Figure 28). - Page 29 Cliniporator model EPS02 – User manual 2. bring the TAG placed on the electrode packaging close to the right part of the CLINIPORATOR, identified by the symbol , and hold it in this position until the system recognises the electrode. Figure 30 –...
-
Page 30: Non-Recognition Of The Electrode
Cliniporator model EPS02 – User manual If the identification goes through, the system goes back to the “ELECTRODE SELECTION” screen in Figure 37, where the recognised and identified electrode has already been entered in ). the electrode list for use (Figure 37, If during the identification process the system detects an error, a dialogue box appears informing about the possible causes and the process is stopped. - Page 31 Cliniporator model EPS02 – User manual In the case where the selftest shows an electrode automatic recognition fault (see section 4.7) and, consequently, only the manual recognition procedure is allowed, the notice in Figure 34 will appear by pressing the "electrode selection" button (Ref.
-
Page 32: Electrode Selection
Cliniporator model EPS02 – User manual Electrode selection After identifying all the electrodes needed for the treatment through the process described in section 5.4, select the electrode to be used by pressing the indicator button placed to the right and to the left of the electrode image (Figure 37 ), which could result enabled or not depending on the number of electrodes loaded, and then press the electrode image. -
Page 33: Ecg Synchronisation
Cliniporator model EPS02 – User manual ECG Synchronisation Only in case of ECT treatments, C L I N I P O R A T O R allows to synchronise pulses delivery with an ECG signal, in the following named “ECG sync”. To be able to use this function, connect a "R-wave trigger"... - Page 34 Cliniporator model EPS02 – User manual Positive outcome: the dialogue box in Figure 40 shows that the test has been passed. By pressing on the confirmation button the window closes and the "ECG sync" button becomes active (green). Figure 40 - Dialogue box confirming ECG synchronism activation ...
-
Page 35: Minimum Requirements For The Ecg Synchronisation
Cliniporator model EPS02 – User manual WARNING Treatment may interfere with cardiac activity if applied to the chest, left arm, or abdominal cavity. It can cause atrial or ventricular fibrillation or other arrhythmias. We recommend the use of an R-wave detector to synchronize treatment with the refractory period of the cardiac cycle, unless there is reasonable certainty that the treatment site is sufficiently far from the heart and the treatment can not interfere with the cardiac activity. -
Page 36: Treatment Screen
Cliniporator model EPS02 – User manual Treatment Screen After identifying and selecting the electrode, the operator accesses the treatment screen (Figure 43). Figure 43 - ECT treatment screen The patient's name and family name are shown in the top-left area while the treatment ... - Page 37 Cliniporator model EPS02 – User manual Pressing the icon activates the virtual keyboard that allows you to enter explanatory notes about the treatment performed. Pressing the confirmation button removes it by saving the entered data, pressing the button cancels the entered data. Figura 44- Virtual keyboard Once started, the program waits until the operator selects the number of the nodule by pressing the increase/decrease buttons...
- Page 38 Cliniporator model EPS02 – User manual The pedal pulse (Pulse) green pedal in Figure 2 must be activated within 10 seconds after pressing the pedal activation (Arm). Once the pedal has been pressed and the delivery of the treatment starts, the system sends an acoustic signal and the information about the system status shown in the status frame is updated (Figure 46 ).
- Page 39 Cliniporator model EPS02 – User manual The background of the status frame is coloured according to the level of treatment "quality": Green - successfully delivered treatment: average current higher than the minimum threshold expected for the selected electrode. ...
-
Page 40: Ecg Synchronisation During The Treatment
Cliniporator model EPS02 – User manual ECG Synchronisation during the Treatment 5.10 Only in case of ECT treatments, in the treatment screen (Figure 43) the icon with the same symbol present in the electrode selection window and an explanatory message below it inform the operator about the synchronisation status with the ECG signal. - Page 41 Cliniporator model EPS02 – User manual Figure 51 - Dialogue box for anomaly on ECG signal during the treatment The “Resume” button is initially shown in grey (inactive) and is activated (green) only if the ECG signal becomes stable within 2 minutes. In this case, after pressing the above mentioned button the window closes and the treatment is resumed.
-
Page 42: Serious Errors Of The Power Part During Operation
Cliniporator model EPS02 – User manual Serious Errors of the Power Part during Operation 5.11 In the case of communication problems between the graphic interface and the power unit or in case of malfunction of the same, on the monitor appears a message that provides information ... -
Page 43: Storing And Exporting Treatment Parameters And Waveforms
Cliniporator model EPS02 – User manual Storing and Exporting Treatment Parameters and Waveforms 5.12 C L I N I P O R A T O R automatically stores in a “treatment file” the treatment parameters and the waveforms resulting from delivery. Every file related to a treatment contains: data regarding the health facility ... - Page 44 Cliniporator model EPS02 – User manual The exportation process consists of three phases: selecting the date of the treatment data to be exported selecting the treatments exporting on a USB pen drive. Regarding the numbering in Figure 55, the displayed elements are: ...
- Page 45 Cliniporator model EPS02 – User manual By pressing the button , which is activated only after making a selection, window Figure appears, informing the user that the device will calculate the space necessary to contain the files to be exported. Figure 56 - USB stick connection request A subsequent message informs about the free space required for the USB pen...
- Page 46 Cliniporator model EPS02 – User manual A message informs the user of the USB media scan. Figura 59 - Scansione If the pen drive is recognized, a dialog box informs the user that the media has been recognized and does not need to be removed until the procedure has been completed.
-
Page 47: Use Of Electrodes
Cliniporator model EPS02 – User manual 6 USE OF ELECTRODES Electrodes C L I N I P O R A T O R must be used together with an applied part, approved by IGEA, the “Disposable sterile electrodes for IGEA electroporators”. The electrodes... -
Page 48: Handle For Connecting The Electrodes
Cliniporator model EPS02 – User manual Some electrode models must be connected to CLINIPORATOR using the HANDLE supplied together with the CLINIPORATOR. Accessory Type Description Blue Handle Handle Re-sterilizable handle for needle electrodes, EPS IG0M910 series, in linear configuration Green Handle Handle Re-sterilizable handle for needle electrodes, EPS IG0M915... -
Page 49: Cleaning, Care And Recommended Replacement Of The Handle
Cliniporator model EPS02 – User manual Align the arrow printed on the handle connector with the dot printed on the output connector of CLINIPORATOR Insert the connector in the socket and push until it is firmly connected. Figure 63 - Connecting the handle to C L I N I P O R A T O R To disconnect the handle from the C L I N I P O R A T O R just hold the connector and take it out pulling it perpendicularly from the generator support but not in a strong way. -
Page 50: Handles Storage Instructions
Cliniporator model EPS02 – User manual The manufacturer is not responsible for consequences resulting from prolonged use of the handle beyond the duration herein specified, or resulting from the use of damaged, worn out or tampered handles. The warranty given by the manufacturer of C L I N I P O R A T O R decays if damaged, worn out or tampered handles are used. -
Page 51: Troubleshooting
Can't open serial device Restart the device, if the problem persists, Software problem contact the Customer Service of IGEA S.p.A. The charging process of the high voltage pulse generator cannot be Try to repeat the capacitors charge. - Page 52 Cliniporator model EPS02 – User manual Error message Possible causes What to do Check if each ECG cable of the Synchronizer is connected to the correct ECG electrode (i.e. there is The ECG leads were not positioned not a reversal of the leads).If the connections match as expected.
- Page 53 Continue with the treatment. If the problem persists, Error during data treatment saving. Treatment has been contact the Customer Service of IGEA S.p.A. completed correctly but data will be lost The USB device used is defective. Replace the USB device.
- Page 54 Too many tags found RFID transponder works Contact Customer Service of IGEA S.p.A. abnormally or is damaged. During treatment, system detected a too high current between Check the electrode position. It is recommended to...
-
Page 55: Unknown Cause Error Messages
The error messages reported in this section relate to unforeseeable problems and therefore cannot be resolved by precise user action. In the presence of one of these messages, the user can restart the device and, if the problem persists, contact the Customer Service of IGEA S.p.A. Error message... -
Page 56: Maintenance
Cliniporator model EPS02 – User manual 8 MAINTENANCE 8.1 Routine Maintenance Table 1 indicates the routine maintenance checks - recommended by the manufacturer - that the user has to perform- to ensure the equipment correct operation. In general it is not possible to carry out maintenance operations while the device is in use on the patient. -
Page 57: Cleaning
Cliniporator model EPS02 – User manual Cleaning For the periodic cleaning of the device use a soft cloth slightly damped with water or sanitizing wipes (certified as a medical device). Do not pour water or other liquids directly on the device. -
Page 58: Power Supply Cord Replacement
Cliniporator model EPS02 – User manual Power Supply Cord Replacement To replace the power supply cord use a 4mm Allen key. This procedure is described below: unscrew the screw which secures the cable clip to the rear panel of the device ... -
Page 59: Technical Data
Cliniporator model EPS02 – User manual 9 TECHNICAL DATA General Information Manufacturer: IGEA S.p.A. Via Parmenide, 10/A 41012 Carpi (MO) Italy Commercial name: CLINIPORATOR Model: EPS02 Power Supply Specifications Main switch voltage 115/230 VAC Main switch frequency 50-60 Hz Maximum power input... -
Page 60: High Voltage Pulses
Cliniporator model EPS02 – User manual High Voltage Pulses The following table shows the maximum and minimum values for each parameter considered alone. The product of Number of pulses times Pulse duration must be less than 1000 µs. Number of Pulses 1 –... - Page 61 Cliniporator model EPS02 – User manual Guidelines and Manufacturer Declaration – electromagnetic immunity C L I N I P O R A T O R can be used in the electromagnetic environment specified below. The client or user of C L I N I P O R A T O R should ensure that it is used in such environment. Test level of Guidelines –...
- Page 62 Cliniporator model EPS02 – User manual Guidelines and MANUFACTURER Declaration – electromagnetic IMMUNITY CLINIPORATOR can be used in the electromagnetic environment specified below. The client or user of CLINIPORATOR should ensure that it is used in such environment. Guidelines – electromagnetic Immunity test Test level of IEC 60601 Compliance level...
- Page 63 Cliniporator model EPS02 – User manual Recommended separation distance between portable and mobile radio communication devices and CLINIPORATOR CLINIPORATOR should be used in an electromagnetic environment where the emitted RF interferences are under control. The client or user of CLINIPORATOR can help preventing electromagnetic interferences by maintaining a minimum distance between portable and mobile RF (transmitters) communication devices and CLINIPORATOR, as shown below, paying attention to respect the maximum output power of the communication devices.
-
Page 64: End Of Life Disposal
Cliniporator model EPS02 – User manual CLINIPORATOR includes an RFID device that has the following characteristics: Antenna Loop type; area < 0.05 m Frequency band 13.553 – 13.567 Mhz Maximum power of RF signal < 60 dBuA/m at 10 m Modulation Backscatter ASK Transmission standard... -
Page 65: Symbols
Cliniporator model EPS02 – User manual 10 SYMBOLS Standard Symbols Used 10.1 The following symbols, used in C L I N I P O R A T O R or its separable parts comply with international standards. Symbol Meaning Where it appears Protective ground connection On every protective ground connection. -
Page 66: Non Standard Symbols
Cliniporator model EPS02 – User manual Non Standard Symbols 10.2 The following are custom symbols, which are also used on C L I N I P O R A T O R or its separable parts. Symbol Meaning Where it appears Printed on the side cover of the generator to RFID reader antenna indicate the area in which the RFID reader... -
Page 67: Warranty And Manufacturer's Liability
Cliniporator model EPS02 – User manual 11 WARRANTY AND MANUFACTURER'S LIABILITY IGEA manufacturer is responsible for the safety, trust and performance of the equipment only if: The installation of the system is carried out by a qualified technician authorised by the manufacturer. -
Page 68: Annex 1 - Ec Certificate
ANNEX 1 - EC CERTIFICATE... - Page 70 IGEA S.p.A. Via Parmenide, 10/A – 41012 Carpi (MO) Italy PHONE: 059 699600 – FAX: 059 695778 email: info@igeamedical.com – http: //www.igeamedical.com...
Need help?
Do you have a question about the Cliniporator EPS02 and is the answer not in the manual?
Questions and answers