
Related Manuals for gefran ADP200


Summary of Contents for gefran ADP200
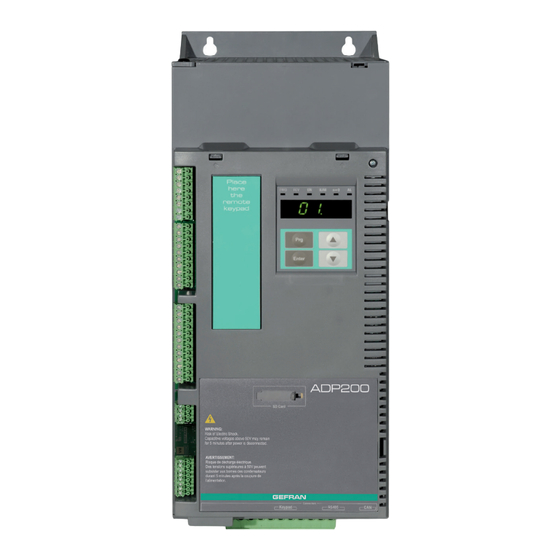
- Page 1 ADP200 English Pressure/Flow Control for Hybrid Injection Molding Machines User Manual...
-
Page 2: Menu 5.3 References; Renamed Par 11066 To Press
Before using the product, read the safety instructions section carefully. Keep the manual in a safe place and available to technical personnel during the product functioning period. Gefran Drives and Motion Control S.r.l. reserves the right to modify products, data and dimensions without notice. -
Page 3: Table Of Contents
MULTIPUMP parameter list ....................... 68 5.12 TUNING menu ..........................69 5.12.1 TUNING parameter list ......................70 5.13 CAN Menu ............................. 71 5.14 MONITORS menu ......................... 74 5.15 ABOUT menu ..........................76 Application Alarm ........................... 77 ADP200 Application PID-IMM User Manual Pag. 3 of 80... -
Page 4: Introduction
Chapter 3 - "Connection diagrams and system interface" illustrates typical connection diagrams and the command interface for controlling the application via digital I/O or fieldbus. Chapter 4 - "Commissioning" provides information about installing the application on the ADP200 drive. Chapter 5 - "Application functions List of Parameters" contains detailed information about application functions, operating modes and the complete list of system parameters. -
Page 5: General Description
Energy-Saving vs Conventional fixed-pump IMM = saving of 55% Energy-Saving vs Variable-pump IMM = saving of 17%. The drive thus receives Flow and Pressure references and the Pressure feedback, as shown in picture below. ADP200 Application PID-IMM User Manual Pag. 5 of 80... - Page 6 The diagram below shows a typical pattern of the flow (speed) and pressure references during a complete machine cycle. Machine movements are sequentially managed and each axis is selected through directional valves that open/close the respective hydraulic circuit. ADP200 Application PID-IMM User Manual Pag. 6 of 80...
- Page 7 The multi-pump convergent mode is used on bigger machines (> 300-400 Tons), allows operation of 1 master pump, controlled by an ADP200 running flow/pressure control, and 1 or more slave (Max. 6 slaves) pumps that operate speed (flow) control only.
- Page 8 The multi-pump in convergent/divergent mode allows, in divergent mode, to use two ADP200 that can operate independently on 2 different hydraulic circuits for contemporary management of 2 movements. When operating divergent mode, machine controller must deliver a double flow/pressure profile reference to the drive, each one operating as a master on its own circuit, with 2 pressure sensors;...
-
Page 9: Description Of The Control Function
• PID-IMM Controller • ADP200 Speed control PID-IMM controller is the core of the application. The control needs as input the Pressure feedback measured from external sensor, the pressure reference and the speed reference. These information are processed by the reference and the feedback Input interfaces. -
Page 10: Connection Diagrams And System Interface
3.2 Single Pump Analog and digital I/Os configuration The example below shows a typical configuration of the digital inputs and outputs of the drive ADP200, in the basic configuration. Digital input signals can be set as shown in the typical startup procedure(see figure below): Figure 7: ADP200 Typical Analog &... - Page 11 Here the I/O board jumper for the Analog I/O setting in Voltage/current (OFF = Voltage, ON = Current) P2: Pressure sensor analog input AIS P3: Analog Input AI1 P4: Analog Input AI2 P5: Analog Output AO Figure 8: Analog Input Configuration ADP200 Application PID-IMM User Manual Pag. 11 of 80...
-
Page 12: Single Pump Configuration Via Canopen
120ohm Machine CANOPEN FIELDBUS Figure 9: ADP200 CANopen PLC master Digital & Analog I/O connection Figure 10: ADP200 with PLC CANopen master Bus Connection and termination Typical I/O terminals (Regulation board + I/O expansion) Digital Input (T1): M9 = EN HW – (*) Enable (not programmable must be 24V if command done via control word) M8 = DI1 –... - Page 13 : Drive Ready (**) M26 = DO2 : Drive Ok (**) (**) Digital output signals can be send to the master via CANopen PDO channel as bit in the ADP200 Status word (WORD COMP). Example of FieldBus Configuration at 500K address 3: Example of assignment of process data: FieldBus M ->...
-
Page 14: Multi- Pump Configuration Via Can Interface
Drive Can Port is the same for PLC master and Multi-Pump messages and then there are some specific rule to follow. For more information contact us at tecnohelp@gefran.com. Also here user must follow the same connection for CAN-BUS reported in the previous chapter and in the ADP200 QS (Quick Start) manual. -
Page 15: Multi-Pump Convergent Configuration
In this example, the commands and reference signals between machine PLC and ADP 200 Master done via Digital & Analog inputs. The application allows the possibility to configure via parameters all the ADP200 for Multi-Pump purposes. The connection among drives need to be done by using CAN HW layer. The picture reported below shows the... -
Page 16: Multi - Pump Convergent & Divergent Configuration
Feedback1 DRV2 DRV1 DRV3 DRVn Slave Master Slave Slave PLC (Panel) (Master1) Max 6 Slave PressureReference FluxReference Start Enable Converget/Divergent PressureReference1 FluxReference1 Figure 14: ADP200 Example Multi-Pump Convergent & Divergent System ADP200 Application PID-IMM User Manual Pag. 16 of 80... -
Page 17: Commissioning Via Gf_Express
This section describes a standard application commissioning procedure using a PC with Gefran GF-eXpress configurator. The startup with a PC require Gefran GF-eXpress version 1.9.15 or higher and Catalog 2.38.0 or higher installed, the RS485 - PCI COM connection kit to the drive and the CD to install the Application. -
Page 18: Preliminary Operations And Pid-Imm Application Startup (Guided Procedure)
Check the connections, with particular attention to shieling (see wiring diagram) in order to reduce interference and noise. Take particular attention to the Resolver/Encoder shield connection for detail see. ADP200 QS manual. See the ADP200 QS manual for details on steps 1….9, 11 and 12. - Page 19 Step 1 - Electrical connections Make the connections as described in paragraph 7.3.2. of ADP200-QS manual. Checks to be performed before powering the drive • Check that the supply voltage is correct and that the input terminals on the drive (L1, L2 and L3) are connected correctly.
- Page 20 These data are lost if the device is switched off. To save the motor data follow the procedure described in step 12. Press the forward key to display the next page for autotuning (step 3). ADP200 Application PID-IMM User Manual...
- Page 21 If you press the “Autotune rotation” or “Autotune still” button, the following message appears: Bring the Enable input to 24V, then press the “Autotune rotation” or “Autotune still” button. The autotune sequence starts. The percentage of progress is shown on the “autotune progress” bar. ADP200 Application PID-IMM User Manual Pag. 21 of 80...
- Page 22 When autotuning is done the bar is at 100%. Autotune status is “Done,” as shown in the following figure: If you press the forward button, the following message appears: ADP200 Application PID-IMM User Manual Pag. 22 of 80...
- Page 23 Return the Enable input to 0V and press the forward key to go to the next page. ADP200 Application PID-IMM User Manual Pag. 23 of 80...
- Page 24 The incorrect configuration of the encoder tension can permanently damage the device; therefore, it is advisable to check the values on the encoder’s specification plate. Enter the resolver / encoder parameters and then go to the next page. ADP200 Application PID-IMM User Manual Pag. 24 of 80...
- Page 25 For more information see parameters 17.23 PAR 2190 Autophase rotation and 17.24 PAR 2192 Autophase still on "Functions description and parameters list" manual (ADP200 Vector inverter for Hybrid injection molding machines). See section A.3.2 Phasing in the Appendix for further information (ADP200 QS manual).
- Page 26 When autophasing is done the bar is at 100%. Autophase status is “Done,” as shown in the following figure: Return the Enable input to 0V and press the forward key to go to the next page. ADP200 Application PID-IMM User Manual...
- Page 27 Enter the full-scale speed value. The overspeed threshold is automatically calculated. Go to the next page. Speed loop tuning values are entered on this page. See the “1S9PFPEN_.._ADP200FP-SYN_EN” manual for more information. Next page. ADP200 Application PID-IMM User Manual Pag. 27 of 80...
- Page 28 Step 8 – Motor overtemperature setting Motor OT protection management: selection of the source, threshold and sensor type setting, behaviour of the drive in case of a motor overtemperature alarm. Next page. ADP200 Application PID-IMM User Manual Pag. 28 of 80...
- Page 29 External braking resistor: enabling of the overload control, setting of the resistance value and of the power that can be continuously dissipated. Enable and enter plate values of the braking resistor connected to the drive. Next page. ADP200 Application PID-IMM User Manual Pag. 29 of 80...
- Page 30 (IPA 11014), which normally must be enabled at this stage of commissioning of the drive. Paragraph 5.1.1 “List of parameters for CONFIGURATION MENU” shows the preset recipe at the Auto- Setup command. ADP200 Application PID-IMM User Manual Pag. 30 of 80...
- Page 31 MULTIPUMP menu. Next page: In case of Multi-Pump application, set the following CAN config parameters according to the instructions given in the MULTIPUMP paragraph and on the CAN menu. Next page. ADP200 Application PID-IMM User Manual Pag. 31 of 80...
- Page 32 Next page. Step 12 - Save parameters To save the new parameter settings, so that they are maintained also after power-off, proceed as follows: ADP200 Application PID-IMM User Manual Pag. 32 of 80...
- Page 33 When the parameters have been saved correctly the drive displays the initial screen to show that the startup wizard is complete. ADP200 Application PID-IMM User Manual Pag. 33 of 80...
-
Page 34: Drive System Parameter Mandatory Settings
IPA 652 Speed Ref2 = Digital Par IPA 642 Digital Par = 0 cnt IPA 666 Speed Reference Filter = 2 ms GF-eXpress diagram: Figure 18: GF-Express Speed Reference block diagram ADP200 Application PID-IMM User Manual Pag. 34 of 80... -
Page 35: Drive Commands
The analog input menu can be changed according the type of pressure sensor used. The application offset and gain tuning of the analog sensors are required. For more detail about analog input tuning sequence and parameters see ADP200 FP (Function Parameter) Manual. Here the most important information. For the pressure sensor analog input (AnInp1Std) offset command can be done with zero pressure while Gain require the maximum pressure and should be done only when the machine is running. - Page 36 IPA 1016 Terminal Start Src = Digital Input 1X mon Figure 23: Commands Management In the above scheme Fault Reset is to Digital input 5x IPA 4500 Fault reset src = Digital input 5x mon ADP200 Application PID-IMM User Manual Pag. 36 of 80...
-
Page 37: Pid_Imm Basic Control Settings
Ipa 11132 Nominal pump speed 2400 rpm Ipa 11134 Nominal Pump pressure 140 bar Ipa 11136 Full Scale Press Sens 200 bar Ipa 11094 Analog pressure gain 1.00 Figure 24: PID_IMM Configuration ADP200 Application PID-IMM User Manual Pag. 37 of 80... -
Page 38: Pid Imm: Pump Direction Of Rotation
11010 Pump Direction to POSITIVE in CONFIGURATION menu 5) Disable Drive 6) Set Ipa 11000 Control Selector = ADP200 on CONFIGURATION menu, so that both pressure and speed references are processed by application. 7) Set pressure reference and flow reference sources (Ipa 11054 and Ipa 11056 respectively) to final assignment (analog inputs or fieldbus process data). -
Page 39: Speed Loop Tuning
In the chapter “TUNING menu” there are all information related to speed/ pressure Automatic Tuning sequence. For additional information related how to tune these gains (Manual tuning) see chapter “Gain menu” on the “Application Function List of Parameters” of this manual. ADP200 Application PID-IMM User Manual Pag. 39 of 80... -
Page 40: Application Functions List Of Parameters
During basic motor startup, speed control without P/Q regulation is possible by setting parameter Ipa 11000 Control Selector to “SPEED”; for pressure / flow regulation. Control Selector will have to be set to “ADP200” starting from Version 1.0.0 with PID IMM application version 1_x37_0 (Standard P+S is the old application) In CONFIGURATION menu user has the possibility to make the proper selection for control and general settings. -
Page 41: List Of Parameters For Configuration Menu
This command will set the drive system parameter in order to be ready for standard application (0…10 V Analog Input Signals) see paragraph 4.3. When active the parameter perform the operations and automatically return “OFF” (in ADP200 Fw1_0_0 PID-IMM 1-x.37.0 the transition from “On” to OFF” value must be done manually. 0=OFF... - Page 42 1020 Digital Start src (*) 1410 Dig output 1X src 1430 Dig out 1X inversion 596 Save Par To SD 598 Load Par From SD (*) parameters visible on Expert mode only. ADP200 Application PID-IMM User Manual Pag. 42 of 80...
-
Page 43: Protections Menu
If the torque is more than “ISA Torque Min 11040” and the pressure in lower than “ISA Press Threshold 11042” for a time more than “ISA Time Out 11044” Pressure Sensor alarm is triggered. Parameter “ISA Alarm Enable 11046” enable this function. ADP200 Application PID-IMM User Manual Pag. 43 of 80... -
Page 44: List Of Parameters For Protections Menu
Normally the pump can only rotate in the opposite direction to normal operation if pressure exceeds the minimum values specified by parameter IPA 11122. Nevertheless, if the pressure sensor is set incorrectly and/or does not work correctly, negative rotation of the motor may occur. ADP200 Application PID-IMM User Manual Pag. 44 of 80... - Page 45 Max Neg Speed Time Setting of the maximum length of time (in ms) above which the NegSpeed alarm activates if the pump’s speed is negative. ADP200 Application PID-IMM User Manual Pag. 45 of 80...
-
Page 46: References Menu
5.3 REFERENCEs menu Pressure feedback block diagram Pressure reference block diagram Flow reference block diagram ADP200 Application PID-IMM User Manual Pag. 46 of 80... - Page 47 (Convergent mode) This two parameters are used only in case of multi-pump Master Drive with PID IMM/CAN/[11626]CANMPacrive = ON 11560 = DivPressRef: source of Press. Ref. is external CANopen master (Divergent mode) ADP200 Application PID-IMM User Manual Pag. 47 of 80...
- Page 48 4094 = Fieldbus M->S8: source is fieldbus process data channel 8 11554 = PLCPressRef: source of Press. Ref. is external CANopen master (Convergent mode) 11556 = PLCSpeedRef: source of Speed Ref. is external CANopen master (Convergent mode) ADP200 Application PID-IMM User Manual Pag. 48 of 80...
- Page 49 Press Ramp Dec Coef Deceleration ramp coefficient for speed referred to IPA 11132 Nominal pump speed. The speed fall time is referred to a speed variation from 0 to Nominal pump speed. If parameter is set to 0, no ramp is applied. ADP200 Application PID-IMM User Manual Pag. 49 of 80...
- Page 50 Speed Ramp Dec Coef Deceleration ramp coefficient for pressure referred to IPA 11134 Nominal pump press. The pressure fall time is referred to a pressure variation from 0 to Nominal pump press. If parameter is set to 0, no ramp is applied. ADP200 Application PID-IMM User Manual Pag. 50 of 80...
-
Page 51: Basicrun Menu
Pressure reference in Basic Run mode BasicRunDelayTime Delay time to exit from the basic run mode when either pressure and speed reference are greater than thresholds (Ipa 11334 & Ia 11338) ADP200 Application PID-IMM User Manual Pag. 51 of 80... -
Page 52: Gain Menu - Pressure And Speed Control Loop
MotorSpeedReference Pressure Control Speed (Flow) Control Figure 25: ADP200 Pressure & Flow (Speed) Control Loop Relevant parameters for the two regulation loops can be found on GAIN menu: Pressure PID Loop Parameters Kp Pressure Control is the proportional action gain for pressure control (bar -> rad/s). -
Page 53: Gain Tuning
Figure 26: Softscope Acquisition during injection As example on softscope it is possible to make comparison between the reference and feedback of Speed and Pressure. The following figure show a scope with Reference variation parameter. ADP200 Application PID-IMM User Manual Pag. 53 of 80... -
Page 54: List Of Parameters Gain Menu
100.00 11096 Ki Speed Control FLOAT 0.00 1000.00 11098 AntiWindupGain FLOAT 0.00 1.00 Kp Pressure Control Proportional gain for pressure control loop. Ki Pressure Control Integral gain for pressure control loop. ADP200 Application PID-IMM User Manual Pag. 54 of 80... - Page 55 Bandwidth of Filter applied to pressure feedback for derivative part. Kp Speed Control Proportional gain for speed control loop. Ki Speed Control Integral gain for speed control loop. AntiWindupGain Anti-Windup Gain ADP200 Application PID-IMM User Manual Pag. 55 of 80...
-
Page 56: Saturation Limit
Neg(ative)SpeedLowPr(essure) set the level of pressure that disable the hysteresis for low saturation pressure loop speed set point. Ipa 11124 NegSpeedHighPr: Neg(ative)SpeedHighPr(essure)set the level of pressure that enable the hysteresis for low saturation pressure loop speed set point. ADP200 Application PID-IMM User Manual Pag. 56 of 80... -
Page 57: Switch_Gain Menu
Pressure Set Point is above the specified value P_Cont_Dis_Thr Pressure control is disabled if the relative percentage error of Pressure Feedback and internal Pressure Set Point is below the specified value ADP200 Application PID-IMM User Manual Pag. 57 of 80... -
Page 58: Gain_Sch Gain Scheduling
Over high speed threshold (Ipa 11178): GAIN is equal to “High Gain” (Gain Sch Sp Kxx (H)). Note that speed loop scheduling is available in the standard firmware Menu SPEED REG GAINS (expert mode). ADP200 Application PID-IMM User Manual Pag. 58 of 80... - Page 59 Guideline about how to use the GAIN_SCH menu Gain schedule block diagram The application PID-IMM for ADP200 drive allows the possibility to change the behavior of the pressure loop gain according to the actual motor speed. This function is known as Gain-Scheduling, below are reported some hints about how to set the parameters.
- Page 60 If parameter 11180 is OFF, the parameter set is determined by the combination of 2 bits. The lower bit’s source is given by parameter 11184 MGain Term Source 1 while that of the upper bit by parameter 11186 MGain Term Source 2. In general, the following scenario is possible: ADP200 Application PID-IMM User Manual Pag. 60 of 80...
-
Page 61: Gain Scheduling Parameter List
Scaling factor 2 (High) for pressure loop Kp. Gain Sch Sp Ki (H) Scaling factor 2 (High) for pressure loop Ki Gain Sch Sp Kd (H) Scaling factor 2 (High) for pressure loop Kd. ADP200 Application PID-IMM User Manual Pag. 61 of 80... - Page 62 Integral gain for the pressure control - set n.3. Active Kp Press Display of the gains applied to the Kp variable. Active Ki Press Display of the gains applied to the Ki variable. ADP200 Application PID-IMM User Manual Pag. 62 of 80...
-
Page 63: Io_Filters Menu
Enabler Sp Ref F Enables speed reference input filter. 0=DISABLED 1=ENABLED Filt Freq Speed Ref Speed reference filter frequency. InputFilter Enabler Enables pressure feedback input filter. 0=DISABLED 1=ENABLED InputFilterCoeff Pressure feedback filter frequency. ADP200 Application PID-IMM User Manual Pag. 63 of 80... - Page 64 Notch Damp at Cut F Notch filter smoothness. Output Notch Enabler Enables notch filter on speed feedback. 0=DISABLED 1=ENABLED Output Notch freq Notch filter frequency. Output Notch Smoothness Notch filter smoothness. ADP200 Application PID-IMM User Manual Pag. 64 of 80...
-
Page 65: Adapt Feed Forward Menu
5.10.1 ADAPT FEEDFORWARD Parameter List Parameter Name Unit Type Default 11246 DynamicFFEnabler Enum ENABLED 11248 DynamicFFGain Float DynamicFFEnabler Enables feed-forward control. 0=DISABLED 1=ENABLED DynamicFFGain Scaling of integrator limitation (strong = 1.0, weak = 100.0). ADP200 Application PID-IMM User Manual Pag. 65 of 80... -
Page 66: Multipump Menu
Slave Slave 1 Slave 1 DRIVE 3 Slave Slave 2 Slave 2 DRIVE 4 SlaveDivMaster Slave 3 DivMaster DRIVE 5 SlaveDivSlave Slave 4 DivSlave The following tables show some parameter configuration: ADP200 Application PID-IMM User Manual Pag. 66 of 80... - Page 67 2- Drive 4 in divergent mode DRIVE 1 DRIVE 2 DRIVE 3 DRIVE 4 DRIVE 5 MASTER SLAVE 1 SLAVE 2 DIV MASTER DIV SLAVE DIV/CONV = DIVERGENT Figure 35: Control in Divergent mode ADP200 Application PID-IMM User Manual Pag. 67 of 80...
-
Page 68: Multipump Parameter List
(1 or 2) Slave Pmp Flow Ratio It is the ratio between the Master displacement and the Slave displacement. Switch Threshold It is the Master speed threshold that makes enable the slaves ADP200 Application PID-IMM User Manual Pag. 68 of 80... -
Page 69: Tuning Menu
When IPA 11484 and 11494 are switched ON, the tuned parameters are immediately applied. As recommendation, this operation should be done when enable is OFF or at least operator must be ready about the change. ADP200 Application PID-IMM User Manual... -
Page 70: Tuning Parameter List
Pressure loop tuned Kp Press Loop Ki Pressure loop tuned Ki SLT Tau (expert mode) SLT Gain (expert mode) Speed Loop Kp Speed loop tuned Kp Speed Loop Ki Speed loop tuned Ki ADP200 Application PID-IMM User Manual Pag. 70 of 80... -
Page 71: Can Menu
5.13 CAN Menu The parameter in this menu are used only in the ADP200 PID-IMM multi-pump configuration. The example described in multi pump menu show how program the parameter Slave xActive and master address. Parameter Name Unit Type Default 11602... - Page 72 If you do this association you can then program directly the bit of wdecomp to the commands. COState: communication status. On the Slave is 1 if the PDO of the Master is received. ADP200 Application PID-IMM User Manual Pag. 72 of 80...
- Page 73 On DivSlave, it is 11h if it is in communication with the master and the DivMaster SlaveState1..SlaveState6: Monitor the status of the single slave. It is valid only on the master ADP200 Application PID-IMM User Manual Pag. 73 of 80...
-
Page 74: Monitors Menu
Float 12030* P - Output Float 12032* D - Output Float 12034* I - Output Float 12036* Est Gain (P/Q) Float 12052* Basic Run State BOOL 12116* Control Mode Pressure Enum ADP200 Application PID-IMM User Manual Pag. 74 of 80... - Page 75 (*) TORQUE an SPEED is displayed according the pump direction convention. Example is the direction is negative and motor speed [260*] is negative, the Speed Feedback [12006*] show the same value but positive. ADP200 Application PID-IMM User Manual Pag. 75 of 80...
-
Page 76: About Menu
Mdplc Version Float 12048* Config Version Float 12050* Appl Date Float ApplVersion Application Version. Mdplc Version MDPLC compiler version. Config Version GF-eXpress configurator version. Appl Date Release date of current version. ADP200 Application PID-IMM User Manual Pag. 76 of 80... -
Page 77: Application Alarm
Note that all the other drive alarms (Eg. OverVoltage…) are listed and described in the ADP200 QS (Quick Start) manual in the troubleshooting chapter. As described in the ADP200 FP manual in the alarm chapter, for each alarm the possible activity (or Action) are:... - Page 78 Chapter SAT_LIMIT. In such cases, the setting of parameter 11050 Max Neg Speed Time should be checked. ADP200 Application PID-IMM User Manual Pag. 78 of 80...
- Page 79 ADP200 Application PID-IMM User Manual Pag. 79 of 80...
- Page 80 ADP200 Application PID-IMM User Manual Pag. 80 of 80...