
Related Manuals for gefran RADIUS APV 1700-2M-TL


Summary of Contents for gefran RADIUS APV 1700-2M-TL
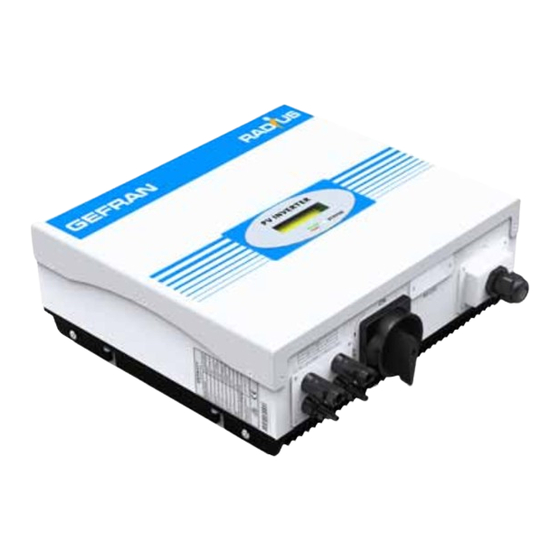
- Page 1 RADIUS Home Single phase solar inverters Solar Inverters ..Installation & operation manual...
- Page 2 Gefran S.p.A has the right to modify products, data and dimensions without notice. The data can only be used for the product description and they can not be understood as legally stated properties.
-
Page 3: Table Of Contents
Contents 1. Introduction ............................5 Design Overview ............................5 Opening the package .............................5 2. Installation .............................6 Installation manual ............................6 Mounting on the wall ............................7 Connecting to the grid (AC utility) ........................9 Connecting to the PV panel (DC input) ......................9 Checking ..............................10 System Diagram ............................10 3. Modes of operation . - Page 4 RADIUS Home...
-
Page 5: Introduction
Introduction 1.1 Design Overview 1.2 Opening the package Please check the contents of the shipping box upon receipt. It should contain the following: Item Name Quantity Solar inverter Mounting frame Mounting screws Safety-Lock screws Sleeve for mounting frame screws AC socket AC socket assembly screws Installation &... -
Page 6: Installation
Installation 2.1 Installation manual Do not remove the casing. Inverter contains no user serviceable parts. Refer servicing to qualified serv- ice personnel. Warning! Both AC and DC voltage sources are terminated inside the PV Inverter. Please disconnect these circuits before servicing. When a photovoltaic panel is exposed to light, it generates a DC voltage. -
Page 7: Mounting On The Wall
2.2 Mounting on the wall Wall fixing dimensions 280 mm (11.02 “) APV 1700-2M-TL - APV 2300-2M-TL - APV 3100-2M-TL 310 mm (12.20 “) APV 4400-2M-TL - APV 5200-2M-TL RADIUS Home... - Page 8 Figure 1 Figure 2 Figure 3 Figure 4 Select a wall or solid vertical surface that can support the PV-Inverter. Inverter requires adequate cooling space. Allow at least 20cm space above and below the inverter (see figure 1). Using the mounting frame as a template, drill 4 holes as shown in figure 2. Fix the mounting frame as shown in the figure 3.
-
Page 9: Connecting To The Grid (Ac Utility)
2.3 Connecting to the grid (AC utility) Measure the grid voltage and frequency. It should be 230VAC (or 220VAC) , 50/60Hz and single phase. Open the breaker or fuse between the PV inverter and the grid. For the inverter, connect AC wires as follows: Terminal Pressing screw cap Shell Ground... -
Page 10: Checking
2.5 Checking When the PV panels are connected and their output voltage is greater than 100 VDC but the AC grid is not yet connected, the message on the LCD display produce the following messages in order: ”Ser NO:xxx”->”xxxxxx”->”FW version”->”No AC connection’ and the LED will be red. Close the AC breaker or fuse between PV-Inverter and grid. -
Page 11: Modes Of Operation
Modes of operation There are 3 different modes of operation. 3.1 Normal mode In this mode, the inverter works normally. Whenever the supplied power from PV panel is sufficient (voltage>120VDC), the inverter converts power generated by the PV panel to the grid. If the power is insuf- ficient (voltage<100VDC), the inverter enters a “waiting”... -
Page 12: Display Content
3.7 Display content The First Line Of LCD STATE DISPLAY CONTENT REMARK Wait State Standby PV voltage low Waiting Initial waiting Connect in xxS System checking Inverter State Connect OK Connect to Grid Power: xxxx.xW Inverter watt during operation Fault State Error: xxx System fault Auto Test State Auto Testing Protection auto test... -
Page 13: Controlling The Lcd Display
3.8 Controlling the LCD display The display on the inverter can be controlled by knocking on the front of it to define the display language, con- trast, auto-test and frequency. When the LCD is dark Knock to make it becomes bright. The display remain visible for 30 seconds for 1-5 information When the LCD is Bright Knock to make it display next information for 1-12. -
Page 14: Inverter Status
Inverter Status Inverter is designed to be user-friendly; therefore, the status of the Inverter can be easily understood by reading the information shown on the front panel display. Ali possible messages are shown in the following table. DISPLAY OPERATION System fault Auto Test Failed Auto Test do not pass No AC Connection... -
Page 15: Communications
Communications 5.1 Communications software instructions RADIUS LigthNET is a PC software which communicates with the APV inverter to analyse its operating state. It is a convenient way of determining the inverter’s real-time operating state and operation log. Specification: Communicate with inverter by RS232 and Bluetooth. Construct net with inverter and RADIUS LigthNET via RS232, Bluetooth and the Internet. -
Page 16: Trouble Shooting
Trouble shooting Note ! In most situations, the Inverter requires very little service. However, if Inverter is not able to work perfectly, please refer to the following instructions before calling your local dealer. Should any problems arise, the LED on the front panel will be red and the LCD displays the relevant information. Please refer to the following for a list of potential problems and their solutions. SYSTEM FAULT Ground Fault 1. The ground current is too high. 2. Unplug the inputs from the PV generator and check the peripheral AC system. 3. After the cause of the fault is cleared, reconnect the PV panel and check the PV inverter status. -
Page 17: Troubleshooting
6.1 Troubleshooting System fault Error message Meanings Suggestion No AC Connection No utility grid connec- 1. Check AC wiring, especially the grounding wire. ted or the utility grid is 2. Check utility status (Voltage and frequency). abnormal. 3. Contact RADIUS Solar Service. AC V Outrange Grid voltage out of Check grid voltage... -
Page 18: Specifications
Specifications APV 1700-2M-TL APV 2300-2M-TL APV 3100-2M-TL APV 4400-2M-TL APV 5200-2M-TL Input Data Max. DC power 1700Wp 2300Wp 3150Wp 4400Wp 5200Wp Max. DC voltage 450V 500V 500V 580V 580V PV voltage range MPPT 120V - 450V 120V - 450V 120V - 450V 120V - 500V 120V - 500V Max. -
Page 19: Warranty Conditions
Warranty conditions The warranty is valid from the date of delivery of the Gefran RADIUS products. The standard manufacturer’s warranty, included in the price of the product, is valid for 5 years starting from the date of delivery. Before the end of that period you may purchase the RWE to extend the manufacturer’s warranty and receive annual cover for between 1 and 5 years. -
Page 20: Contact
Contact RADIUS Solar Service (for UK only) Tel. Day number (8.00 to 6.00 GMT): +44 (0) 845 604555 Tel. Out of hours: +44 (0) 7780 952361 e-mail: service@gefran.co.uk, fax +44 (0) 845 2604556. RADIUS Solar Service (Worlwide) Tel: +39 02 96760428, e-mail: technohelp@gefran.com, fax +39 02 9682653 RADIUS Home... -
Page 21: 10. Appendix
10. Appendix 10.1 Suggested Circuit breaker / fuses APV 1700-2M-TL APV 2300-2M-TL APV 3100-2M-TL APV 4400-2M-TL APV 5200-2M-TL DC Load Circuit breaker 500V / 10A 500V / 16A 500V / 16A 600V / 25A 600V / 25A AC Load Circuit breaker 400V / 10A 400V / 16A 400V / 16A 400V / 32A... - Page 22 Note: RADIUS Home...
- Page 24 Fax +33 (0) 478770320 Fax +86 21 69169333 info@gefran.be commercial@gefran.fr info@gefransiei.com.cn GEFRAN BRASIL GEFRAN SUISSE SA GEFRAN SIEI Electric (Shanghai) pte. Ltd. ELETROELETRÔNICA Rue Fritz Courvoisier 40 No. 1285, Beihe Road, Jiading District, Avenida Dr. Altino Arantes, 2302 La Chaux-de-Fonds Shanghai, China...
Need help?
Do you have a question about the RADIUS APV 1700-2M-TL and is the answer not in the manual?
Questions and answers