Table of Contents
Advertisement
Advertisement
Table of Contents

Subscribe to Our Youtube Channel
Related Manuals for Chroma 19020


Summary of Contents for Chroma 19020
- Page 3 Multi-Channel Sync Hipot Tester 19020/19020-4/19021/19021-4/ 19022/19022-4 User’s Manual Version 2.3 April 2017...
- Page 4 The information in this document is subject to change without notice. Chroma ATE INC. makes no warranty of any kind with regard to this manual, including, but not limited to, the implied warranties of merchantability and fitness for a particular purpose.
- Page 5 All of Chroma’s instruments are warranted against defects in material and workmanship for a period of one year from date of shipment. Chroma agrees to repair or replace any assembly or component found to be defective, under normal use during this period. Chroma’s obligation under this warranty is limited solely to repairing any such instrument, which in Chroma’s sole...
- Page 6 Material Contents Declaration The recycling label shown on the product indicates the Hazardous Substances contained in the product as the table listed below. : See <Table 1>. : See <Table 2>. <Table 1> Hazardous Substances Lead Mercury Cadmium Hexavalent Polybrominated Selected Phthalates Chromium Biphenyls/...
- Page 7 “” indicates that the level of the specified chemical substance exceeds the threshold level specified in the standards of SJ/T-11363-2006 and EU Directive 2011/65/EU.. Chroma is not fully transitioned to lead-free solder assembly at this moment; however, most of the components used are RoHS compliant.
- Page 9 CD for user’s manuals in English and Traditional Chinese Note When additional item is required, just inform Chroma the item name. The cable quantity is varied with the output channel configured, for instance, the cable quantity for 10CH model is 10 sets and for 4CH mode is 4 sets.
- Page 10 Hazard Operation Methods 1. Do not touch the testing area when this Hipot Tester is outputting voltage or you may get electric shock and it may cause death. Be sure to obey the following: The earth wire must be connected exactly and use a standard power cord. ․...
- Page 11 Remove all connected wires and cables on the instrument before cleaning. Use a brush to clean the dust on it. For internal cleaning, use a low-pressure air gun to vacuum the dust inside or send it back to the distributors or agents of Chroma for cleaning.
- Page 12 Add two new items in the chapter of “Precaution before Use”. Dec. 2010 1.4 Update “Material Contents Declaration.” May 2011 1.5 Add descriptions for 19020-4 & 19022-4 two new models. Sep. 2011 1.6 Update “Standard Package” and its Note in “Unpacking for Check & Inspection”.
-
Page 13: Table Of Contents
Multi-Channel Sync Hipot Tester 19020/19020-4/19021/19021-4/19022/19022-4 User’s Manual Table of Contents Preface........................ 1-1 Product Overview ................... 1-1 Features ......................1-1 Specification (18°C ∼ 28°C RH ≤ 70%) .............. 2-1 Precaution before Use ..................3-1 Operation ......................4-1 Front Panel ....................4-1 Rear Panel ..................... - Page 14 Multi-Channel Sync Hipot Tester 19020/19020-4/19021/19021-4/19022/19022-4 User’s Manual GPIB/RS232 Interface (IEEE-488.2) ..............6-1 Introduction ....................6-1 GPIB Interface ....................6-1 6.2.1 Applied Standard ..................6-1 6.2.2 Interface Capability .................. 6-1 6.2.3 Interface Message ................... 6-1 6.2.4 Command Format ..................6-2 6.2.5 Panel Description ..................
-
Page 15: Preface
For withstand voltage test, the output power of each channel for 19020/19020-4 is AC: 50VA(5kV, 10mA) /DC: 30VA(6kV, 5mA), for 19021/19021-4 is AC: 48VA(6kV, 8mA) and for 19022/19022-4 is DC: 28VA(8kV, 3.5mA). - Page 16 Multi-Channel Sync Hipot Tester 19020/19020-4/19021/19021-4/19022/19022-4 User’s Manual ■ Clear Display The testers have a clearest design for display. All programs for settings such as test voltage, current state, test readings, test steps and test states are able to be viewed from the LED display directly.
-
Page 17: Specification (18°C ~ 28°C Rh ≤ 70%)
Specification Specification (18°C ∼ 28°C RH ≤ 70%) Maximum/Model 19020 19020-4 19021 19021-4 19022 19022-4 Output Channels 10CH 10CH 10CH 5kV,10mA 6kV,8mA ------- 6kV,5mA ------- 8kV,3.5mA ------- Multi-hipot unit Output channels are defined by model, independent output Master fixed the frame number on 0 Frame number ... - Page 18 Multi-Channel Sync Hipot Tester 19020/19020-4/19021/19021-4/19022/19022-4 User’s Manual 10GΩ~50GΩ: ± (10% of reading + 1% of full scale) < 500V: 1MΩ~1GΩ: ± [3% of reading + (0.2 x 500V /Vs)% of full scale] Test time 0.03 – 999.9 sec., and Continuous (IR: 0.3 – 999.9 sec.) Ramp time 0.1–...
- Page 19 Hi-Pot L + N to Earth Less than 10mA at WVAC 1.5kV, 60Hz, 3sec no flashover happen (ARC level < 8mA, tested by Chroma 19032) Insulation L + N to Earth Greater than 20MΩ at 500V dc, 2 sec.
-
Page 21: Precaution Before Use
Precaution before Use Precaution before Use The Hipot Tester can output up to 8kV high voltage for external test. Accidents may occur or even cause death if using this Tester incorrectly or in the wrong way. Thus for safety sake, be sure to read the precautions in this chapter to avoid any accidents from happening. - Page 22 Multi-Channel Sync Hipot Tester 19020/19020-4/19021/19021-4/19022/19022-4 User’s Manual Press ․ STOP Ensure the DANGER indicator is off. ․ Short the test cable of RTN/LOW and high voltage output to make sure there is no ․ voltage output. Plug in the high voltage test cable to high voltage output terminal.
- Page 23 Precaution before Use follow the instruction described above for actions. Do not touch any area that may cause electric shock especially when the power is just turned off. 10. Ensure the charged voltage is fully discharged The time required for fully discharging the voltage depends on the test voltage applied and the features of UUT.
- Page 24 When pressing the START key the voltage meter has readings but the DANGER LED indicator is still off, it means the indicator may be broken. Please power off the hardware and replace it with another device, then send the broken one back to Chroma or its distributor for repair service.
- Page 25 Precaution before Use package for storage. For proper test and safety measures, do not place the Tester under direct sunlight, high temperature, trembling, humid or dusty area. 21. Warming up The tester is activated when power is on; however, in order to meet the specifications for accuracy please warm it up for 15 minutes or above.
-
Page 27: Operation
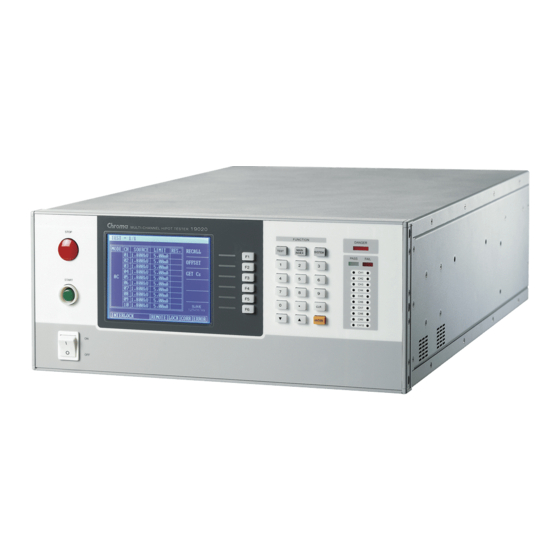
Operation Operation 4.1 Front Panel Figure 4-1 The front panel is divided into several easy-to-use areas. This section introduces each control item and the information displayed on LCD. ■ Zoom in on Display Area MAIN INDEX Title Bar 01 . PROGRAM 02 . - Page 28 Multi-Channel Sync Hipot Tester 19020/19020-4/19021/19021-4/19022/19022-4 User’s Manual Display Area Title Bar: This line of text indicates the setting or test mode at present of the Tester. Function Key Area: Different function key descriptions will appear in different screen and the mapping function keys are at the right of LCD. If the description is blank, it indicates the mapping function key is invalid.
- Page 29 Operation Simple Function Flow Chart MENU MAIN START TEST STOP TEST TEST KEY RECALL GET OFFSET OFFSET STOP OFFSET GET Cs EXIT CLEAR STORE PROGRAM RECALL MAIN INDEX KEY STORE/RECALL DELETE TEST CONTROL EXIT SYSTEM CONFIG SYSYEM KEY KEY LOCK FAIL LOCK CHANGE PASSWO CALIBRATION...
- Page 30 CH1~CH10 test results is bad and will keep on until STOP is pressed. The indicator shows the test result in the channel numbers specified by the model, for instance, the 19020 shows the test result of CH1~CH10 and 19020-4 shows the test result of CH1~CH4.
-
Page 31: Rear Panel
Operation 4.2 Rear Panel Figure 4-2 (1) GPIB Interface: This is the connector of GPIB interface card under IEEE-488-1978 standard. See Chapter 6 GPIB/RS232 Interface (IEEE-488.2) for detail usage description. (2) RS232 Interface: This is the connector of optional RS232 interface card. GPIB and RS232 cannot be used at the same time. -
Page 32: Notices Before Using & Procedure
Multi-Channel Sync Hipot Tester 19020/19020-4/19021/19021-4/19022/19022-4 User’s Manual (9) GND Terminal: It is the safety grounding terminal. Please use an appropriate tool to connect it to earth properly. If it is not properly grounded, the Tester chassis may contain high voltage when the power circuit or any device’s cable is shorted with the grounding terminal, and it is... -
Page 33: Setting System Parameters
Operation 4.4 Setting SYSTEM Parameters 4.4.1 Entering SYSTEM Setting Screen Press SYSTEM in any screen will show the following: SYSTEM 01 . TEST CONTROL 02 . SYSTEM CONFIG 03 . KEY LOCK 04 . FAIL LOCK 05 . CHANGE PASSWORD 06 . -
Page 34: Setting Test Control
Multi-Channel Sync Hipot Tester 19020/19020-4/19021/19021-4/19022/19022-4 User’s Manual 4.4.2 Setting TEST CONTROL In SYSTEM screen, move the highlight to TEST CONTROL and press ENTER to go to TEST CONTROL setting screen as shown below: TEST CONTROL 01. PASS HOLD 0.2 sec 02. - Page 35 Use Function Key [NEXT FRAME] to move the highlight to next FRAME. Please follow the model to set the output channel, for instance, the 19020 can set the output channel to CH1~CH10 while the 19020-4 can only set the channel to CH1~CH4.
-
Page 36: Setting System Config
When LINK SETUP is set to SLAVE, besides the items “02. SYSTEM CONFIG”, “05. CHANGE PASSWORD”, “06. CALIBRATION”, “07. ERROR LOG” and “08. ABOUT” in the SYSTEM screen, the rest items are all invalid. Only the 19020/19020-04 LINK SETUP settings has SCANNER selection. 4-10... -
Page 37: Setting Key Lock
Operation 4.4.4 Setting KEY LOCK The way to set KEY LOCK: In SYSTEM screen, move the highlight to KEY LOCK and press ENTER to go to KEY LOCK setting screen as shown below: KEY LOCK LOCK KEY: USER PASSWORD:■ EXIT REMOTE LOCK CORR ERROR... -
Page 38: Setting Fail Lock
Multi-Channel Sync Hipot Tester 19020/19020-4/19021/19021-4/19022/19022-4 User’s Manual Enter the PASSWORD and press ENTER, the LOCK box returns to normal indicating the KEY LOCK is cancelled. 4.4.5 Setting FAIL LOCK The way to set FAIL LOCK: In SYSTEM screen, move the highlight to FAIL LOCK and press ENTER to go to FAIL LOCK... -
Page 39: Changing Password
Operation FAIL LOCK UNLOCK: USER PASSWORD:■ EXIT REMOTE LOCK CORR ERROR Enter the PASSWORD and press ENTER, the LOCK box returns to normal indicating the FAIL LOCK is cancelled. 4.4.6 Changing PASSWORD Setting password for KEY LOCK: In SYSTEM screen, move the highlight to CHANGE PASSWORD and press ENTER to go to CHANGE PASSWORD setting screen as shown below: CHANGE PASSWORD USER PASSWORD:■... -
Page 40: Setting Calibration
Multi-Channel Sync Hipot Tester 19020/19020-4/19021/19021-4/19022/19022-4 User’s Manual 4.4.7 Setting CALIBRATION In SYSTEM screen, move the highlight to CALIBRATION and press ENTER to go to CALIBRATION setting screen as shown below: CALIBRATION CAL. PASSWORD︰■ EXIT REMOTE LOCK CORR ERROR When in CALIBRATION screen, press keys to set the related functions. -
Page 41: Setting Program
Operation 4.5 Setting PROGRAM 4.5.1 How to Get in PROGRAM Setting Screen Press MAIN INDEX in any screen will show the following: MAIN INDEX 01 . PROGRAM 02 . STORE/RECALL REMOTE LOCK CORR ERROR 4.5.2 Setting Program Procedure In MAIN INDEX screen, press ▲, ▼ to move the highlight to [PROGRAM] and press ENTER to enter into the program setting screen as shown below: PROGRAM 01. -
Page 42: Selecting Test Mode
/ DC / IR / OSC /PA available for selection. Different test mode and model number has different programs for setting. 4.5.4 Description of Parameters Following explains the parameters set in each test mode. AC Withstand Voltage (AC) Test Mode (for Model 19020/19020-4/19021/19021-4) PROGRAM 01. TEST STEP 02. TEST MODE 03. - Page 43 LINK SETUP in the SYSTEM of 19020/19020-4 is set to SCANNER. Please follow the model to set the output channel, for instance, the 19020 can set the output channel to CH1~CH10 while the 19020-4 can only set the channel to CH1~CH4. The message line on the test screen will show “Module Fail”...
- Page 44 Multi-Channel Sync Hipot Tester 19020/19020-4/19021/19021-4/19022/19022-4 User’s Manual “Module Fail” if set otherwise and the test is unable to start. Insulation Resistance Test Mode (IR) (for Model 19020/19020-4/19022/19022-4) PROGRAM 01. TEST STEP 02. TEST MODE 03. VOLTAGE 0.050 kV DC 04. LOW LIMIT MΩ...
- Page 45 LINK SETUP in the SYSTEM of 19020/19020-4 is set to SCANNER. Please follow the model to set the output channel, for instance, the 19020 can set the output channel to CH1~CH10 while the 19020-4 can only set the channel to CH1~CH4. The message line on the test screen will show “Module Fail”...
- Page 46 OPEN/SHORT is the reading of GET Cs. Please follow the model to set the output channel, for instance, the 19020 can set the output channel to CH1~CH10 while the 19020-4 can only set the channel to CH1~CH4. The message line on the test screen will show “Module Fail”...
-
Page 47: Managing Memory For Programs
When “MAIN INDEX” shows on the title bar, press ▲, ▼ to move the highlight to [STORE/RECALL] and press ENTER to go to the setting screen as shown below: STORE/RECALL 01 . (01) CHROMA STORE 02 . (00) 03 . (00) RECALL 04 . -
Page 48: Deleting Memory
Multi-Channel Sync Hipot Tester 19020/19020-4/19021/19021-4/19022/19022-4 User’s Manual STORE/RECALL (01) CHROMA■ 02 . (00) 03 . (00) NEXT CH. 04 . (00) 05 . (00) 06 . (00) 07 . (00) 08 . (00) 09 . (00) 10 . (00) EXIT... -
Page 49: Recalling Memory
Follow the steps below to recall the programs stored in memory: to move the highlight to memory to be recalled and press Function Key ▲ ▼ [RECALL]. STORE/RECALL 01 . (01) CHROMA 02 . (00) 03 . (00) 04 . (00) 05 . (00) 06 . (00) 07 . -
Page 50: Using Get Offset
Multi-Channel Sync Hipot Tester 19020/19020-4/19021/19021-4/19022/19022-4 User’s Manual 4.7.2 Using GET OFFSET Press Function Key [OFFSET] in TEST screen to go to GET OFFSET screen as shown below: GET OFFSET 1.PLEASE OPEN THE OUTPUT TERMINAL. PRESS <START> TO START EXIT STANDBY... -
Page 51: Conducting The Test
Operation 4.8 Conducting the Test 4.8.1 Connecting the UUT First ensure there is no voltage output and the DANGER LED is off. Connect the low potential test cable (black) to the Tester RTN/LOW terminal. Short-circuit the test cable and high voltage output terminal and ensure there is no high voltage output. -
Page 52: Procedure For Ir Test
Multi-Channel Sync Hipot Tester 19020/19020-4/19021/19021-4/19022/19022-4 User’s Manual immediately. The HANDLER outputs FAIL signal and the beeper acts at the same time until the STOP key on Tester is pressed. The test result will show FAIL state. FAIL State: Test Result Display Meaning... -
Page 53: Procedure For Osc Test
Operation until the STOP key on Tester is pressed. The test result will show FAIL state. FAIL State: Test Result Display Meaning FAIL The resistance measured exceeds the range or the set high/low limit. To stop test output in any condition, just press STOP. 4.8.4 Procedure for OSC Test Connect the UUT properly following the connection method. -
Page 54: Test Procedure For Pa Test
Multi-Channel Sync Hipot Tester 19020/19020-4/19021/19021-4/19022/19022-4 User’s Manual FAIL State: Test Result Display Meaning The Open/Short Capacitance reading exceeds the OPEN/ FAIL SHORT setting. To stop test output in any condition, just press STOP. Every time the cable or fixture is changed for OSC, be sure to run OFFFSET in advance to ensure the test accuracy. -
Page 55: Auto Range
Operation 4.8.6 Auto Range Set Auto Range to ON. As Position 1 shown in the figure below setting it to high current range. Position 1 TEST – 1/2 MODE CH SOURCE LIMIT RES. RECALL 0.500kV 10.00 mA 0.500kV 10.00 mA OFFSET 0.500kV 10.00 mA... - Page 56 Multi-Channel Sync Hipot Tester 19020/19020-4/19021/19021-4/19022/19022-4 User’s Manual When the ACV/DCV test time is less than 0.29 second, the H/W AGC is OFF. Vo / Vs = RL / (Rs + RL) H/W AGC: Since the load effect caused Vo<Vs, the hardware comparator circuit is used to make Vo compensate voltage to be the same as within Vs within 0.1sec.
-
Page 57: Handler Interface
HANDLER Interface HANDLER Interface 5.1 Introduction The HANDLER interface socket can be purchased for the Tester rear panel. When it is desired to control the Tester output via external signal or to send the signal outside, the HANDLER card can be inserted for external control. 5.2 Specification 5.2.1 Driving Capability Internal Signal Output Specification:... - Page 58 Multi-Channel Sync Hipot Tester 19020/19020-4/19021/19021-4/19022/19022-4 User’s Manual It is the external DC voltage input. The input +VEXT - voltage range is between +3V~+26V. nRecall1 nRecall1~nRecall3 signals indicate the memory position to be read. nRecall2 It uses 3 bits to present 7 test steps.
-
Page 59: Example Of External Control Circuit
HANDLER Interface 5.3 Example of External Control Circuit 5.3.1 Example of Using Internal Power Supply +5VHan 560Ω 560Ω Internal of 1902X +VEXT CHN1 CHN2 CHN3 CHN4 CHN5 CHN6 CHN7 CHN8 CHN9 CHN10 nPASS_FAIL nEOT nPA_MODE nEOS GNDF EXT_STOP EXT_START Rcall1 Rcall2 Rcall3 Rcall4... -
Page 60: Example Of Using External Power Supply
Multi-Channel Sync Hipot Tester 19020/19020-4/19021/19021-4/19022/19022-4 User’s Manual 5.3.2 Example of Using External Power Supply DC POWER SUPPLY +5VHan 2.7kΩ 2.7kΩ +3V~+26V Internal of 1902X +VEXT CHN1 CHN2 CHN3 CHN4 CHN5 CHN6 CHN7 CHN8 CHN9 CHN10 nPASS_FAIL nEOT nPA_MODE nEOS GNDF... -
Page 61: Timing Diagram
HANDLER Interface 5.4 Timing Diagram Test Process Control /EXT_START /EOT /EOS STEP STEP STEP STEP /PASS_FAIL /CHN1~10 T4 T5 T4 T5 Time Limit Description It sets the time required for external trigger signal > 10mS (/EXT_START) to sustain. It sets the time for clear from external trigger signal <... - Page 62 Multi-Channel Sync Hipot Tester 19020/19020-4/19021/19021-4/19022/19022-4 User’s Manual Control for Recalling Saved Parameter /Recall1~/Recall3 /Recall4 Time Limit Description > 5mS It sets the time for /Recall1~/Recall3 signal to sustain. > 5mS It sets the time for /Recall4 signal to sustain.
-
Page 63: Gpib/Rs232 Interface (Ieee-488.2)
GPIB/RS232 Interface (IEEE-488.2) GPIB/RS232 Interface (IEEE-488.2) 6.1 Introduction The tester can be controlled remotely by PC for data transmission through RS232 or GPIB (IEEE 488-1978) interface. GPIB Interface 6.2.1 Applied Standard The tester applies the IEEE488-1978 standard. 6.2.2 Interface Capability Code Meaning Source Handshake... -
Page 64: Command Format
Multi-Channel Sync Hipot Tester 19020/19020-4/19021/19021-4/19022/19022-4 User’s Manual 6.2.4 Command Format The function of GPIB interface is to input the ASCII code composed commands in order to do remote control and setting. The command string is formed by [command+parameter]. Semicolon “;” can be used to connect any two commands with end code at last. The End... -
Page 65: Connector
GPIB/RS232 Interface (IEEE-488.2) End Code CR+LF 6.3.3 Connector The RS232 connector of the Tester is a female 9-pin connector. Pin No. Description Unused Sending data Receiving data Unused Grounding signal Unused Unused Unused Unused 6.3.4 Connection The RS232 connector of the Tester is a female 9-pin connector. 9 Pin (female) 9 Pin (male) 9 Pin (female) -
Page 66: Structure Of Remote Interface
Multi-Channel Sync Hipot Tester 19020/19020-4/19021/19021-4/19022/19022-4 User’s Manual 6.4 Structure of Remote Interface Error/Event Queue Output Buffer Summary Register Enable Register Not Used Has Result Error/Event Queue Not Used Message Available Standard Event Request Service Not Used Serial Poll(SPOLL) *SRE <value>... - Page 67 GPIB/RS232 Interface (IEEE-488.2) *SRE? *STB? The parameter syntax of SCPI command includes: (1) Use “< >” to indicate the defined parameter format of standard SCPI command. (2) “< numeric value >” is a decimal data while “< boolean >” is Boolean program data with value 0 or 1.
- Page 68 Multi-Channel Sync Hipot Tester 19020/19020-4/19021/19021-4/19022/19022-4 User’s Manual :MMETerage? :OMETerage? :TIME [:ELAPsed] :DWELl? :FALL? :RAMP? [:TEST]? :STARt [:ONCE] :CORRection :OPEN GET | OFF :OPEN? :SAMPle GET :SAMPle? :STATus? :STEP<n> :CHANnel [:CLOSe] <channel list> [:CLOSe]? :DEFault :STATe? :PSC P | S | PS, S | C | SC :PSC? [:LEVel] <number value>...
- Page 69 GPIB/RS232 Interface (IEEE-488.2) :TIME :DWELl <number value> :DWELl? :FALL <number value> :FALL? :RAMP <number value> :RAMP? [:TEST] <number value> [:TEST]? :DELete :CHANnel [:CLOSe] <channel list> [:CLOSe]? :DEFault :STATe? :PSC P | S | PS, S | C | SC :PSC? [:LEVel] <number value>...
- Page 70 Multi-Channel Sync Hipot Tester 19020/19020-4/19021/19021-4/19022/19022-4 User’s Manual :PAuse [:MESSage] <string data> [:MESSage]? :TIME [:TEST] <number value> [:TEST]? :MODE? :SET? :STOP :SYSTem :ERRor [:NEXT]? :KLOCk <boolean> | ON | OFF (RS232 only) :KLOCk? :LINK :ADDRess? :MASTer? :LOCK :OWNer? :RELease (RS232 only)
-
Page 71: Command Description
GPIB/RS232 Interface (IEEE-488.2) 6.5.2 Command Description ● IEEE 488.2 Command *CLS It clears the data structure of status in the following actions: Clear the standard event register. Clear the byte register except MAV bit (bit 4). *ESE < decimal data> It sets the value for standard event enable register. - Page 72 Multi-Channel Sync Hipot Tester 19020/19020-4/19021/19021-4/19022/19022-4 User’s Manual *SRE? It reads the value of service request enable register. The output format is <decimal data> within 0~255. *STB? It reads the value of status bit register. The output format is <decimal data> within 0~255.
- Page 73 [:CHANnel] is 3 digits. The first digit is Frame index in the range of 0~9 and the last two digits are Channel index in the range of 01~10 (19020/19021/19022) or 01~04(19020-4/19021-4/19022-4). When the variable is ignored it is 001 to indicate Channel 1 of the Master.
- Page 74 <m> at the end of [:CHANnel] is 3 digits. The first digit is Frame index in the range of 0~9 and the last two digits are Channel index in the range of 01~10 (19020/19021/19022) or 01~04(19020-4/19021-4/19022-4). When the variable is ignored it is 001 to indicate Channel 1 of the Master.
- Page 75 <m> at the end of [:CHANnel] is 3 digits. The first digit is Frame index in the range of 0~9 and the last two digits are Channel index in the range of 01~10 (19020/ 19021/19022) or 01~04 (19020-4/19021-4/19022-4). When the variable is ignored it is 001 to indicate Channel 1 of the Master.
- Page 76 <m> at the end of [:CHANnel] is 3 digits. The first digit is Frame index in the range of 0~9 and the last two digits are Channel index in the range of 01~10 (19020/ 19021/19022) or 01~04(19020-4/19021-4/19022-4). When the variable is ignored it is 001 to indicate Channel 1 of the Master.
- Page 77 On. The format of variable <m> at the end of [:CHANnel] is 3 digits. The first digit is Frame index in the range of 0~9 and the last two digits are Channel index in the range of 01~10 (19020/19021/19022) or 01~04(19020-4/19021-4/19022-4). When the variable is ignored it is 001 to indicate Channel 1 of the Master.
- Page 78 <m> at the end of [:CHANnel] is 3 digits. The first digit is Frame index in the range of 0~9 and the last two digits are Channel index in the range of 01~10 (19020/19021/19022) or 01~04(19020-4/19021-4/19022-4). When the variable is ignored it is 001 to indicate Channel 1 of the Master.
- Page 79 GPIB/RS232 Interface (IEEE-488.2) [:SOURce]:SAFety:FRAMe<f>:RESult:STEP<n>:MMETerage? It queries the MEASURE METER readings of specified STEP for all channels of a Frame when the Screen sets to On. The range of variable <f> at the end of FRAMe<f> command is 0~9 that indicates the Frame address. When <f> is ignored the default is 1 it indicates to query the MEASURE METER readings of all channels for Slave 1.
- Page 80 Multi-Channel Sync Hipot Tester 19020/19020-4/19021/19021-4/19022/19022-4 User’s Manual Description: The returned result indicates the tested voltage fall times of STEP 4 for all channels of Address 0 host are 3sec, 3sec, 3sec, 3sec, 3sec, 3sec, 3sec, 3sec, 3sec, 3sec. [:SOURce]:SAFety:FRAMe<f>:RESult:STEP<n>:TIME[:ELAPsed]:RAMP? It queries the time voltage ramp elapsed of a specified STEP for all channels of a Frame when the Screen sets to On.
- Page 81 GPIB/RS232 Interface (IEEE-488.2) Example: Input the command SAF:STAR:CORR:SAMP GET Description: It means to start the GET Cs function in Open Short Check mode. [:SOURce]:SAFety:STARt:CORRection:SAMPle? It queries if the GET Cs function is started in Open Short Check mode. Example: Input the command SAF:STAR:CORR:SAMP ? The tester returns 1 Description: The returned 1 means the GET Cs function has been started in Open...
- Page 82 [:SOURce]:SAFety:STEP<n>:AC[:LEVel] < numeric value > It sets the voltage required for AC withstand voltage test for selected STEP. The unit is Volt (V). Range: The range of 19020 is 50~5000 and the range of 19021 is 50~6000. Example: Input the command SAF:STEP1:AC 3000. Description: It means to set the voltage required by AC withstand voltage test for the host STEP 1 is 3kV.
- Page 83 It sets the low limit of AC withstand leakage current for selected STEP. The unit is Ampere (A). Range: The range of 19020 is 0.000001~0.01 and the 19021 range is 0.000001~0.008 (the low limit of leakage current ≤ the set high limit.) Example: Input the command SAF:STEP1:AC:LIM:LOW 0.00001.
- Page 84 Multi-Channel Sync Hipot Tester 19020/19020-4/19021/19021-4/19022/19022-4 User’s Manual the host STEP 1 is 5.0sec. [:SOURce]:SAFety:STEP<n>:AC:TIME:RAMP? It queries the time required for the voltage to ramp to the set for selected STEP. Example: Input the command SAF:STEP1:AC:TIME:RAMP? The tester returns 5.000000E+00. Description: The returned 5.000000E+00 means the time required for the voltage...
- Page 85 [:SOURce]:SAFety:STEP<n>:DC[:LEVel] < numeric value > It sets the voltage required for DC withstand voltage test for selected STEP. The unit is Volt (V). Range: 50~6000 for 19020, 50~8000 for 19022. Example: Input the command SAF:STEP2:DC 4000. Description: It means the voltage set for the DC withstand voltage test for the host STEP 2 is 4kV.
- Page 86 Multi-Channel Sync Hipot Tester 19020/19020-4/19021/19021-4/19022/19022-4 User’s Manual Range: 0.000001~0.005 for 19020, 0.000001~0.0035 for 19022. Example: Input the command SAFE:STEP2:DC:LIM 0.002999. Description: It means the high limit of DC withstand voltage leakage current is set to 2.999mA for the host STEP 2.
- Page 87 GPIB/RS232 Interface (IEEE-488.2) STEP is 3.0sec. [:SOURce]:SAFety:STEP<n>:DC:TIME:FALL? It queries the time required for set voltage to fall to 0 for selected STEP. Example: Input the command SAF:STEP2:DC:TIME:FALL? The tester returns 3.000000E+00. Description: The returned 3.000000E+00 means the time required for set voltage to fall to 0 for the host STEP 2 is 3.0sec.
- Page 88 Multi-Channel Sync Hipot Tester 19020/19020-4/19021/19021-4/19022/19022-4 User’s Manual CH1~CH10 of Address 2 host are enabled as well. [:SOURce]:SAFety:STEP<n>:IR:CHANnel[:CLOSe]? It queries the high voltage output channel status of selected STEP. Example: Input the command SAF:STEP3:IR:CHAN? The tester returns (@001,002,201:210). Description: The returned result means the high voltage output channels CH1 &...
- Page 89 Ampere (A). Example: Input the command SAF:STEP3:IR:RANG 0.0003. Range: 0.000000001~0.005 for 19020, 0.000000001~0.0035 for 19022. Description: It means the current for IR measurement in the host STEP 3 is 300uA, so the upper current range selected for IR measurement is 3mA.
- Page 90 [:SOURce]:SAFety:STEP<n>:IR:RANGe[:LOWer] < numeric value > It selects the lower current range for measurement based on the inputted current. The unit is Ampere (A). Range: 0.000000001~0.005 for 19020, 0.000000001~0.0035 for 19022. Example: Input the command SAF:STEP3:IR:RANG:LOW 0.0003. Description: It means the current for IR measurement in the host STEP 3 is 300uA, so the lower current range selected for IR measurement is 300uA.
- Page 91 GPIB/RS232 Interface (IEEE-488.2) Range: 0 or 0.1~999.9, 0 is OFF. Example: Input the command SAF:STEP3:IR:TIME:FALL 3. Description: It means the time required for set voltage to fall to 0 for the host STEP 3 is 3.0sec. [:SOURce]:SAFety:STEP<n>:IR:TIME:FALL? It queries the time required for set voltage to fall to 0 for selected STEP. The unit is second (s).
- Page 92 Multi-Channel Sync Hipot Tester 19020/19020-4/19021/19021-4/19022/19022-4 User’s Manual [:SOURce]:SAFety:STEP<n>:OSC:CHANnel[:CLOSe]? It queries the high voltage output channel status of selected STEP. Example: Input the command SAF:STEP4:OSC:CHAN? The tester returns (@001,002,201:210). Description: The returned result means the high voltage output channels CH1 &...
- Page 93 GPIB/RS232 Interface (IEEE-488.2) the second parameter is standard capacitance in the unit farad. Example: Input the command SAF:STEP4:OSC:CORR:SAMP? The tester returns 2,3.000000E-09. Description: The returned 2 means host STEP 4 use the 2 range for OSC and the standard capacitance is 3nF. [:SOURce]:SAFety:STEP<n>:OSC:LIMit[:OPEN] <numeric value>...
- Page 94 Multi-Channel Sync Hipot Tester 19020/19020-4/19021/19021-4/19022/19022-4 User’s Manual STEP 5. [:SOURce]:SAFety:STEP<n>:PAuse:TIME[:TEST] <numeric value> It sets the time required for PA mode test for selected STEP. Example: Input the command SAF:STEP5:PA:TIME 5. Description: It means the time required for test for the host STEP 5 is 5.0sec.
- Page 95 GPIB/RS232 Interface (IEEE-488.2) LLO command. However, it does not affect the Remote/Local state of GPIB. Example: Input the command SYST:KLOC ON. Description: It means the key is enabled to lock the panel from returning. :SYSTem:KLOCk? It queries if the panel has been locked. Example: Input the command SYST:KLOC? The tester returns 1.
- Page 96 Multi-Channel Sync Hipot Tester 19020/19020-4/19021/19021-4/19022/19022-4 User’s Manual :SYSTem:TCONtrol:AGC[:SOFTware]? It queries if the software AGC function is enabled. Example: Input the command SYST:TCON:AGC? The tester returns 1. Description: The returned 1 means the software AGC function is enabled. :SYSTem:TCONtrol:CHANnel[:DEFault][:CLOSe] <channel_list> It sets the default of high voltage channel to close.
- Page 97 GPIB/RS232 Interface (IEEE-488.2) :SYSTem:TCONtrol:FAIL:OPERation? It queries if continue to test the next step when the present test is judged FAIL. Example: Input the command SYST:TCON:FAIL:OPER? The tester returns CONTinue. Description: The returned CONTinue means to carry on next test step. :SYSTem:TCONtrol:RJUDgment <...
- Page 98 Multi-Channel Sync Hipot Tester 19020/19020-4/19021/19021-4/19022/19022-4 User’s Manual :SYSTem:TCONtrol:VPERcent[:MINimum]? It queries the ratio set for MIN. VOLTAGE. Example: Input the command SYST:TCON:VPER? The tester returns 6.000000E-01. Description: The returned 6.000000E-01 means the ration set for MIN. VOLTAGE is 60%. :SYSTem:TCONtrol:WRANge[:AUTO] < boolean > | ON | OFF It sets the WV mode to enable or disable auto range function.
-
Page 99: Error Messages
GPIB/RS232 Interface (IEEE-488.2) The tester returns 1990.0. Description: The returned 1990.0 means the SCPI version supported by this device is 1990.0. 6.6 Error Messages ● The error messages stored in error queue will be returned in the way of first in first out (FIFO) which means the first error message returned is the first one being saved. - Page 100 Multi-Channel Sync Hipot Tester 19020/19020-4/19021/19021-4/19022/19022-4 User’s Manual The command is conflict with the device at present and is unable to execute. -222 Data out of range The parameter value exceeds the tolerance. -241 Hardware missing The hardware does not exist.
-
Page 101: Calibration Procedure
30 minutes. A/D REFERENCE Calibration (see Section 7.3) A/D REFERENCE ;A/D Reference Calibration Voltage Calibration (see Section 7.4) 19020/19020-4 ACV 5kV AGC OFFSET (0.1kV) ; AC Voltage AGC OFFSET point ACV 5kV AGC FULL (4kV) ; AC Voltage AGC FULL point ACV 5kV 50Hz OFFSET (0.1kV) - Page 102 Multi-Channel Sync Hipot Tester 19020/19020-4/19021/19021-4/19022/19022-4 User’s Manual DCA 5mA FULL (4.8mA) ; DC 5mA range FULL point 19021/19021-4 ACA 0.03mA OFFSET (0.002mA) ;AC current 0.03mA range OFFSET point ACA 0.03mA FULL(0.02mA) ;AC current 0.03mA range FULL point ACA 0.3mA OFFSET (0.02mA)...
-
Page 103: Entering Calibration Screen
Calibration Procedure 7.1 Entering Calibration Screen When in SYSTEM screen, move the highlight to CALIBRATION and press ENTER to go to CALIBRATION setting screen as shown below: CHANGE PASSWORD CAL. PASSWORD︰■ EXIT REMOTE LOCK CORR ERROR Key-in the calibration password 7 9 3 1 to enter into the calibration mode. 7.2 Selecting the Channel for Calibration CALIBRATION A/D REFERENCE... -
Page 104: A/D Reference Calibration
Multi-Channel Sync Hipot Tester 19020/19020-4/19021/19021-4/19022/19022-4 User’s Manual 7.3 A/D REFERENCE Calibration To calibrate the HV OUTPUT and RTN/LOW terminals of a CH, conduct the ■ following calibration procedure without any DUT or cables connected. A/D REFERENCE Calibration Screen: CALIBRATION A/D REFERENCE... - Page 105 Calibration Procedure Press START to output voltage and read the data from the high voltage meter. Press numeric key 0 . ~ 9 to input the reading of high voltage meter. Press ENTER to confirm the input. Press STOP to stop high voltage output. Press ▼...
- Page 106 Multi-Channel Sync Hipot Tester 19020/19020-4/19021/19021-4/19022/19022-4 User’s Manual ACV 5kV 50Hz FULL (4kV) Calibration Screen: CALIBRATION ACV 5kV 50Hz FULL (4kV) NEXT CH PREV CH CHANNEL: 1 OUTPUT READING 4.000kV 3.990kV STANDARD 3.985kV DEF=4kV REMOTE LOCK CORR ERROR Press START to output voltage and read the data from the high voltage meter.
-
Page 107: Dcv Calibration
Calibration Procedure ACV 5kV 60Hz FULL (4kV) Calibration Screen: CALIBRATION ACV 5kV 60Hz FULL (4kV) NEXT CH PREV CH CHANNEL: 1 OUTPUT READING 4.000kV 4.012kV STANDARD 3.998kV DEF=4kV REMOTE LOCK CORR ERROR Press START to output voltage and read the data from the high voltage meter. Press numeric key 0 . - Page 108 Multi-Channel Sync Hipot Tester 19020/19020-4/19021/19021-4/19022/19022-4 User’s Manual DCV 6kV AGC FULL (4kV) Calibration Screen: CALIBRATION DCV 6kV AGC FULL (4kV) NEXT CH PREV CH CHANNEL: 1 OUTPUT READING 4.000kV 3.991kV STANDARD 3.991kV DEF=4kV REMOTE LOCK CORR ERROR Press START to output voltage and read the data from the high voltage meter.
-
Page 109: Oscv Calibration
Calibration Procedure DCV 6kV FULL (4kV) Calibration Screen: CALIBRATION DCV 6kV FULL (4kV) NEXT CH PREV CH CHANNEL: 1 OUTPUT READING 4.000kV 3.982kV STANDARD 3.991kV DEF=4kV REMOTE LOCK CORR ERROR Press START to output voltage and read the data from the high voltage meter. Press numeric key 0 . -
Page 110: Current Calibration
Multi-Channel Sync Hipot Tester 19020/19020-4/19021/19021-4/19022/19022-4 User’s Manual OSC 100V FULL (100V) Calibration Screen: CALIBRATION OSC 100V FULL (100V) NEXT CH PREV CH CHANNEL: 1 OUTPUT READING 100V 104V STANDARD 110V DEF=100V REMOTE LOCK CORR ERROR Press START to output voltage and read the data from the high voltage meter. - Page 111 Calibration Procedure ACA 30uA OFFSET(2uA) Calibration Screen: CALIBRATION ACA 30uA OFFSET(2uA) NEXT CH PREV CH CHANNEL: 1 OUTPUT READING 0.100kV 1.78uA STANDARD 2.00uA LOAD=600MΩ REMOTE LOCK CORR ERROR Press START to output voltage and read the data from the AC meter. Press numeric key 0 .
- Page 112 Multi-Channel Sync Hipot Tester 19020/19020-4/19021/19021-4/19022/19022-4 User’s Manual Change the simulated load resistance to 60MΩ, 10watt or higher power. ■ ACA 300uA OFFSET(20uA) Calibration Screen: CALIBRATION ACA 300uA NEXT CH PREV CH CHANNEL: 1 OUTPUT READING 1.200kV 19.7uA STANDARD 20.0uA REMOTE LOCK...
- Page 113 Calibration Procedure Connect a 10MΩ 0.5 Watt or high power simulated load resistance in between the ■ high voltage output terminal (HV OUTPUT) of the channel to be calibrated on this Tester and the high potential terminal of AC meter, also connect the low potential terminal (RTN/LOW) of the channel to be calibrated on this Tester to the low potential terminal of AC meter.
- Page 114 Multi-Channel Sync Hipot Tester 19020/19020-4/19021/19021-4/19022/19022-4 User’s Manual ACA 10mA OFFSET(2.4mA) Calibration Screen: CALIBRATION ACA 10mA OFFSET(2.4mA) NEXT CH PREV CH CHANNEL: 1 OUTPUT READING 1.200kV 2.36mA STANDARD 2.40mA LOAD=500kΩ REMOTE LOCK CORR ERROR Press START to output voltage and read the data from the AC meter.
-
Page 115: Dca Current Calibration
Calibration Procedure 7.5.2 DCA Current Calibration Connect a 10MΩ 0.5 Watt or high power simulated load resistance in between the ■ high voltage output terminal (HV OUTPUT) of the channel to be calibrated on this Tester and the high potential terminal of AC meter, also connect the low potential terminal (RTN/LOW) of the channel to be calibrated on this Tester to the low potential terminal of AC meter. - Page 116 Multi-Channel Sync Hipot Tester 19020/19020-4/19021/19021-4/19022/19022-4 User’s Manual Press STOP to stop high voltage output. Press ▼ to go to DCA 5mA OFFSET (2.4mA) calibration. DCA 5mA OFFSET(2.4mA) Calibration Screen: CALIBRATION DCA 5mA OFFSET(2.4mA) NEXT CH PREV CH CHANNEL: 1 OUTPUT READING 1.200kV...
-
Page 117: Insulation Resistance (Ir) Calibration
Calibration Procedure 7.6 Insulation Resistance (IR) Calibration Connect a 4MΩ standard resistance in between the high voltage output terminal ■ (HV OUTPUT) and low potential terminal (RTN/LOW) of the channel to be calibrated on the Tester. IRR 200MΩ OFFSET (4MΩ) Calibration Screen: CALIBRATION IRR 200MΩ... - Page 118 Multi-Channel Sync Hipot Tester 19020/19020-4/19021/19021-4/19022/19022-4 User’s Manual Press to stop high voltage output. STOP Press to go to IRR 2GΩ OFFSET (40MΩ) calibration. ▼ Connect a 40MΩ standard resistance in between the high voltage output terminal ■ (HV OUTPUT) and low potential terminal (RTN/LOW) of the channel to be calibrated on the Tester.
- Page 119 Calibration Procedure Press ENTER to confirm the input. Press STOP to stop high voltage output. Press ▼ to go to IRR 20GΩ OFFSET (400MΩ) calibration. Connect a 400MΩ standard resistance in between the high voltage output terminal ■ (HV OUTPUT) and low potential terminal (RTN/LOW) of the channel to be calibrated on the Tester.
- Page 120 Multi-Channel Sync Hipot Tester 19020/19020-4/19021/19021-4/19022/19022-4 User’s Manual Press START to output voltage. Press numeric key 0 . ~ 9 to input actual resistance. Press ENTER to confirm the input. Press STOP to stop high voltage output. Press ▼ to go to IRR 200GΩ OFFSET (4GΩ) calibration.
- Page 121 Calibration Procedure Press START to output voltage. Press numeric key 0 . ~ 9 to input actual resistance. Press ENTER to confirm the input. Press STOP to stop high voltage output. Press ▼ to go to IRR 550GΩ OFFSET (40GΩ) calibration. Connect a 40GΩ...
-
Page 122: Arc Calibration
ARC calibration is special task as the high voltage is exposed WARNING outside the terminal. Please be careful as it may cause hazard. For detail information, please contact Chroma or its local distributors. 7.7.1 AC ARC Calibration Connect one end of 250kΩ10Watt or high power simulated load resistance to the ■... -
Page 123: Dc Arc Calibration
Calibration Procedure 7.7.2 DC ARC Calibration DC ARC 5mA (3mA) Calibration Screen: CALIBRATION DC ARC 5mA(3mA) NEXT CH PREV CH CHANNEL: 1 OUTPUT READING 1.500kV 1.9mA STANDARD 3.0mA LOAD=500kΩ REMOTE LOCK CORR ERROR Press START to output voltage. When the status indicator shows PASS, it means the device has grabbed the ARC value correctly and stopped the high voltage output. - Page 125 Chroma’s Continuous Quality Process User Manual Customer Feedback Chroma welcomes all comments and recommendations to improve this publication in the future editions. Please scan the QR code below or click the URL http://www.chromaate.com/survey?n=793ce6db-17ef-4cd3-b0de-8bbd09aa38e0 to fill in the customer feedback form. Thank you!
- Page 126 66 Huaya 1st Road, Guishan, Taoyuan 33383, Taiwan 台灣桃園市 33383 龜山區 華亞一路 66 號 T +886-3-327-9999 F +886-3-327-8898 Mail: info@chromaate.com http://www.chromaate.com Copyright by CHROMA ATE INC. All Rights Reserved. All other trade names referenced are the properties of their respective companies.
Need help?
Do you have a question about the 19020 and is the answer not in the manual?
Questions and answers