Table of Contents
Advertisement
® ® ® ®
KARA
KARA
KARA
KARA
modular wst
modular wst
modular wst
modular wst
R R R R IGGING PROCEDURES USING
IGGING PROCEDURES USING
IGGING PROCEDURES USING
IGGING PROCEDURES USING
VERSION 1.0 0 0 0
VERSION 1.
VERSION 1.
VERSION 1.
® ® ® ®
system
system
system
system
KARA- - - - MINI
KARA
KARA
KARA
w w w . l - a c o u s t i c s . c o m
MINIBU
MINI
MINI
BU
BU
BU
Advertisement
Table of Contents

Related Manuals for L-Acoustics KARA MODULAR WST SYSTEM


Summary of Contents for L-Acoustics KARA MODULAR WST SYSTEM
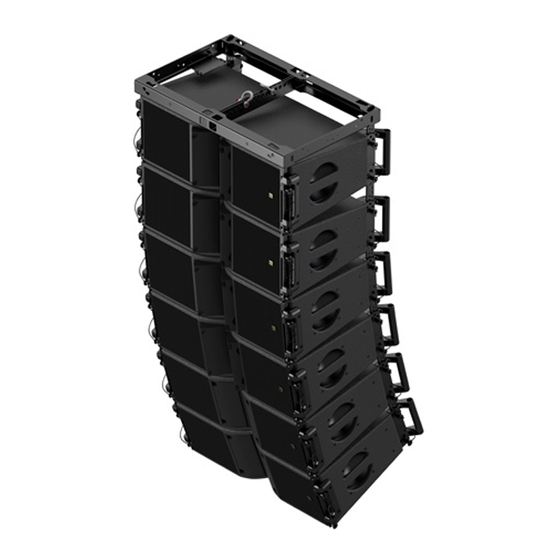
- Page 1 ® ® ® ® KARA KARA KARA KARA ® ® ® ® modular wst modular wst system system modular wst modular wst system system KARA KARA KARA KARA- - - - MINI MINI MINI MINIBU R R R R IGGING PROCEDURES USING IGGING PROCEDURES USING IGGING PROCEDURES USING IGGING PROCEDURES USING...
- Page 2 w w w . l - a c o u s t i c s . c o m...
-
Page 3: Safety Warnings
Heed all safety warnings Follow all instructions ® The user should never incorporate equipment or accessories not approved by L-ACOUSTICS Personnel qualification Installation and set-up should only be carried out by qualified personnel that are familiar with the rigging techniques and safety recommendations outlined in this manual. It is recommended to attend the training WARNING ®... - Page 4 11. Local regulations Some countries require higher Ultimate Strength Safety Factors and specific rigging approvals. It is the user’s ® responsibility to verify that any overhead suspension of L-ACOUSTICS loudspeaker assemblies has been made in accordance with all applicable local regulations.
-
Page 5: Ec Declaration Of Conformity
EC declaration of conformity ® L-ACOUSTICS 13 rue Levacher Cintrat Parc de la Fontaine de Jouvence 91462 Marcoussis Cedex France States that the following products: Rigging structure, KARA-MINIBU Extension bars, KARA-MINIBUEX Angle arm extensions, KARA-ANGARMEX Rigging accessory, KARA-PULLBACK Are in conformity with the provisions of:... -
Page 6: Table Of Contents
CONTENTS SAFETY WARNINGS Symbol description ................................1 Important safety instructions............................... 1 EC declaration of conformity .............................. 3 CONTENTS INTRODUCTION ® Welcome to L-ACOUSTICS ............................. 5 Symbol description ................................5 Unpacking ..................................5 Web links ................................... 5 ® KARA SYSTEM ®... -
Page 7: Introduction
Unpacking ® Carefully open the shipping carton and check the product for any noticeable damage. Each L-ACOUSTICS product is tested and inspected before leaving the factory and should arrive in perfect condition. If found to be damaged, notify the shipping company or the distributor immediately. Only the consignee may initiate a claim with the carrier for damage incurred during shipping. -
Page 8: Kara ® System
SOUNDVISION Acoustical and mechanical modeling software ® Each loudspeaker assembly configuration should first be modeled using L-ACOUSTICS SOUNDVISION Software [3.4] to verify its mechanical conformity. Please refer to the SOUNDVISION Help menu to obtain a detailed description on software use. - Page 9 KARA-MINIBU KARA-MINIBUEX KARA-PULLBACK SB28 KARA-ANGARMEX Figure 2: KARA system components (part 2) w w w . l - a c o u s t i c s . c o m KARA_SRM_EN_1-0 7 7 7 7...
-
Page 10: Kara ® Rigging Components
® One laser support plate with four bolts for optional TEQSAS LAP-TEQ laser/inclinometer device ® mounting. The LAP-TEQ is part of the L-ACOUSTICS TECH TOOLCASE (refer to the TECH TOOLCASE Product spec sheet [3.4]). • Two shackles fitted with 12 mm/0.47 inch-diameter bolts and safety pins. -
Page 11: Kara-Minibuex, Kara-Angarmex
KARA-MINIBUEX, KARA-ANGARMEX ® The L-ACOUSTICS KARA-MINIBUEX is a set of two complementary rigging plates for KARA-MINIBU to adapt to the SB18 enclosure or to stack KARA. ® The L-ACOUSTICS KARA-ANGARMEX is a set of two angle arm extensions providing extra 10° downwards site angle for the bottom KARA in stacked configurations. -
Page 12: Kara-Pullback
VERSION 1.0 KARA-PULLBACK ® The L-ACOUSTICS KARA-PULLBACK rigging accessory will allow setting the KARA array in a Shackle pullback configuration. It attaches to the bottom enclosure of the array and to the hook or stinger of an additional motor. -
Page 13: Installation
Any loudspeaker assembly must be modeled before installation so as to ensure acoustical and mechanical conformity. ® This can be done using L-ACOUSTICS SOUNDVISION Software [3.4] which will assist the user to: • Determine the number of required KARA enclosures. - Page 14 ® ® ® ® KARA KARA KARA KARA ® ® ® ® M M M M O O O O DULAR DULAR DULAR DULAR WST SYSTEM SYSTEM SYSTEM SYSTEM kara- - - - minibu kara minibu kara kara minibu minibu rigging procedures using rigging procedures using rigging procedures using...
- Page 15 Attach a KARA-MINIBU to KARA#1 as follows: a. Remove the four R-BLP from the KARA-MINIBU. b. Turn the KARA-MINIBU so that the text of the identification plate is readable and the laser plate is placed at the front (towards audience). c.
- Page 16 ® ® ® ® KARA KARA KARA KARA ® ® ® ® M M M M O O O O DULAR DULAR DULAR DULAR WST SYSTEM SYSTEM SYSTEM SYSTEM kara- - - - minibu kara minibu kara kara minibu minibu rigging procedures using rigging procedures using rigging procedures using...
- Page 17 13. Secure the front link points between ARRAY#1 and ARRAY#2 as follows: a. Slide each KARA#4 front arm up and align it with the KARA#3 front bottom link point. b. Secure each KARA#4 front arm to KARA#3 by removing the KARA#3 front bottom R-BLP from its storage hole and re-inserting it into its link hole.
- Page 18 ® ® ® ® KARA KARA KARA KARA ® ® ® ® M M M M O O O O DULAR DULAR DULAR DULAR WST SYSTEM SYSTEM SYSTEM SYSTEM kara- - - - minibu kara minibu kara kara minibu minibu rigging procedures using rigging procedures using rigging procedures using...
-
Page 19: Array Disassembling Procedure
6.1.3 Array disassembling procedure All along the procedure: STRICTLY follow the sequence of the successive steps. SYSTEMATICALLY verify that each BLP is fully inserted. WARNING For clarity purposes the loudspeaker cable removal procedure will not be described. The loudspeaker cables will not be represented in the figures. CAUTION Detach both safety slings from the KARA-MINIBU. - Page 20 ® ® ® ® KARA KARA KARA KARA ® ® ® ® M M M M O O O O DULAR DULAR DULAR DULAR WST SYSTEM SYSTEM SYSTEM SYSTEM kara- - - - minibu kara minibu kara kara minibu minibu rigging procedures using rigging procedures using rigging procedures using...
- Page 21 10. Remove ARRAY#2 from the rigging location and put the flight-case lid on. 11. Lower the array to a height for which the angle arms of ARRAY#1 are within comfortable reach and set the angles to 0° by applying step 4. 12.
- Page 22 ® ® ® ® KARA KARA KARA KARA ® ® ® ® M M M M O O O O DULAR DULAR DULAR DULAR WST SYSTEM SYSTEM SYSTEM SYSTEM kara- - - - minibu kara minibu kara kara minibu minibu rigging procedures using rigging procedures using rigging procedures using...
-
Page 23: Flying A Sb18/Kara Mixed Array Or A Sb18 Standalone Array
Any loudspeaker assembly must be modeled before installation so as to ensure acoustical and mechanical conformity. ® This can be done using L-ACOUSTICS SOUNDVISION Software [3.4] which will assist the user to: • Determine the number of required KARA enclosures (acoustic data not available for subwoofers). - Page 24 ® ® ® ® KARA KARA KARA KARA ® ® ® ® M M M M O O O O DULAR DULAR DULAR DULAR WST SYSTEM SYSTEM SYSTEM SYSTEM kara- - - - minibu kara minibu kara kara minibu minibu rigging procedures using rigging procedures using rigging procedures using...
- Page 25 Attach the rigging structure to SB18#1 as follows: a. Remove the four T-BLP from the top part of SB18#1 and turn the four link arms up. b. According to the chosen configuration [9.2], position the rigging structure above SB18#1 and lower it so as to slide the SB18#1 link arms into the KARA-MINIBUEX arm guides.
- Page 26 ® ® ® ® KARA KARA KARA KARA ® ® ® ® M M M M O O O O DULAR DULAR DULAR DULAR WST SYSTEM SYSTEM SYSTEM SYSTEM kara- - - - minibu kara minibu kara kara minibu minibu rigging procedures using rigging procedures using rigging procedures using...
- Page 27 10. Check the inter-enclosure attachments in ARRAY#1 as follows (repeat on both sides of the array): a. Verify that each front arm (x2) is open and secured to the link holes of two KARA by two R-BLP. Note: A link hole is indicated by a yellow circle.
- Page 28 ® ® ® ® KARA KARA KARA KARA ® ® ® ® M M M M O O O O DULAR DULAR DULAR DULAR WST SYSTEM SYSTEM SYSTEM SYSTEM kara- - - - minibu kara minibu kara kara minibu minibu rigging procedures using rigging procedures using rigging procedures using...
- Page 29 15. Attach ARRAY#1 to the SB18 array as follows: a. Remove the four T-BLP from the storage holes of both KARA- MINIBUEX. b. Lower the SB18 array so as to align its four bottom link points with those of both KARA-MINIBUEX. Note: Do NOT stack the SB18 array onto the KARA array.
-
Page 30: Array Disassembling Procedure
® ® ® ® KARA KARA KARA KARA ® ® ® ® M M M M O O O O DULAR DULAR DULAR DULAR WST SYSTEM SYSTEM SYSTEM SYSTEM kara- - - - minibu kara minibu kara kara minibu minibu rigging procedures using rigging procedures using rigging procedures using... - Page 31 Separate the KARA-MINIBU/KARA-MINIBUEX rigging structure from KARA#1 as follows: a. Remove the four R-BLP from the KARA-MINIBU. b. Separate the rigging structure from ARRAY#1. c. Re-insert the four R-BLP into the same KARA-MINIBU holes. (X4) Figure 31: Separating the rigging structure from KARA#1 Close the four KARA#1 arms as follows (repeat on both sides of the enclosure): a.
- Page 32 ® ® ® ® KARA KARA KARA KARA ® ® ® ® M M M M O O O O DULAR DULAR DULAR DULAR WST SYSTEM SYSTEM SYSTEM SYSTEM kara- - - - minibu kara minibu kara kara minibu minibu rigging procedures using rigging procedures using rigging procedures using...
- Page 33 17. Separate the KARA-MINIBU/KARA-MINIBUEX rigging structure from SB18#1 as follows: a. Remove the four T-BLP from both KARA-MINIBUEX. b. Lift the rigging structure up and separate it from SB18#1. c. Rotate the four SB18#1 link arms down. d. Lock the link arms in closed position by re-inserting the four T-BLP into the top SB18#1 link points. (x4) SB18#1 SB18#2...
-
Page 34: Stacking A Kara Standalone Array
A KARA array must be stacked onto a KARA-MINIBU/KARA-MINIBUEX platform (platform stacked array). Any platform stacked array must be modeled before installation so as to ensure acoustical conformity. This can be ® done using L-ACOUSTICS SOUNDVISION Software [3.4] which will assist the user to: • Determine the number of required KARA enclosures. - Page 35 Laser plate a. Identification plate KARA-MINIBU b. Stud inserted KARA-MINIBUEX (x2) into slit c. Bolts (x3) Figure 35: Assembling a KARA-MINIBU/KARAMINIBUEX stacking platform If KARA-ANGARMEX are intended to be used [9.3.2], attach two KARA-ANGARMEX to the platform as follows: a. Remove an R-BLP from a rear corner of the KARA-MINIBU. When using KARA-ANGARMEX the platform must be put in front extension configuration [9.3.1].
- Page 36 ® ® ® ® KARA KARA KARA KARA ® ® ® ® M M M M O O O O DULAR DULAR DULAR DULAR WST SYSTEM SYSTEM SYSTEM SYSTEM kara- - - - minibu kara minibu kara kara minibu minibu rigging procedures using rigging procedures using rigging procedures using...
- Page 37 Attach the platform to KARA#1 as follows: a. Turn the platform feet pointing up and position it above KARA#1 according to the chosen configuration [9.3.1]. b. Lower the platform to slide the four KARA-MINIBU slits along the KARA#1 arms. Note: If KARA- ANGARMEX are attached to the KARA-MINIBU, the rear slits are located on both KARA-ANGARMEX.
- Page 38 ® ® ® ® KARA KARA KARA KARA ® ® ® ® M M M M O O O O DULAR DULAR DULAR DULAR WST SYSTEM SYSTEM SYSTEM SYSTEM kara- - - - minibu kara minibu kara kara minibu minibu rigging procedures using rigging procedures using rigging procedures using...
- Page 39 12. Attach KARA#2 to KARA#1 as follows: a. Turn KARA#2 arms pointing down and front face towards the audience. b. Align the four arms with the KARA#1 link points. c. Secure the link points together by removing the four KARA#1 top R-BLP from their storage holes and re- inserting them into their link holes.
- Page 40 ® ® ® ® KARA KARA KARA KARA ® ® ® ® M M M M O O O O DULAR DULAR DULAR DULAR WST SYSTEM SYSTEM SYSTEM SYSTEM kara- - - - minibu kara minibu kara kara minibu minibu rigging procedures using rigging procedures using rigging procedures using...
-
Page 41: Array Disassembling Procedure
6.3.3 Array disassembling procedure All along the procedure: STRICTLY follow the sequence of the successive steps. SYSTEMATICALLY verify that each BLP is fully inserted. WARNING For clarity purposes the loudspeaker cables removal procedure will not be described. The loudspeaker cables will not be represented in the figures. CAUTION Detach the ratchet strap or other equivalent material from the stacked array. - Page 42 ® ® ® ® KARA KARA KARA KARA ® ® ® ® M M M M O O O O DULAR DULAR DULAR DULAR WST SYSTEM SYSTEM SYSTEM SYSTEM kara- - - - minibu kara minibu kara kara minibu minibu rigging procedures using rigging procedures using rigging procedures using...
- Page 43 10. Separate the platform from KARA#1 as follows: a. Remove both KARA-MINIBU front R-BLP. b. If KARA-ANGARMEX are attached to the platform, remove both T-BLP from them. Otherwise, remove both KARA-MINIBU rear R-BLP. c. Separate the platform from KARA#1. d. If KARA-ANGARMEX are attached to the platform, remove them by removing both KARA-MINIBU rear R-BLP.
- Page 44 ® ® ® ® KARA KARA KARA KARA ® ® ® ® M M M M O O O O DULAR DULAR DULAR DULAR WST SYSTEM SYSTEM SYSTEM SYSTEM kara- - - - minibu kara minibu kara kara minibu minibu rigging procedures using rigging procedures using rigging procedures using...
-
Page 45: Stacking A Sb18/Kara Mixed Array Or A Sb18 Standalone Array
Any SB18/KARA ground stacked array must be modeled before installation so as to ensure acoustical conformity. ® This can be done using L-ACOUSTICS SOUNDVISION Software [3.4] which will assist the user to: • Determine the number of required KARA enclosures (acoustic data not available for subwoofers). - Page 46 ® ® ® ® KARA KARA KARA KARA ® ® ® ® M M M M O O O O DULAR DULAR DULAR DULAR WST SYSTEM SYSTEM SYSTEM SYSTEM kara- - - - minibu kara minibu kara kara minibu minibu rigging procedures using rigging procedures using rigging procedures using...
- Page 47 If KARA-ANGARMEX are intended to be used [9.3.2], attach two KARA-ANGARMEX to the platform as follows: a. Remove an R-BLP from a rear corner of the KARA-MINIBU. b. Insert the single part of a first KARA-ANGARMEX into the corner slit: position it vertically with sling ring towards the front and indentation resting on the spacer.
- Page 48 ® ® ® ® KARA KARA KARA KARA ® ® ® ® M M M M O O O O DULAR DULAR DULAR DULAR WST SYSTEM SYSTEM SYSTEM SYSTEM kara- - - - minibu kara minibu kara kara minibu minibu rigging procedures using rigging procedures using rigging procedures using...
- Page 49 11. Attach the platform to KARA#1 as follows: a. Turn the platform feet pointing up and position it above KARA#1 in rear extension configuration [9.3.1]. b. Lower the platform to slide the four KARA-MINIBU slits along the KARA#1 arms. Note: If KARA- ANGARMEX are attached to the KARA-MINIBU, the rear slits are located on both KARA-ANGARMEX.
- Page 50 ® ® ® ® KARA KARA KARA KARA ® ® ® ® M M M M O O O O DULAR DULAR DULAR DULAR WST SYSTEM SYSTEM SYSTEM SYSTEM kara- - - - minibu kara minibu kara kara minibu minibu rigging procedures using rigging procedures using rigging procedures using...
- Page 51 13. Attach the KARA#1/platform assembly to the top SB18 (SB18#2 for example) as follows: a. Turn the assembly feet pointing down and KARA#1 front face towards audience. b. Position the assembly onto SB18#2 by sliding it downwards into the link arms. c.
- Page 52 ® ® ® ® KARA KARA KARA KARA ® ® ® ® M M M M O O O O DULAR DULAR DULAR DULAR WST SYSTEM SYSTEM SYSTEM SYSTEM kara- - - - minibu kara minibu kara kara minibu minibu rigging procedures using rigging procedures using rigging procedures using...
- Page 53 17. Attach KARA#3 to KARA#2 by applying steps 14 to 16. 18. Using another full KARA flight-case, repeat steps 14 to 16 until all KARA enclosures composing the array are assembled. Figure 56: Example of stacked SB18/KARA mixed array 19. Secure the loudspeaker assembly to a fixed point using a ratchet strap or any other equivalent material (not included).
-
Page 54: Array Disassembling Procedure
® ® ® ® KARA KARA KARA KARA ® ® ® ® M M M M O O O O DULAR DULAR DULAR DULAR WST SYSTEM SYSTEM SYSTEM SYSTEM kara- - - - minibu kara minibu kara kara minibu minibu rigging procedures using rigging procedures using rigging procedures using... - Page 55 Lift up and turn KARA#3 arms pointing up. Put KARA#3 into the flight-case tray. KARA#3 Pay attention to the tray position: both wedges must slope upwards from front to rear. WARNING Wedge Figure 58: Putting KARA#3 into the tray Set angle 0° on KARA#3 as follows (repeat on both sides of the enclosure): a.
- Page 56 ® ® ® ® KARA KARA KARA KARA ® ® ® ® M M M M O O O O DULAR DULAR DULAR DULAR WST SYSTEM SYSTEM SYSTEM SYSTEM kara- - - - minibu kara minibu kara kara minibu minibu rigging procedures using rigging procedures using rigging procedures using...
- Page 57 11. Separate the platform from KARA#1 as follows: a. Remove both KARA-MINIBU front R-BLP. b. If KARA-ANGARMEX are attached to the platform, remove both T-BLP from them. Otherwise, remove both KARA-MINIBU rear R-BLP. c. Separate the platform from KARA#1. d. If KARA-ANGARMEX are attached to the platform, remove them by removing both KARA-MINIBU rear R-BLP.
- Page 58 ® ® ® ® KARA KARA KARA KARA ® ® ® ® M M M M O O O O DULAR DULAR DULAR DULAR WST SYSTEM SYSTEM SYSTEM SYSTEM kara- - - - minibu kara minibu kara kara minibu minibu rigging procedures using rigging procedures using rigging procedures using...
- Page 59 13. Put the flight-case lid on. 14. Separate the top SB18 (SB18#2 for example) from the SB18 below (SB18#1 for example) as follows: a. Remove a T-BLP from an SB18#1 top link point. b. Rotate the link arm up. c. Lock the link arm in closed position by re-inserting the T-BLP into SB18#2. d.
-
Page 60: Care And Maintenance
® ® ® ® KARA KARA KARA KARA ® ® ® ® M M M M O O O O DULAR DULAR DULAR DULAR WST SYSTEM SYSTEM SYSTEM SYSTEM kara- - - - minibu kara minibu kara kara minibu minibu rigging procedures using rigging procedures using rigging procedures using... -
Page 61: Authorized Service Procedures
The replacement kits (KR) available for the customer are listed in Table 4. Table 5 is a list of all tools and material needed for rigging and service (not included). ® Service and repair work for any other part must be carried out by an L-ACOUSTICS authorized representative. Otherwise, the customer may be exposed to dangerous situations and the warranty will no longer apply. -
Page 62: Laser Support Plate
5 mm hex bit, 7 mm hex key, KR LOCKBLUE. ® Available in the L-ACOUSTICS TECH TOOLCASE (refer to the TECH TOOLCASE Product spec sheet [3.4]). Laser support plate replacement procedure Put the M-BUMP on a flat horizontal surface (verify with the handheld inclinometer). -
Page 63: Specifications
High-grade steel coated with polyester powder. Included accessories 4 R-BLP, 1 laser support plate with 4 bolts, 2 shackles. ® Installation safety limits are specified in SOUNDVISION Software which is designed to help with L-ACOUSTICS product implementation. Reference KARA-MINIBUEX Dimensions (L x H x D) 34 x 123.6 x 662 mm / 1.3 x 4.9 x 24.5 inch... - Page 64 ® ® ® ® KARA KARA KARA KARA ® ® ® ® M M M M O O O O DULAR DULAR DULAR DULAR WST SYSTEM SYSTEM SYSTEM SYSTEM kara- - - - minibu kara minibu kara kara minibu minibu rigging procedures using rigging procedures using rigging procedures using...
-
Page 65: Appendix
A laser support plate has been integrated inside the KARA-MINIBU for optional TEQSAS LAP-TEQ ® inclinometer/laser device mounting. The LAP-TEQ is a remote control device which is part of the L-ACOUSTICS TECH TOOLCASE (refer to the TECH TOOLCASE Product spec sheet [3.4]). Laser support plate with Inclinometer mounted to ®... -
Page 66: Flown Array Options And Site Angle Setting
9.2.1 KARA-MINIBU rigging options ® L-ACOUSTICS recommends 4 different rigging options to fly the KARA-MINIBU for arrays containing KARA and/or SB18 enclosures. It is possible to use 1 or 2 hang points and to include the KARA-MINIBUEX accessories (see Figure 66). -
Page 67: Kara-Minibu Site Angle Setting
9.2.2 KARA-MINIBU site angle setting The KARA-MINIBU site angle setting will be discrete or continuous depending on the chosen rigging option. Rigging options 1 and 3 offer 17 discrete site angle values in each configuration by selecting the single shackle position (holes 1-17). -
Page 68: Kara-Pullback Setup Safety Limits
® ® ® ® KARA KARA KARA KARA ® ® ® ® M M M M O O O O DULAR DULAR DULAR DULAR WST SYSTEM SYSTEM SYSTEM SYSTEM kara- - - - minibu kara minibu kara kara minibu minibu rigging procedures using rigging procedures using rigging procedures using... -
Page 69: Stacked Array Options And Site Angle Setting
Stacked array options and site angle setting 9.3.1 Stacking platform configuration The KARA-MINIBU can be used as a horizontal stacking platform along with both KARA-MINIBUEX extension bars. The platform can be set in front or rear extension configuration as show in Figure 71 and Figure 72 (refer to [9.3.2] for bottom KARA angle settings). -
Page 70: Array Site Angle Setting
® ® ® ® KARA KARA KARA KARA ® ® ® ® M M M M O O O O DULAR DULAR DULAR DULAR WST SYSTEM SYSTEM SYSTEM SYSTEM kara- - - - minibu kara minibu kara kara minibu minibu rigging procedures using rigging procedures using rigging procedures using... -
Page 71: Safety Pin Removal And Insertion
Safety pin removal and insertion The safety pins provided with the shackles have an integrated locking system. Figure 75 presents the removal and insertion procedures. ALWAYS put the safety pin in locked position before use. WARNING Lock Unlock Remove / Insert Figure 75: Safety pin removal and insertion procedures w w w . - Page 72 w w w . l - a c o u s t i c s . c o m...
- Page 73 w w w . l - a c o u s t i c s . c o m...
- Page 74 w w w . l - a c o u s t i c s . c o m...
- Page 75 w w w . l - a c o u s t i c s . c o m...
- Page 76 Document reference: KARA_SRM_EN_1-0 Distribution date: April 4 , 2011 ® © 2011 L-ACOUSTICS . All rights reserved. No part of this publication may be reproduced or transmitted in any form or by any means without the express written consent of the publisher.
Need help?
Do you have a question about the KARA MODULAR WST SYSTEM and is the answer not in the manual?
Questions and answers