Table of Contents
Advertisement
Quick Links
Advertisement
Table of Contents

Related Manuals for Danfoss VACON NX FI6


Summary of Contents for Danfoss VACON NX FI6
- Page 1 Operating Guide VACON® NX Inverters FI4-FI8...
-
Page 3: Table Of Contents
Lifting the Product Using the Product Modified Label 5 Mounting the Unit Environmental Requirements 5.1.1 General Environmental Requirements 5.1.2 Ambient Temperature and Derating 5.1.3 High Altitude Installation Cooling Requirements 5.2.1 General Cooling Requirements Danfoss A/S © 2019.07 AQ299433367205en-000101 / | 3... - Page 4 Navigating on the Control Panel Using the Monitoring Menu (M1) 8.2.1 Monitored Values Using the Parameter Menu (M2) 8.3.1 Finding the Parameter 8.3.2 Selecting Values 8.3.3 Editing the Values Digit by Digit 4 | Danfoss A/S © 2019.07 AQ299433367205en-000101 /...
- Page 5 Enabling/Disabling the Change of Multimonitoring Items 8.7.7 Keypad Settings 8.7.7.1 Finding the Keypad Settings Menu 8.7.7.2 Changing the Default Page 8.7.7.3 Default Page in the Operating Menu (P6.6.2) 8.7.7.4 Setting the Timeout Time Danfoss A/S © 2019.07 AQ299433367205en-000101 / | 5...
- Page 6 Insulation Checks of the DC Supply Cable 9.3.3 Insulation Checks of the Motor Checks after Commissioning 9.4.1 Testing the Inverter after Commissioning 9.4.2 RUN Test without Load 9.4.3 Start-up Test 9.4.4 Motor Run Checklist 6 | Danfoss A/S © 2019.07 AQ299433367205en-000101 /...
- Page 7 Technical Data 12.9 DC Currents and DC Link Capacitance 12.9.1 DC Currents, Supply Voltage 465–800 V DC 12.9.2 DC Currents, Supply Voltage 640–1100 V DC 12.9.3 DC Link Capacitance 12.10 Faults and Alarms Danfoss A/S © 2019.07 AQ299433367205en-000101 / | 7...
-
Page 8: Introduction
Do not dispose of equipment containing electrical components together with domestic waste. Collect it separately in accordance with local and currently valid legislation. 1.4 Type Approvals and Certifications The following list is a selection of possible type approvals and certifications for Danfoss drives: 8 | Danfoss A/S © 2019.07 AQ299433367205en-000101 / DPD00908... -
Page 9: Start Up Quick Guide
Introduction N O T I C E The specific approvals and certification for the drive are on the nameplate of the drive. For more information, contact the local Danfoss office or partner. 1.5 Start up Quick Guide Context: Do at minimum these procedures during the installation and commissioning. - Page 10 Nominal speed of the motor • Nominal current of the motor • Motor cos phi 9. Obey the commissioning instructions, see 9.2 Commissioning the Inverter. ® The VACON NX Inverter is ready for operation. 10 | Danfoss A/S © 2019.07 AQ299433367205en-000101 / DPD00908...
-
Page 11: Safety
Do not touch the motor terminals U, V, W, the brake resistor terminals, or the DC terminals when the inverter is connected to DC supply. Before connecting the inverter to DC supply, make sure that the covers of the inverter are closed. Danfoss A/S © 2019.07 AQ299433367205en-000101 / DPD00908| 11... - Page 12 (RCM) device can lead to the RCD not providing the intended protection and therefore can result in death or serious injury. Use a type B RCD or RCM device on the mains side of the drive. 12 | Danfoss A/S © 2019.07 AQ299433367205en-000101 / DPD00908...
-
Page 13: Cautions And Notices
Some of the electronic components inside the AC drive are sensitive to ESD. Static voltage can damage the components. Remember to use ESD protection always when working with electronic components of the AC drive. Do not touch the components on the circuit boards without proper ESD protection. Danfoss A/S © 2019.07 AQ299433367205en-000101 / DPD00908| 13... - Page 14 N O T I C E VOLTAGE WITHSTAND TESTS Doing voltage withstand tests can damage the drive. Do not do voltage withstand tests on the AC drive. The manufacturer has already done the tests. 14 | Danfoss A/S © 2019.07 AQ299433367205en-000101 / DPD00908...
-
Page 15: Product Overview
Charge res Power Measure- Supply ments Gate Drivers Control Panel Motor and Motor Application Control Control Control ASIC Unit Control Control Control Control Control ® Illustration 1: Block Diagram of VACON NX Inverter Danfoss A/S © 2019.07 AQ299433367205en-000101 / DPD00908| 15... -
Page 16: Intended Use
This manual is regularly reviewed and updated. All suggestions for improvement are welcome. The original language of this manual is English. Table 1: Manual and Software Version Edition Remarks DPD00908D Structure of the manual changed. 16 | Danfoss A/S © 2019.07 AQ299433367205en-000101 / DPD00908... -
Page 17: Standard Features Of Vacon Nx Inverters
Integrated charging Alphanumeric control panel (in the front end of the module) I/O modules A1 & A2 Standard board Safety CE/UL 3.5 Package Label The package label gives detailed information about the delivery. Danfoss A/S © 2019.07 AQ299433367205en-000101 / DPD00908| 17... -
Page 18: Description Of The Type Code
Each part of the type code agrees to the data in the order. Example: The code can have this format, for example: • NXI00035-A2T0SSS-A1A2C30000+DNOT Table 3: Description of the Type Code Code Description VACON This part is same for all the products. 18 | Danfoss A/S © 2019.07 AQ299433367205en-000101 / DPD00908... - Page 19 • The boards, the third letter (xxX): S = Direct connection, standard boards, FI4-FI8 V = Direct connection, varnished boards, FI4-FI8 F= Fiber connection, standard boards G = Fiber connection, varnished boards Danfoss A/S © 2019.07 AQ299433367205en-000101 / DPD00908| 19...
-
Page 20: Enclosure Sizes
Label). Use these values to find out the enclosure size of the AC drive from the table. In the example "NXI00035-A2H1SSS-A1A2C30000+DNOT", the code for nominal current is 0003 and the code for nominal mains voltage is 5. 20 | Danfoss A/S © 2019.07 AQ299433367205en-000101 / DPD00908... -
Page 21: Available Protection Ratings
0018 0022 0027 0034 0041 0052 0062 0080 0100 3.8 Available Protection Ratings Table 5: Available Protection Ratings Mains voltage Enclosure size IP21 (UL Type 1) IP00 350–500 V FI4-FI7 350–500 V Danfoss A/S © 2019.07 AQ299433367205en-000101 / DPD00908| 21... -
Page 22: Available Emc Classes
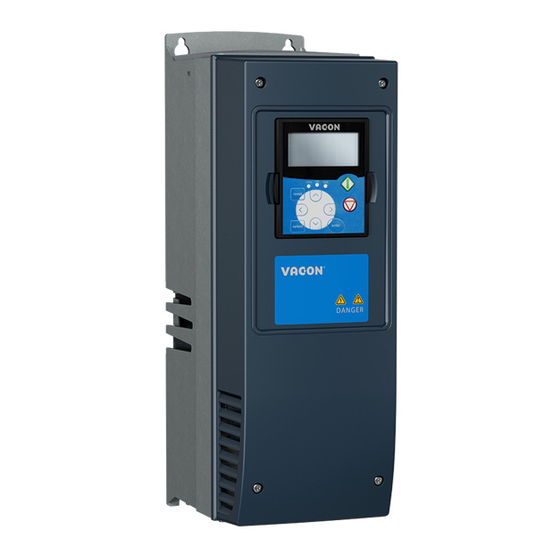
In a residential environment, this product can cause radio interference. Take supplementary mitigation measures. 3.10 Control Panel 3.10.1 Keypad ® The VACON keypad has 9 buttons with which to control the AC drive (and motor), set parameters, and monitor values. 22 | Danfoss A/S © 2019.07 AQ299433367205en-000101 / DPD00908... -
Page 23: Display
L The Browser button Up. Use it to scroll the main menu and the pages of different submenus and to increase a value. ® Illustration 3: Keypad Buttons for VACON 3.10.2 Display Danfoss A/S © 2019.07 AQ299433367205en-000101 / DPD00908| 23... -
Page 24: Basic Menu Structure
The data of the AC drive is in menus and submenus. The figure shows the basic menu structure of the AC drive. This menu structure is only an example and the contents and items can vary depending on the application in use. 24 | Danfoss A/S © 2019.07 AQ299433367205en-000101 / DPD00908... - Page 25 V1.17 Multimonit. items Expander boards See Application Manual Parameters P3.1 Control place M3 Keypad control R3.2 Keypad reference P3.3 Direction (on keypad) P3.4 Stop button Illustration 5: Basic Menu Structure of the AC Drive Danfoss A/S © 2019.07 AQ299433367205en-000101 / DPD00908| 25...
-
Page 26: Receiving The Delivery
Receiving the Delivery 4 Receiving the Delivery 4.1 Checking the Delivery Context: ® Before a VACON AC drive is sent to the customer, the manufacturer makes many tests on the drive. 26 | Danfoss A/S © 2019.07 AQ299433367205en-000101 / DPD00908... - Page 27 Illustration 6: Contents of the Accessories Bag for FR4-FR6/FI4-FI6 FR7-FR8/FI7-FI8 1 Screws, M4x16, 3 pieces 2 The grounding clamps for control cable, 3 pieces 4 The rubber grommets GDM36 (FR7/FI7), 3 pieces Danfoss A/S © 2019.07 AQ299433367205en-000101 / DPD00908| 27...
-
Page 28: Storing The Product
In the accessories bag, there is also a "product modified" label. The function of the label is to tell the service personnel about the changes that are made in the AC drive. 28 | Danfoss A/S © 2019.07 AQ299433367205en-000101 / DPD00908... - Page 29 1. Attach the label on the side of the AC drive to know where to find it. 2. If changes are made in the AC drive, write the change on the label. Danfoss A/S © 2019.07 AQ299433367205en-000101 / DPD00908| 29...
-
Page 30: Mounting The Unit
= ambient temperature x = derating coefficient, see the following list: • in ambient temperature of 40–50 °C, use derating factor 1.5%/1 °C • For higher temperatures, contact the factory. 30 | Danfoss A/S © 2019.07 AQ299433367205en-000101 / DPD00908... -
Page 31: High Altitude Installation
When using fuses at high altitudes, the cooling effect of the fuse decreases as the density of the atmosphere decreases. When using fuses above 2000 meters, the continuous rating of the fuse: Danfoss A/S © 2019.07 AQ299433367205en-000101 / DPD00908| 31... -
Page 32: Cooling Requirements
If many AC drives are installed above each other, the necessary free space is C + D (see illustration 11). Make also sure that the outlet air from the lower drive goes to a different direction than the air intake of the top drive. 32 | Danfoss A/S © 2019.07 AQ299433367205en-000101 / DPD00908... - Page 33 Table 6: Minimum Clearances around the AC Drive in mm (in inch) Drive type 0004 5-0012 5 (0.79) (0.79) (3.94) (1.97) 0016 5-0048 5 0004 6-0034 6 (1.18) (0.79) (6.30) (3.15) 0061 5-0105 5 0041 6-0052 6 (3.15) (3.15) (11.81) (3.94) Danfoss A/S © 2019.07 AQ299433367205en-000101 / DPD00908| 33...
-
Page 34: Installation Sequence For Wall-Mounted Ac Drives
If the inverter is installed outside the enclosure, cabinet or device space, install a separate inverter cover in accordance with protection class IP21 requirements. There is no need to install the inverter cover if the inverter is installed in an enclosure, separate cabinet, or device space. 34 | Danfoss A/S © 2019.07 AQ299433367205en-000101 / DPD00908... - Page 35 3. Make sure that there is sufficiently free space around the AC drive for cooling, see 5.2.2 Cooling of FI4 to FI8. Some free space is also necessary for maintenance. 4. Attach the AC drive with the screws and other components in the delivery. Danfoss A/S © 2019.07 AQ299433367205en-000101 / DPD00908| 35...
-
Page 36: Electrical Installation
The power cables are connected to terminals DC+ and DC- (R+/B+ and DC terminals when using an external charging circuit) and the motor cables to terminals U, V, and W. Illustration 12: Principal Connection Diagram For EMC-compliant installation, see 6.3 EMC-compliant Installation. 36 | Danfoss A/S © 2019.07 AQ299433367205en-000101 / DPD00908... -
Page 37: General Cable Requirements
The dimensions of the cables must comply with the requirements of the National Electric Code (NEC) and the Canadian Electric Code (CEC). Danfoss A/S © 2019.07 AQ299433367205en-000101 / DPD00908| 37... -
Page 38: Fuse Selection
There must be an automatic disconnection of the mains, if the protective earthing conductor breaks. OR • There must be a terminal for a second protective earthing conductor in the same cross-sectional area as the first protective earthing conductor. 38 | Danfoss A/S © 2019.07 AQ299433367205en-000101 / DPD00908... -
Page 39: Emc-Compliant Installation
To comply with the EMC levels, use a grommet when installing the motor cable at the two ends. For the EMC level C4, it is necessary to have a 360º grounding of the shield with grommets in the motor end. Danfoss A/S © 2019.07 AQ299433367205en-000101 / DPD00908| 39... -
Page 40: Get Access And Locate The Terminals
6.4 Get Access and Locate the Terminals 6.4.1 Get Access and Locate the Terminals for FR4/FI4 Context: Follow these instructions to open the AC drive for installing the cables, for example. 40 | Danfoss A/S © 2019.07 AQ299433367205en-000101 / DPD00908... - Page 41 1. Open the cover of the AC drive. 2. Remove the screws of the cable cover. Remove the cable cover. Do not open the cover of the power unit. 3. Locate the terminals. Danfoss A/S © 2019.07 AQ299433367205en-000101 / DPD00908| 41...
-
Page 42: Get Access And Locate The Terminals For Fr6/Fi6
D Grounding terminals Illustration 14: FR4/FI4 Terminals 6.4.2 Get Access and Locate the Terminals for FR6/FI6 Context: Follow these instructions to open the AC drive for installing the cables, for example. 42 | Danfoss A/S © 2019.07 AQ299433367205en-000101 / DPD00908... - Page 43 1. Open the cover of the AC drive. 2. Remove the screws of the cable cover. Remove the cable cover. Do not open the cover of the power unit. 3. Locate the terminals. Danfoss A/S © 2019.07 AQ299433367205en-000101 / DPD00908| 43...
-
Page 44: Get Access And Locate The Terminals For Fr7/Fi7
C Motor terminals Illustration 15: FR6/FI6 Terminals 6.4.3 Get Access and Locate the Terminals for FR7/FI7 Context: Follow these instructions to open the AC drive for installing the cables, for example. 44 | Danfoss A/S © 2019.07 AQ299433367205en-000101 / DPD00908... - Page 45 1. Open the cover of the AC drive. 2. Remove the screws of the cable cover. Remove the cable cover. Do not open the cover of the power unit. 3. Locate the terminals. Danfoss A/S © 2019.07 AQ299433367205en-000101 / DPD00908| 45...
-
Page 46: Get Access And Locate The Terminals For Fr8/Fi8
D Grounding terminals Illustration 16: FR7/FI7 Terminals 6.4.4 Get Access and Locate the Terminals for FR8/FI8 Context: Follow these instructions to open the AC drive for installing the cables, for example. 46 | Danfoss A/S © 2019.07 AQ299433367205en-000101 / DPD00908... - Page 47 1. Open the cover of the AC drive. 2. Open the power unit cover. 3. Find the DC terminals and Brake resistor terminals on top of the AC drive. B- B+ R+ R- 4. Locate the terminals. Danfoss A/S © 2019.07 AQ299433367205en-000101 / DPD00908| 47...
-
Page 48: Installing The Cables
2. Follow the installation instructions of the correct enclosure size. To check the enclosure size of the AC drive, see 3.7 Enclosure Sizes • 6.5.2 Installing the Cables, FR4-FR6/FI4-FI6 • 6.5.3 Installing the Cables, FR7/FI7 • 6.5.4 Installing the Cables, FR8/FI8 48 | Danfoss A/S © 2019.07 AQ299433367205en-000101 / DPD00908... -
Page 49: Additional Instructions For Cable Installation
Make sure that the delivery contains all necessary components. For the installation, the contents of the accessories bag is needed, see 4.1 Checking the Delivery. Open the covers according to instructions in 6.4.1 Get Access and Locate the Terminals for FR4/FI4, or 6.4.2 Get Access and Locate the Terminals for FR6/FI6. Danfoss A/S © 2019.07 AQ299433367205en-000101 / DPD00908| 49... - Page 50 4. Put the cable entry plate with the cables into the groove on the frame of the drive. To attach the cable entry plate, use the M4x10 screws delivered in the accessories bag. 50 | Danfoss A/S © 2019.07 AQ299433367205en-000101 / DPD00908...
- Page 51 12.5 Tightening Torques for Cover Screws. Attach the grounding clamps for control cable with 3 pieces of M4x16 screws delivered in the accessories bag. Use these clamps to ground the control cables. Danfoss A/S © 2019.07 AQ299433367205en-000101 / DPD00908| 51...
-
Page 52: Installing The Cables, Fr7/Fi7
Make sure that the delivery contains all necessary components. For the installation, the contents of the accessories bag is needed, see 4.1 Checking the Delivery. Open the covers according to instructions in 6.4.3 Get Access and Locate the Terminals for FR7/FI7. 52 | Danfoss A/S © 2019.07 AQ299433367205en-000101 / DPD00908... - Page 53 4. Put the cable entry plate with the cables into the groove on the frame of the drive. To attach the cable entry plate, use the M4x10 screws delivered in the accessories bag. Danfoss A/S © 2019.07 AQ299433367205en-000101 / DPD00908| 53...
- Page 54 12.5 Tightening Torques for Cover Screws. Attach the grounding clamps for control cable with 3 pieces of M4x16 screws delivered in the accessories bag. Use these clamps to ground the control cables. 54 | Danfoss A/S © 2019.07 AQ299433367205en-000101 / DPD00908...
-
Page 55: Installing The Cables, Fr8/Fi8
For information on how to comply with the UL regulations in cable installations, see 6.1.2 UL Standards on Cabling. ® If it is necessary to connect an external brake resistor, see VACON Brake Resistor Manual. See also 8.7.8.2 Setting the Internal Brake Resistor Connection. Danfoss A/S © 2019.07 AQ299433367205en-000101 / DPD00908| 55... - Page 56 Make sure that the delivery contains all necessary components. For the installation, the contents of the accessories bag is needed, see 4.1 Checking the Delivery. Open the covers according to instructions in 6.4.4 Get Access and Locate the Terminals for FR8/FI8. 56 | Danfoss A/S © 2019.07 AQ299433367205en-000101 / DPD00908...
- Page 57 DC cover: 2.4 Nm 7. Attach the grounding clamps for control cable on the grounding level with M4x16 screws. Use the clamps delivered in the accessories bag. Use the clamps to ground the control cables. Danfoss A/S © 2019.07 AQ299433367205en-000101 / DPD00908| 57...
- Page 58 Operating Guide | VACON® NX Inverters FI4-FI8 Electrical Installation 1 Standard 2 PROFIBUS Illustration 22: FR8/FI8 8. Attach the cover of the drive. For the tightening torques of the screws, see 12.5 Tightening Torques for Cover Screws. 58 | Danfoss A/S © 2019.07 AQ299433367205en-000101 / DPD00908...
-
Page 59: Control Unit
Boards User Manual. With this voltage, the control unit stays on and parameters can be set. The measurements of the main circuit (for example, the DC-link voltage, and the unit temperature) are not available when the drive is not connected to mains. Danfoss A/S © 2019.07 AQ299433367205en-000101 / DPD00908| 59... -
Page 60: Control Unit Cabling
(16 AWG) for other terminals. Table 10: Tightening Torques of the Control Cables The terminal The terminal screw The tightening torque in Nm (lb-in.) Relay and thermistor terminals (4.5) Other terminals M2.6 (1.8) 60 | Danfoss A/S © 2019.07 AQ299433367205en-000101 / DPD00908... -
Page 61: Control Terminals On Opta1
The specified total load on all available +24 V/EXT+24 V output terminals must not exceed 250 mA. Danfoss A/S © 2019.07 AQ299433367205en-000101 / DPD00908| 61... -
Page 62: Digital Input Signal Inversions
The active signal level is different when the common inputs CMA and CMB (terminals 11 and 17) are connected to +24 V or to ground (0 V). The 24 V control voltage and the ground for the digital inputs and the common inputs (CMA, CMB) can be internal or external. 62 | Danfoss A/S © 2019.07 AQ299433367205en-000101 / DPD00908... -
Page 63: Jumper Selections On The Opta1 Basic Board
On the A1 basic board, there are 4 jumper blocks: X1, X2, X3, and X6. Each jumper block contains 8 pins and 2 jumpers. See the possible jumper selections in illustration A B C D A B C D A B C D Illustration 28: Jumper Blocks on OPTA1 Danfoss A/S © 2019.07 AQ299433367205en-000101 / DPD00908| 63... -
Page 64: Control Terminals On Opta2 And Opta3
A B C D isolated from GND = Factory default AO1 mode: Voltage output; 0...10V Illustration 29: Jumper Selections for OPTA1 7.3.3 Control Terminals on OPTA2 and OPTA3 64 | Danfoss A/S © 2019.07 AQ299433367205en-000101 / DPD00908... - Page 65 • 5 V/10 mA TI1+ Thermistor input TI1- DigIN:B.1 *) *) Parameter reference on control panel and NCDrive. Illustration 30: Control Terminal Signals on Relay Boards OPTA2 and OPTA3 Illustration 31: OPTA2 Danfoss A/S © 2019.07 AQ299433367205en-000101 / DPD00908| 65...
-
Page 66: Installation Of Option Boards
The control connections are isolated from mains. The GND terminals are permanently connected to I/O ground. See illustration The digital inputs on the I/O board are galvanically isolated from the I/O ground. The relay outputs are also double-isolated from each other at 300 VAC (EN-50178). 66 | Danfoss A/S © 2019.07 AQ299433367205en-000101 / DPD00908... - Page 67 DIN4... Digital DIN6 input group B Control Power unit unit AO1+ Analogue AO2- output Digital output RI1/1 RO1/2 RO1/3 RO2/1 RO2/2 RO2/3 U V W TI1+ TI1- Illustration 33: Galvanic Isolation Barriers Danfoss A/S © 2019.07 AQ299433367205en-000101 / DPD00908| 67...
-
Page 68: Using The Control Panel
Follow these instructions to monitor the actual values of the parameters and signals. The values cannot be changed in the Monitoring menu. To change the values of parameters, see 8.3.2 Selecting Values 8.3.3 Editing the Values Digit by Digit. 68 | Danfoss A/S © 2019.07 AQ299433367205en-000101 / DPD00908... -
Page 69: Monitored Values
2. To go to the Monitoring menu from the main menu, push the Menu button Right. 3. To scroll through the menu, push the Browser buttons Up and Down. 8.2.1 Monitored Values The monitored values have the indication V#.#. The values update each 0.3 s. Danfoss A/S © 2019.07 AQ299433367205en-000101 / DPD00908| 69... -
Page 70: Using The Parameter Menu (M2)
See VACON All in One Application Manual for more monitored values. 8.3 Using the Parameter Menu (M2) 8.3.1 Finding the Parameter Context: Use these instructions to find the parameter to edit. 70 | Danfoss A/S © 2019.07 AQ299433367205en-000101 / DPD00908... -
Page 71: Selecting Values
Use these instructions to edit the text values on the control panel. The basic application package "All in One+" includes 7 applications with different sets of parameters. For more information, see ® VACON All in One Application Manual. Danfoss A/S © 2019.07 AQ299433367205en-000101 / DPD00908| 71... -
Page 72: Editing The Values Digit By Digit
Use these instructions to edit the numerical values on the control panel. The basic application package "All in One+" includes 7 applications with different sets of parameters. For more information, see ® VACON All in One Application Manual. Prerequisites: 72 | Danfoss A/S © 2019.07 AQ299433367205en-000101 / DPD00908... -
Page 73: Using The Keypad Control Menu
8.4.1 Finding the Keypad Control Menu Context: In the Keypad control menu, the following functions are available: selecting the control mode, editing the frequency reference, and changing the direction of the motor. Danfoss A/S © 2019.07 AQ299433367205en-000101 / DPD00908| 73... -
Page 74: Keypad Control Parameters M3
3 control modes are available to control the AC drive. For each control place, a different symbol shows on the display: The control mode The symbol I/O terminals I/O term Keypad (control panel) Keypad Fieldbus Bus/Comm 74 | Danfoss A/S © 2019.07 AQ299433367205en-000101 / DPD00908... -
Page 75: Changing The Rotation Direction
3. To select Yes or No, use the Browser buttons. 4. Accept the selection with the [enter] button. When the Stop motor function is not active, the Stop button stops the motor only when the keypad is the control mode. Danfoss A/S © 2019.07 AQ299433367205en-000101 / DPD00908| 75... -
Page 76: Special Functions In Keypad Control Menu
For more information on the fault types and how to reset faults, see 11.1 General Information on Fault Tracing 11.2 Resetting a Fault. For the fault codes, possible causes and information on how to correct the fault, see the Faults and Alarms section. 76 | Danfoss A/S © 2019.07 AQ299433367205en-000101 / DPD00908... -
Page 77: Examining The Fault Time Data Record
The fault time data record shows some important data that was valid at the time of the fault. This helps to find the cause of the fault. If real time is set on the AC drive, the data items T1 and T2 show as in column Real Time Data Record. Danfoss A/S © 2019.07 AQ299433367205en-000101 / DPD00908| 77... -
Page 78: Using The Fault History Menu (M5)
The newest fault has the indication H5.1, the second newest H5.2, and so on. If there are 30 faults in the history, the next fault that shows removes the oldest one (H5.30) from the history. See the different fault codes in the Faults and Alarms section. 78 | Danfoss A/S © 2019.07 AQ299433367205en-000101 / DPD00908... -
Page 79: Resetting The Fault History
System Menu S1 S11 8.7.2 System Menu Functions Table 12: System Menu Functions Code Function Unit Default Cust Description S6.1 Language selection English The selection is different in all the language packages Danfoss A/S © 2019.07 AQ299433367205en-000101 / DPD00908| 79... - Page 80 Not used S6.4.3 Factory settings S6.4.4 Keypad set S6.5 Security S6.5.1 Password Not used 0 = Not used P6.5.2 Parameter lock Change Ena- Change Enabled bled Change Disabled S6.5.3 Start-up wizard 80 | Danfoss A/S © 2019.07 AQ299433367205en-000101 / DPD00908...
- Page 81 T6.8.2.2 Clear MWh trip counter T6.8.2.3 Operating days trip counter T6.8.2.4 Operating hours trip counter hh:mm: ss T6.8.2.5 Clear operating time counter S6.8.3 Software info S6.8.3.1 Software package S6.8.3.2 System software version Danfoss A/S © 2019.07 AQ299433367205en-000101 / DPD00908| 81...
-
Page 82: Changing The Language
The application can be changed in the Application selection page (S6.2). When the application is changed, all parameters are reset. ® For more information on the Application Package, see VACON NX All in One Application Manual. 82 | Danfoss A/S © 2019.07 AQ299433367205en-000101 / DPD00908... -
Page 83: Copy Parameters (S6.3)
- Select Load set 2 to download the values in set 2 as the actual values. 5. To accept the selection, push the [enter] button. 6. Wait until OK shows on the display. Danfoss A/S © 2019.07 AQ299433367205en-000101 / DPD00908| 83... -
Page 84: Uploading Parameters To Control Panel (Up To Keypad, S6.3.2)
When the application is changed, the parameters in the parameter settings on page S6.3.1 are deleted. To copy parameters from one application to a different application, first upload them to the control panel. 84 | Danfoss A/S © 2019.07 AQ299433367205en-000101 / DPD00908... -
Page 85: Comparing The Parameters
5. To go to the edit mode, push the Menu button Right. The actual value starts to blink. 6. To change the actual value, use the Browser buttons, or change the value digit by digit with the Menu button Right. Danfoss A/S © 2019.07 AQ299433367205en-000101 / DPD00908| 85... -
Page 86: Security
Set a password to protect the application selection menu. N O T I C E Keep the password in a safe location! The password cannot be changed if a valid password is not available. 86 | Danfoss A/S © 2019.07 AQ299433367205en-000101 / DPD00908... -
Page 87: Entering A Password
Use the Parameter lock function to prevent changes to the parameters. If the parameter lock is active, the text locked shows on the display when trying to edit a parameter value. N O T I C E This function does not prevent unauthorized changes of parameter values. Danfoss A/S © 2019.07 AQ299433367205en-000101 / DPD00908| 87... -
Page 88: Start-Up Wizard (P6.5.3)
Use Multimonitoring to monitor up to 3 actual values at the same time (see 8.2 Using the Monitoring Menu (M1) and the chapter Monitored values in the Application Manual of your application). 88 | Danfoss A/S © 2019.07 AQ299433367205en-000101 / DPD00908... -
Page 89: Keypad Settings
5. To edit the third level page number, push the Menu button Right. Change the number of the third level page with the Browser buttons. 6. To accept the new default page value, push the [enter] button. Danfoss A/S © 2019.07 AQ299433367205en-000101 / DPD00908| 89... -
Page 90: Default Page In The Operating Menu (P6.6.2)
Fan control • HMI acknowledge timeout, HMI ACK timeout • HMI retry • Sine filter • Pre-charge mode. Prerequisites: Use a password to go the Hardware settings submenu, see 8.7.6.2 Passwords. 90 | Danfoss A/S © 2019.07 AQ299433367205en-000101 / DPD00908... -
Page 91: Setting The Internal Brake Resistor Connection
If the IGBT temperature is below 30 °C (86 °F), the fan stops. As the default temperature at power-up is 25 °C (77 °F), the fan does not start immediately. For instructions, see 8.7.8.4 Changing the Fan Control Settings. Danfoss A/S © 2019.07 AQ299433367205en-000101 / DPD00908| 91... -
Page 92: Changing The Fan Control Settings
2. To go to the edit mode, push the Menu button Right. 3. To change the acknowledgement time, use the Browser buttons. 4. To accept the change, push the [enter] button. 92 | Danfoss A/S © 2019.07 AQ299433367205en-000101 / DPD00908... -
Page 93: Changing The Number Of Retries To Receive Hmi Acknowledgement (P6.7.4)
The Power On time counter (days and hours) always counts, when the AC power is on. The counter does not count when control unit runs on +24 V only. Table 13: Total Counters Page Counter Example C6.8.1.1. MWh counter Danfoss A/S © 2019.07 AQ299433367205en-000101 / DPD00908| 93... -
Page 94: Trip Counters (S6.8.2)
6. The display shows again Not reset. 8.7.9.5 Software (S6.8.3) The Software information page includes information on the AC drive software. Page Content 6.8.3.1 Software package 6.8.3.2 System software version 6.8.3.3 Firmware interface 6.8.3.4 System load 94 | Danfoss A/S © 2019.07 AQ299433367205en-000101 / DPD00908... -
Page 95: Applications (S6.8.4)
The Expander boards pages give information about the basic and option boards connected to the control board. See 7.1 Control Unit Components for more information on the boards. For more information on the parameters of the option boards, see 8.8.1 Expander Board Menu. Danfoss A/S © 2019.07 AQ299433367205en-000101 / DPD00908| 95... -
Page 96: Debug Menu (S6.8.7)
1 = 0–20 mA 2 = 4–20 mA 3 = 0–10 V 4 = 2–10 V 8.8.2 Examining the Connected Option Boards Context: Use these instructions to examine the connected option boards. 96 | Danfoss A/S © 2019.07 AQ299433367205en-000101 / DPD00908... -
Page 97: Finding The Option Board Parameters
8.3.2 Selecting Values 8.3.3 Editing the Values Digit by Digit. 8.9 Further Control Panel Functions ® The VACON NX control panel has more application-related functions. See VACON NX Application Package for more information. Danfoss A/S © 2019.07 AQ299433367205en-000101 / DPD00908| 97... -
Page 98: Commissioning
The control terminals can have a dangerous voltage also when the drive is disconnected from DC supply. A contact with this voltage can lead to injury. Make sure that there is no voltage in the control terminals before touching the control terminals. 98 | Danfoss A/S © 2019.07 AQ299433367205en-000101 / DPD00908... -
Page 99: Commissioning The Inverter
9.2 Commissioning the Inverter Context: Follow these instructions to commission the inverter. Prerequisites: Read the safety instructions in 2.2 Danger and Warnings 9.1 Safety Checks before Starting the Commissioning, and obey them. Danfoss A/S © 2019.07 AQ299433367205en-000101 / DPD00908| 99... -
Page 100: Measuring The Cable And Motor Insulation
The insulation checks of the motor, see 9.3.3 Insulation Checks of the Motor 9.3.1 Insulation Checks of the Motor Cable Context: Use these instructions to check the insulation of the motor cable. 100 | Danfoss A/S © 2019.07 AQ299433367205en-000101 / DPD00908... -
Page 101: Insulation Checks Of The Dc Supply Cable
6. Do the final insulation check on the drive side. Put all phases together and measure to the ground. 7. Connect the motor cables to the drive. 9.4 Checks after Commissioning 9.4.1 Testing the Inverter after Commissioning Context: Before starting the motor, do these checks. Danfoss A/S © 2019.07 AQ299433367205en-000101 / DPD00908| 101... -
Page 102: Run Test Without Load
6. If the motor was not connected in the start-up test, connect the motor to the process. 7. Do again the Run test A or B, see 9.4.2 RUN Test without Load. 102 | Danfoss A/S © 2019.07 AQ299433367205en-000101 / DPD00908... -
Page 103: Motor Run Checklist
3. Before reversing the motor, make sure it can be done safely. 4. Make sure that no power correction capacitors are connected to the motor cable. 5. Make sure that the motor terminals are not connected mains potential. Danfoss A/S © 2019.07 AQ299433367205en-000101 / DPD00908| 103... -
Page 104: Maintenance
The correct course of action is to ensure that the insulation layer of the capacitor is ‘reformed’ by the application of a limited current using a DC supply. Current limiting ensures that the heat generated within the capacitor is kept at a sufficiently low level to prevent any damage. 104 | Danfoss A/S © 2019.07 AQ299433367205en-000101 / DPD00908... - Page 105 If the AC drive or spare capacitors are intended to be stocked, discharge the capacitors before storage. Use a measuring device to make sure that there is no voltage. If in doubt, contact your Danfoss Drives® representative. Case 1: AC drive which has been non-operational or stocked for over 2 years.
-
Page 106: Fault Tracing
Active Faults list, and the Fault History. 11.2 Resetting a Fault Context: The fault stays active until it is reset. Reset the fault using these instructions. 106 | Danfoss A/S © 2019.07 AQ299433367205en-000101 / DPD00908... -
Page 107: Creating Service Info File
NCDrive PC tool is installed on the computer. To install it, go to our website http://drives.danfoss.com/ downloads/portal/ Procedure ® 1. Open the VACON NCDrive. 2. Go to File and select Service Info..The service information file opens. 3. Save the service info file on the computer. Danfoss A/S © 2019.07 AQ299433367205en-000101 / DPD00908| 107... -
Page 108: Specifications
63.9 48.0 105.8 12.2 Dimensions For dimension information, see the following topics: • 12.2.1 Dimensions for FI4–FI8 • 12.2.2 Dimensions for Flange Mounting, FI4–FI6 • 12.2.3 Dimensions for Flange Mounting, FI7–FI8 108 | Danfoss A/S © 2019.07 AQ299433367205en-000101 / DPD00908... - Page 109 (3 x 1.11) 0061 5–0105 5 3 x 37 3 x 37 3 x 28.3 0041 6–0052 6 (9.33) (7.48) (24.80) (24.17) (23.27) (9.33) (0.35) (3 x 1.46) (3 x 1.46) (3 x 1.11) Danfoss A/S © 2019.07 AQ299433367205en-000101 / DPD00908| 109...
- Page 110 Drive type Ø 0004 5–0012 5 (5.03) (4.45) (13.27) (12.8) (12.9) (1.18) (0.87) (7.48) (3.03) (0.27) 0016 5–0045 5 0004 6–0034 6 (7.68) (6.69) (22.05) (21.61) (22) (1.18) (0.79) (9.33) (4.17) (0.26) 110 | Danfoss A/S © 2019.07 AQ299433367205en-000101 / DPD00908...
- Page 111 Table 20: The Dimensions in mm (in inch) of the Opening and Drive Outline with Flange, FI4 to FI6 Drive type Ø 0004 5–0012 5 – – (4.84) (4.45) (–) (12.40) (12.8) (–) (0.20) (0.26) 0016 5–0045 5 0004 6–0034 6 (7.28) (6.69) (6.18) (21.22) (21.61) (0.27) (0.20) (0.26) Danfoss A/S © 2019.07 AQ299433367205en-000101 / DPD00908| 111...
- Page 112 NX Inverters, FI7 and FI8, part 2 Drive type 0061 5–0105 5 188.5 188.5 0041 6–0052 6 (25.67) (24.88) (24.80) (7.42) (7.42) (0.91) (0.79) 0140 5 – 0062 6–0100 6 (29.72) (–) (29.33) (10.16) (10.43) (1.69) (2.24) 112 | Danfoss A/S © 2019.07 AQ299433367205en-000101 / DPD00908...
- Page 113 0061 5–0105 5 188.5 188.5 34.5 0041 6–0052 6 (9.17) (6.89) (9.96) (24.4) (7.42) (7.42) (1.36) (1.26) (0.28) (0.22) Ø Illustration 43: Dimensions of the Opening and Drive Outline with Flange, FI8 Danfoss A/S © 2019.07 AQ299433367205en-000101 / DPD00908| 113...
-
Page 114: Cable And Fuse Sizes
NXI_0012 5 170M1562 NXI_0016 5 170M1565 NXI_0022 5 170M1565 NXI_0031 5 170M1565 NXI_0038 5 170M1567 NXI_0045 5 170M1567 NXI_0061 5 170M1568 NXI_0072 5 170M1570 NXI_0087 5 170M1570 NXI_0105 5 170M1571 NXI_0140 170M3819 114 | Danfoss A/S © 2019.07 AQ299433367205en-000101 / DPD00908... -
Page 115: Fuse Sizes For 640-1100 V Dc (525-690 V Ac)
2*25 3*25+16 2.5–50 Cu 6–70 6–50 Al NXI_0087 5 2*35 3*35+16 2.5–50 Cu 6–70 6–50 Al NXI_0105 5 2*50 3*50+25 2.5–50 Cu 6–70 6–50 Al NXI_0140 5 2*70 3*70+35 25–95 Cu/Al 25–95 Danfoss A/S © 2019.07 AQ299433367205en-000101 / DPD00908| 115... -
Page 116: Cable Sizes For 640-1100 V Dc (525-690 V Ac)
2*25 3*25+16 25–95 Cu/Al 25–95 NXI_0100 6 2*35 3*35+16 12.4 Cable Stripping Lengths illustration 44 for parts of cables to be stripped and check the corresponding stripping length in the table. 116 | Danfoss A/S © 2019.07 AQ299433367205en-000101 / DPD00908... - Page 117 Table 30: Cable Stripping Lengths [in] Enclosure size 0.39 0.79/2.76 0.28 1.97 0.28 1.38 0.59 2.36/3.15 0.79 3.54 0.59 2.36 0.98 4.72/5.51 0.98 4.72 0.98 4.72 1.18 5.91 0.91 9.45 0.91 9.45 0140 Danfoss A/S © 2019.07 AQ299433367205en-000101 / DPD00908| 117...
-
Page 118: Tightening Torques For Cover Screws
) is required for 1 minute every 10 minutes, the remaining 9 minutes must be approximately 98% of I or less. This is to make sure that the output current is not more than I during the duty cycle. 118 | Danfoss A/S © 2019.07 AQ299433367205en-000101 / DPD00908... - Page 119 This is to make sure that the output current is not more than I during the duty cycle. H*150% H*150% 1 min 9 min Illustration 46: High Overload For more information, refer to the standard IEC61800-2. Danfoss A/S © 2019.07 AQ299433367205en-000101 / DPD00908| 119...
-
Page 120: Power Ratings For 465-800 V Dc (380-500 V Ac)
40 °C load 50 °C rent I [A] rent I [A] [kW] [kW] NXI _0004 6 NXI _0005 6 NXI _0007 6 NXI _0010 6 11.3 NXI _0013 6 13.5 14.9 120 | Danfoss A/S © 2019.07 AQ299433367205en-000101 / DPD00908... -
Page 121: Technical Data
(1 min/10 min) Starting torque for 2 s, depends on the motor Starting current for 2 s every 20 s Output frequency 0…320 Hz; 7200 Hz (special use) Frequency resolution Depends on application Danfoss A/S © 2019.07 AQ299433367205en-000101 / DPD00908| 121... - Page 122 NXI_xxxx 6: 1…6 kHz; Factory default 1.5 kHz Analog input Resolution 0.1% (10-bit), accuracy ±1% Panel reference Resolution 0.01 Hz Field weakening point 30…320 Hz Acceleration time 0…3000 s Deceleration time 0…3000 s 122 | Danfoss A/S © 2019.07 AQ299433367205en-000101 / DPD00908...
- Page 123 IEC/EN 61800-5-1, UL 508C, CSA C22.2 No.274 Approvals CE, cULus, RCM, KC, EAC, UA (see nameplate of the drive for more approvals.) Marine approvals: LR, BV, DNV, GL, ABS, RMRS, CCS, KR Efficiency https://www.danfoss.com/en/about-danfoss/our-businesses/ drives/knowledge-center/energy-efficiency-directive/ Danfoss A/S © 2019.07 AQ299433367205en-000101 / DPD00908| 123...
-
Page 124: Dc Currents And Dc Link Capacitance
For DC currents, see: • 12.9.1 DC Currents, Supply Voltage 465–800 V DC • 12.9.2 DC Currents, Supply Voltage 640–1100 V DC For DC link capacitance, see 12.9.3 DC Link Capacitance. 124 | Danfoss A/S © 2019.07 AQ299433367205en-000101 / DPD00908... -
Page 125: Dc Currents, Supply Voltage 465-800 V Dc
(input) 0.81 0.82 0.83 10.0 0.84 10.9 13.5 0.85 14.9 18.0 0.85 19.9 22.0 0.86 24.6 27.0 0.86 30.2 34.0 0.86 38.1 41.0 0.87 52.0 0.87 62.0 0.87 80.0 0.88 100.0 0.88 Danfoss A/S © 2019.07 AQ299433367205en-000101 / DPD00908| 125... -
Page 126: Dc Link Capacitance
Troubleshooting • Do a check of the loading. • Do a check of the motor. • Do a check of the cables and connections. • Make an identification run. 126 | Danfoss A/S © 2019.07 AQ299433367205en-000101 / DPD00908... - Page 127 Set the deceleration time longer. • Use the brake chopper or the brake resistor. They are available as options. • Activate the overvoltage controller. • Do a check of the input voltage. Danfoss A/S © 2019.07 AQ299433367205en-000101 / DPD00908| 127...
- Page 128 DO NOT RESTART THE DRIVE or CONNECT THE POWER! • Ask instructions from the factory. If this fault shows at the same time with Fault 1, do a check of the motor cable and the motor. 128 | Danfoss A/S © 2019.07 AQ299433367205en-000101 / DPD00908...
- Page 129 Reset the fault and start the drive again. • If the fault shows again, ask instructions from the local distributor. 12.10.14 Fault 8 - System fault, Subcode S7 - Charging switch Cause • operation malfunction • defective component Danfoss A/S © 2019.07 AQ299433367205en-000101 / DPD00908| 129...
- Page 130 12.10.18 Fault 8 - System fault, Subcode S11 - Power unit comm. (Measurement) Cause • operation malfunction • defective component Troubleshooting • Reset the fault and start the drive again. • If the fault shows again, ask instructions from the local distributor. 130 | Danfoss A/S © 2019.07 AQ299433367205en-000101 / DPD00908...
- Page 131 OPTAF board has been removed. It is not allowed to remove the OPTAF board once the software has recognized it. Troubleshooting The system requires a manual acknowledgement using System menu parameter 6.5.5 OPTAF Remove. Ask help from the local distributor. Danfoss A/S © 2019.07 AQ299433367205en-000101 / DPD00908| 131...
- Page 132 12.10.27 Fault 8 - System fault, Subcode S37 - OPTAF: Test pulse is not detected in both STO channels Cause Single hardware problem detected in Safe Disable inputs. Troubleshooting • Change the OPTAF board. • Change the control board. 132 | Danfoss A/S © 2019.07 AQ299433367205en-000101 / DPD00908...
- Page 133 Troubleshooting Change the OPTAF board. 12.10.32 Fault 8 - System fault, Subcode S42 - OPTAF: Test pulse low is not detected on thermistor Cause Single hardware problem detected in the thermistor input. Danfoss A/S © 2019.07 AQ299433367205en-000101 / DPD00908| 133...
- Page 134 12.10.36 Fault 8 - System fault, Subcode S46 - OPTAF: Thermistor or analog input is not set, even if STO is active Cause Single hardware problem detected in Safe Disable inputs or in the thermistor input. Troubleshooting • Change the OPTAF board. • Change the control board. 134 | Danfoss A/S © 2019.07 AQ299433367205en-000101 / DPD00908...
- Page 135 12.10.40 Fault 8 - System fault, Subcode S50 - OPTAF: Filter discharge resistor fault Cause Problem with the control board. Troubleshooting Ask instructions from the local distributor. 12.10.41 Fault 8 - System fault, Subcode S70 - False fault activated Cause Fault in application. Danfoss A/S © 2019.07 AQ299433367205en-000101 / DPD00908| 135...
- Page 136 Do a check of the supply voltage. If the supply voltage is sufficient, there is an internal fault. • Ask instructions from the local distributor. 12.10.44 Fault 9 - Undervoltage, Subcode S3 - Undervoltage control supervision Cause The DC-link voltage is lower than the limits. 136 | Danfoss A/S © 2019.07 AQ299433367205en-000101 / DPD00908...
- Page 137 The measurement of current tells that there is no current in 1 motor phase. It is possible to set different responses in the application for this fault. See parameter group Protections. Troubleshooting Do a check of the motor cable and the motor. Danfoss A/S © 2019.07 AQ299433367205en-000101 / DPD00908| 137...
- Page 138 Too low a temperature in the heat sink of the power unit or in the power board. The heat sink temperature is below -10 °C (14 °F). Troubleshooting Add an external heater near the AC drive. 138 | Danfoss A/S © 2019.07 AQ299433367205en-000101 / DPD00908...
- Page 139 Heat sink temperature is over 90 °C (194 °F). Overtemperature alarm is issued when the heat sink temperature goes over 85 °C (185 °F). In 525–690 V, FR6: Heat sink temperature is over 77 ºC (170.6 °F). Overtemperature alarm is issued when the heat sink temperature goes over 72 ºC (161.6 °F). Danfoss A/S © 2019.07 AQ299433367205en-000101 / DPD00908| 139...
- Page 140 It is possible to set different responses in the application for this fault. See parameter group Protections. Troubleshooting • Check the load. • Check underload protection parameterization. 12.10.58 Fault 18 - Unbalance, Subcode S1 - Current unbalance Cause Unbalance between power modules in paralleled power units. 140 | Danfoss A/S © 2019.07 AQ299433367205en-000101 / DPD00908...
- Page 141 If the fault occurs again, ask instructions from the local distributor. 12.10.62 Fault 22 - Parameter fault, Subcode S2 - Firmware interface variable check sum error Cause Parameter save fault. • Operation malfunction • defective component Danfoss A/S © 2019.07 AQ299433367205en-000101 / DPD00908| 141...
- Page 142 12.10.65 Fault 22 - Parameter fault, Subcode S5 - Application-defined power-down, variable checksum error Cause Parameter save fault. • Operation malfunction • defective component Troubleshooting If the fault occurs again, ask instructions from the local distributor. 142 | Danfoss A/S © 2019.07 AQ299433367205en-000101 / DPD00908...
- Page 143 • Recommission the application. • Check parameters. 12.10.69 Fault 24 - Counter fault Cause Values that showed on the counters are incorrect. Troubleshooting Have a critical attitude towards values shown on counters. Danfoss A/S © 2019.07 AQ299433367205en-000101 / DPD00908| 143...
- Page 144 12.10.74 Fault 26 - Start-up prevented, Subcode S30 - RUN request given too quickly Cause Start-up of the drive has been prevented. START command is ON after system software or application was downloaded, or after application was changed. 144 | Danfoss A/S © 2019.07 AQ299433367205en-000101 / DPD00908...
- Page 145 STO inputs SD1 and SD2 are activated through the OPTAF option board. Troubleshooting Cancel Safe Disable if it can be done safely. 12.10.78 Fault 31 - IGBT temperature (hardware) Cause IGBT Inverter Bridge overtemperature protection has detected too high a short-term overload current. Danfoss A/S © 2019.07 AQ299433367205en-000101 / DPD00908| 145...
- Page 146 For an application programmer: do a check of the application program. 12.10.82 Fault 36 - Control unit Cause • The software needs newer version of the control unit. Troubleshooting • Change the control unit. 146 | Danfoss A/S © 2019.07 AQ299433367205en-000101 / DPD00908...
- Page 147 12.10.87 Fault 40 - Device unknown, Subcode S2 - StarCoupler: power sub units are not identical Cause An unknown or mismatching device was connected (the power unit or option board). Troubleshooting Ask instructions from the local distributor. Danfoss A/S © 2019.07 AQ299433367205en-000101 / DPD00908| 147...
- Page 148 Ask instructions from the local distributor. 12.10.92 Fault 40 - Device unknown, Subcode S7 - Old ASIC detected Cause An unknown or mismatching device was connected (the power unit or option board). 148 | Danfoss A/S © 2019.07 AQ299433367205en-000101 / DPD00908...
- Page 149 Make an identification run. 12.10.96 Fault 41 - IGBT temperature, Subcode S5 - BCU: Filtered current too high for some time Cause IGBT Inverter Bridge overtemperature protection has detected too high a short-term overload current. Danfoss A/S © 2019.07 AQ299433367205en-000101 / DPD00908| 149...
- Page 150 Brake resistor overtemperature protection has detected too heavy braking. Troubleshooting • Reset unit. • Set the deceleration time longer. • Dimensioning of the brake chopper is not correct. • Use external brake resistor. 150 | Danfoss A/S © 2019.07 AQ299433367205en-000101 / DPD00908...
- Page 151 Dimensioning of the brake chopper is not correct. • Use external brake resistor. 12.10.103 Fault 43 - Encoder fault, Subcode S1 - Encoder 1 channel A is missing Cause Problem detected in encoder signals. Encoder channel A is missing. Danfoss A/S © 2019.07 AQ299433367205en-000101 / DPD00908| 151...
- Page 152 12.10.106 Fault 43 - Encoder fault, Subcode S4 - Encoder reversed Cause Problem detected in encoder signals. The encoder is reversed. The output frequency has been set to the positive value, but the encoder signal is negative. 152 | Danfoss A/S © 2019.07 AQ299433367205en-000101 / DPD00908...
- Page 153 Problem detected in parameterization of option board. There is a mismatch of the resolver/ motor pole pair number. Resolver pole pair number (if >1) is not matching the motor pole pair number. Danfoss A/S © 2019.07 AQ299433367205en-000101 / DPD00908| 153...
- Page 154 Encoder speed supervision. The difference between the encoder speed and estimated speed is too large. Dual speed supervision: Estimated speed and encoder speed difference is too high (0.05 x f or minimum motor nominal slip frequency). See variable EstimatedShaftFrequency. 154 | Danfoss A/S © 2019.07 AQ299433367205en-000101 / DPD00908...
- Page 155 New device of different type or different power rating. Troubleshooting • Reset. • If option board was changed, set the option board parameters again. • If power unit was changed, set AC drive parameters again. Danfoss A/S © 2019.07 AQ299433367205en-000101 / DPD00908| 155...
- Page 156 Digital input has been programmed as external fault input and this input is active. Troubleshooting • Check the programming. • Check the device which the error message indicates. • Check the cabling for the respective device. 156 | Danfoss A/S © 2019.07 AQ299433367205en-000101 / DPD00908...
- Page 157 Shows temperature measurement fault for option board OPTBH or OPTB8. • Temperature exceeded set limit. • Sensor disconnected. • Short circuit. Troubleshooting Find the cause of temperature rise. 12.10.126 Fault 57 - Identification Cause Identification run has failed. Danfoss A/S © 2019.07 AQ299433367205en-000101 / DPD00908| 157...
- Page 158 Normally this fault comes from the heat exchanger unit. Troubleshooting Do a check of the reason for the failure on the external system. 12.10.130 Fault 61 - Speed error Cause Motor speed is unequal to reference. 158 | Danfoss A/S © 2019.07 AQ299433367205en-000101 / DPD00908...
- Page 159 Do a check of the main power switch of the drive. 12.10.134 Fault 65 - Measured Temperature Cause Shows temperature measurement fault for option board OPTBH or OPTB8. • Temperature exceeded set limit. • Sensor disconnected. • Short circuit. Danfoss A/S © 2019.07 AQ299433367205en-000101 / DPD00908| 159...
- Page 160 Cause When using normal Master Follower function this fault code is given if one or more follower drives trips to fault. Troubleshooting Correct the fault cause on follower and reset fault. 160 | Danfoss A/S © 2019.07 AQ299433367205en-000101 / DPD00908...
- Page 161 Cooling Cooling space Copy parameters Copying frequency reference set Hardware information Hardware settings menu Covers, tightening torques High altitude installation High overload HMI acknowledge timeout DC currents 125, 125 DC link capacitance Danfoss A/S © 2019.07 AQ299433367205en-000101 / DPD00908| 161...
- Page 162 Package label Terminals, FR8/FI8 Parameter lock Terminals, tightening torques Parameter menu Timeout time Parameter set, saving Total counters Parameter, comparing Trip counters Parameter, downloading to drive Type code Parameter, editing 71, 72 162 | Danfoss A/S © 2019.07 AQ299433367205en-000101 / DPD00908...
- Page 163 Operating Guide | VACON® NX Inverters FI4-FI8 Index UL certification UL requirements, cables Up to keypad Vibration and shock Weight Danfoss A/S © 2019.07 AQ299433367205en-000101 / DPD00908| 163...
- Page 164 Operating Guide | VACON® NX Inverters FI4-FI8 164 | Danfoss A/S © 2019.07 AQ299433367205en-000101 / DPD00908...
- Page 165 Operating Guide | VACON® NX Inverters FI4-FI8 Danfoss A/S © 2019.07 AQ299433367205en-000101 / DPD00908| 165...
- Page 166 Danfoss can accept no responsibility for possible errors in catalogues, brochures and other printed material. Danfoss reserves the right to alter its products without notice. This also applies to products already on order provided that such alterations can be made without subsequential changes being necessary in specifications already agreed. All trademarks in this material are property of the respective companies.
Need help?
Do you have a question about the VACON NX FI6 and is the answer not in the manual?
Questions and answers