
Subscribe to Our Youtube Channel
Related Manuals for Danfoss TripleLynx


Summary of Contents for Danfoss TripleLynx
- Page 1 MAKING MODERN LIVING POSSIBLE TripleLynx Installation Manual Three-phase – 8, 10, 12.5 and 15 kW SOLAR INVERTERS...
-
Page 2: Table Of Contents
Contents Contents 1. Safety and Conformity Important Safety Information Hazards of PV Systems PV Load Switch Conformity 2. Introduction Introduction Installation Sequence Overview of Inverter 3. Installation Installation Dimensions and Patterns Mounting the Inverter Removing the Inverter Opening and Closing the Inverter AC Grid Connection PV Connection Auxiliary Input/Output... -
Page 3: Safety And Conformity
1. Safety and Conformity 1. Safety and Conformity 1.1. Important Safety Information All persons installing and servicing inverters must be: • Trained and experienced in general safety rules for work on electrical equipment • Familiar with local requirements, rules and regulations for the installation Safety information important for human safety. -
Page 4: Hazards Of Pv Systems
Additionally it will lead to the cancellation of all inver- ter operating approval certificates. The Danfoss inverters are all designed according to the German VDE0126-1-1 (February 2006) standard, which includes an insulation test between PV array(s) and Earth, and a type B, RCMU according to DIN VDE 0100-712. -
Page 5: Conformity
VDEW TripleLynx VDEW Konformitätserklärung Table 1.1: Approvals and Certifications For more information, go to the download area at www.danfoss.com/solar, Approvals and Cer- tifications. CE marking - This certifies the conformity of the equipment with the regula- tions which apply in accordance with the directives 2004/108/EC and 2006/95/EC. -
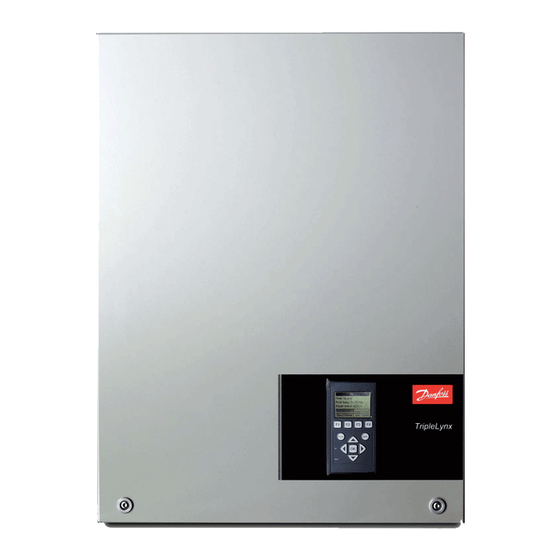
Page 6: Introduction
2. Introduction 2. Introduction 2.1. Introduction This manual explains the installation and setup of the TripleLynx solar inverter, for the installa- tion technician. Illustration 2.1: TripleLynx 8 kW, 10 kW, 12.5 kW, 15 kW CE marking - This certifies the conformity of the equipment with the regula- tions which apply in accordance with the directives 2004/108/EC and 2006/95/EC. -
Page 7: Installation Sequence
Close the inverter according to the section Turn on AC at the mains switch. Set language, time, date, installed PV power and country: For setup via the integrated Web Server, see the TripleLynx User Manual, Quick Guide section Web Server... -
Page 8: Overview Of Inverter
2. Introduction 2.1.2. Overview of Inverter Illustration 2.3: Overview of Danfoss TLX inverter Live Part AC Connection Area DC Connection Area Terminal block for parallel connection Auxiliary output: Potential free relay PELV (Safe to touch) Auxiliary interface: RS485 Auxiliary interface: Temperature, Irradiation, Energy meter (SO) -
Page 9: Installation
3. Installation 3. Installation 3.1. Installation Dimensions and Patterns Note: When choosing the installation place, ensure that all labels are visible at all times. Specifications . For details refer to the section Avoid constant stream of water. Avoid direct sunlight. Ensure adequate air flow. - Page 10 3. Installation Illustration 3.1: Safe Distances Observe these distances when installing one or more inverters. One row mounting is recom- mended. Contact the supplier for information on mounting in more rows. Illustration 3.2: Wall Plate Note: Use of the wall plate delivered with the inverter is mandatory. Use screws that can safely carry the weight of the inverter.
-
Page 11: Mounting The Inverter
3. Installation 3.2. Mounting the Inverter For safe handling of the inverter, two people must carry the unit, or a suitable transport trolley must be used. Safety boots must be worn. Tilt the inverter as shown in the illustration and place the top of the inverter against the mounting bracket. - Page 12 3. Installation Place the lower part of the inverter against the mounting bracket. Illustration 3.5: Place Inverter in Mounting Bracket Lower (4) the inverter and make sure that the hook of the inverter base plate is placed in the lower part of the mounting bracket (5).
-
Page 13: Removing The Inverter
3. Installation 3.3. Removing the Inverter Loosen the locking screws on either side of the inverter. Removal is performed in the reverse order of mounting. With a firm grip at the lower end of the inverter, lift the inverter approximately 20 mm vertically. Pull the inverter slightly away from the wall. - Page 14 3. Installation Push the front cover upwards. When a slight resistance is felt, give the front cover a tap on the bottom to snap it into holding posi- tion. It is recommended to use the holding position instead of dismounting the front cover completely.
-
Page 15: Ac Grid Connection
3. Installation Illustration 3.10: Fasten Front Screws and En- sure Proper PE Connection The two front screws are the PE connection to the front cover. Make sure that both screws are mounted and fastened with the specified torque. 3.5. AC Grid Connection Note: When choosing the installation place, ensure that all labels are visible at all times. - Page 16 3. Installation Illustration 3.11: AC Cable Wire Strip Legend 1 Blue cable - Neutral 2 Yellow/green cable - Earth The illustration shows the stripping of insulation of all 5 wires of the AC cable. The length of the PE wire must be longer than the mains and neutral wires. Illustration 3.12: AC Connection Area Verify the inverter matches the grid-voltage.
-
Page 17: Pv Connection
3. Installation Technical All wires must be properly fastened with the correct torque. See the section Data, Torque Specifications for Installation . Close the front cover, and remember to verify that both front screws are applied with the correct torque to obtain PE connection. Close main circuit breaker. -
Page 18: Auxiliary Input/Output
3. Installation When unmated the MC4 connectors are not IP54. The intrusion of moisture may occur in the following situations: The inverter runs in Master/Slave operation and only one or two PV in- puts are in use. In this case, the other inputs are not connected to PV and they are therefore open to intrusion. -
Page 19: Start-Up And Check Of Settings
4. Start-up and Check of Settings 4. Start-up and Check of Settings 4.1. Start-up and Check of Settings Note: Due to the advanced functionalities of the inverter, it may take up to 10 seconds before the display becomes available after power up. Note: For the TLX Pro version the first start-up and check of settings can also be performed via the integrated Web Server. - Page 20 4. Start-up and Check of Settings Set time as prompted by the display. Press 'OK' to select number. Press ‘ ’ to scroll up ▲ through the numbers. Select by pressing 'OK'. The clock is 24-hour format. Illustration 4.2: Set Time Note: It is very important to set the time and date accurately as the inverter uses this for logging.
- Page 21 4. Start-up and Check of Settings Enter the amount of installed PV power for each of the PV inputs. When two or more PV inputs are connected in parallel, each PV in- put in the parallel group must be set to the total amount of PV power installed to that group divided by the number of parallel in- puts.
-
Page 22: Troubleshooting
4. Start-up and Check of Settings Note: If the two grid code selections do not match they will be cancelled and it will be necessary to redo the selections. If an incorrect grid code is accidentally accepted at the first selection, simply accept the “Grid: Undefined”... - Page 23 4. Start-up and Check of Settings Inverter To enable Master mode go to the details menu [Setup → Inverter details → Ena- Master mode] and set Master mode to bled. Ensure that no other master inverters are present in the network prior to carrying out this action.
-
Page 24: Technical Data
5. Technical Data 5. Technical Data 5.1. Technical Data Nomen- Parameter TripleLynx TripleLynx TripleLynx TripleLynx cla- 8 kW 10 kW 12.5 kW 15 kW ture Nom. power AC 8000 W 10000 W 12500 W 15000 W ac,r Reactive power range 0-4.8 kVAr... -
Page 25: Norms And Standards
250 V depending on total input power. mppmin 4) SPL (Sound Pressure Level) at 1.5m. 5) Grid Management Box (TLX Pro and TLX Pro+) or third-party product. 5.2. Norms and Standards Normative TripleLynx TripleLynx TripleLynx TripleLynx References 8 kW 10 kW 12.5 kW... -
Page 26: Installation
Copper Outer diameter 18-25 mm Insulation strip All 5 wires 16 mm Max. recommended cable length 21 m 2.5 mm TripleLynx 34 m 4 mm 8k and 10k 52 m 6 mm 87 m 10 mm Max. recommended cable length... - Page 27 5. Technical Data Illustration 5.1: TripleLynx 8 kW Cable Losses [%] versus Cable Length [m] Illustration 5.2: TripleLynx 10 kW Cable Losses [%] versus Cable Length [m] Illustration 5.3: TripleLynx 12.5 kW Cable Losses [%] versus Cable Length [m] L00410309-07_02...
- Page 28 5. Technical Data Illustration 5.4: TripleLynx 15 kW Cable Losses [%] versus Cable Length [m] Consider also the following when choosing cable type and cross-sectional area: Ambient temperature Layout type (inside wall, under ground, free air etc.) UV resistance L00410309-07_02...
-
Page 29: Torque Specifications For Installation
5. Technical Data 5.5. Torque Specifications for Installation Illustration 5.5: Overview of Inverter with Torque Indications, 1-3 Illustration 5.6: Overview of Inverter with Torque Indications, 4-7 Parameter Screwdriver Tightening Torque Terminal blocks (large) Straight slot 1.0 x 5.5 mm Min. 1.2 Nm Terminal blocks (small) Straight slot 1.0 x 5.5 mm 0.5 Nm... -
Page 30: Mains Circuit Specifications
5. Technical Data 5.6. Mains Circuit Specifications TripleLynx TripleLynx TripleLynx TripleLynx 8 kW 10 kW 12.5 kW 15 kW Maximum inverter current 12 A 15 A 19 A 22 A Recommended fuse type gL/gG 16 A 16 A 20 A 25 A Table 5.7: Mains Circuit Specifications... -
Page 31: Auxiliary Interface Specifications
5. Technical Data 5.7. Auxiliary Interface Specifications Parameter Parameter Details Specification Serial Communication RS485 Common cable specification Cable jacket diameter (⌀) 2 x 5-7 mm Cable type Shielded Twisted Pair (STP) (Cat 5e) Cable Characteristic Impedance 100 Ω – 120 Ω Max. -
Page 32: Rs485 And Ethernet Connections
5. Technical Data 1) Max. number of inverters are 100. If GSM modem is used for portal upload, the amount of inverters in a network is limited to 50. 2) For outdoor use, we recommend outdoor burial type cable (if buried in the ground) for both Ethernet and RS485. - Page 33 5. Technical Data • Connect Bias L to RX/TX B • Connect Bias H to RX/TX A The RS485 address of the inverter is unique, and defined at the factory. Illustration 5.8: RS485 Communication Detail - Cat 5 T-568A Pinout RS485 1.
-
Page 34: L00410309-07_02
Danfoss can accept no responsibility for possible errors in catalogues, brochures and other printed material. Danfoss reserves the right to alter its products without notice. This also applies to products already on order provided that such alterations can be made without subsequential changes being necessary in specifications already agreed.
Need help?
Do you have a question about the TripleLynx and is the answer not in the manual?
Questions and answers