
Related Manuals for Wexiodisk WD-215T


Summary of Contents for Wexiodisk WD-215T
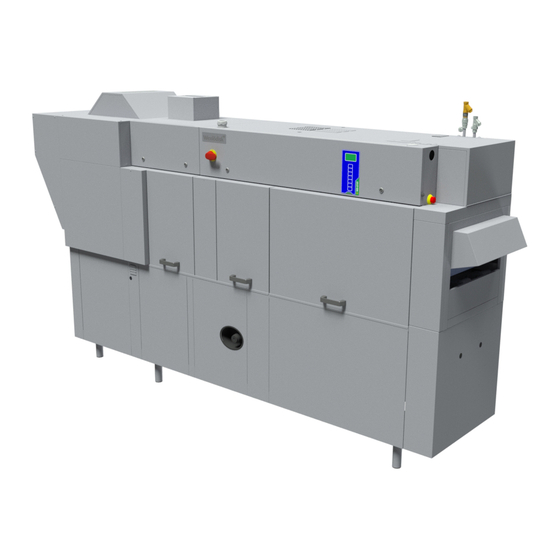
- Page 1 TRAY DISHWASHER WD-215T (Translation of original documentation) Read the manual before using the machine! Installation and user manual S/N: (En) Valid from: 201812 Rev.: 6.0...
-
Page 2: Table Of Contents
WD-215T Rev. 6.0 (201812) 1. General instructions ................ 1 1.1 Symbols used ....................2 1.2 Machine rating ....................3 1.3 Checking that the machine and manual correspond ........3 1.4 EU Declaration of Conformity ................4 2. Safety instructions ................5 2.1 General information .................. - Page 3 WD-215T Rev. 6.0 (201812) 3.5 Connections ....................12 3.5.1 Power supply ..................13 3.5.2 Water ...................... 13 3.5.3 Ventilation ....................13 3.5.4 Steam (option, steam-heated machines) ..........14 3.5.5 Condensation water (option, steam-heated machines) ......14 3.5.6 Drain/waste pipe ..................14 3.5.7 Detergent and drying agent ..............
-
Page 4: General Instructions
WD-215T Rev. 6.0 (201812) General instructions 1. General instructions Read the instructions in this manual carefully as they contain important informa- tion regarding the correct, effective and safe installation, use and servicing of the machine. Service personnel should have access to all documentation for the machine. -
Page 5: Symbols Used
WD-215T Rev. 6.0 (201812) General instructions 1.1 Symbols used This symbol warns of situations where a safety risk may arise. The instructions given should be followed in order to prevent injury and dangerous situations. This symbol on a machine part warns of electrical equipment. The machine must be entirely non-live during servicing, turn off the power at the power switch and if required, the switch should be locked to prevent unintentional operation. -
Page 6: Machine Rating
WD-215T Rev. 6.0 (201812) General instructions 1.2 Machine rating The machine has two rating plates, one of which is placed at the bottom of one side of the machine and the other in the electrical cabinet. The technical informa- tion on the plates is also included on the machine's wiring diagram. The various... -
Page 7: Eu Declaration Of Conformity
WD-215T Rev. 6.0 (201812) General instructions 1.4 EU Declaration of Conformity A so-called EU Declaration of Conformity is provided on delivery of the machine. CE_16_2 Contact details of the manufacturer (Wexiödisk AB, Mårdvägen 4, SE- 35245 Växjö, SWEDEN, Tel.: +46 470 771200, Fax: +46 470 23752, E-mail: wexiodisk@wexiodisk.com). -
Page 8: Safety Instructions
WD-215T Rev. 6.0 (201812) Safety instructions 2. Safety instructions Read the chapter GENERAL INSTRUCTIONS carefully before starting work. 2.1 General information The machine is CE marked, which means that it complies with the requirements of the EU Machinery Directive with regard to product safety. Product safety means that the design of the machine will prevent personal injury or damage to property. -
Page 9: Transport
WD-215T Rev. 6.0 (201812) Safety instructions and maintenance. For authorised service companies, please see www.wexiodisk.com or contact Wexiödisk AB. • The regular checks described in the manual must be carried out in accor- dance with the instructions. 2.2 Transport Handle the machine with care during unloading and transport; there is a risk of it tipping over. -
Page 10: Risk Of Slipping
WD-215T Rev. 6.0 (201812) Safety instructions 2.5.3 Risk of slipping The floor should be kept clean and dry to eliminate any risk of slipping. Mop up any water and leftover food that has been spilt. 2.5.4 Sounds The machine is not silent during operation, see TECHNICAL SPECIFICATIONS. -
Page 11: Installation Instructions
WD-215T Rev. 6.0 (201812) Installation instructions 3. Installation instructions Read the chapters GENERAL INSTRUCTIONS and SAFETY INSTRUCTIONS carefully before starting work. 3.1 General information Read these instructions carefully, as they contain important information regarding the correct installation method. • The instructions should be used together with the machine’s wiring dia- gram and flow diagram for water and steam. -
Page 12: Water
WD-215T Rev. 6.0 (201812) Installation instructions 3.2.4 Water Water connections are made by qualified personnel in a way that complies with local and national regulations. The machine’s capacity requirements are stipula- ted in TECHNICAL SPECIFICATIONS. 3.2.5 Drain/waste pipe There must be a waste pipe with an effective trap for the machine’s waste water and for water used for rinse cleaning. -
Page 13: Transport And Storage
WD-215T Rev. 6.0 (201812) Installation instructions 3.3 Transport and storage Always transport the machine in an upright position. Take care during transport, as there is a risk of tipping. NB: The machine must not be transported without a pallet or other support. Some form of support beam must always be used along the sides of the machine during transport. -
Page 14: Installation
WD-215T Rev. 6.0 (201812) Installation instructions 3.4 Installation 3.4.1 Preparing for the installation Check that there is sufficient room for the machine at the installation location. • Check that correct connections are available for water, electricity, drainage and possibly steam at the installation location. See TECHNICAL SPECIFI- CATIONS. -
Page 15: Connections
WD-215T Rev. 6.0 (201812) Installation instructions 3.5 Connections WD215T_12_R2 Installation drawing A = Perforation in the end plate for drain connection Electrical connection. Cold water connection Hot water connection Reducing valve. The valve is used to adjust the final rinse flow. -
Page 16: Power Supply
WD-215T Rev. 6.0 (201812) Installation instructions 3.5.1 Power supply Information about electrical connections is available on the machine’s wiring dia- gram which is provided on delivery. Store the diagrams in the plastic pocket, loca- ted in the electrical cabinet, even after installation. -
Page 17: Steam (Option, Steam-Heated Machines)
WD-215T Rev. 6.0 (201812) Installation instructions 3.5.4 Steam (option, steam-heated machines) Connect the pipe for steam inside the front cover plate (6). The connection is fitted with a filter. A shut-off valve for steam must be installed on the incoming pipe. The required steam pressure can be found in the TECHNICAL SPECIFICATIONS. - Page 18 WD-215T Rev. 6.0 (201812) Installation instructions Connection of the equipment The machine is ready for fitting detergent and drying agent equipment, but this is not included in the delivery. To avoid making unnecessary holes in the machine, the equipment should be placed on the wall behind the machine.
- Page 19 WD-215T Rev. 6.0 (201812) Installation instructions Electrical connection of the equipment The machine comes ready for fitting detergent and drying agent equipment, but this is not included with the machine. To avoid making unnecessary holes in the machine, the equipment should be pla- ced on the wall behind the machine on the outfeed side.
-
Page 20: Trial Operation
WD-215T Rev. 6.0 (201812) Installation instructions 3.6 Trial operation Prepare the machine for trial operation by following the INSTRUCTIONS FOR USE. The instructions describe the measures that must be taken to prepare the machine for operation. 3.6.1 Start-up schedule This should be completed and signed by the customer on start-up. -
Page 21: Documentation
WD-215T Rev. 6.0 (201812) Installation instructions 4. Start the machine: • Check the direction of rotation of the pumps NB! If the direction of rotation is wrong, the phase must be inverted on the incoming feed • Check the function of the overload switch for the feed 5. -
Page 22: Instructions For Use
WD-215T Rev. 6.0 (201812) Instructions for use 4. Instructions for use Read the chapters GENERAL INSTRUCTIONS and SAFETY INSTRUCTIONS carefully before starting work. This chapter describes what must be done with the machine: • Before washing • How washing should be performed •... -
Page 23: Before Washing
WD-215T Rev. 6.0 (201812) Instructions for use 4.1 Before washing 4.1.1 Machine design WD215T_ 11_R6 Display for messages. LED which indicates that functions are enabled. Button for starting the filling process and heating of the machine. Button for manually unloading the trays. -
Page 24: Preparations Before Filling
WD-215T Rev. 6.0 (201812) Instructions for use Grille for drying zone fan Door lock Main switch Wash nozzle Wash arm Curtain Door Tank filters Pump filter Rubber sleeve Level pipe Door Outlet seal Filter Filter for the final rinse Timer for a timed start of the machine (option) - Page 25 WD-215T Rev. 6.0 (201812) Instructions for use Curtain placement There are 5 curtains and the shortest of these must be hung only in the direction of feed. G ard in e r_ 21 5T _ u t an re f.
-
Page 26: Filling And Heating
WD-215T Rev. 6.0 (201812) Instructions for use 4.1.3 Filling and heating You can see what the machine is doing on the machine’s panel. • Turn the main switch (14) to the ON position. • Close the doors • Press button (10) to switch on the power supply. - Page 27 WD-215T Rev. 6.0 (201812) Instructions for use The switch (B) on the timer should be set to AUTO position. If you want to bypass the TimerStart function and start manually, press the machi- ne’s TO/FROM button (10) once more when the message above is shown on the display.
- Page 28 WD-215T Rev. 6.0 (201812) Instructions for use Setting the date and time For the TimerStart function to work as expected, the date and timer clock must be set. This is normally done on delivery. This is what you should do to set the time and date: Go into settings mode by holding down the MODE and SET buttons for 3 seconds.
- Page 29 WD-215T Rev. 6.0 (201812) Instructions for use Setting the start time, days of the week With this setting, you can set a time when the dishwasher begins to fill and heat the water in the tank, and which days of the week this start time applies to. If you want the dishwasher to start at another (additional) time, you must set it for this time too.
- Page 30 WD-215T Rev. 6.0 (201812) Instructions for use This is what you should do to set the start time and which days of the week it should apply to: Set the start time. The value that is currently set flashes. •...
- Page 31 WD-215T Rev. 6.0 (201812) Instructions for use Setting the start time, date It is possible to set the start time for specific dates, either for an individual date or for a period between a start date and an end date. It is possible to set the timer for a date up to two years from the current date.
- Page 32 WD-215T Rev. 6.0 (201812) Instructions for use This is what you should do to set the start time and which dates it should apply • Change the flashing value with the buttons ▲ and . • Scroll to the next value with the button ►.
- Page 33 WD-215T Rev. 6.0 (201812) Instructions for use This is what you should do to set the start time and which dates it should apply • The pulse length should always be set to 1 second. Change with the help of the buttons ▲...
- Page 34 WD-215T Rev. 6.0 (201812) Instructions for use Checking, changing and removal of set start time If the buttons have not been pressed for at least 60 seconds while in check infor- mation mode, the display returns automatically to normal display mode.
- Page 35 WD-215T Rev. 6.0 (201812) Instructions for use Changing set start times, days of the week: • Press the SET button. PULSE 90-9-05-021 Edt flashes • Set days of the week, start time and pulse length in the same way as des- cribed above under “Setting the start...
- Page 36 WD-215T Rev. 6.0 (201812) Instructions for use Changing the set start times, date: • Press the SET button. PULSE 90-9-05-023 Edt flashes • Set start date, stop date, start time and pulse length in the same way as described under “Setting the start ti- me, date”...
- Page 37 WD-215T Rev. 6.0 (201812) Instructions for use Removal of set start time: • Change with the help of either of the buttons ▲ or ▼ so that Clr is indica- ted under the start time setting num- ber instead of Edt.
-
Page 38: Using The Machine
WD-215T Rev. 6.0 (201812) Instructions for use 4.2 Using the machine 4.2.1 Washing Before trays are fed into the machine, they must be soaked to remove dried-on pieces of food. Push in the trays on the long side first through the feed opening. The belt and the washing process will start. -
Page 39: Storage In The Tray Dispenser
WD-215T Rev. 6.0 (201812) Instructions for use 4.2.3 Storage in the tray dispenser If washed trays are stored in the tray dispenser connected to the machine's out- feed end, a message will appear on the display when the dispenser is full of trays. -
Page 40: After Use
WD-215T Rev. 6.0 (201812) Instructions for use 4.3 After use HACCP is a preventive inspection system to ensure hygiene requirements are met during the washing process and cleaning of the machine. As a result of its design, the machine meets strict hygiene requirements. Regular, thorough clea- ning is also important from a hygiene perspective. -
Page 41: Daily Cleaning
WD-215T Rev. 6.0 (201812) Instructions for use 4.3.2 Daily cleaning Internally • Unhook the curtains (17) at the infeed end and wash them in a basket. • Switch the machine off by pressing button (10). • Empty the tank by turning the level pipe (22) a quarter of a turn. -
Page 42: Cleaning And Checking Each Week Or As Required
WD-215T Rev. 6.0 (201812) Instructions for use Rec.filter Removing/fitting the filter A=Filter housing B=Filter C=Cover Externally Wipe the outside of the machine with a soft, damp cloth. 4.3.3 Cleaning and checking each week or as required Weekly cleaning should be more thorough than daily cleaning. In addition to the daily cleaning measures, clean the machine as per these instructions: •... - Page 43 WD-215T Rev. 6.0 (201812) Instructions for use Cleaning brush WD721.0301 The door springs may be cleaned as required by rinsing these from the side using a hose. The springs must NOT be removed! The door in front of the spring being...
-
Page 44: Cleaning In The Event Of An Alarm Or 1 Time / Year
WD-215T Rev. 6.0 (201812) Instructions for use 4.3.4 Cleaning in the event of an alarm or 1 time / year The machine's condensing battery (D) must be cleaned at least once a year or when an alarm with a message about cleaning the battery appears on the control panel display. -
Page 45: Operating Problems
WD-215T Rev. 6.0 (201812) Instructions for use • Remove the cover plate (B) from the condensing battery by unscrewing the wing nuts which fasten it in place. Lift up the condensing battery using the lifting arm (C) to make it easier to remove. - Page 46 WD-215T Rev. 6.0 (201812) Instructions for use ALARM MESSAGE ACTION (100) Reset the alarm by pressing button (9). If the error recurs, contact an authorised NOMINAL VALUES service company. RESTORED FROM UI Restart the machine. COMMUNICATION ERROR BETWEEN CPU AND I/O 1 CALL SERVICE Restart the machine.
- Page 47 WD-215T Rev. 6.0 (201812) Instructions for use ALARM MESSAGE ACTION (31) Reset the alarm by pressing button (9). If the error recurs, contact an authorised TIMEOUT HEATING service company. TANKS AND BOILERS PRESS RESET (33) Close the door and start the feed by pressing button (5).
- Page 48 WD-215T Rev. 6.0 (201812) Instructions for use ALARM MESSAGE ACTION (75) Clean the nozzles. Reset the alarm by pressing button (9). If the error recurs, FINAL RINSE ERROR contact an authorised service company. LOW FLOW IN THE MACHINE (90) Leave more time between feeding in trays.
-
Page 49: Technical Information
WD-215T Rev. 6.0 (201812) Technical information 5. Technical information The manufacturer reserves the right to make changes to the technical data. Technical data Pump motor chemical wash (kW) Pump motor, recirculating rinse (kW) 0.11 Condensing fan (kW) 0.12 Drying zone fan I (kW) Drive motor, belt (kW) 0.12... - Page 50 WD-215T Rev. 6.0 (201812) Technical information Connection, electrically-heated machines Max. connection area 230 V 3~ (L1-L3, PE) Cu (mm²) * Other voltages on request Connection, steam-heated machine 50-140 kPa Total connected power (kW) Main fuse 400 V 3N~ (A) Max. connection area 400 V 3N~ (L1-L3, N, PE) Cu (mm²) Main fuse 230 V 3~ (A) Max.
Need help?
Do you have a question about the WD-215T and is the answer not in the manual?
Questions and answers