
Related Manuals for Wexiodisk WD-11 touch


Summary of Contents for Wexiodisk WD-11 touch
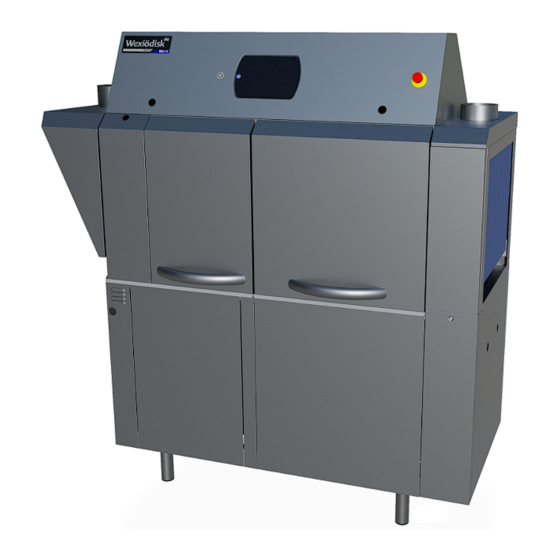
- Page 1 TUNNEL DISHWASHER WD-11 touch (original documentation) Read the manual before using the machine! Installation and user manual S/N: (En) Valid from: 202310 Rev.: 00 (202310)
-
Page 3: Table Of Contents
WD-11 Rev. 00 (202310) touch 1. General instructions ................ 1 1.1 Symbols used ....................2 1.2 Machine rating ....................3 1.3 Checking that the machine and manual correspond ........3 1.4 EU Declaration of Conformity ................4 2. Safety instructions ................5 2.1 General information .................. - Page 4 WD-11 Rev. 00 (202310) touch 3.6 Installation and connection of auxiliary equipment and options ..... 20 3.6.1 Limit switch ..................... 20 3.6.2 Conveyors ....................20 3.6.3 Emergency stop ..................20 3.7 Trial operation ....................21 3.7.1 Start-up schedule ..................21 3.8 Documentation ....................
-
Page 5: General Instructions
WD-11 Rev. 00 (202310) General instructions touch 1. General instructions Read the instructions in this manual carefully as they contain important informa- tion regarding the correct, effective and safe installation, use and servicing of the machine. Service personnel should have access to all documentation for the ma- chine. -
Page 6: Symbols Used
WD-11 Rev. 00 (202310) General instructions touch 1.1 Symbols used This symbol warns of situations where a safety risk may arise. The instructions given should be followed in order to prevent injury and dangerous situations. This symbol on a machine part warns of electrical equipment. The machine must be entirely non-live during servicing, turn off the power at the power switch and if required, the switch should be locked to prevent unintentional operation. -
Page 7: Machine Rating
WD-11 Rev. 00 (202310) General instructions touch 1.2 Machine rating The machine has two rating plates, one of which is placed at the bottom of one side of the machine and the other in the electrical cabinet. The technical informa- tion on the plates is also included on the machine’s wiring diagram. -
Page 8: Eu Declaration Of Conformity
1.4 EU Declaration of Conformity A so-called EU Declaration of Conformity is provided on delivery of the machine. Contact details of the manufacturer (Wexiödisk AB, Mårdvägen 4, SE- 35245 Växjö, SWEDEN, Tel.: +46 470 771200, E-mail: wexiodisk@wexio- disk.com). Representatives of Wexiödisk AB. -
Page 9: Safety Instructions
WD-11 Rev. 00 (202310) Safety instructions touch 2. Safety instructions Read the chapter GENERAL INSTRUCTIONS carefully before starting work. 2.1 General information The machine is CE marked, which means that it complies with the requirements of the EU Machinery Directive with regard to product safety. Product safety means that the design of the machine will prevent personal injury or damage to property. -
Page 10: Transport
Warranty repairs must be performed by an authorised company. Contact an authorised service company to draw up a programme of preventive care and maintenance. For authorised service companies, please see www.wexiodisk.com or contact Wexiödisk AB. • The regular checks described in the manual must be carried out in accord- ance with the instructions. -
Page 11: Operation
WD-11 Rev. 00 (202310) Safety instructions touch 2.5 Operation Be very careful around the machine when it is in operation. 2.5.1 High temperatures • The temperature of the washing and rinsing water is 60° C and 85°C. Do not open the machine until the washing and rinsing phases have finished. The steam that comes out of the machine after the wash has been com- pleted is hot. -
Page 12: Installation Instructions
WD-11 Rev. 00 (202310) Installation instructions touch 3. Installation instructions Read the chapters GENERAL INSTRUCTIONS and SAFETY INSTRUCTIONS carefully before starting work. 3.1 General information Read these instructions carefully, as they contain important information regarding the correct installation method. • The instructions should be used together with the machine's wiring dia- gram and flow diagram. -
Page 13: Rust On Industrial Dishwashers
WD-11 Rev. 00 (202310) Installation instructions touch 3.1.1 Rust on industrial dishwashers • Large-scale industrial dishwashers in general as well as our dishwashers are made of stainless materials, but despite this, there are still situations where rust can occur on “stainless” materials. •... -
Page 14: Requirements For The Installation Site
WD-11 Rev. 00 (202310) Installation instructions touch 3.2 Requirements for the installation site 3.2.1 Lighting In order to ensure the best possible working conditions during installation, opera- tion, servicing and maintenance, make sure that the machine is installed in a well- lit room. -
Page 15: Transport And Storage
WD-11 Rev. 00 (202310) Installation instructions touch 3.3 Transport and storage Always transport the machine in an upright position. Take care during transport, as there is a risk of tipping. N.B.! The machine must not be transported without a pallet or other support. Some form of support beam must always be used along the sides of the machine during transport. -
Page 16: Installation
WD-11 Rev. 00 (202310) Installation instructions touch 3.4 Installation 3.4.1 Preparing for the installation Check that there is sufficient room for the machine at the installation location. • Check that correct connections are available for water, electricity, drainage and possibly steam at the installation location. See TECHNICAL SPECIFI- CATIONS. -
Page 17: Connections
WD-11 Rev. 00 (202310) Installation instructions touch 3.5 Connections 11 10 9 2 313155 min.30 Electrical connection Hot water connection, (cold water connection (option)) Drain/waste pipe connection Floor drain Ventilation connection, outfeed Alternative electrical connection Alternative hot water connection, (cold water connection (option)) Alternative drain connection Non-return valve Vacuum valve... -
Page 18: Electrical Connection
WD-11 Rev. 00 (202310) Installation instructions touch 3.5.1 Electrical connection Information about electrical connections is available on the machine’s wiring dia- gram which is provided on delivery. Store these in the special plastic document wallet. • The machine is designed for quick electrical installation. •... -
Page 19: Drain/Waste Pipe
WD-11 Rev. 00 (202310) Installation instructions touch 3.5.4 Drain/waste pipe The waste water system connected to (3 or 8) should consist of a 50mm metal pipe that will withstand mechanical impacts. The waste pipe must run to a floor drain, where its opening must be above the water level. The drain can be fitted to the right or left. - Page 20 WD-11 Rev. 00 (202310) Installation instructions touch Connection of the equipment WD11t_05 Hot water outlet Alternative location of detergent equipment Hole ø 25 mm for hose intended for detergent in solid form Hole ø 19 mm for drying agent hose Plugged connection ø...
- Page 21 WD-11 Rev. 00 (202310) Installation instructions touch Electrical connection of the equipment The electrical connection for the detergent and drying agent is in the junction box (10). To avoid making unnecessary holes in the machine, the equipment should be placed on the wall behind the machine on the outfeed side. Connections for detergent and drying agent.
- Page 22 WD-11 Rev. 00 (202310) Installation instructions touch Detergent dosage The water outlet (1) for the detergent dosage is placed on the incoming hot water pipe. Hot water outlet Plugged holes for hoses for detergent and drying agent...
- Page 23 WD-11 Rev. 00 (202310) Installation instructions touch “D” indicating alternative opening for detergent Plugged hole for measuring cell Drying agent dosage The connection for drying agent (6) is located next to the booster heaters. Drying agent dosage outlet...
-
Page 24: Installation And Connection Of Auxiliary Equipment And Options
WD-11 Rev. 00 (202310) Installation instructions touch 3.6 Installation and connection of auxiliary equipment and options • Once the machine is in place and has been adjusted horizontally and ver- tically, the auxiliary equipment can be fitted. • The machine can be equipped with a number of options. Check what your machine is equipped with, which depends on the model, machine type and country. -
Page 25: Trial Operation
WD-11 Rev. 00 (202310) Installation instructions touch 3.7 Trial operation Prepare the machine for trial operation with the help of OPERATING INSTRUC- TIONS. The instructions describe the measures that must be taken to prepare the machine for operation. 3.7.1 Start-up schedule This should be completed when the machine is started up and used. -
Page 26: Documentation
WD-11 Rev. 00 (202310) Installation instructions touch 4. Start the machine: • Check the direction of rotation of the pumps NB! If the direction of rotation is wrong, the phase must be inverted on the incoming feed. • Check that the overload switch on the feed cradle is functioning. 5. -
Page 27: Operating Instructions
WD-11 Rev. 00 (202310) Operating instructions touch 4. Operating instructions Read the chapters GENERAL INSTRUCTIONS and SAFETY INSTRUCTIONS carefully before starting work. • The machine's touch panel contains built-in guides on what and how things must be done. • The use of the machine is dependent on how the machine is equipped. This chapter describes what must be done with the machine: •... -
Page 28: Before Washing
WD-11 Rev. 00 (202310) Operating instructions touch 4.1 Before washing 4.1.1 Machine design... - Page 29 WD-11 Rev. 00 (202310) Operating instructions touch Touch panel ON/OFF button Emergency stop Curtains Wash nozzle Catch Door Wash arms Plate between filter tray Filter Level pipe Rubber sleeve Outlet seal Filter for the final rinse Timer for a timed start of the machine (option) In the following chapter, figures are given in brackets to clarify what needs to be done.
-
Page 30: Preparations Before Filling
WD-11 Rev. 00 (202310) Operating instructions touch 4.1.2 Preparations before filling Check: • That the machine and removable parts have been cleaned. If not – clean them! • That there is no dirt in the wash arms (8) or rinse nozzles (5). •... - Page 31 WD-11 Rev. 00 (202310) Operating instructions touch Curtain placement The curtains in the machine must hang in accordance the image depending on the feed direction. L - R R - L 11t_gardin The machine in the image has a left - right feed direction...
-
Page 32: Touch Panel
WD-11 Rev. 00 (202310) Operating instructions touch 4.1.3 Touch panel General The panel comprises four fields: • A = Top bar • B = Process bar • C = Activity field • D = Bottom bar Active (clickable) symbols are in blue. Inactive symbols are in grey. The activity field (C) contains both information text and selectable symbols which are used to continue to different entries: The various fields are divided into the following parts:... - Page 33 WD-11 Rev. 00 (202310) Operating instructions touch Top bar (A) This indicates the machine status using text and symbols (2, 3, 4) and the date and time (1). Alarm and information messages are displayed here. More information about these is shown in the activity field (C). Process bar (B) This indicates what the machine is doing using various symbols (7) and text (6).
- Page 34 WD-11 Rev. 00 (202310) Operating instructions touch Symbols The following symbols and a brief description may be displayed in the various fields of the panel (some depending on machine type). Symbol Explanation Symbol Explanation Black: Information Change the water Blue: About the machine Autostart of filling and Consumption washing...
- Page 35 WD-11 Rev. 00 (202310) Operating instructions touch Symbol Explanation Symbol Explanation Low flow Machine status No / Cancel No flow Other Wash program for mixed dishware Manual feeding Empty the machine START / ON Protocol Glass Plates Pots Relay test Repeat / Machine is in op- Reset eration...
-
Page 36: Filling And Heating The Machine
WD-11 Rev. 00 (202310) Operating instructions touch 4.1.4 Filling and heating the machine • A: ON/OFF button Start button Activity text • Press the ON/OFF button (A) located in the vicinity of the touch panel to start the machine. N.B.! At least 25 seconds must have elapsed after the main switch is set in the ON position. - Page 37 WD-11 Rev. 00 (202310) Operating instructions touch N.B.! The time it takes for the machine to fill and heat up to the right washing tem- perature varies between 5 and 30 minutes and depends on the temperature of the incoming water. The figure above will be displayed when the machine is ready for washing.
-
Page 38: Positioning Of Dishware In Baskets
WD-11 Rev. 00 (202310) Operating instructions touch 4.1.5 Positioning of dishware in baskets The machine is supplied with washing baskets depending on the equipment level. The washing baskets are used according to the following: The yellow basket is used for side plates, trays, plates, etc. The blue basket is used for glasses, cups and canteens The brown basket is used for cutlery during the first wash... - Page 39 WD-11 Rev. 00 (202310) Operating instructions touch Cutlery must therefore be placed in designated baskets before the second wash, the baskets above are placed in the blue basket...
-
Page 40: Washing
WD-11 Rev. 00 (202310) Operating instructions touch 4.2 Washing DIN 10510 is a German standard which describes how the washing process must work in a tunnel dishwasher in order to ensure good washing results. Amongst other things, it recommends that the contact time should be around 120 seconds for normally soiled loads. -
Page 41: Washing With Automatic Operation
WD-11 Rev. 00 (202310) Operating instructions touch 4.2.2 Washing with Automatic operation • Washing with automatic stop. The machine starts when a basket is pushed into it. The basket stays in the washing zone until the next basket pushes it onwards. The machine stops automatically after a set period of time if no new basket is fed in. -
Page 42: Guaranteed Final Rinse
WD-11 Rev. 00 (202310) Operating instructions touch 4.2.6 Guaranteed final rinse The temperature of the final rinse water is always correct and the right amount of rinse water is always used. If there is an error during the final rinse, this is indicated by an alarm and informa- tion on what must be done. -
Page 43: Checking The Wash Result
WD-11 Rev. 00 (202310) Operating instructions touch 4.2.8 Checking the wash result The dishware should be checked after each wash for: PROBLEM CAUSES & MEASURES Starch spots • Scraping: Important to remove as much food particles as possible before washing. This also means that the water in the machine Misting does not need to be changed as often. -
Page 44: After Use - Cleaning
WD-11 Rev. 00 (202310) Operating instructions touch 4.3 After use – Cleaning HACCP is a preventive inspection system to ensure hygiene requirements are met during the washing process and cleaning of the machine. As a result of its design, the machine meets strict hygiene requirements. Regular, thorough clean- ing is also important from a hygiene perspective. -
Page 45: Emptying And Daily Cleaning
WD-11 Rev. 00 (202310) Operating instructions touch 4.3.2 Emptying and daily cleaning A guide to emptying and cleaning is also displayed on the panel when the relevant function has been selected. Machines with manual emptying and manual cleaning • Open the machine doors. •... - Page 46 WD-11 Rev. 00 (202310) Operating instructions touch Machines with manual emptying and automatic cleaning The outer curtains should remain in the machine while the machine is being emp- tied and cleaned. • Open the machine doors. • Unhook the curtains. N.B.! Leave the outermost curtains on both the infeed and outfeed side.
-
Page 47: Cleaning And Checking Each Week Or As Required
WD-11 Rev. 00 (202310) Operating instructions touch 4.3.3 Cleaning and checking each week or as required Once the daily cleaning is complete, you have the option of proceeding to the weekly cleaning and can also follow the instructions on the touch panel for this. Weekly cleaning should be more thorough than daily cleaning. -
Page 48: Operating Problems
WD-11 Rev. 00 (202310) Operating instructions touch 4.3.4 Operating problems Check: • Has the appliance been used according to the instructions? • Are all the removable parts in their correct place? • Are there any error messages on the display? •... - Page 49 WD-11 Rev. 00 (202310) Operating instructions touch PROBLEM CAUSE ACTION The machine does not fill with The incoming water stopcock is Open the tap. water. closed. The door/hood is open. Close the door/hood. The final rinse pipe nozzles are Clean the wash nozzles. blocked.
- Page 50 WD-11 Rev. 00 (202310) Operating instructions touch All errors displayed on the touch panel have an error code, which is displayed in the alarm. This error code must be specified when contacting service personnel. Call the service company and state the following: •...
- Page 51 WD-11 Rev. 00 (202310) Operating instructions touch Information alarms (blue) An information alarm is generated, e.g. because a predetermined number of wash cycles has been reached. Type of alarm and minimise / maximise Descriptive text Symbol for type of alarm (maintenance) Error code Name and contact details of service personnel Continue to next screen...
- Page 52 WD-11 Rev. 00 (202310) Operating instructions touch Error alarms (yellow) An error alarm is generated, e.g. because of a low temperature in one of the tanks. Type of alarm and minimise / maximise Error code Symbol for type of alarm Descriptive text Continue to next screen Reset alarm...
- Page 53 WD-11 Rev. 00 (202310) Operating instructions touch Critical error alarms (red) A critical error alarm is generated because a serious error has occurred. The ma- jority of these alarms cannot be reset by the operator, and service personnel must be contacted. Type of alarm and minimise / maximise Login symbol Descriptive text...
-
Page 54: Technical Specifications
WD-11 Rev. 00 (202310) Technical specifications touch 5. Technical specifications The manufacturer reserves the right to make changes to the technical data. TECHNICAL DATA Pump motor, chemical wash (kW) Pump motor, final rinse (kW) 0.11 Drive motor (kW) 0.12 Booster pump (kW) * 0.58 Booster heater (kW) 12 / 2x9 *... - Page 55 WD-11 Rev. 00 (202310) Technical specifications touch CONNECTION, ELECTRICALLY HEATED MACHINE Total connected load (kW) 19.7 Main fuse 400-415 V 3N~ (A) * 35 / 50 **/ 63** Max. connection area 400V 3N~ (L1-L3, N, PE) Cu (mm²) Main fuse 400-440 V 3~ (A) * 35 / 50 ** Max.
- Page 56 WD-11 Rev. 00 (202310) Technical specifications touch...
Need help?
Do you have a question about the WD-11 touch and is the answer not in the manual?
Questions and answers