Table of Contents
Advertisement
Quick Links
MEsoftstart
USERS INSTALLATION & INSTRUCTION MANUAL
Applies to models:
- MEsoftstart/I00
- MEsoftstart/I01
- MEsoftstart/I02
- MEsoftstart/I03
- MEsoftstart/I04
Thank you for choosing this Mitsubishi Electric Europe B.V. soft starter. This Instruction Manual provides installation instructions and guidelines
for advanced use of the MEsoftstart series soft starters. Before using the soft starter carefully read this Manual and ensure to follow all Safety Instructions.
This document is a DRAFT. Please ensure to get the latest release from your distributer
– industry-hardened low-voltage soft starter
(100A soft starter)
(200A soft starter)
(390A soft starter)
(600A soft starter)
(900A soft starter)
INTRODUCTION ............................................................................................... 7
INSTALLATION INSTRUCTIONS ...................................................................... 17
WIRING ......................................................................................................... 32
PRECAUTIONS FOR USE OF THE SOFT STARTER ............................................. 45
BASIC OPERATION – CORE MODELS .............................................................. 49
BASIC OPERATION – PRO MODELS ................................................................ 62
MESOFTSTART COMMUNICATION INTERFACE .............................................. 82
PROTECTIVE FUNCTIONS & TROUBLESHOOTING (PRO) ............................... 100
MAINTENANCE AND INSPECTION ................................................................ 106
SPECIFICATIONS ...................................................................................... 110
APPENDICES ....................................................................................................... 117
Advertisement
Table of Contents
Troubleshooting

Related Manuals for Mitsubishi Electric MEsoftstart/I01


Summary of Contents for Mitsubishi Electric MEsoftstart/I01
- Page 1 (900A soft starter) Thank you for choosing this Mitsubishi Electric Europe B.V. soft starter. This Instruction Manual provides installation instructions and guidelines for advanced use of the MEsoftstart series soft starters. Before using the soft starter carefully read this Manual and ensure to follow all Safety Instructions.
- Page 2 Updates for Core error pattern For Maximum Safety Mitsubishi Electric Europe B.V. Soft starters are not designed or manufactured to be used in equipment or systems in situations that can affect or endanger human life When considering this product for operation in special applications such as machinery or systems in passenger...
-
Page 3: Table Of Contents
TABLE OF CONTENTS INTRODUCTION ............................7 ..........................8 OFT STARTER SELECTION ....................13 HECKING THE RODUCT WHEN UNPACKING ....................14 OMPONENT AND ERMINAL IDENTIFICATION INSTALLATION INSTRUCTIONS ....................... 17 ....................18 REPARING FOR SOFT STARTER INSTALLATION ..................... 23 OTOR CONTROL CENTRE CABINET DESIGN ........................ - Page 4 Installation, operation, maintenance and inspection must be performed by qualified personnel. Here, an expert means a person who meets all the conditions below: • A person who has proper engineering training. Such training may be available at your local Mitsubishi Electric office. Contact your local sales office for schedules and locations. •...
- Page 5 2.2.2.7 for details.) • If halogen-based materials (fluorine, chlorine, bromine, iodine, etc.) infiltrate into a Mitsubishi Electric product, the product will be damaged. Halogen-based materials are often included in fumigant, which is used to sterilize or disinfest wooden packages. When packaging, prevent residual fumigant components from being infiltrated into Mitsubishi Electric products, or use an alternative sterilization or disinfection method (heat disinfection, etc.) for packaging.
- Page 6 List of Abbreviations Abbreviation Definition Alternating Current Device category for squirrel cage motors Amplitude Modulation BAUD Bits per second (relating to the Modbus link) Conformité Européenne (for conformity with protection standards of the European Economic Area) Communication port on PCs Current Transformer Electromagnetic Compatibility Electromagnetic Interference...
-
Page 7: Introduction
TFT screen (as shown) and/or PC Application on Modbus RTU or TCP. This manual contains the Installation and Operating instructions for the MEsoftstart/I00 and MEsoftstart/I01 Core variants and the MEsoftstart/I01, MEsoftstart/I02, MEsoftstart/I03 and MEsoftstart/I04 Pro variants of the MEsoftstart range of Industrial soft starters. -
Page 8: Soft Starter Selection
Soft starter selection The correct soft starter model needs to be selected according to the user’s intended application and installation environment. The selection of the soft starter model can also be driven by a cost compromise between an expensive motor control centre enclosure / cabinet / panel design / long cables, or a higher rated soft starter model. - Page 9 Table 1: MEsoftstart/I00 guideline for motor sizes Model MEsoftstart/I01 is rated at 200A continuous current and can be used at 480A starting current for normal duty and at 250A starting current for heavy duty applications. MEsoftstart/I01 can be ordered for voltage ranges from 400Vac to 690Vac and can be ordered with a built-in bypass contactor or can be installed with an external bypass contactor, or without a bypass contactor.
- Page 10 Table 2: MEsoftstart/I01 guideline for motor sizes Model MEsoftstart/I02 is rated at 390A continuous current and can be used at 730A starting current for normal duty and at 390A starting current for heavy duty applications. MEsoftstart/I02 can be ordered for voltage ranges from 400Vac to 690Vac and can be ordered with a built-in bypass contactor or can be used with an external bypass contactor, or without a bypass contactor.
- Page 11 Table 4: MEsoftstart/I03 guideline for motor sizes Model MEsoftstart/I04 is rated at 900A continuous current and can be used at 1600A starting current for normal duty and at 900A starting current for heavy duty applications. MEsoftstart/I04 can be ordered for voltage ranges from 400Vac to 690Vac and can be used with an external bypass contactor, or without a bypass contactor.
- Page 12 60°C. From Table 2, the motor’s FLC = 136A (at 0.8 power factor), while the MEsoftstart/I01 model soft starter can provide a maximum starting current of 184% (or 250A) if operated below 50°C.
-
Page 13: Checking The Product When Unpacking
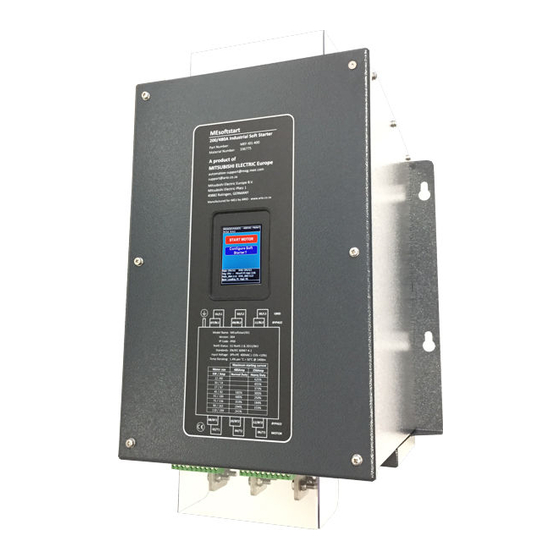
Unpack the product and check the label on the soft starter to ensure that the model agrees with the order and that the product is intact. Figure 2 shows product labels for the MEsoftstart/I01 and MEsoftstart/I02 models. From the label can be seen the rated continuous current of the MEsoftstart soft starter, as well as the maximum starting current for normal duty. -
Page 14: Component And Terminal Identification
Figure 2 – Product marking Component and Terminal identification Component and terminals are identified in Figure 3 and Table 6 below. Comparable markings are used on all other models. 14 Introduction... - Page 15 Figure 3 – Soft starter terminal and component identification 15 Introduction...
- Page 16 Table 6: List of components and terminals Symbol Name Description Notes Busbar 1 / L1 Grid supply L1 Busbar 3 / L2 Grid supply L2 Busbar 5 / L3 Grid supply L3 Busbar 7 / BL1 Supply L1 to bypass contactor L1 Only on models without Busbar 9 / BL2 Supply L2 to bypass contactor L2...
-
Page 17: Installation Instructions
INSTALLATION INSTRUCTIONS This chapter explains the installation of the MEsoftstart/I00, MEsoftstart/I01, MEsoftstart/I02, MEsoftstart/I03 and MEsoftstart/I04 model soft starters. Note that for safety reasons, it is important to install the soft starter in a cabinet or enclosure where the terminals will not pose a hazard to personnel. This section shows how to safely install the soft starter and provides guidelines for the selection or design of a suitable motor control centre cabinet / enclosure. -
Page 18: Preparing For Soft Starter Installation
Preparing for soft starter installation The peripheral devices that are needed around the soft starter need to be specified before planning the installation of the soft starter. The soft starter can be wired to start a normal 3-wire motor or inside-delta on a six-wire motor. The installation and wiring of the soft starter is similar for the normal and the inside-delta connections, but there may be implications for the enclosure size and cable length, as well as the selection of external bypass contactor for the different ways of connecting the motor. - Page 19 Inside-delta 6-wire connection The diagram below shows the connection diagram for the soft starter with and without built-in bypass contactor, for an inside- delta 6-wire connection. With this method of connecting the motor, 58% of the motor’s starting current flows through the soft starter switching elements during the start-up ramp.
- Page 20 Take special note of the wiring of an inside delta motor when the grid connection on the soft starter is clockwise or anti- clockwise. Refer to Figure 6 to understand the difference. Figure 6 –6-wire Inside-delta wiring for clockwise and anti-clockwise grid rotation 20 Installation Instructions...
- Page 21 Soft starter and Peripheral devices Always check the nameplate information on your motor before designing the peripheral devices Figure 7 shows the MEsoftstart/I01 Core model soft starter and the associated peripheral devices. The installation for the other MEsoftstart models will be the same.
- Page 22 58% of the motor rated running current. Refer to Mitsubishi Electric’s non-reversing Magnetic Contactors. Bypass contactor relay circuit This circuit breaker is a 2A circuit breaker protecting the Soft starter output signal that breaker activates the external Bypass contactor via a 50/60Hz coil.
-
Page 23: Motor Control Centre Cabinet Design
Realtive humidity < 85% Ideally < 50% @ 50° to < 85% @20°C Storage temperature -30°C to +70°C MEsoftstart/I00 MEsoftstart/I01 Indoors - free from corrosive gas, flammable Atmosphere MEsoftstart/I02 gas, oil mist, dust and dirt MEsoftstart/I03 For the installation at an altitude above 1400m... - Page 24 Temperature For the MEsoftstart range of soft starters, the permissible surrounding air temperature of the soft starter is between -10°C and +60°C. Always operate the soft starter within this temperature range. Operation outside this range will considerably shorten the service lives of the semiconductors, parts, capacitors and other electronics. Take the following measures to keep the surrounding air temperature of the soft starter within the specified range.
- Page 25 Dust, dirt, oil mist Dust and dirt may cause such faults as poor contacts, reduced insulation and cooling effect due to the moisture-absorbed accumulated dust and dirt and in-cabinet temperature rise due to a clogged filter. In an atmosphere where conductive powder floats, dust and dirt may cause such faults as malfunction, deteriorated insulation and short circuit in a short time.
- Page 26 Cooling system types for soft starter cabinet The heat that the soft starter and other equipment (transformers, lamps, resistors, etc.) generates, as well as any incoming heat (such as direct sunlight) must be dissipated to keep the temperature inside the cabinet lower than the permissible operating temperature of the soft starter.
-
Page 27: Soft Starter Installation
Soft starter installation Soft starter placement Placement of the soft starter needs careful planning. The clearance below the soft starter is required for terminal access for wiring as well as air inlet and the clearance above the soft starter is required for heat dissipation as well as terminal access for wiring. - Page 28 Air flow around the soft starter Heat is blown up from inside the soft starter by the small built-in fan. Leave space around the soft starter for ample air flow through the soft starter cabinet. Any equipment placed above the soft starter should be heat resistant. Figure 9 –...
- Page 29 Arrangement of the ventilation fan and soft starter Figure 11 – Arrangement of the ventilation fan and soft starter Heat generated in the soft starter is blown up from the bottom of the unit as warm air by the cooling fan. When installing a ventilation fan for that heat, determine the place of ventilation fan installation after fully considering air flow.
- Page 30 MEsoftstart/I00 and MEsoftstart/I01 Drilling plan Figure 12 – Drilling plan: MEsoftstart/I00 with and without bypass contactor and MEsoftstart/I01 without bypass Figure 13 – Drilling plan: MEsoftstart/I01 with bypass contactor contactor MEsoftstart/I02 Drilling plan Figure 14 – Drilling plan: MEsoftstart/I02 without bypass Figure 15 –...
- Page 31 MEsoftstart/I03 Drilling plan Figure 16 – Drilling plan: MEsoftstart/I03 without Figure 17 – Drilling plan: MEsoftstart/I03 with bypass contactor bypass contactor MEsoftstart/I04 Drilling plan Figure 18 – Drilling plan: MEsoftstart/I03 without bypass contactor 31 Installation Instructions...
-
Page 32: Wiring
WIRING This chapter identifies the terminals and explains the wiring of the MEsoftstart/I01 and MEsoftstart/I02 models soft starter. Always read the instructions before installing, connecting and using the equipment. WIRING ................................... 32 ..............................33 ERMINAL IDENTIFICATION ................................35 IRING INSTRUCTIONS... -
Page 33: Terminal Identification
Terminal identification – Pro variants All Pro MEsoftstart variants have a Modbus TCP RJ45 terminal (grid input side) and additional signal terminals on green wiring terminal blocks. Figure 19 shows the terminals/connectors for Pro variant models MEsoftstart/I01 and MEsoftstart/I02 without built-in bypass contactor. - Page 34 Terminal identification – Core variants Figure 20 shows the terminals for Core variant models MEsoftstart/I00 and MEsoftstart/I01 without built-in bypass contactor. Figure 20 – Soft starter Core variant terminal identification 34 Wiring...
-
Page 35: Wiring Instructions
NOTES: To prevent a malfunction due to noise, route the signal cables 10 cm or more away from the power cables. Also, separate the main circuit cables at the input side from the main circuit cables at the output side. ... - Page 36 Table 11: Power wiring size and tightening torque specification Inverter model Lug, Nut and Bolt size Tightening torque Cable size [Nm] MEsoftstart/I00 MEsoftstart/I01 Select the cable size according to the motor maximum MEsoftstart/I02 starting current. Refer to local installation standards for the site. MEsoftstart/I03 MEsoftstart/I04...
- Page 37 Figure 23 – Fitting protective guards over terminals 37 Wiring...
- Page 38 Wiring terminals on the Pro variants This section defines the wiring terminals on the full-featured MEsoftstart/I pro range of soft starters. Wiring terminal X1 (Pro) – Control outputs The green wiring terminal X1 on the bottom side of the soft starter (refer Figure 19) provides access to the control outputs of the soft starter.
- Page 39 Wiring terminal X2 (Pro) – Temperature Sensors and Contactor control The green wiring terminal X2 on the bottom side of the soft starter (refer Figure 19) provides access to the terminals where the external temperature sensors should be connected and where the reversing or bypass contactors can be connected. Table 13: Temperature sensor input and contactor output terminals on the Pro models Terminal function description Terminal...
- Page 40 Wiring terminal X3 (Pro) – Communications and Control inputs The green wiring terminal X3 on the top side of the soft starter (refer Figure 19) provides access to the wiring terminals for the PC Interface and is where the Auto/Maintenance, remote start and reset signals to the soft starter, should be connected. Table 14: Communication and Control I/O wiring terminals on the Pro models Terminal function description Terminal...
- Page 41 Wiring terminal X4 (Pro) – Control I/O and power The green wiring terminal X4 on the top side of the soft starter (refer Figure 19) provides access to the wiring terminals for the PC Interface and is where the Reset, Temperature fault monitoring and external 24V DC may optionally be connected. Table 15: DC power and Control I/O wiring terminals on the Pro models Terminal function description Terminal...
- Page 42 Wiring terminals on the Core variants This section defines the wiring terminal connectors for the MEsoftstart/I Core variants of Industrial soft starters. Wiring terminal X1 (Core) – Control outputs The green wiring terminal X1 on the top side of the soft starter (refer Figure 20) provides access to the control outputs of the soft starter and is where the external temperature sensors should be connected.
- Page 43 Wiring terminal X2 (Core) – Control I/O and power The green wiring terminal X2 on the top side of the soft starter (refer Figure 20) provides access to the wiring terminals for the PC Interface and is where the Auto/Maintenance, remote start and reset signals to the soft starter, should be connected. Table 17: Communication and Control I/O wiring terminals on the Core models Terminal function description Terminal...
- Page 44 The MEsoftstart PC interface is available as a two-wire RS485 port plus ground Modbus RTU interface on all MEsoftstart/I models (MEsoftstart/I00 – MEsoftstart/I04). On Pro variants of MEsoftstart/I01 – MEsoftstart/I04, the MEsoftstart PC interface is also available on the Modbus TCP interface (on the Ethernet port).
-
Page 45: Precautions For Use Of The Soft Starter
PRECAUTIONS FOR USE OF THE SOFT STARTER This chapter explains the precautions for use of this product. Always read the instructions before using the equipment. PRECAUTIONS FOR USE OF THE SOFT STARTER ....................... 45 ............................46 HECKLIST BEFORE APPLYING POWER 45 Precautions for use... -
Page 46: Checklist Before Applying Power
Checklist before applying power The MEsoftstart/I series soft starter is a highly reliable product, but an incorrect peripheral circuit may shorten the product life or damage the product. Before starting operation, always recheck the following points: Refer Checked Checkpoint Countermeasure The soft starter model is If the soft starter model is not appropriate Table 1... - Page 47 Refer Checked Checkpoint Countermeasure - If the phases to or from the bypass contactor are swapped around, a short circuit will be caused between phases when the soft starter closes the bypass. - Before switch-on, inspect to confirm that the phases on the bypass contactor are wired using the same orientation as on the soft starter.
- Page 48 Refer Checked Checkpoint Countermeasure insulation of the soft starter's output side before connecting the soft starter. - This is especially important for an installation with an existing or old motor or use in a hostile atmosphere to make sure to check the motor insulation resistance.
-
Page 49: Basic Operation - Core Models
BASIC OPERATION – CORE MODELS This chapter explains the configuration and the basic operation of the core variants of MEsoftstart Industrial soft starter. This chapter explains the operation and use of this product. Always read the instructions before using the equipment. BASIC OPERATION –... -
Page 50: Power-Up The Soft Starter
Power-up the soft starter On power-up, the soft starter will be in IDLE mode. The user will be presented with HMI LEDs that indicates that the power is present and the supply phase is detected. Power LED When 24V power is present this LED will flash at a frequency of 0.5 Hz. When Modbus RTU communication has been established and the soft starter is under Modbus control this LED will flash at 1 Hz. -
Page 51: Configure The Soft Starter For The Application
The Mode LED will indicate the operational mode of the soft starter as shown in the table below. Mode LED This LED provides feedback regarding the mode of the software. The Mode LED state can be interpreted whenever the Power LED is flashing. The interpretation of the Mode LED state is described in the table below. - Page 52 Switch Usage Bypass The soft starter can be used with a built-in or external bypass contactor. A bypass contactor is activated once the motor is running and reduces the current through the soft starter switching elements while the motor is running.
-
Page 53: Controlling The Soft Starter
Configure a 55kW motor (with 99A full load current at power factor of 0.8) at 100% For the MEsoftstart/I01 which is a 200A continuous current soft starter: Configure a 75kW motor (with 135A full load current at power factor of 0.8) at 67%. - Page 54 Auto/Maintenance input on the soft starter to prevent remote control of the soft starter. When the Auto/Maintenance input is open, the soft starter will only accept control inputs locally on the soft starter, from the TFT panel. The Auto/Maintenance feature must never be used in place of a proper safety procedure to ensure the safety of personnel working on the soft starter or the motor.
- Page 55 Figure 34 – MEsoftstart/I Core – Start, Stop and Reset control options from the green wiring terminals Note that (when in Auto control) the motor can be started from any of the three control inputs and stopped from any of the three control inputs.
-
Page 56: Troubleshooting The Mesoftstart/I Core Variant
Figure 35 – MEsoftstart/I Core – JOG setup and control Take care not to over-use the JOG functionality as the motor and the internal switching elements in the soft starter will overheat quickly if JOG is done for prolonged periods. Troubleshooting the MEsoftstart/I core variant No LEDs on When connected to three phase power the Power LED should be on, and the Phase LED should be either ON or flashing. - Page 57 Mode LED flashing at 0.5Hz A Mode LED that is flashing at 0.5 Hz indicates that the soft starter is in Error Mode and the ERROR LED will show a flash pattern as described below. Use this table to determine the cause of the fault. The Error LED provides feedback on error conditions.
- Page 58 Check the Motor size setting (Rated Current% potentiometer) on the HMI panel and confirm that this is correct according to the manufacturers nameplate. (This setting can also be confirmed on the PC Application). iii. Adjust the Motor Underload percentage (MULC%) on the PC Application. The default is 10%. Line voltage Check the supply voltage levels.
- Page 59 Make the ‘Start Current’ higher. iii. Make the ‘Start%’ higher. If none of these actions resolve the problem, check the motor nameplate for the full load current specification of the motor and re-check the soft starter continuous current rating as well as the maximum starting current for the MEsoftstart soft starter and contact your distributor for advice.
- Page 60 Motor temperature too high This error occurs when the temperature on the motor is higher than the ‘Maximum Motor Temperature’ that is configured (refer paragraph 5.2.1). The soft starter will trip and only allow a restart again when the motor has cooled down to below the configured ‘Motor restart temperature’.
- Page 61 Press and hold the Reset button for 20 seconds while switching power on. The four LEDs will flash together once indicating that the factory restore has been completed; d. Release the reset button; Retry the Modbus communication with the default communication settings and address of 1. If the Modbus Master is not the MEsoftstart PC application, test the communication first with the MEsoftstart/I Core variant PC application (refer paragraph 7.1).
-
Page 62: Basic Operation - Pro Models
BASIC OPERATION – PRO MODELS This chapter explains the configuration and the basic operation of the full-featured pro variants Industrial soft starter This chapter explains the operation and use of this product. Always read the instructions before using the equipment. BASIC OPERATION –... -
Page 63: Operational Modes Of The Soft Starter
Operational modes of the soft starter On power-up, the soft starter will be in IDLE mode. The user will be presented with a menu to Start the motor or to make the selection to enter a configuration setup menu where parameters can be viewed and changed. Figure 36 –... -
Page 64: Power-Up The Soft Starter
Power-up the soft starter At power-up the soft starter TFT display will present the user with the option to Start the motor (if the current configuration is known) or to configure the soft starter for the required language, size of the motor and settings for the application. Section 6.4 below explains the parameters that can be changed and how that influences the operation of the soft starter. -
Page 65: Parameters
Parameters This section explains configurable parameters. Parameters can be viewed and changed when the user selects to ‘Configure the soft starter’ and then selects ‘User Configure’ (refer Figure 37). A menu will be presented allowing the user to configure the soft starter as shown below. - Page 66 Reference Parameter group Parameters Factory Default (where applicable) 6.4.4 Advanced Setup Kickstart Voltage % = 60% • • Kickstart Period = 0.2s Constant Current % = 50% • Pedestal RampUp % = 20% • • Pedestal RampDown % = 50% MSC % = 200% •...
- Page 67 Reference Parameter group Parameters Factory Default (where applicable) 6.4.7 Supply Tolerances Max Volt Imbalance = 20% • • Max Current Imbalance = 10% Nominal Grid Voltage = 400V • Note that changing the nominal grid voltage requires the installer to ensure that all connected contactors (Bypass etc) have their coils updated to the same voltage level or damage to the...
- Page 68 Parameters Description - with options or range This parameter defaults to Normal connection. If the Inside Delta option is selected, the soft starter will Inside Delta Connection allow a wider range of motor sizes (since the current through each phase will be only 58% of the phase current for normal delta connection.) Do not select Inside Delta when the motor is wired for a normal 3-wire motor.
- Page 69 Parameters Description - with options or range If set to “Don’t care” the soft starter will allow the motor to start in the direction of the present direction of rotation of the phases. If the direction of rotation of the motor is important, the Phase Rotation should not be set to “Don’t care”.
- Page 70 Parameters Description - with options or range Ramp Up time This parameter defines the period during which the motor voltage, ramps-up. The parameter is adjustable between: [10 seconds – 60 seconds or the Maximum Ramp up time parameter]. Note: The Ramp-up time is limited when Normal duty is selected. Note: The Ramp-up time can be extended by the current limiting functionality of the soft starter.
- Page 71 Parameters Description - with options or range Ramp Down Time In this mode, the Firing angle of the SCRs decreases linearly from the maximum to zero with the Ramp up time. This parameter defines the ramp down time [10sec – 30seconds] Pedestal: In this mode, the firing angle drops immediately to a predefined pedestal level.
- Page 72 For a 45kW motor on a MEsoftstart/I01, normal connection, no bypass contactor, the MOLC parameter range will be [100% - 589%]. For a 110kW motor on a MEsoftstart/I01 the MOLC parameter will be fixed at [100%-241%]. Maximum Starts/Hour This parameter will limit the starts per hour to protect the motor and the soft starter.
- Page 73 Temperature Setup These parameters specify the temperature limits that will be used by the soft starter to ensure the soft starter and the motor are operated within safe limits. Parameters Description - with options or range Heatsink Fan Control This parameter defines if the soft starter fan should be started when temperature becomes too high, or if the fan should always run during motor start, stop and run.
- Page 74 Parameters Description - with options or range Supply Tolerances Parameters that specifies if Torque control should be used during starting and stopping of the motor and related parameters: Parameters Description - with options or range Max Volt Imbalance This parameter is the maximum percentage imbalance that can occur between the lowest and highest measuring phase voltages before a trip will occur.
-
Page 75: Parameter Inter-Dependencies
Parameters Description - with options or range RS485 Parity The default parity on the Modbus RS485 port is Even parity. This may be set to Odd parity or No Parity. Modbus Slave Address The address of the soft starter on the Modbus link. The default address is 1.The address may be set between [1 –... -
Page 76: Basic Operation Procedure - Operation From Tft Display Panel
Basic operation procedure - operation from TFT display panel This section shows the basic operation of the soft starter when using the TFT display panel. Note that for operation from the TFT panel, the Modbus Controller (or MEsoftstart PC Application) should not be present and the Soft starter must be in LOCAL operation mode (refer par 6.4.8). - Page 77 Figure 40 – Understanding the data display 77 Basic operation – Pro models...
- Page 78 Motor starting Once User Configuration is completed and the configuration accepted, the user will be presented with the Start screen as shown in Figure 41. Figure 41 – Power-up the soft starter: Start the Motor When the START MOTOR button is pressed, the soft starter will start the motor applying the configuration parameters. During the start of the motor, the voltage as a function of time is displayed on a start progress screen.
-
Page 79: Basic Operation Procedure - Operation From A Remote Controller
Motor stopping The motor may be stopped during the motor starting sequence or while it is running, by pressing the STOP MOTOR button. When the STOP MOTOR button has been pressed, the voltage as a function of time is displayed on a stop progress screen. Note that the screen in Figure 41 shows a Ramp-down stop type. - Page 80 Selecting REMOTE operation Configure the soft starter for remote control from the TFT display panel: Select to Configure Soft starter Select User Configure Scroll through using the button until the ‘Operation’ parameter is shown; and Edit the parameter. Set to ‘Remote’. Be sure to the change.
-
Page 81: Using The Auto/Maintenance-Feature
Using the Auto/Maintenance-feature The MEsoftstart soft starter features an Auto/Maintenance input which may be used to prevent inadvertent START / STOP or RESET control of the soft starter from a remote location while e.g. maintenance is in progress. Note that to be able to use the Auto/Maintenance function, the Maintenance switch must be wired on the soft starter (refer Table 14). -
Page 82: Mesoftstart Communication Interface
MESOFTSTART COMMUNICATION INTERFACE This chapter introduces the MEsoftstart PC App for the MEsoftstart/I PRO variants and MEsoftstart/I Core variants, and explains how to install and use the software. This chapter explains the operation and use of this product. Always read the instructions before using the equipment. MESOFTSTART COMMUNICATION INTERFACE ........................ -
Page 83: Mesoftstart Pc App
MEsoftstart PC App This section describes how to install the MEsoftstart PC App on the user’s computer and how to use the interface to configure, monitor and control the soft starter. The MEsoftstart PC App is tested to run on the Windows 10 operating system. Two versions of PC Application software are available: for the Pro variants and the Core variants - the difference between the two is shown in the table below. - Page 84 Copy the files to the PC or laptop Copy the MEsoftstart installation files can be downloaded from the Mitsubishi Electric Europe website (they can also be obtained from your distributor) to the hard drive of the PC or laptop that will be used for the MEsoftstart configuration and monitoring.
- Page 85 The MEsoftstart PC App should run and the home screen should be visible (refer Figure 46). Figure 46 –Home screen with Modbus RTU setup selected Once the MEsoftstart PC App is running, the Information screen can be accessed by clicking the _icon.
- Page 86 Modbus RTU – Test to see if a driver is required for the Modbus-USB cable If Modbus TCP is being used, this step may be omitted. Ensure that the Connection Setup-> Type is on ‘Serial’ to be able to view the serial Modbus RTU setup parameters. Click on the down arrow of the “Available COM Ports”...
- Page 87 Modbus TCP If the Core variant is used or the Pro variant with Modbus RTU is being used, this step may be omitted. Ensure that the Connection Setup-> Type is on ‘TCP’ to be able to view the serial Modbus TCP setup parameters. Ensure that the IP Address is correct and the Port is 502.
- Page 88 Figure 50 – MEsoftstart PC App on RTU Modbus waiting for communication from soft starter If the MEsoftstart PC App is not connecting to the soft starter, it may be that the Modbus communication parameters or the Modbus Slave Address of the soft starter have been modified on the soft starter. For the Pro variants: Refer paragraph 6.4.9 for information on how to check the TCP and RTU Modbus communication parameters and RTU address on the soft starter using the TFT display.
- Page 89 On the Pro variants: Once the MEsoftstart PC App (or other Modbus controller) is connected, the soft starter TFT display will not accept command inputs (other than to toggle through the Parameter Display Area options). This will be clear to the user with the yellow text “TCPCTL”...
- Page 90 On the Pro variant: The parameters that may be configured via the MEsoftstart PC App are the same parameters which are available for configuration via the TFT display. From the Start screen select to “Edit Configuration”. The Configure screen will be shown with the “Basic Setup” parameters (refer Figure 53).
- Page 91 Figure 53 –Configure screen When the configuration is acceptable, the user should select “Download” to save the configuration to the soft starter followed by “Back” to return to the Start screen. There is an optional password when downloading a new configuration to the soft starter.
- Page 92 ‘download’ action to continue. If the password was activated on the soft starter, the correct password will be required to download the configuration to the soft starter. Refer paragraph 6.4.8 for more information on the password. The user may at any time revert to “Factory default” parameter set, or to the “Current Configuration” on the soft starter, or may load “From File”...
- Page 93 Temperatures, when the soft starter will trip to protect the motor or the switching electronics inside the soft starter, can also be adjusted. Figure 55 –Configure screen - limits and tolerances Configuring general parameters and communication settings On the Core and the Pro variants: Just like on the TFT display, the MEsoftstart PC App may be used to configure general parameters and communication settings for the Modbus interface.
- Page 94 Configuring for the JOG option using the MEsoftstart PC App On the Core variant: JOG is controlled from the HMI panel (refer paragraph5.3.3) On the Pro variant: Just like on the TFT display the soft starter may be configured using the MEsoftstart PC App to “JOG” the motor at a fixed voltage for testing or calibration purposes.
- Page 95 Figure 58 –Configure screen –password and revisions Controlling the soft starter using the MEsoftstart PC App On the Core variant – refer paragraph 5.3.2 On the Core and the Pro variants: The MEsoftstart PC App may be used to control the soft starter. From the Start screen, use the “START” button to start the motor.
- Page 96 Figure 59 – MEsoftstart PC Application Control screen Resetting the soft starter using the MEsoftstart PC Application On the Core variant – refer paragraph 5.3.2 On the Core and the Pro variants: Whenever a fault is detected by the soft starter, the soft starter will require a RESET before operation is possible again. Investigate the cause of the fault, fix the issue and “Reset”...
- Page 97 Figure 60 – MEsoftstart PC Application Fault screen 97 MEsoftstart PC Interface Application...
-
Page 98: Mesoftstart Modbus Interfaces
MEsoftstart Modbus interfaces The MEsoftstart PC App and any SCADA system, both use the same MODBUS protocol and either is the Modbus Master when connected to the soft starter. The SCADA uses a subset of the total register definition. Some of the registers will only be used by the PC Application (note: these register values will not be shown in the final SCADA SICD document). - Page 99 At present the following Modbus function codes (FCs) are supported: 4 = Read Input Register. (Read Only Registers) 3 = Read Holding Registers. (Read/Write Registers) 6 = Write Single Holding Register. 16 = Write Multiple Holding Registers. The soft starter RTU address can be configured from 1 to 247. Any write action either to Configuration registers, or the Control Command register, that receives a positive response back from the soft starter, may be interpreted by the Modbus Master as confirmation that the configuration data is correct and will be saved in the soft starter, or that the command will be put into effect.
-
Page 100: Protective Functions & Troubleshooting (Pro)
PROTECTIVE FUNCTIONS & TROUBLESHOOTING (PRO) This chapter explains the protection functions that are implemented in the PRO variants of the soft starter. For troubleshooting on the Core variant refer to paragraph 5.4. This chapter explains the operation and use of this product. Always read the instructions before using the equipment. PROTECTIVE FUNCTIONS &... -
Page 101: Soft Starter Fault And Alarm Indications
Soft starter fault and alarm indications When the soft starter detects a fault, the operation panel displays a fault message, or a protective function activates to trip the soft starter - depending on the nature of the fault. How to reset the soft starter after a fault has occurred Always investigate to find the cause of the problem when a fault was detected by the soft starter. -
Page 102: Troubleshooting Using The Fault Display On The Soft Starter
Fault screen with RESET button Parameter Description Revolutions per Minute (Motor Shaft Speed) Gbal Grid voltage imbalance% Mbal Motor side voltage imbalance% RemINH Switching card inhibit relay status RlySht Shunt Trip relay status Ibal Current imbalance% RemStrt Remote start signal ExtRst External Reset signal RlyRun... - Page 103 Fault Message Description Corrective action Motor Overload An overload current was detected while the Check the motor current specification motor is running. This limit is defined by and confirm that the configuration of the Applicable during RUNNING. parameter “Motor Over Load Current” (MOLC) following parameters is correct: as described in paragraph 6.4.4.
- Page 104 Fault Message Description Corrective action The heatsinks will get too hot if the number of • If an external bypass contactor is starts per hour is very high, or if the soft starter used, confirm that the bypass is used to run the motor for a long time without contactor is working and that the a bypass contactor.
-
Page 105: General Troubleshooting
Fault Message Description Corrective action The phase rotation is configured by parameter If motor rotation direction is not “Phase Rotation” refer paragraph 6.4.1). If the important, this parameter may be set to phase rotation is not corrected, the motor will “Don’t care”... -
Page 106: Maintenance And Inspection
MAINTENANCE AND INSPECTION This chapter explains the precautions for maintenance and inspection for this product. MAINTENANCE AND INSPECTION ..........................106 ................................107 NSPECTION ITEM 106 Precautions for Maintenance and Inspection... -
Page 107: Inspection Item
Inspection item The soft starter is a static unit mainly consisting of semiconductor devices. Weekly inspection should be performed to prevent any fault from occurring due to the adverse effects of the operating environment, such as temperature, humidity, dust, dirt and vibration, changes in the parts with time, service life and other factors. - Page 108 Weekly and periodic inspection checklist Inspection interval Corrective action Area of Inspection item Description Check at fault occurrence inspection Weekly Peri o dic Check the surrounding air temperature, humidity, Improve the Surrounding dirt, corrosive gas, water, oil, etc. environment. environment Check fault location Check for unusual noise and vibration.
- Page 109 Replacement of parts The soft starter consists of many electronic parts and power semiconductor devices. The only parts that may be replaced on the installation site, are the fans on the MEsoftstart/I01 Core and all Pro variants. Part name Estimated lifespan...
-
Page 110: Specifications
SPECIFICATIONS This chapter explains the specifications of this product. Always read the instructions before using the equipment. SPECIFICATIONS ................................ 110 ...............................111 OFT STARTER SPECIFICATION ............................112 UTLINE DIMENSION DRAWINGS 110 Specifications... -
Page 111: Soft Starter Specification
340 – 420Vac, 425 – 578Vac, 586 -760Vac Current Ratings MEsoftstart/I00 MEsoftstart/I01 MEsoftstart/I02 MEsoftstart/I03 MEsoftstart/I04 Max. continuous current @ +50°C 100A 200A 390A 600A 900A Mitsubishi Electric Bypass contactor S-T80 S-N150 S-N400 S-N600 (S-N800) Max continuous current with bypass 120A 200A 450A 800A 1000A Max. -
Page 112: Outline Dimension Drawings
Outline dimension drawings MEsoftstart/I00 - 100A model Figure 62: MEsoftstart/I00 without internal bypass contactor Figure 63: MEsoftstart/I00 with internal bypass contactor 112 Specifications... - Page 113 MEsoftstart/I01 - 200A model Figure 64: MEsoftstart/I01 without bypass contactor Figure 65: MEsoftstart /I01 with internal bypass contactor 113 Specifications...
- Page 114 MEsoftstart/I02 - 390A model Figure 66: MEsoftstart/I02 without bypass contactor Figure 67: MEsoftstart/I02 with internal bypass contactor 114 Specifications...
- Page 115 MEsoftstart/I03 - 600A model Figure 68: MEsoftstart/I03 without bypass contactor Figure 69: MEsoftstart/I03 with internal bypass contactor 115 Specifications...
- Page 116 MEsoftstart/I04 - 900A model Figure 70: MEsoftstart/I04 without bypass contactor Note: No internal bypass contactor option is available for the MEsoftstart/I04 model. 116 Specifications...
-
Page 117: Appendices
APPENDICES This APPENDIX provides the additional maintenance information for this product. APPENDIX ..................................... 117 .........................118 DVANCED AINTENANCE EPLACEMENT OF THE FAN 117 Instruction Manual Supplement... -
Page 118: Advanced Maintenance: Replacement Of The Fan
(or fans on the MEsoftstart/I03 and MEsoftstart/I04). Instructions are provided in this section. Removing the bottom cover gives access to the fan. Pictures show the MEsoftstart/I01. Figure 71: Replacement of the fan...
Need help?
Do you have a question about the MEsoftstart/I01 and is the answer not in the manual?
Questions and answers