Table of Contents
Advertisement
Quick Links
Advertisement
Table of Contents

Related Manuals for Haier A7+


Summary of Contents for Haier A7+
- Page 1 User Guide of A7+ Phone (Version V0.3) 【File No.】 【Doc Level】 【Project Name】 A7+ 【Issue Date】 December 1, 2006 【Author】 【Summary】 Introduce user guide of A7+ phone. 【Keywords】 Phone introduction, function introduction, menu introduction, accessories...
-
Page 2: Table Of Contents
1. Phone Introduction........................4 1.1 Keypad Area........................4 1.1.1 Number/letter key.....................4 1.1.2 Control key.......................5 1.1.3 Key operation under stand-by state................6 1.1.4 Key operation without SIM card................6 1.2 Display ..........................6 1.3 Install and remove battery....................8 1.4 Install and remove SIM card ....................8 1.5 Battery charge ........................9 2. - Page 3 3.2 Settings..........................24 3.2.1 Ringer settings......................24 3.2.2 Phone Settings......................25 3.2.3 Call settings......................27 3.2.4 Date and time ......................29 3.2.5 Guard settings ......................29 3.2.6 Security Settings ....................31 3.2.7 Network settings.....................33 3.2.8 Factory settings ......................35 3.3 My documents........................35 3.3.1 Pictures........................35 3.3.2 Ring tone ........................36 3.3.3 Memory capacity....................37 3.4 Quick settings........................37 3.4.1 Personalize ......................37...
-
Page 4: Phone Introduction
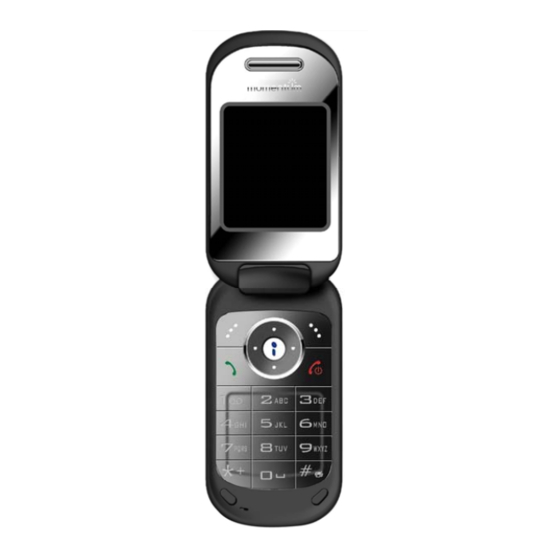
1. Phone Introduction 1.1 Keypad Area There are 21 keys on keypad of this phone, which can be divided into two parts: • Number/letter area, total 12 keys • Control keys area, total 9 keys 1.1.1 Number/letter key Number/letter area consists of 12 keys, which arranges according to definite standard, and includes [0]~[9], [*] and [#]. -
Page 5: Control Key
Switching input Switching mode input mode switching capital switching capital small mode and small mode Press Press and hold for a hold for a long time: switch to long time: symbols switch symbols 1.1.2 Control key [On/Off]: Right red key at keypad area, also called red key or power key. •... -
Page 6: Key Operation Under Stand-By State
• Browse short message or other long text message. • Turn to last and next picture when previewing pictures. Note: [Up] and [Down] keys have automatic repeating function; if we press and hold one key of them for a long time, it is equal to press the key for many times. It means that when the time you press the key exceeds preset time, phone starts the automatic repeating function of the key. - Page 7 of phone, such as electricity, network signal and etc. Icon Name of icons Description Display energy of battery, there is five battery indicator levels. The icon Battery scrolls during charge process. Network icon is divided into two parts, left part indicates if it register in Network network, left part indicated signal strength, which is divided into five levels (from no signal to strongest signal).
-
Page 8: Install And Remove Battery
Press [Pickup] on stand-by screen, phone displays the list of dialed number. You can use [Up]/ [Down] to select one of them and press [Pickup] to dial the number directly. 1.3 Install and remove battery Install battery 1. Back of phone face upwards, hold phone, see from the direction of phone back, there is an opening at side of phone;... -
Page 9: Battery Charge
1.5 Battery charge · Plug the pin charger into 110AC power socket. · Plug adapter of charger into the interface at the top of the phone (the side with arrow sign adown), plug adapter into interface socket. · When phone is turned on, battery stick in battery icon on screen start to scroll, which shows that mobile is in charging state. -
Page 10: Dial Number
Press and hold [On/Off] for a long time in any situation to turn off phone power. 2.3 Dial number • This function can be used only after network name displays on screen. • Input phone number. • Press [Pickup] to dial directly; or enter option menu, select dial or IP dial. The function of Dial is completely same as [Pickup]. -
Page 11: Input Method
you can: • Set current call in holding state and answer for second call. • Press [On/Off] to stop current call then take usual operation to answer for or reject second call. 2.5 Input method The phone uses T9 input method. You often need to input text message when using phone. -
Page 12: T9 Spanish(T9Spa/T9Spa
in stand-by row firstly. When input row and stand-by row all are blank, press and hold [SKR] for a short time will delete the character at left of cursor in text area. If there is no character at left of cursor, delete right character. - Page 13 Note: when it is turned on, phonebook cannot be used because it is initialization, so please wait for a moment. Classification of phonebook Phonebook is classified into class: phonebook on SIM card (capacity depends on SIM card) and phonebook on phone (support 500 name card records). The record of two phonebooks is mixed together but operation of them is different.
-
Page 14: Search
icon). Different group can be distinguished by different ring. 2.6.1 Search You can enter mixed list of phonebook of SIM card and phone by this menu. Firstly, you can input the front character of the name to bee looked or directly press [OK] to enter list. If input character and it exists in list, list scroll to the first position that meets requirements. - Page 15 SIM card record, it is SIM card icon, if it is phone record, then it displays the default number of the phone. Select some name in the list; you can do following operation by soft option menu on left: • IP call: if you still don’t IP service number, prompt you to insert it firstly, then do IP dial.
-
Page 16: Capacity
It is similar with copy, but after copy, deletes original record. • Move to SIM card (if record is in phone): It is similar with copy, but after copy, and delete original record. To select phonebook record, if there is unnumber field in record (such as e-mail, note, address, post code field), these fields will be kept constantly. -
Page 17: Copy All
2.6.6 Copy all SIM card to phone Only capacity of phonebook is not full, copy one by one is able, you can copy as much as you can until all are copied or capacity of phonebook is full. When copying, to every record in SIM card, copy its name and number to phonebook, and set number in SIM card as the default number (default field) of the name card. -
Page 18: Fixed Numbers List
Phone has no any check to the IP service you input; you need to confirm it is correct by yourself. 2.6.11 Fixed numbers list If your SIM card has this function, you can restrict the numbers that you will call. If you set Fixed number mode On, your phone can only call the numbers saved in the fixed numbers list. -
Page 19: Use Preparation For Pc Sync Software
2.7.1 Use preparation for PC Sync software 2.7.1.1 System requirement To install and run PC Sync software, you need: A computer: Pentium200MHz or above processor 32MB or above RAM Windows 95/98/Me//2000/XP operating system At least 40 MB or above hard disk space A data cable: connect PC and phone 2.7.1.2 Connection of phone and PC Confirm phone is turned on, connect data cable to phone;... -
Page 20: Operation Process Using Phone As Modem
2.7.2.3 Phonebook By phonebook management function, you can synchronize the phonebook on PC and phone 通 so that they have same content; you can also transfer phonebook from phone to PC for browse, or create, delete, change phonebook on phone, then download to phone or kept it in file format on PC;... -
Page 21: Big Picture
2. power on the phone and Enter Fun/Connect to PC, display “PC connected” 3. Select adding new modem from control panel, and then select a standard modem type, standard 28800bps modem(If OS is Windows XP, please select 56000 bps modem). 4. -
Page 22: Earphone
If you want to hide these info to safety box, you just need to select “move to safety box” to move these info to safety box When you preview these info 2.11 Earphone The phone support earphone function, you can answer for call and reject call by earphone, when earphone is inserted and a call is incoming, you can press the button on earphone to answer for the phone or press and hold the button for a long time to reject the call;... - Page 23 • Send SMS: send message to selected number • Send phone number: send select number to others by means of message • Delete • Check number • Save (only unsaved number will display the item) • Call Delete Delete record includes three submenu (Outgoing calls, Answered calls, Missed calls), select some sub menu, after confirmation all call record in the class will be deleted.
-
Page 24: Settings
• Reset charge counter: clear value of fee counter as zero, (it is protected by PIN2 code). • Balance balance: display left call fee. • Show limit: display the upper limitation of call fee that is set. • Cancel limit: cancel upper limitation setting of call fees (it is protected by PIN2 code). -
Page 25: Phone Settings
ringer Alarm clock You can set rings of alarm clock here. SMS alert ringer You can set prompt rings of short message. MMS alert ringer You can set prompt rings of MMS. 3.2.2 Phone Settings Switch tone You can appoint if it has prompt ring when phone is on/off. Welcome text You can edit welcome words after on act. - Page 26 Languages You can set the language used in phone menu and prompt text. The phone supply Spanish and English. Contrast Enter the menu, you can press direction key to adjust the contrast of the screen display. Backlight You can select that backlight is turned off after 10 seconds, 30 seconds or 60 seconds. In following situation, LCD background light and keypad light (except background light is set off) is lighted: Press some key (when it is folded you need to press and hold side key for a long time).
-
Page 27: Call Settings
set. If the key is still not set, phone prompts unset hotkey, confirm and open function list, here you can set its function directly. 3.2.3 Call settings 3.2.3.1 Call forward (need network support) In the situation that it is not easy to answer for a phone or in other situations, it is used to set received call to other phone (or voicebox), and set transfer condition. - Page 28 to the home number set beforehand, when the time you set come, the call will come back to phone again. • Office Number: it will inform you to input office number first, and then need to input the time, press [OK], the setting value is saved. When this activated, the incoming call will transfer to the office number set beforehand.
-
Page 29: Date And Time
3.2.3.7 Auto answer You can set if to turn on Automatic response function, which means when phone receives call; the phone will connect the call after short time rings. 3.2.3.8 Active flip When the function is enabled, fold out the phone to connect the call. 3.2.3.9 Send ID (need network support) By this menu, you can select if send phone number to called party during the call. - Page 30 blacklist’ can add new number, and can enter waster number list to change or delete by query. Alert type There are two prompt methods of waste message, after waste message prompt is set, when receiving waster message, only display icon prompt of new waste message and no any sound and vibration prompt, press OK to close prompt dialog and don’t see the content of the message.
-
Page 31: Security Settings
Note: when no connection function /only connection function is turned on, standard soft icon is displayed on stand-by screen. 3.2.5.3 Privacy guard You can protect the important information on your phone, which include message, phonebook and call record. You can set password to message, phonebook, call record, or only set password to some items of them, or don’t set;... - Page 32 • All incoming: once it is enabled, all calls are prohibited. • Roaming incoming: once it is enabled, any call during roam state will be prohibited. If you select enable, phone will ask you to input restriction password. If password is correct, phone connects with network and applies to enable the function.
-
Page 33: Network Settings
Notify type: you can turn on or turn off ‘call information’ and ‘message information’. Notify period: you can select information date. • Change password: you change the password of smart guard against theft. • Activate: you can turn on or turn off smart guard against theft function. 3.2.6.4 Fixed dialing mode You can set fixed dialing on/off when input the correct PIN2 code. - Page 34 Phone starts to search available network after confirmation, then networks are displayed on by list. Select one from them, press [add] the network is added to the end of prefer network list. • Add existing network Display network list saved in phone. You can select any one from it, press [add], the network will be added to the end of prefer network list.
-
Page 35: Factory Settings
can set which method is used: GPRS first: Use GPRS first GPRS only: only use GPRS. GSM only: only use GSM. GPRS settings. You can set: Show settings: Show GPRS setting APN setting:set the mane of connection。 User name:Required name to logon wap server. User passwords: required password for logon. -
Page 36: Ring Tone
store and manage downloaded pictures via WAP; "Downloaded images" is used to store and manage downloaded pictures by PC sync tools. In the menu Pictures, you will see the option “Delete image”, which is used to empty a soft folder in one time. By pressing the left soft key or [OK] key in the menu Pictures, the phone enters into the picture list. -
Page 37: Memory Capacity
3.3.3 Memory capacity To check the capacity of total, PC sync and other, display used capacity and all capacity. 3.4 Quick settings Quick settings function can make you use preset parameter combination under special environment by simple operation. Left of the current mode has a selected mark. Quick settings is a group of preset character definition, it directly overwrite all original settings after start up. -
Page 38: Messages (Need Network Support)
You can adjust the volume of ring. It has three levels. Alarm volume Adjust the volume. Once you select a level, it is effective to alarm clock. SMS volume Adjust the volume. Once you select a level, it is effective to SMS. MMS volume Adjust the volume. -
Page 39: Sms (Need Network Support)
3.5.1 SMS (need network support) SMS service provides a kind of convenient and cheap communication method and can transfer text message to others quickly. You can use ‘messages’ menu to send messages to other phone or devices that can receive message. Phone support long SMS (concatenate SMS) function, every concatenate can contain not more than 10 normal SMS. - Page 40 3.5.1.2 Outbox Phone keep saved messages in outbox. Outbox can be divided into sub mail box used to save sent and not sent message. If mailbox is empty, phone prompt message list is empty. • If select ‘save message’ when editing message, the message is saved in unsent message mail box;...
- Page 41 • Press [SKL] to option menu, select phonebook in option menu to open name selection screen, press [OK] to select/cancel (if it is not selected before, select it, otherwise, cancel it). Right of selected items has selected icon. Selected name corresponding to its default number, if you want to select other number of him;...
- Page 42 ‘move to inbox’, which means move current waste message into inbox. Note: refer to description of message guard. 3.5.1.5 Message settings Service center number Used to save the number of message service center for the network you are in. the number can be edited.
- Page 43 • Outbox After select and confirm, phone will delete all messages in Inbox/outbox. 3.5.1.7 Capacity You can view the quantity of used message, total amount and used percent on SIM card and phone. 3.5.1.8 Voice mail Note: you can set “call forward’ function to transfer call to voicebox (the number used to left words).
-
Page 44: Mms (Need Network Support)
Note: when turn on the function, stand-by time of the phone will be shorter. Topics <Add channel> You can add new channel number into channel list, which means adding a kind of new broadcast type to be received. Channel list is a number consisted of three numeric. List of existing channel Select any number and press [option] to proceed following operation: Edit: change channel number. - Page 45 Save as Template: Save MMS in Draft box Dial: Dial Sender’s number 3.5.2.2 Outbox 3.5.2.2.1 Sent box Enter outbox, successfully sent and saved MMS are listed on screen, select some MMS, press SKL to delete, press OK to read. In view MMS interface, press SKL “option”, include following functions: Send: select the menu to open MMS edit interface, selected MMS content displays on edit screen, you can change it before sent it out.
- Page 46 press SKL to preview selected picture detail. In preview interface, you can press SKL “option” or press [OK] to insert Voice: select some kind of music, phone enter music list, you can press [OK] or SKL “confirm” to realize insert operation. Page: if there is blank page in the MMS being edited, phone will prompt “can not add new page”...
- Page 47 Recipients: you can edit recipients again Subject: you could edit subject again CC: phone enter group send name input screen, you can add copier, the most copier is8 BCC: phone enter group send name input screen, you can add blank copier, the most blank copier is 8 Priority: you can choose priority level which include high, normal and low Save: you can choose turn on or turn off this option.
-
Page 48: Fun
Center of MMS You can edit MMS center Network account You can select network account Gateway You can do some gateway settings, such as Proxy type, IP address, and IP port Status report The option can be set as ‘turn on’ or ‘turn off’, if it is set as ‘turn on’, then it will give you a read report to inform you if the MMS arrive, or send failure, or refused Validity period By the menu you can set the time to keep the MMS in MMS service center... -
Page 49: Pc Sync
3.6.1.2 Boxman The boxes can only be pushed but not pulled; only one box can be pushed once. Push all boxes to the place marked with small flow, then you success. It can select random turn. 3.6.1.3 Mine Goal of digging mine is to find all mines in mine area with stepping on any mine. If stepping on mine, you will lose the game. -
Page 50: Home
provider change its WAP website or content so that you cannot browse WAP net page, our company will not inform it. And don’t answer for the result caused by it. Please consult network operator and internet provider to get latest information. 3.7.1 Home Select the menu, you can enter homepage directly. - Page 51 incident, change notebook, delete note or implement capacity query. When it happens, phone automatically display new incident and play notepad prompt. 30 incidents can be produced at most. 3.8.1.1 New Two types • Meeting If it is meeting type, you need to set date, start time, end time (end time is late than start time), text, and prompt mode and repeat method.
- Page 52 3.8.1.7 Capability You can check the using status for example: the quantity of the used, the total quantity and the using percentage. 3.8.1.8 Event list The events list shows all events of present month. Select an event and press [Ok] key, then the screen will display its detailed content.
-
Page 53: Alarm Clock
3.8.2 Alarm clock With 24-hour alarming function .Total with 3 groups alarm clock and your can set them separately. In this menu you can choose one group alarm clock and input alarming time and select the repeating way, press ”TURN ON” to start the clock.. Below mentioned four repeating ways you can choose: ●... -
Page 54: Auto On/Off
3.8.6 Auto on/off With the function of turn on and turn off automatically. You can set turn on or turn off separately. Select “start” to get into the editor and input time of turn on and turn off... While turning on the mobile phone you should test the PIN code otherwise it will stay in the PIN code input process. -
Page 55: Important Safety Precautions
4. Important Safety Precautions When using this product please follow the safety precautions below to avoid possible legal issues and damage. SAFETY IN AN AIR CRAFT Your cell phone can cause interference in an aircraft's navigation system and its network. In most countries, using this product on board an airplane is against the law. - Page 56 according to your local regulations. Health and Safety Information – RF Exposure Information (SAR) This phone meets the government’s requirement for exposure to radio waves. This phone is designed and manufactured not to exceed the emission limits for exposure to radio frequency (RF) energy set by the FCC.
Need help?
Do you have a question about the A7+ and is the answer not in the manual?
Questions and answers