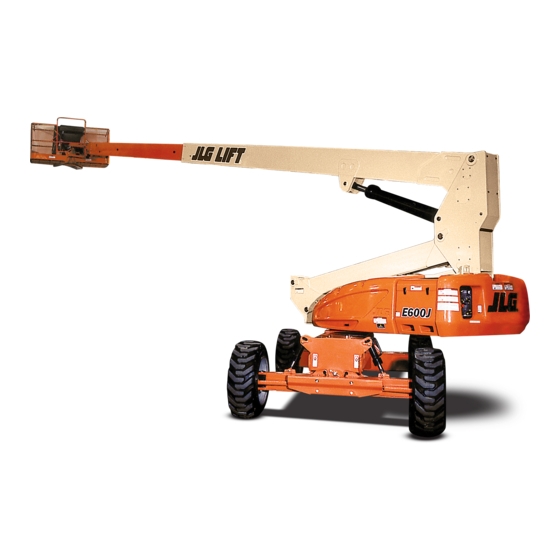
JLG E600 Service And Maintenance Manual
Hide thumbs
Also See for E600:
- Operation and safety manual (114 pages) ,
- Operation and safety manual (122 pages)

Related Manuals for JLG E600


Summary of Contents for JLG E600
- Page 1 Service and Maintenance Manual Model E600 E600J E600JP M600 M600J M600JP P/N - 3121813 December 18, 2012...
-
Page 3: Bhydraulic System Safety
• USE ONLY APPROVED, NONFLAMMABLE CLEANING direct any line pressure back into the reservoir. Pressure SOLVENTS. feed lines to system components can then be discon- nected with minimal fluid loss. 3121813 – JLG Lift –... - Page 4 INTRODUCTION REVISON LOG Original Issue - August 10, 2000 Revised - November 22, 2000 Revised - April 15, 2003 Revised - February 11, 2008 Revised - December 18, 2012 – JLG Lift – 3121813...
-
Page 5: Table Of Contents
Lubrication Specifications ........... 2-4 3121813 – JLG Lift –... - Page 6 Welding on JLG Equipment ............2-6 Do the Following When Welding on JLG Equipment ......2-6 Do NOT Do the Following When Welding on JLG Equipment .
- Page 7 Timing Sequences ............3-54 To Connect the JLG Control System Analyzer to the Generator ..... 3-55 Alarms and Fault Flash Codes .
- Page 8 Troubleshooting............4-33 – JLG Lift –...
- Page 9 To Connect the JLG Control System Analyzer ........
- Page 10 HD30/HDP20 Series Disassembly..........7-10 – JLG Lift –...
- Page 11 Operating Principle - Jib Rotator...........4-25 3121813 – JLG Lift –...
- Page 12 Hydraulic Schematic - Sheet 2 of 2..........7-19 viii – JLG Lift – 3121813...
- Page 13 LIST OF FIGURES FIGURE NO. TITLE PAGE NO. This page left blank intentionally. 3121813 – JLG Lift –...
- Page 14 JLG Control System Flash Codes........
-
Page 15: Section 1 - Specifications
36/14 LL-22.5 foam filled E600JP/M600JP 51 psi (3.6 kg/cm Maximum Drive Speed: 3.0 mph (1.3 m/s) Electrical System Voltage 48 volts Maximum Hydraulic System Pressure 3200 psi (221 Bar) Maximum Wind Speed 28 mph (12.5 m/s) 3121813 – JLG Lift –... -
Page 16: Function Speeds
Rotate the opposite direction, Record Time. Rotate the other direction, Record Time. Articulating Jib: Platform level and centered with the boom. Start with the Jib down. Jib Up, Record Time. Jib Down, Record Time. – JLG Lift – 3121813... -
Page 17: Torque Requirements
Boom Assembly (E/M 600J) 4464 2025 Tire & Wheel 102.5 Swing Drive Swing Bearing 45.4 Platform Console Side Entry Platform - 30x72 (bare) Side Entry Platform - 30x48 (bare) Counterweight 2560 1161 Foam Fill (Filled Tires) 3121813 – JLG Lift –... -
Page 18: Hydraulic Oil
Specific Gravity .910 of comparable viscosities. If use of hydraulic oil Pour Point -44°F (-42°C) other than Mobil DTE 11M is desired, contact JLG Industries for proper recommendations. Flash Point 500°F (260°C) Operating Temp. 0 to 180°F (-17 to 162°C) Table 1-12. -
Page 19: Operator Maintenance
Classification GL-5 or Mil-Spec Mil-L-2105. Hydraulic Oil. Mobil DTE-11M Open Gear Lube - Tribol Molub-Alloy 936 Open Gear Com- pound. (JLG Part No. 3020027) Bearing Grease (JLG Part No. 3020029) Mobilith SHA 460. Synthetic Lithium Lubricant, Gredag 741 Grease. (JLG Part No. 3020022) Engine (crankcase) Oil. - Page 20 Prior to S/N 51941 - 15 gal. tank (56.7 L) S/N 51941 to present - 15.9 gal. system (56.7L) 12.4 gal. (46.9 L) to Full Mark Lube - HO Interval - Check Level daily; Change every 2 years or 1200 hours of operation. – JLG Lift – 3121813...
- Page 21 Lube Point(s) - Level/Fill Plug Capacity - 0.4 gal. (1.5 L) Lube - EPGL Interval - Check level every 3 months or 150 hrs of operation; change every 2 years or 1200 hours of operation 3121813 – JLG Lift –...
-
Page 22: Torque Chart (Sae Fasteners - Sheet 1 Of 7)
1. THESE TORQUE VALUES DO NOT APPLY TO CADMIUM PLATED FASTENERS 2. ALL TORQUE VALUES ARE STATIC TORQUE MEASURED PER STANDARD AUDIT METHODS TOLERANCE = ±10% 3. * ASSEMBLY USES HARDENED WASHER REFERENCE JLG ANEROBIC THREAD LOCKING COMPOUND JLG P/N Loctite® P/N... -
Page 23: Torque Chart (Sae Fasteners - Sheet 2 Of 7)
1. THESE TORQUE VALUES DO NOT APPLY TO CADMIUM PLATED FASTENERS 2. ALL TORQUE VALUES ARE STATIC TORQUE MEASURED PER STANDARD AUDIT METHODS TOLERANCE = ±10% 3. * ASSEMBLY USES HARDENED WASHER Figure 1-4. Torque Chart (SAE Fasteners - Sheet 2 of 7) 3121813 – JLG Lift –... -
Page 24: Torque Chart (Sae Fasteners - Sheet 3 Of 7)
4. CLAMP LOAD LISTED FOR SHCS IS SAME AS GRADE 8 OR CLASS 10.9 AND DOES NOT REPRESENT FULL STRENGTH CAPABILITY OF SHCS. IF HIGHER LOAD IS REQUIRED, ADDITIONAL TESTING IS REQUIRED. Figure 1-5. Torque Chart (SAE Fasteners - Sheet 3 of 7) 1-10 – JLG Lift – 3121813... -
Page 25: Torque Chart (Sae Fasteners - Sheet 4 Of 7)
4. CLAMP LOAD LISTED FOR SHCS IS SAME AS GRADE 8 OR CLASS 10.9 AND DOES NOT REPRESENT FULL STRENGTH CAPABILITY OF SHCS. IF HIGHER LOAD IS REQUIRED, ADDITIONAL TESTING IS REQUIRED. Figure 1-6. Torque Chart (SAE Fasteners - Sheet 4 of 7) 3121813 – JLG Lift – 1-11... -
Page 26: Torque Chart (Metric Fasteners - Sheet 5 Of 7)
4. CLAMP LOAD LISTED FOR SHCS IS SAME AS GRADE 8 OR CLASS 10.9 AND DOES NOT REPRESENT FULL STRENGTH CAPABILITY OF SHCS. IF HIGHER LOAD IS REQUIRED, ADDITIONAL TESTING IS REQUIRED. Figure 1-7. Torque Chart (METRIC Fasteners - Sheet 5 of 7) 1-12 – JLG Lift – 3121813... -
Page 27: Torque Chart (Metric Fasteners - Sheet 6 Of 7)
4. CLAMP LOAD LISTED FOR SHCS IS SAME AS GRADE 8 OR CLASS 10.9 AND DOES NOT REPRESENT FULL STRENGTH CAPABILITY OF SHCS. IF HIGHER LOAD IS REQUIRED, ADDITIONAL TESTING IS REQUIRED. Figure 1-8. Torque Chart (METRIC Fasteners - Sheet 6 of 7) 3121813 – JLG Lift – 1-13... -
Page 28: Torque Chart (Metric Fasteners - Sheet 7 Of 7)
4. CLAMP LOAD LISTED FOR SHCS IS SAME AS GRADE 8 OR CLASS 10.9 AND DOES NOT REPRESENT FULL STRENGTH CAPABILITY OF SHCS. IF HIGHER LOAD IS REQUIRED, ADDITIONAL TESTING IS REQUIRED. Figure 1-9. Torque Chart (METRIC Fasteners - Sheet 7 of 7) 1-14 – JLG Lift – 3121813... -
Page 29: Section 2 - General
JLG Service It is important to establish and conform to a comprehen- Training School for the subject JLG product model. Refer- sive inspection and preventive maintenance program. The ence the machine Service and Maintenance Manual and... -
Page 30: Service And Guidelines
Prior to each sale, lease, or Owner, Dealer, or User Qualified JLG Service and Maintenance Inspection rental delivery. Mechanic Manual and applicable JLG inspection form. Frequent Inspection In service for 3 months or 150 hours, which- Owner, Dealer, or User Qualified JLG Service and Maintenance ever comes first;... -
Page 31: Component Disassembly And Reassembly
If a bolt is too short, there will not be enough thread area to engage and hold the part properly. When replacing bolts, use only those having the same specifications of the original, or one which is equivalent. 3121813 – JLG Lift –... -
Page 32: Lubrication And Information
Hydraulic Oil 1. Refer to Section 1 for recommendations for viscosity ranges. 2. JLG recommends Mobil DTE-11M hydraulic oil for this machine. NOTE: Start-up of hydraulic system with oil temperatures below -15 degrees F (-26 degrees C) is not recom- mended. -
Page 33: Cylinder Drift Test
If the cylinder passes this test, it is acceptable. tion. NOTE: This information is based on 6 drops per minute cyl- inder leakage. 3121813 – JLG Lift –... -
Page 34: Welding On Jlg Equipment
Silicone Dielectric Compound must be used on all electri- cal connections for the following reasons: Do the Following When Welding on JLG Equipment • To prevent oxidation at the mechanical joint between male and female pins. - Page 35 Hood, Hood Props, Hood Latches Chassis Assembly 16,17 16,17,18 16,17,18 Tires Wheel Nuts/Bolts 14,24 Wheel Bearings Oscillating Axle/Lockout Cylinder Systems Steer Components Drive Motors Drive Hubs Functions/Controls Platform Controls Ground Controls Function Control Locks, Guards, or Detents Footswitch 3121813 – JLG Lift –...
- Page 36 General Operators and Safety Manuals in Storage Box ANSI and EMI Manuals/Handbooks Installed Capacity Decals Installed, Secure, Legible All Decals/Placards Installed, Secure, Legible Walk-Around Inspection Performed Annual Machine Inspection Due No Unauthorized Modifications or Additions – JLG Lift – 3121813...
- Page 37 21, 22 Function Test of All Systems Paint and Appearance Stamp Inspection Date on Frame Notify JLG of Machine Ownership Footnotes: Prior to use each day; or at each Operator change Prior to each sale, lease, or delivery In service for 3 months or 150 Hours; or Out of service for 3 months or more; or Purchased used...
-
Page 38: Operating Temperature Specifications - Kubota
SECTION 2 - GENERAL 4150548 D Figure 2-1. Operating Temperature Specifications - Kubota 2-10 – JLG Lift – 3121813... -
Page 39: Section 3 - Chassis & Turntable
The air pressure for pneumatic tires must be equal to the same. air pressure that is stenciled on the side of the JLG prod- Wheel Replacement uct or rim decal for safe and proper operational character- istics. -
Page 40: Drive Hub -Rear (Prior To S/N 0300112585)
PRIOR TO OPERATING THE DISCONNECT THE MACHINE HAS TO BE ON LEVEL GROUND AND COMPLETELY SECURED FROM ANY MOVEMENT, I.E. VIA TOW BAR TO PULLING VEHICLE. THE MACHINE SHOULD NOT BE MOVED UNLESS IT IS SECURED TO THE TOWING VEHICLE TO PREVENT RUNAWAY. – JLG Lift – 3121813... -
Page 41: Engaging After Towing Is Complete
MOVEMENT, I.E. VIA TOW BAR TO PULLING VEHICLE. THE MACHINE SHOULD NOT BE MOVED UNLESS IT IS SECURED TO THE TOWING VEHICLE TO PREVENT RUNAWAY. ENSURE THE DISCONNECT MECHANISM IS ONLY OPERATED WITH THE MACHINE AT A STANDSTILL. 3121813 – JLG Lift –... -
Page 42: Torque Hub
43. Sun Gear Shaft 57 & 58. Not Used 84 to 87. Not Used 11. Roller Bearing 23. Bolt 44. Input Shaft 59. Disk Rotor 88. Wheel Stud 12. Roller Bearing Figure 3-1. Torque Hub – JLG Lift – 3121813... -
Page 43: Disassembly
18. The second stage planetary bearings (11) must be replaced in sets of four pieces. 19. The second stage planetary gears (1) must be changed as a complete set of four and JLG recom- mends changing the sun gear (3) along with this set of planets. -
Page 44: Assembly Of End Cover Unit (8)
The exact location of a leak can usually be detected by brushing a soap and water solution around the main seal and where the o-rings or gaskets – JLG Lift – 3121813... -
Page 45: Tightening And Torquing Bolts
Ring Gear (1F) to the Housing (1G). 12. Lift the Ring Gear (1F) off of the Housing (1G). 13. Remove the O-ring (18) from between the Housing (1G) and the Ring Gear (1F). 3121813 – JLG Lift –... -
Page 46: Main Disassembly Drawing 1
10. First Stage Sun Gear Washer 11. Second Stage Sun Gear Input Carrier Subassembly 15. I.D. Plate Output Carrier Subassembly 18. O-ring Cover Assembly 19. Flat Head Bolts 6G. Retaining Ring Figure 3-2. Main Disassembly Drawing 1 – JLG Lift – 3121813... -
Page 47: Main Disassembly Drawing 2
10. First Stage Sun Gear 1G. Housing 11. Second Stage Sun Gear Output Carrier Subassembly 18. O-ring Retaining Ring 19. Flat Head Bolts Cover Assembly 20. Retaining Ring 6G. Retaining Ring Figure 3-3. Main Disassembly Drawing 2 3121813 – JLG Lift –... -
Page 48: Output Carrier Disassembly
Needle Bearings (4C) in the process. 4E Planet Shaft 4A Output Carrier 4F Planet Gear 4B Thrust Washer 4G Roll Pin 4C Needle Bearing 4H Thrust Washer 4D Thrust Spacer Figure 3-4. Output Carrier 3-10 – JLG Lift – 3121813... -
Page 49: Planet Gear
7. Remove the Thrust Washer (4H) from the counter- bore in the Output Carrier (4A). 1F Output Carrier 4B Thrust Washer 4C Needle Bearing 4D Thrust Spacer 4F Planet Gear Figure 3-5. Planet Gear 3121813 – JLG Lift – 3-11... -
Page 50: Input Carrier Disassembly
Planet Shaft (3E). NOTE: The Roll Pins 3A Carrier 3B Thrust Washer 3C Needle Bearing 3E Planet Shaft 3F Planet Gear 4G Roll Pin Figure 3-6. Input Carrier 3-12 – JLG Lift – 3121813... -
Page 51: Hub-Spindle Disassembly
(1Q) from Hub (1G) if applicable. (1D) out of Hub (1G). 1A Spindle 1H Stud 1D Tapered Bearing Cup 1J Retaining Ring Ext. 1E Tapered Bearing Cone 1N Spacer 1G Hub (Housing) 1Q Seal Boot Figure 3-7. Hub Spindle 3121813 – JLG Lift – 3-13... -
Page 52: Cover Disassembly
(6A). engage Cap (6B) from Cover (6A). Thrust Spacer 3A Input Carrier 6A Cover 6B Disengage Cap 6C Bolt, Hex 6D Dowel Pin 6E O-ring 6F Pipe Plug 17 O-ring Figure 3-8. Cover Assembly 3-14 – JLG Lift – 3121813... -
Page 53: Input Carrier Assembly
10. Repeat Steps 1-9 for the installation of the two remaining Planet Gears (3F). NOTE: Some grease may need to be applied to the Thrust Washers (3B) to hold them in place while installing the planet gears. 3121813 – JLG Lift – 3-15... -
Page 54: Output Carrier Assembly
(NOT THE SAME TOOL USED IN STEP #9) on the end of the spindle, and then striking the tool with a piece of barstock. This should be adequate to remove any additional bearing pre-load. 3-16 – JLG Lift – 3121813... -
Page 55: Cover Subassembly
13. Attach ID Tag (15) onto unit using Drive Screws (16). 14. Check disconnect, roll and air check unit, leak check brake, and record release pressure. 14. Insert Plas- tic Plug (12) into place if applicable. 3121813 – JLG Lift – 3-17... -
Page 56: Hub Assembly - Sheet 1 Of 2
SECTION 3 - CHASSIS & TURNTABLE Figure 3-9. Hub Assembly - Sheet 1 of 2 3-18 – JLG Lift – 3121813... -
Page 57: Hub Assembly - Sheet 1 Of 2
18 O-ring Thrust Spacer 6A Cover 19 Bolt, Flat Head - Hex Skt (.375-16) 3A Input Carrier 6B Disengage Cap 20 Retaining Ring - Ext. Figure 3-10. Hub Assembly - Sheet 1 of 2 3121813 – JLG Lift – 3-19... -
Page 58: Cup Pressing Tool
SECTION 3 - CHASSIS & TURNTABLE Figure 3-11. Cup Pressing Tool Figure 3-12. Cup Pressing Tool 3-20 – JLG Lift – 3121813... -
Page 59: Drive Brake - Mico
1. Clean all parts thoroughly before assembly. for proper operation in system. 2. Press new rotary seal (22) into cover (21). Note direction of seal 3. Install new bearing (18) and retaining ring (19) on shaft (10). 3121813 – JLG Lift – 3-21... -
Page 60: Drive Brake
4. Case Seal 10. Shaft 16. Spring Retainer 22. Rotary Oil Seal 5. O-ring 11. Stator Disc 17. Retaining Ring 23. Gasket 6. Backup Ring 12. Sensor Ring 18. Bearing Figure 3-13. Drive Brake 3-22 – JLG Lift – 3121813... - Page 61 Replace o-rings. release. Discs frozen These brakes are designed for only limited dynamic Replace disc stack. braking. A severe emergency stop or prolonged reduced release pressure operation may result in this type of damage. 3121813 – JLG Lift – 3-23...
-
Page 62: Speed Sensor Adjustment
Refer to Figure 3-14., Speed Sensor sensor will not be able to sense the proper direction. Orientation. 4. Use a 1/2" wrench to hold the sensor and a 11/16" wrench to snug the lock nut to the brake. 3-24 – JLG Lift – 3121813... -
Page 63: Speed Sensor Orientation
SECTION 3 - CHASSIS & TURNTABLE Figure 3-14. Speed Sensor Orientation 3121813 – JLG Lift – 3-25... -
Page 64: Drive Components
SECTION 3 - CHASSIS & TURNTABLE Figure 3-15. Drive Components 3-26 – JLG Lift – 3121813... -
Page 65: Speed Sensor Installation Verification
OBSTRUCTIONS. THE OPERATOR SHOULD BE FAMILIAR WITH The worse case condition of speed sensor misadjustment JLG EQUIPMENT AND BE PREPARED TO USE THE FOOTSWITCH occurs when both sensors are installed in a manner that TO STOP THE MACHINE. READ AND UNDERSTAND THIS ENTIRE allows them to indicate the exact opposite direction that PROCEDURE PRIOR TO BEGINNING. - Page 66 The 15. Use the right left cursor keys on the analyzer to high- analyzer display should match direction light diagnostics and press enter. selected. 3-28 – JLG Lift – 3121813...
-
Page 67: Oscillating Axle
SECTION 3 - CHASSIS & TURNTABLE Figure 3-16. Oscillating Axle 3121813 – JLG Lift – 3-29... -
Page 68: Axle Oscillation Lockout Valve
SECTION 3 - CHASSIS & TURNTABLE Figure 3-17. Axle Oscillation Lockout Valve 3-30 – JLG Lift – 3121813... -
Page 69: Oscillating Axle Lockout Test (If Equipped)
(centered between drive wheels). When boom reaches center, stowed posi- tion, lockout cylinders should release and allow wheel to rest on ground, it may be necessary acti- vate Drive to release cylinders. 3121813 – JLG Lift – 3-31... -
Page 70: Swing Drive
5. Remove Motor Control Valve (31) from Motor (10) by The following steps describe how to tighten and torque removing the four Bolts (34) and washers (33). bolts or socket head cap screws in a bolt circle. 3-32 – JLG Lift – 3121813... -
Page 71: Motor Control Valve Disassembly
SECTION 3 - CHASSIS & TURNTABLE 17. Elbow Fitting 29. Plug 18. Fittings 31. Motor Control Valve 19. Ferrule 33. Washers 20. Tubing Assembly 34. Bolts 21. Fitting Figure 3-18. Motor Control Valve Disassembly 3121813 – JLG Lift – 3-33... -
Page 72: Motor And Brake Disassembly
4. Remove one O-Ring Plug (13) from Motor (10) and drawing). one O-Ring Plug (13) from Brake Housing (6). 2. Remove O-Ring (5A) from between Brake/Motor 5. Remove O-Ring Plug (4) from Brake Housing (6). Subassembly and Housing (1G) (See assembly drawing). 3-34 – JLG Lift – 3121813... -
Page 73: Brake Disassembly
8-3. Outer Plates 10. Motor 8-1A. O-ring 8-4. Inner Plates 13. O-ring Plug 8-1B. Backup Ring 8.5. Thrust Spacer 15. Bolts 8-1C. O-ring 8-6. Spring 26. O-ring 8-1D. Backup Ring 8.7. Spring Figure 3-20. Brake Disassembly 3121813 – JLG Lift – 3-35... -
Page 74: Main Disassembly
4. Remove four Dowel Pins (14) from Housing Subas- (1A), remove the Carrier Subassembly. sembly. 2. Remove Ring Gear (2) from Housing Subassembly. 2. Ring Gear 5. O-Ring 14. Dowel Pins 28. Input Spacer Figure 3-21. Main Disassembly 3-36 – JLG Lift – 3121813... -
Page 75: Hub-Shaft Disassembly
Housing (1G) by the Bearing Cone (1D) during this step. 1A. Output Shaft 1F. Bearing Cone 1B. Lip Seal 1G. Housing 1C. Bearing Cup 1H. Thrust Washer 1D. Bearing Cone 1l. Retaining Ring 1E. Bearing Cup Figure 3-22. Hub Shaft Disassembly 3121813 – JLG Lift – 3-37... -
Page 76: Carrier Disassembly
Planet Gears (3F). 2. Remove the Planet Shaft (3E) from the Carrier (3A). 3A. Carrier 3E. Planet Shaft 3B. Thrust Washers 3F. Planet Gear 3C. Needle Bearings 3G. Roll Pin 3D. Spacer Figure 3-23. Carrier Disassembly 3-38 – JLG Lift – 3121813... -
Page 77: Hub-Shaft Sub-Assembly
(3G) is flush in the slot. NOTE: On 6:1 Ratios of S1C"s, the pin must be 0.125” below the surface of the outside diameter. 11. Repeat Steps 1 through 10 for the remaining two Planet Gears (3F). 3121813 – JLG Lift – 3-39... -
Page 78: Main Assembly
4. Grease the O Rings (8-1A) & (8-1C) and Backup Rings (8-1B) & (8-1D), and place them in their respective grooves in the Piston (8-2). Make sure the backup-rings are correctly positioned as per the assembly print. 3-40 – JLG Lift – 3121813... -
Page 79: Motor Control Valve Assembly
NOTE: The bearing high spot will be marked with yellow end into the nut. paint. 3. Place tube tight against the flared fitting in the 1. Place a shim, JLG P/N 4071009, between the pinion assembly. and bearing high spot. 4. Lubricate threads and fitting end with hydraulic oil. -
Page 80: Swing Bearing
NOTE: This check is designed to replace the existing bear- trate under the bolt head to the bolt shank. ing bolt torque checks on JLG Lifts in service. This 11. Swing the turntable 90 degrees, and check some check must be performed after the first 50 hours of selected bolts at the new position. -
Page 81: Wear Tolerance
11. Continue rotating the turntable at 90 degrees inter- c. Noise. vals until a sampling of bolts have been checked in d. Rough rotation. all quadrants. 5. If bearing inspection shows no defects, reassemble bearing and return to service. 3121813 – JLG Lift – 3-43... -
Page 82: Swing Drive And Bearing Installation
SECTION 3 - CHASSIS & TURNTABLE Figure 3-27. Swing Drive and Bearing Installation 3-44 – JLG Lift – 3121813... -
Page 83: Replacement Of Swing Bearing
3. Attach suitable overhead lifting equipment to the base of turntable weldment. JLG INDUSTRIES RECOMMENDS THAT ALL REMOVED GRADE 8 BEARING NUTS AND BOLTS BE DISCARDED AND REPLACED 4. Use a suitable tool to scribe a line on the inner race WITH NEW GRADE 8 NUTS AND BOLTS. -
Page 84: Swing Bearing Torque Value
5. Coat the threads of the mounting plate bolts with Loctite #271 and torque to 420 ft.lbs. (588 Nm). Setting Backlash 1. Place a shim (JLG P/N 4071009) between pinion and bearing on high spot of bearing. 2. After applying Loctite #271 to the shoulder bolt, torque to 420 foot-pounds (588 Nm). -
Page 85: Battery Maintenance And Charging
6. Start hydraulic system and ensure that it functions 4. The Charger will shut off automatically when the bat- properly. teries are fully charged. Depleted batteries will take approximately 23 hours to charge. 3121813 – JLG Lift – 3-47... -
Page 86: Removing The Battery Box
2. Remove the two attachment bolts that secure the battery box to the turntable. Figure 3-29. Battery Cable Routing 3-48 – JLG Lift – 3121813... -
Page 87: Batteries And Battery Charger
SECTION 3 - CHASSIS & TURNTABLE Figure 3-30. Batteries and Battery Charger 3121813 – JLG Lift – 3-49... -
Page 88: Battery Charger
15. Shunt Assembly 4. DC Cord 10. AC Inlet Plug 16. Strain Relief 5. Fuse Holder 11. DC Plug 17. Transformer 6. 80 Amp DC Fuse 12. Rectifier 18. Varistor Figure 3-31. Battery Charger 3-50 – JLG Lift – 3121813... -
Page 89: Battery Charger Schematic
4 3 2 1 THIS MAY BE AN BLACK AUTOMOTIVE FUSE. WHITE CONNECTORS ARE SAME. GREEN TO 4POS CONN OF MAIN BOARD PIN 1 CONNECTOR PIN 2 PIN 3 PIN 4 Figure 3-32. Battery Charger Schematic 3121813 – JLG Lift – 3-51... -
Page 90: Generator (Prior To S/N 88375)
14.2 psi (1 Electrical power for the starter is provided by the start bat- Bar). tery. The starter is energized by the start control relay. 3-52 – JLG Lift – 3121813... -
Page 91: Generator Components
SECTION 3 - CHASSIS & TURNTABLE Figure 3-33. Generator Components 3121813 – JLG Lift – 3-53... -
Page 92: Timing Sequences
The RBS will attempt to start the engine up until the Table 3-5. RBS Shutdown Sequence number of crank cycles is reached. If the RBS does Remove CTS not start, an Overcrank fault is indicated. TDER Engine Run TDC Cooldown Engine Stop 3-54 – JLG Lift – 3121813... -
Page 93: To Connect The Jlg Control System Analyzer To The Generator
In the event of an RBS alarm, a flash code will be issued and an alarm indicated on the analyzer. The JLG Control System Analyzer can be used to monitor generator settings and conditions. Connect the analyzer NOTE: Alarms must be reset once the fault has been cor- as follows: rected. - Page 94 SECTION 3 - CHASSIS & TURNTABLE 3-56 – JLG Lift – 3121813...
-
Page 95: Output Current And Voltage Settings
RBS loss of voltage sense alarm will be indicated. This feature protects the batteries and load from high DC voltages due to a loss of output control. • Run Inhibited The RBS unit is disabled by the run inhibited input. 3121813 – JLG Lift – 3-57... -
Page 96: Priming The Fuel Line
10. Engine might run rough for 20 seconds or so, but it will clean out. 4. When fuel starts to flow out of the rubber line, re- connect the fuel line to the fuel injector pump. 3-58 – JLG Lift – 3121813... -
Page 97: Generator (S/N 88375 To Present)
Voltage regulation and current limiting is provided by the glow plug. RBS Engine/Generator Controller. Rating: 15ADC The rectifier diodes and output current sensor are located in the alternator endbell. This fuse is located on the right side of the engine. 3121813 – JLG Lift – 3-59... -
Page 98: Generator
9. Voltage Regulator 3. Start Control Relay 10. Alternator 4. Fuel Solenoid 11. Starter 5. Fuel Filter 12. Starter Solenoid 6. Low Oil Pressure Switch 13. Oil Filter 7. Glow Plug Figure 3-35. Generator 3-60 – JLG Lift – 3121813... -
Page 99: Start Battery
The engine is equipped with a 12VDC starter, which pro- vides the mechanical power to crank the engine. Electrical power for the starter is provided by the start battery. The starter is energized by the start control relay. 3121813 – JLG Lift – 3-61... -
Page 100: Fuel Control Relay
The glow plug is a resistive heating element located in the combustion chamber. It is used during starting at temper- atures below 32°F (0°C). The heater is energized by the glow plug control relay. 3-62 – JLG Lift – 3121813... -
Page 101: Fuel Pump
This sensor provides an analog signal to the engine/gen- The fuel solenoid is located on the right side of the engine. erator controller. The primary use of this signal is for high engine temperature shutdown 248°F (120°C) for the 3121813 – JLG Lift – 3-63... -
Page 102: Alternator Output Current Sensor
The engine speed sensor is located inside the recoil Pre-heat starter cover at the front of the engine. Inhibit run Engine temp. switch + Output voltage Speed sensing + 5V Output current sense Not used Not used Field Drive 3-64 – JLG Lift – 3121813... -
Page 103: Warnings And Safety Precautions
SPEED TIME AND GLOW PLUG SETTINGS TD no speed signal TD DC sensing fault Starter disconnect 1000 Hz Overspeed shutdown 3800 RPM Underspeed shutdown 2000 RPM Glow plug on temperature 5°C Glow plug on time 3121813 – JLG Lift – 3-65... -
Page 104: Rbs Start
Overcrank fault to cool down. is indicated after 3 failed crank cycles. Time delay bypass RBS waits until normal engine operating conditions are reached before Low oil pressure and Underspeed faults are moni- tored. 3-66 – JLG Lift – 3121813... -
Page 105: Rbs Alarms And Flash Codes
Change engine oil and filter every 150 hours The RBS can be reset using the analyzer or by disabling and re-enabling the RBS controller. This will clear any cur- rent fault condition with the controller. 3121813 – JLG Lift – 3-67... -
Page 106: Troubleshooting
Refer to the Kubota OC60 Engine Manual for further checks. If the ambient temperature is low, verify that the heater and/or glow plug are operating. No Speed Signal Check wiring connections. Overvoltage Check alternator output voltage. 3-68 – JLG Lift – 3121813... -
Page 107: Apu Engine Start Battery Boosting
THE MAIN BATTERY OF THE LIFT MUST NEVER BE USED TO BOOST THE APU. DAMAGE TO SENSITIVE ELECTRONIC COMPO- IMPROPER USE OF A BOOSTER BATTERY TO START AN APU MAY NENTS WILL RESULT. CAUSE AN EXPLOSION. 3121813 – JLG Lift – 3-69... -
Page 108: Supplementary Fuse For Engine Generator Controller
• - Weather proof fuse holder - JLG P/N 2400081 • - AGC1, 1 Amp fuse - JLG P/N 2400080 • - 45 cm of #16 AWG wire - JLG P/N 4920019 • - 2 X insulated butt splice connectors - JLG P/N 4460035 •... - Page 109 5. Cut wire 106 going to the Engine/Generator Control- ler after the existing connection point and install the conductors that lead to the new inline fuse holder. Use insulated butt splice connectors for these con- ductors. 3121813 – JLG Lift – 3-71...
- Page 110 SECTION 3 - CHASSIS & TURNTABLE NOTES: 3-72 – JLG Lift – 3121813...
-
Page 111: Section 4 - Boom & Platform
10. Tag and disconnect the hydraulic lines running to pin and remove the jib. the telescope cylinder. 11. Tag and disconnect the hydraulic lines running to the master cylinder. 12. Remove the upper lift cylinder pivot pin. 3121813 – JLG Lift –... -
Page 112: Boom Assembly - Sheet 1 Of 3
SECTION 4 - BOOM & PLATFORM Figure 4-1. Boom Assembly - Sheet 1 of 3 – JLG Lift – 3121813... -
Page 113: Boom Assembly - Sheet 2 Of 3
SECTION 4 - BOOM & PLATFORM Figure 4-2. Boom Assembly - Sheet 2 of 3 3121813 – JLG Lift –... -
Page 114: Boom Assembly - Sheet 3 Of 3
SECTION 4 - BOOM & PLATFORM Figure 4-3. Boom Assembly - Sheet 3 of 3 – JLG Lift – 3121813... -
Page 115: Installation
2. Install the boom link pivot pin. 3. Install the boom pivot pin. 4. Install the upper master cylinder pivot pin. 5. Install the upper lift cylinder pivot pin. 3121813 – JLG Lift –... -
Page 116: Boom Limit Switch Adjustment
SECTION 4 - BOOM & PLATFORM Figure 4-4. Boom Limit Switch Adjustment – JLG Lift – 3121813... -
Page 117: Transport Limit Switch (Ce Only)
SECTION 4 - BOOM & PLATFORM SWITCH TO ACTIVATE WHEN BOOM IS EXTENDED 18 ± 1” (46 ± 2.5 CM) Figure 4-5. Transport Limit Switch (CE Only) 3121813 – JLG Lift –... -
Page 118: Load Cell Calibration Procedure
Torque to 50 ft.lbs. (68 Nm) Loctite #242 Torque to 480 ft. lbs. (650 Nm) Check torque every 150 hours of operation Torque to 85 ft. lbs. (115 Nm) Figure 4-6. Platform Support Torque Values – JLG Lift – 3121813... -
Page 119: Load Sensor
SECTION 4 - BOOM & PLATFORM Figure 4-7. Load Sensor 3121813 – JLG Lift –... -
Page 120: Platform Rotator (Prior To S/N 0300130810)
(18) and (1 9) and the piston bearings (17) should have a maximum radial clearance of 0.006” (0.152 mm). A clearance in excess of 0.008” (0.203 mm) requires replacement of the bearings. Rough and grooved shaft journals require shaft replacement. 4-10 – JLG Lift – 3121813... -
Page 121: Platform Rotator Assembly - Cutaway
2C. Bearing Tube 9. Piston Seal 18. Radial Bearing P2 Pressure Port 3. Piston Sleeve 11. Piston Seal 19. Radial Bearing 4. Piston 14. O-ring 20. Thrust Bearing Figure 4-9. Platform Rotator Assembly - Cutaway 3121813 – JLG Lift – 4-11... -
Page 122: Platform Rotator (S/N 0300130810 To Present)
- similar to the operation of a hydraulic cylin- der - while the splines cause the shaft to rotate. When the control valve is closed, oil is trapped inside the actuator, 4-12 – JLG Lift – 3121813... -
Page 123: Required Tools
2. Felt Marker - match mark the timing marks and out- line troubled areas. 3. Allen wrench - removal of port plugs and set screws. 4. Box knife - removal of seals. 5. Seal tool - assembly and disassembly of seals and wear guides. 3121813 – JLG Lift – 4-13... -
Page 124: Rotary Actuator - Exploded View
204. O-ring 420.2 Bushing 4. End Cap 106.2. Port Plug 205. Cup Seal 421.1 Bushing 109 . Lock Pin 207. Backup Ring 113. Capscrew 304.1. Wiper Seal Figure 4-10. Rotary Actuator - Exploded View 4-14 – JLG Lift – 3121813... -
Page 125: Rotary Actuator - Assembly Drawing
204. O-ring 420.2 Bushing 4. End Cap 106.2. Port Plug 205. Cup Seal 421.1 Bushing 109 . Lock Pin 207. Backup Ring 113. Capscrew 304.1. Wiper Seal Figure 4-11. Rotary Actuator - Assembly Drawing 3121813 – JLG Lift – 4-15... -
Page 126: Disassembly
(4) by turning it counter clockwise. 3. Remove the lock pins using an ”Easy Out” (a size #2 is shown). If the pin will not come out with the ”Easy Out”, use 4-16 – JLG Lift – 3121813... - Page 127 9. Prior to removing the shaft, (2), use a felt marker to clearly indicate the timing marks between shaft and piston. This will greatly simplify timing during assem- bly. 3121813 – JLG Lift – 4-17...
- Page 128 15. Remove the wear guides (302) from the end cap (4) 12. To remove the piston (3) use a rubber mallet and a and shaft (2). plastic mandrel so the piston is not damaged. 4-18 – JLG Lift – 3121813...
- Page 129 17. Remove the thrust washers (304), from the end cap (4) and shaft (2). 18. Remove the wiper seal (304.1) from its groove in the end cap (4) and shaft (2). 3121813 – JLG Lift – 4-19...
-
Page 130: Inspection
2. Inspect the thrust washers (304) for rough or worn edges and surfaces. Measure it’s thickness to make sure it is within specifications (Not less than 0.092” or 2.34 mm). 4-20 – JLG Lift – 3121813... - Page 131 (304). 6. Install the inner T-seal (200) into the piston (3) using a circular motion. Install the outer T-seal (202) by stretching it around the groove in a circular motion. 3121813 – JLG Lift – 4-21...
- Page 132 (1) during disassembly line up as shown. Using a rubber mallet, tap the piston into the housing up to Repeat this step for the outer seal (202). the point where the gear teeth meet. 4-22 – JLG Lift – 3121813...
- Page 133 13. Install the stop tube onto the shaft end. Stop tube is an available option to limit the rotation of an actua- tor. 3121813 – JLG Lift – 4-23...
- Page 134 19. Insert the set screws (113) over the lock pins. it is threaded into the housing (1). Tighten them to 25 in. lbs. (2.825 Nm). 4-24 – JLG Lift – 3121813...
-
Page 135: Jib Rotator
... the helical gearing forces the rotation of the shaft. Note how the double helix design compounds rotation: shaft rotation is about twice that of the piston. Figure 4-12. Operating Principle - Jib Rotator 3121813 – JLG Lift – 4-25... - Page 136 Before the shaft and piston gearing are completely disengaged, note the orientation between the spline teeth: small punch marks on the face the piston 4-26 – JLG Lift – 3121813...
-
Page 137: Jib Rotator Assembly
200. Rod Seal 302. Shaft Bearing 5. Lockring 201. Rod Seal 303. Shaft Bearing 102. Socket Head Capscrew 202. Piston Seal 304. Thrust Washer 106. Port Plug 204. Cap Seal Figure 4-12. Jib Rotator Assembly 3121813 – JLG Lift – 4-27... -
Page 138: Tool For Removing End Cap
Note the orientation of the sealing lips prior to removal. 8. Clean all components thoroughly with solvent or in a parts washer. Be sure to flush all grease and con- taminants from the grease fittings and grease relief passages. 4-28 – JLG Lift – 3121813... -
Page 139: Inspection
Photo F. If the set screws are threaded in too far, the seals will be extruded during greasing and damaged. Secure the set screws with Loctite# 242. 3121813 – JLG Lift – 4-29... - Page 140 10. Apply a thin film of grease to the seals, then thread the end cap onto the shaft to a net fit where the end cap just begins to damp against the thrust washer. Tighten the end cap to approximately 120 FT-LB (163 N.m). 4-30 – JLG Lift – 3121813...
-
Page 141: Installing Counterbalance Valve
2. Make sure the new valve has the O-rings in the inch pounds (15.8 Nm). Do not torque over 145 inch counterbores of the valve to seal it to the actuator pounds (16.3 Nm). housing. Figure 4-14. Rotator Counterbalance Valve 3121813 – JLG Lift – 4-31... -
Page 142: Testing The Actuator
1. Connect a 3/16" inside diameter x 5/16" outside diameter x 5 foot clear, vinyl drain tube to each of the two bleed nipples. Secure them with hose clamps. Place the vinyl tubes in a clean 5-gallon container to 4-32 – JLG Lift – 3121813... -
Page 143: Troubleshooting
Operate the actuator through the housing ports. Conduct the internal leakage test as described in the Testing section on page 24 of this manual. c. Air in actuator c. Purge air from actuator. See bleeding proce- dures 3121813 – JLG Lift – 4-33... - Page 144 SECTION 4 - BOOM & PLATFORM NOTES: 4-34 – JLG Lift – 3121813...
-
Page 145: Section 5 - Hydraulics
1. Hold the fitting in one hand while using the brush with the other hand to dip into the container. Remove excess hydraulic oil from the brush so an even film of oil is applied on the o-ring. 3121813 – JLG Lift –... -
Page 146: Dip Method
3. O-ring Boss type fittings will require more pressure in able to immerse more of the fitting into the satu- rated sponge. This will also cause more oil to be dis- persed from the sponge. – JLG Lift – 3121813... -
Page 147: Cylinders - Theory Of Operation
7. If extend port leakage is less than 6-8 drops per min- ute, carefully reconnect hose to extend port, then activate cylinder through one complete cycle and check for leaks. If leakage continues at a rate of 6-8 3121813 – JLG Lift –... -
Page 148: Cylinders With Dual Counterbalance Valve
Procedures that apply to a specific cylinder will be so noted. Disassembly Figure 5-2. Capscrew Removal DISASSEMBLY OF THE CYLINDER SHOULD BE PERFORMED ON A CLEAN WORK SURFACE IN A DIRT FREE WORK AREA. – JLG Lift – 3121813... -
Page 149: Axle Lockout Cylinder
8. Wiper Ring 13. Bolt 18. Loctite #242 4. T-Seal 9. Seal 14. Counterbalance Valve 19. Locking Primer (Not Shown) 5. Wear Ring 10. Rod 15. Bleeder Valve 20. Bushing Figure 5-3. Axle Lockout Cylinder 3121813 – JLG Lift –... -
Page 150: Level Cylinder
10. O-ring Plug 16. Backup Ring 22. Bolt 28. Counterbalance Valve 5. Tapered Bushing 11. O-ring Plug 17. Wear Ring 23. Wiper 6. Bushing 12. Not Used 18. Backup Ring 24. Seal Figure 5-4. Level Cylinder – JLG Lift – 3121813... -
Page 151: Jib Lift Cylinder
4. Loctite #RC609 (Not Shown) 10. Barrel 16. Backup Ring 21. O-ring 26. Bolt 5. Bolt 11. Rod 17. Backup Ring 22. O-ring 27. Counterbalance Valve 6. Tapered Bushing 12. Washer Ring Figure 5-5. Jib Lift Cylinder 3121813 – JLG Lift –... -
Page 152: Lift Cylinder
24. Check Valve 4. Bolt 10. O-ring Plug 15. Washer Ring 20. Capscrew 25. Counterbalance Valve 5. Tapered Bushing 11. Not Used 16. Wear Ring 21. Seal 26. Check Valve 6. Bushing Figure 5-6. Lift Cylinder – JLG Lift – 3121813... -
Page 153: Master Cylinder
11. Backup Ring 2. O-ring 8. Barrel 12. Setscrew 3. Wear Ring 8A. Bushing 13. Guide 4. Piston 9. Rod 14. Seal 5. Piston Seal 9A. Bushing 15. Wiper 6. O-ring 10. O-ring Figure 5-7. Master Cylinder 3121813 – JLG Lift –... -
Page 154: Steer Cylinder
2. Locking Primer (Not Shown) 6. Head 10. O-ring 14. Seal 3. Loctite (Not Shown) 7. Not Used 11. Wiper 15. Washer Ring 4. Rod 8. Wear Ring 12. Backup Ring 16. Bolt Figure 5-8. Steer Cylinder 5-10 – JLG Lift – 3121813... -
Page 155: Telescope Cylinder
10. O-ring Plug 16. Backup Ring 22. Bolt 27. Spacer 5. Bolt 11. Not Used 17. Wear Ring 23. Backup Ring 28. Valve 6. Tapered Bushing 12. Support Pad 18. O-ring Figure 5-9. Telescope Cylinder 3121813 – JLG Lift – 5-11... -
Page 156: Cleaning And Inspection
Dress piston surface or replace piston as necessary. 7. Inspect threaded portion of piston for damage. Dress threads as necessary. 8. Inspect seal and o-ring grooves in piston for burrs and sharp edges. Dress applicable surfaces as nec- essary. 5-12 – JLG Lift – 3121813... -
Page 157: Assembly
Replace as necessary. NOTE: Prior to cylinder assembly, ensure that the proper cylinder seal kit is used. See your JLG Parts Manual. 10. Inspect threaded portion of head for damage. Dress threads as necessary. -
Page 158: Installation Of Head Seal Kit
WHEN REBUILDING THE STEER, LOWER LIFT, LEVEL CYLINDER, OR UPPER LIFT CYLINDER, APPLY LOCTITE #242 TO TAPERED BUSHING BOLTS, THEN TIGHTEN SECURELY. 11. Assemble the tapered bushing loosely into the pis- ton and insert JLG capscrews (not vendor cap- 5-14 – JLG Lift – 3121813... -
Page 159: Tapered Bushing Installation
Place the shaft against the cylinder rod and in (See Figure 5-19., Poly-Pak Piston Seal Installation) contact with the bushing in the spaces between the capscrews. Figure 5-19. Poly-Pak Piston Seal Installation 3121813 – JLG Lift – 5-15... -
Page 160: Rod Assembly Installation
THE MACHINE, EXTREME CARE SHOULD BE USED TO INSURE THAT THE OUTER END OF THE ROD IS SUPPORTED. USE EITHER A TRAVELING OVERHEAD HOIST, FORK-LIFT, OR OTHER MEANS TO SUPPORT THE OVERHANGING WEIGHT OF THE EXTENDING ROD. 5-16 – JLG Lift – 3121813... -
Page 161: Hydraulic Tank And Pump (Prior To S/N 51941)
3. Suction Strainer 9. Hydraulic Pump 4. Magnetic Plug 10. Contactor Module 5. Sight Gauge 11. Fuel Tank (M Models Only) 6. Filter Indicator Figure 5-21. Hydraulic Tank and Pump (Prior to S/N 51941) 3121813 – JLG Lift – 5-17... -
Page 162: Hydraulic Tank And Pump (S/N 51941 To Present)
3. Suction Strainer 9. Hydraulic Pump 4. Magnetic Plug 10. Contactor Module 5. Sight Gauge 11. Fuel Tank (M Models Only) 6. Filter Indicator Figure 5-22. Hydraulic Tank and Pump (S/N 51941 to Present) 5-18 – JLG Lift – 3121813... -
Page 163: Pressure Settings
Swing 1. Connect the pressure gauge at the MP port on the main valve. 2. Activate the swing function with the turntable lock pin engaged. Adjust pressure to 2500 psi (172 Bar). 3121813 – JLG Lift – 5-19... -
Page 164: Hydraulic Control Valve - Main Valve
SECTION 5 - HYDRAULICS NOTE: Torque all cartridges to 20 ft. lbs.(28 Nm) Figure 5-23. Hydraulic Control Valve - Main Valve 5-20 – JLG Lift – 3121813... -
Page 165: Hydraulic Control Valve - Platform Valve
NOTE: Torque all cartridges to 20 ft. lbs.(28 Nm) NOTE: Torque all cartridges to 20 ft. lbs.(28 Nm) NOTE: Torque all cartridges to 20 ft. lbs.(28 Nm) Figure 5-24. Hydraulic Control Valve - Platform Valve 3121813 – JLG Lift – 5-21... - Page 166 SECTION 5 - HYDRAULICS NOTES: 5-22 – JLG Lift – 3121813...
-
Page 167: Section 6 - Jlg Control System
ING OPTIONS. tion. The JLG Control System controller has a built in LED to indicate any faults. The system stores recent faults which IT IS A GOOD PRACTICE TO AVOID PRESSURE-WASHING ELEC- may be accessed for troubleshooting. - Page 168 SECTION 6 - JLG CONTROL SYSTEM – JLG Lift – 3121813...
- Page 169 SECTION 6 - JLG CONTROL SYSTEM 3121813 – JLG Lift –...
-
Page 170: Control Module Location
SECTION 6 - JLG CONTROL SYSTEM Figure 6-4. Control Module Location – JLG Lift – 3121813... -
Page 171: To Connect The Jlg Control System Analyzer
SECTION 6 - JLG CONTROL SYSTEM 6.2 TO CONNECT THE JLG CONTROL The top level menus are as follows: SYSTEM ANALYZER HELP DIAGNOSTICS 1. Connect the four pin end of the cable supplied with ACTIVATE TEST the analyzer, to the motor controller module located... -
Page 172: Changing The Access Level Of The Hand Held Analyzer
SECTION 6 - JLG CONTROL SYSTEM Pressing ENTER with any of the above displayed menus, Once the correct password is displayed, press ENTER. will display additional sub-menus within the selected The access level should display the following, if the pass- menu. -
Page 173: Adjusting Parameters Using The Hand Held Analyzer
SECTION 6 - JLG CONTROL SYSTEM 6.5 ADJUSTING PARAMETERS USING THE 6.6 MACHINE SETUP HAND HELD ANALYZER When a machine digit item is selected, press the UP or DOWN arrow keys to adjust its value, for example: Once you have gained access to level 1, and a personality... - Page 174 SECTION 6 - JLG CONTROL SYSTEM There is a setting that JLG strongly recommends that you Table 6-1. Machine Setup Descriptions do not change. This setting is so noted below: MODEL NUMBER... Displays/adjusts machine model NOTE: ELEVATION CUTBACK all personalities reset to default when model number is altered TILT...
-
Page 175: Machine Personality Settings
SECTION 6 - JLG CONTROL SYSTEM 6.7 MACHINE PERSONALITY SETTINGS NOTE: Personality settings can be adjusted within the adjustment range in order to achieve optimum machine performance. Table 6-2. Personality Ranges/Defaults FUNCTION PERSONALITY RANGE DEFAULTS DRIVE ACCELeration 0.5s to 5.0s DECELeration 0.1s to 2.0s... - Page 176 SECTION 6 - JLG CONTROL SYSTEM Table 6-2. Personality Ranges/Defaults FUNCTION PERSONALITY RANGE DEFAULTS TELEscope ACCELeration 0.5 to 5.0 DECELeration 0.1 to 3.0 MINimum IN speed 0 to 20 MAXimum IN speed 0 to 100 MINimum OUT speed 0 to 20...
- Page 177 SECTION 6 - JLG CONTROL SYSTEM Table 6-2. Personality Ranges/Defaults FUNCTION PERSONALITY RANGE DEFAULTS GROUND MODE LIFT UP speed 0 to 100 LIFT DOWN speed 0 to 100 SWING speed 0 to 100 TELEscope speed 0 to 100 BASKET ROTATE speed...
-
Page 178: Machine Configuration Programming Information
SECTION 6 - JLG CONTROL SYSTEM 6.8 MACHINE CONFIGURATION PROGRAMMING INFORMATION Table 6-3. Machine Configuration Programming Information Default Configuration Digit Number Description Number E600 MODEL # M600 When tilted the tilt light is lit (continuously) and drive speed is reduced to the creep speed setting... - Page 179 SECTION 6 - JLG CONTROL SYSTEM Table 6-3. Machine Configuration Programming Information Default Configuration Digit Number Description Number Sounds continuously when above elevation and tilted only. PLATFORM ALARM Sounds continuously when above elevation and tilted, and in conjunction with fault code flashes (Option)
-
Page 180: Level Vehicle Description
SECTION 6 - JLG CONTROL SYSTEM 6.9 LEVEL VEHICLE DESCRIPTION Help Descriptions and Fault Flash Codes Table 6-4. JLG Control System Flash Codes Code Description A NEW TILT MODULE WILL ACT AS IF IT IS TILTED ALL OF THE TIME UNTIL THE FOLLOWING PROCEDURE IS PERFORMED. - Page 181 SECTION 6 - JLG CONTROL SYSTEM Table 6-5. Help Descriptions and Fault Flash Codes Flash Code Description No flash code is indicated for the following help messages; they are intended to hint at a possible problem if the vehicle is not behaving as expected.
- Page 182 SECTION 6 - JLG CONTROL SYSTEM Table 6-5. Help Descriptions and Fault Flash Codes Flash code 2/2 indicates problems with drive & steer selection. DRIVE JOYSTICK FAULTY The drive joystick center tap is out of valid range, or the wiper is wire-off.
- Page 183 SECTION 6 - JLG CONTROL SYSTEM Table 6-5. Help Descriptions and Fault Flash Codes Flash code 2/5 indicates that a function is prevented due to a cutout. BOOM PREVENTED - DRIVE SELECTED A boom function is selected while a drive function is selected and drive cutout is configured to prevent simultaneous drive & boom operation.
- Page 184 SECTION 6 - JLG CONTROL SYSTEM Table 6-5. Help Descriptions and Fault Flash Codes Flash code 3/3 indicates that a contactor coil is short-circuit. OVERLOADED VALVE SUPPLY-CHECK WIRING There is a high current draw from the valve supply when no valve is energized; this is probably due to a wiring error at the ground module.
- Page 185 GROUND MODULE FAILURE: OBSOLETE ON THIS VEHICLE The ground module is an old design which is incompatible with the E600 vehicle; it must be replaced (it can be used on E300/M45/E45 vehicles).
- Page 186 SECTION 6 - JLG CONTROL SYSTEM Table 6-5. Help Descriptions and Fault Flash Codes Flash code 7/7 indicates problems with a motor. CAPACITOR BANK FAULT - CHECK POWER/MOTOR WIRING The capacitor bank is not charging. This is probably due to a motor or power wiring error causing illegal current drain; it could also be due to a very low battery supply.
- Page 187 SECTION 6 - JLG CONTROL SYSTEM Table 6-5. Help Descriptions and Fault Flash Codes Flash code 9/9 indicates problems with the controller. POWER MODULE FAILURE: CONTACTOR DRIVE CODE 1 A contactor remained energized when turned off. POWER MODULE FAILURE: HWFS CODE 2 The hardware fail-safe tests did not complete because traction point A is not safe, or the hardware fail-safe is permanently tripped.
-
Page 188: Analyzer Diagnostics Menu Structure
SECTION 6 - JLG CONTROL SYSTEM 6.10 ANALYZER DIAGNOSTICS MENU the next outer level. The LEFT/RIGHT arrow keys move between items in the same level. The UP/DOWN arrow STRUCTURE keys alter a value if allowed In the following structure descriptions, an intended item is selected by pressing ENTER;... - Page 189 SECTION 6 - JLG CONTROL SYSTEM Table 6-6. ADJUSTMENTS - Personality Descriptions CREEP LEFT … Displays/adjusts maximum swing left speed NOTE: used when creep switch on pump pot is active MIN RIGHT … Displays/adjusts minimum swing right speed MAX RIGHT …...
- Page 190 SECTION 6 - JLG CONTROL SYSTEM Table 6-6. ADJUSTMENTS - Personality Descriptions MAX DOWN … Displays/adjusts maximum jib down speed MIN LEFT … Displays/adjusts minimum jib left speed MAX LEFT … Displays/adjusts maximum jib left speed MIN RIGHT … Displays/adjusts minimum jib right speed MAX RIGHT …...
- Page 191 SECTION 6 - JLG CONTROL SYSTEM Table 6-7. Diagnostic Menu Descriptions DRIVE DRIVE … Displays drive joystick direction & demand SPEED … Displays vehicle direction & speed 4WD … Displays 4WD status NOTE: Not Displayed when 4WD ASSIST=NO POSITRAC …...
- Page 192 SECTION 6 - JLG CONTROL SYSTEM Table 6-7. Diagnostic Menu Descriptions FSW1 … Displays footswitch status NOTE: FSW1 is wired to the power module FSW2 … Displays footswitch status NOTE: FSW2 is wired to the platform module DRIVE CUTOUT …...
- Page 193 SECTION 6 - JLG CONTROL SYSTEM Table 6-8. Calibration Descriptions CALIBRATIONS Not available at password level 2; can be viewed but not changed at level 1 CONTROLLER CALS TEMPERATURE … Displays/adjusts heatsink temperature calibration The setting should not be altered from that set during manufacture TRACTION I …...
- Page 194 SECTION 6 - JLG CONTROL SYSTEM Table 6-9. Calibration Ranges/Defaults Calibration Range Defaults E600 M600 BRAKE 0 to 100 PUMP@0% 0 to 50 PUMP@100% 50 to 100 FLOW VALVE@0% 0 to 50 FLOW VALVE@100% 50 to 100 LIFT VALVE@0% 0 to 100...
-
Page 195: System Self Test
SECTION 6 - JLG CONTROL SYSTEM 6.11 SYSTEM SELF TEST switch has been closed, it will move on to the next input, lower lift down LLD. If the switch is faulty or the The system self test is utilized to locate typical problems. - Page 196 SECTION 6 - JLG CONTROL SYSTEM Table 6-11. System Test Messages RUNNING Initial display when system test is run; certain “critical” checks are made. Problems which can be reported include: ONLY 1 ANALYZER! Do not connect two Analyzers while running the system test.
- Page 197 SECTION 6 - JLG CONTROL SYSTEM Table 6-11. System Test Messages TESTING VALVES Indicates that the valve test is beginning. Each valve is alternately energized and de-energized; checks are made for open- and short- circuit valve coils. NOTE: in platform mode, the footswitch must be closed.
- Page 198 SECTION 6 - JLG CONTROL SYSTEM Table 6-11. System Test Messages CHECKING INPUTS Indicates that the inputs test is beginning. Every input is checked to ensure that it is in its “normal” position; function switches should be open, cutout switches should be closed, joysticks should be in neutral.
- Page 199 SECTION 6 - JLG CONTROL SYSTEM Table 6-11. System Test Messages TEST ALL INPUTS? Prompts whether to check every operator input. If ESC is pressed, the system test ends. If ENTER is pressed, each operator input is prompted for in turn.
- Page 200 SECTION 6 - JLG CONTROL SYSTEM NOTES: 6-34 – JLG Lift – 3121813...
-
Page 201: Section 7 - Basic Electrical Information & Schematics
Polarity Getting a negative Voltage or current reading when expecting a positive reading frequently means the leads are reversed. Check what reading is expected, the loca- 3121813 – JLG Lift –... -
Page 202: Resistance Measurement
Meter should produce an audible alarm, resistance indicating continuity • Disconnect component from circuit before testing • If meter is not auto ranging, set it to the correct range (See multimeter’s operation manual) • Use firm contact with meter leads – JLG Lift – 3121813... -
Page 203: Current Measurement
These switches can be tested the same way as a standard switch by manually operating the sensing arm. Another type of limit switch used by JLG is the inductive Figure 7-4. Current Measurement (DC) proximity switch, also referred to as a "prox switch". Induc- tive proximity switches are actuated only by ferrous metal •... -
Page 204: Automatic Switches
NOTE: Curing-type sealants might also be used to prevent shorting and would be less messy, but would make future pin removal more difficult. – JLG Lift – 3121813... -
Page 205: Amp Connector
3. Install a hole plug into this and/or any unused wire lbs. to be sure the retention fingers are holding the seal that has silicone dielectric compound escaping from it. contact (See Figure 7-7.). Figure 7-6. AMP Connector 3121813 – JLG Lift –... -
Page 206: Connector Assembly Figure 2
(See Figure 7-9.). Release the locking latches by squeezing them inward (See Figure 7-8.). Figure 7-9. Connector Assembly Figure 4 Figure 7-8. Connector Assembly Figure 3 – JLG Lift – 3121813... -
Page 207: Disassembly
The wedge lock has slotted openings in the forward, or mating end. These slots accommodate circuit testing in the field, by using a flat probe such as a pocket knife. DO NOT use a sharp point such as an ice pick. 3121813 – JLG Lift –... -
Page 208: Connector Installation
SECTION 7 - BASIC ELECTRICAL INFORMATION & SCHEMATICS Figure 7-11. Connector Installation – JLG Lift – 3121813... -
Page 209: Deutsch Connectors
The wedgelock will snap into place. Rectangular wedges are not oriented. Thy may go in either way. NOTE: The receptacle is shown - use the same procedure for plug. 3121813 – JLG Lift –... -
Page 210: Hd30/Hdp20 Series Assembly
Figure 7-15. HD/HDP Locking Contacts Into Position Figure 7-17. HD/HDP Unlocking Contacts NOTE: Do Not twist or insert tool at an angle. NOTE: For unused wire cavities, insert sealing plugs for full environmental sealing 7-10 – JLG Lift – 3121813... - Page 211 SECTION 7 - BASIC ELECTRICAL INFORMATION & SCHEMATICS This page left blank intentionally. 3121813 – JLG Lift – 7-11...
-
Page 212: Electrical Components Installation - Sheet 1
SECTION 7 - BASIC ELECTRICAL INFORMATION & SCHEMATICS Figure 7-18. Electrical Components Installation - Sheet 1 7-12 – JLG Lift – 3121813... -
Page 213: Electrical Components Installation - Sheet 2
SECTION 7 - BASIC ELECTRICAL INFORMATION & SCHEMATICS Figure 7-19. Electrical Components Installation - Sheet 2 3121813 – JLG Lift – 7-13... -
Page 214: Electrical Schematic - Sheet 1 Of 4
SECTION 7 - BASIC ELECTRICAL INFORMATION & SCHEMATICS Figure 7-20. Electrical Schematic - Sheet 1 of 4 7-14 – JLG Lift – 3121813... -
Page 215: Electrical Schematic - Sheet 2 Of 4
SECTION 7 - BASIC ELECTRICAL INFORMATION & SCHEMATICS 1870226 A Figure 7-21. Electrical Schematic - Sheet 2 of 4 3121813 – JLG Lift – 7-15... -
Page 216: Electrical Schematic - Sheet 3 Of 4
SECTION 7 - BASIC ELECTRICAL INFORMATION & SCHEMATICS Figure 7-22. Electrical Schematic - Sheet 3 of 4 7-16 – JLG Lift – 3121813... -
Page 217: Electrical Schematic - Sheet 4 Of 4
SECTION 7 - BASIC ELECTRICAL INFORMATION & SCHEMATICS 1870226 A Figure 7-23. Electrical Schematic - Sheet 4 of 4 3121813 – JLG Lift – 7-17... -
Page 218: Hydraulic Schematic - Sheet 1 Of 2
SECTION 7 - BASIC ELECTRICAL INFORMATION & SCHEMATICS Figure 7-24. Hydraulic Schematic - Sheet 1 of 2 7-18 – JLG Lift – 3121813... -
Page 219: Hydraulic Schematic - Sheet 2 Of 2
SECTION 7 - BASIC ELECTRICAL INFORMATION & SCHEMATICS 2792459 A Figure 7-25. Hydraulic Schematic - Sheet 2 of 2 3121813 – JLG Lift – 7-19... - Page 220 SECTION 7 - BASIC ELECTRICAL INFORMATION & SCHEMATICS NOTES: 7-20 – JLG Lift – 3121813...
- Page 222 +33 (0) 553 84 85 74 Email:german-parts@jlg.com +(852) 2639 5797 Email: emeaservice@jlg.com Email: pieces@jlg.com JLG Industries (Italia) S.R.L. JLG EMEA B.V. JLG NZ Access Equipment & JLG Industries Via Po. 22 Polaris Avenue 63 Services Vahutinskoe shosse 24b. 20010 Pregnana Milanese (MI)
Need help?
Do you have a question about the E600 and is the answer not in the manual?
Questions and answers