Table of Contents

Related Manuals for Atmos S 351


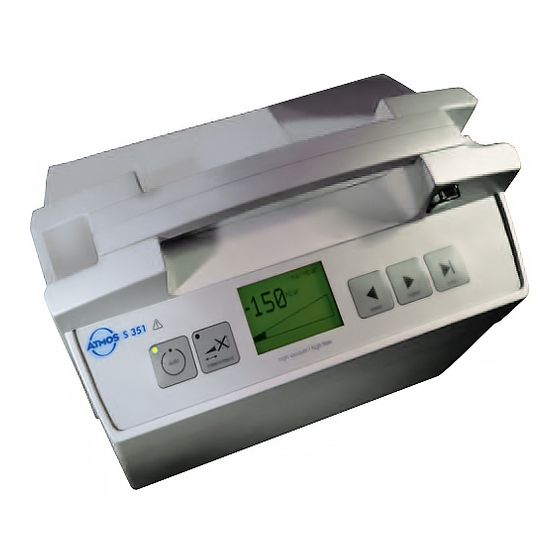
Summary of Contents for Atmos S 351
- Page 1 MedizinTechnik English ATMOS S 351 Natal 444.0401.B 2013-01 Index: 18 ATMOS MedizinTechnik Ludwig-Kegel-Str. 16 Tel. +49 (0) 7653 / 6 89-0 atmos@atmosmed.de GmbH & Co. KG 79853 Lenzkirch / Germany Fax +49 (0) 7653 / 6 89-190 www.atmosmed.de...
-
Page 2: Table Of Contents
Contents Page Introduction Notes on operating instructions ......3 Maintenance ............38 Function ..............4 Explanation of symbols .........5 Trouble-shooting ........39 - 41 Safety information ........6 - 7 Spare Parts and Accessories ....42 - 45 Spare parts ..........42 - 43 Purpose ..............8 Accessories .......... -
Page 3: Introduction
These instructions contain important information on how to operate the ATMOS S 351 Natal safely, properly and effi ciently. It should, therefore, not only be used for new operators who have to be instructed, but also as an ongoing source of reference. -
Page 4: Function
The ATMOS S 351 Natal is a mains-operated suction unit. The quiet, maintenance-free diaphragm pump forms the core of the ATMOS S 351 Natal. It creates a vacuum in the collection jar which assists in drawing off and collecting the secretions. -
Page 5: Explanation Of Symbols
1.0 Introduction Explanation of symbols Caution, observe operating instructions ! Equipment safety fuse Unit off Unit on "max." Maximum vacuum Alternating current Protective ground terminal System for protecting delicate tissue Trolley Foot regulator Filter blocked Full collection jar Bacterial fi lter Equipotential bonding Application part Type B Extraction cup... -
Page 6: Safety Information
with a scalpel. Then carefully let air back into the suction The ATMOS S 351 Natal may be used only by trained staff hose (carefully release the pinched suction hose) so that under supervision (IEC 601-1 / EN 60601-1). - Page 7 ATMOS. The ATMOS S 351 Natal must only be operated in rooms designated for medical use. It is not designed for use in potentially explosive areas (M and G) and in oxygen rich References environments.
-
Page 8: Purpose
3.0 Purpose The ATMOS S 351 Natal is especially used for the extraction cup birth and is, in addition, a suction system for use in dia- gnostic and therapeutic medicine and invasive surgery. It is especially designed for the removal by suction, collecting and fi... -
Page 9: Installation And Commissioning
Indicators and controls Fig. 1. ATMOS S 351 Natal Bracket and contact element for collection jar Pump connection Hose reducer 10 - 6 mm Bracket for collection jar ... - Page 10 4.0 Installation and commissioning Fig. 2. ATMOS S 351 Natal (rear) Mains connection Equipment safety fuses Connection for potential equalization Connection for foot regulator Vent...
-
Page 11: Initial Start-Up
– how to lock and insert the collection jar, – which hoses have to be connected, – how to connect the ATMOS S 351 Natal to mains electricity. Please note the safety information in Section 2.0 before initial start-up. - Page 12 Fig. 5. Please do not use the collection jar brackets on the ATMOS S 351 Natal and the trolley for any other purpo- ses. This will prevent malfunctions. Fig. 5. Attaching the 1.5 litre collection jar ...
- Page 13 safety jar lig The ATMOS S 351 Natal must never be used without a bacterial fi lter. Fig. 8b. Hose connections for suction mode Pump connection Bacterial fi lter ...
- Page 14 4.0 Installation and commissioning Now fi t the suction hose to the angled connection of the double socket nipple. Fig. 9. Connecting the suction hose The 10 mm dia. suction hose is fi tted directly to connection (...
- Page 15 , Fig. 11) to mains power. Secure the mains cable against accidental removal using safety clamp If the ATMOS S 351 is used for surgical procedures, we recommend connecting it to the equipotential bon-ding connection of the room via connection ...
-
Page 16: Operation
5.0 Operation Please ensure that the following parts have been reprocessed before treating a new patient: – suction hose including suction attachment or suction instrument, – collection jar lid and double socket nipple, – connection hose to safety jar as well as safety jar and bacterial fi... - Page 17 5.0 Operation Electronic fi lling level monitoring The ATMOS S 351 Natal is equipped with an electronic fi lling level monitoring which, in VE mode, does not affect the per- formance of the pump. The vacuum is not decreased. The alarm signal for a full jar (fi...
-
Page 18: Fully Automatic Vacuum Build Up
5.1.2 Fully automatic vacuum build up (VE Auto Mode) Switch on the ATMOS S 351 Natal. Make sure that the pilot lamp in the switch lights up. Then, the switching-on menu (fi g. 15) is shown in the display for approx. 2seconds. - Page 19 In addition, the desired vacuum build up time (default = 120 s) is shown top left and the fi nal vacuum set at the top right (default = -80 kpa). The ATMOS S 351 Natal attempts to build up the base vacuum of -20kPa. ...
-
Page 20: Semi-Automatic Vacuum Build Up
(fi g. 19). Switch on the ATMOS S 351 Natal. Check that the indicator lamp in the switch is illuminated. Fig. 19. Extraction cup button The switch-on menu (fi g. 18, page 19) is shown on the display for about 2 seconds. - Page 21 5.0 Operation After the -20 kPa base vacuum has been reached, the unit waits for the extraction cup button to be depressed. During this waiting period, an alert tone sounds syn-chronised with the fl ashing of the green LED. When the extraction cup button is pressed, the alert tone stops and the automatic vacuum build up starts (fi...
-
Page 22: Controlled Venting (Vacuum Release)
5.0 Operation 5.1.4 Controlled venting (vacuum release) After completed vacuum extraction or at any other time in VE Mode (VE Auto Mode and VE Semi Mode), the extraction cup can be vented in a controlled manner over a preset period (default: 5 s) (fi g. 25 and 26) by pressing the END button (fi... -
Page 23: Additional Functions
5.0 Operation 5.1.5 Additional functions In the VE mode of the ATMOS S 351 Natal it is possible at any time to intervene in the operation of the unit using the arrow buttons (fi g. 28). The Max button is locked. -
Page 24: Use Of The Foot Regulator In Ve Mode
During VE mode, it is possible to transfer the control of the vacuum to the connected foot regulator. The ATMOS S 351 Natal automatically goes into Suction mode in this case. The ATMOS S 351 Natal must be switched off before the foot regulator is connected or disconnected. ... -
Page 25: Vacuum Build Up With Foot Regulator
5.1.8 Starting automatic vacuum build up from a vacuum value preset in suction mode It is possible for the ATMOS S 351 Natal to start the automa- tic vacuum build up from a vacuum value preset in suction mode: Manual presetting of vacuum ... - Page 26 5.0 Operation Presetting the vacuum with the foot regulator The ATMOS S 351 Natal must be switched off before the foot regulator is connected or disconnected. Completely depress the connected foot regulator to the heel position. Switch on the ATMOS S 351 Natal. Check that the lamp in the switch is illuminated.
-
Page 27: Warning Signals
The warning signal is cleared as soon as vacuum build up can be continued or after abortion of the action by the user. The ATMOS S 351 Natal cannot predict a loss of contact of the extraction cup. There is no warning for this. -
Page 28: Electronic Fi Lling Level Monitoring
The vacuum currently present is not affected (there is no vacuum release). To avoid malfunctions, use the supports on the unit for original ATMOS jars only. 5.2.6 Electronic fi lter monitoring Fig. 32. Warning of short circuit between contact See page 17. -
Page 29: Switching On/Off Of Alert Tones
5.0 Operation 5.3.1 Switching on/off of alert tones The alert tones for the ‘start of automatic vacuum build up (VE Start Beep)' and ’reaching the fi nal vacuum (VE Stop Beep)' can be switched on and off in the VE Tone sub-menu (fi... -
Page 30: Ve Automatic
Adjust unities The vacuum unity displayed can be changed for the ATMOS adjust unity S 351 Natal. To do this, press and hold the extraction cup button while switching on until Service 1 is displayed on the graphics display. ... -
Page 31: Trolley Operation
5.0 Operation Trolley operation If the ATMOS S 351 Natal is mounted on a trolley, the trolley symbol (Fig. 38) is shown on the display. The trolley symbol must be displayed during operation on a trolley. If the symbol is not displayed, the liquid level in the collection jar cannot be detected. -
Page 32: Changing The Collection Jar
Insert the double connecting nipple into the empty collection jar and continue suction. After use Switch off the ATMOS S 351 Natal and clean unit and accessories as described in chapter 6.0. Fig. 42. Removing the collection jar... -
Page 33: Suction With Foot Regulator
Connect the suction catheter, suction connector or suction instruments. Switch on the ATMOS S 351 Natal. Check that the indicator Fig. 43. Graphics display for foot regulator operation lamp in the switch is illuminated. Select the fi nal vacuum required using one of the arrow ... -
Page 34: Faults
If this happens, the overheating display Fig. 46. Overheating is left on the graphics display. Please call the service depart- ment if this happens. Set up the ATMOS S 351 Natal on a clear, level surface. This will ensure free air circulation. 5.6.3 Fault If the ATMOS S 351 Natal detects a functional fault, this will be shown on the graphics display. -
Page 35: Cleaning And Maintenance
6.0 Cleaning and Maintenance Reprocessing of hoses and collection jar Always wear protective clothing (gloves) when carrying out cleaning work. Those parts which come into contact with the secretion must be cleaned and disinfected after each use before a new patient is treated. -
Page 36: Cleaning And Sterilising The Outside Of The Unit
6.0 Cleaning and Maintenance Cleaning and disinfecting the outside of the unit You must disconnect the mains plug before cleaning and disinfecting the unit casing. Wipe over the casing with a cloth moistened with a cleaning agent or disinfectant solution. Do not allow any liquid to enter the equipment. -
Page 37: Recommended Instrument Disinfectants
6.0 Cleaning and Maintenance Recommended instrument disinfectants Disinfectant Contents (in 100 g) Manufacturer GIGASEPT FF succinic acid dialdehyde Schülke & Mayr, Norderstedt (concentrate) Dimethoxytetrahydrofurane Corrosion protection agents non-ionic tensides and perfume neodisher AN non-ionic tensides < 5 Dr. Weigert, Hamburg (Application concentrate) Phosphate >... -
Page 38: Maintenance
7.0 Maintenance Please clean your ATMOS S 351 Natal before sending it for servicing ! Before each use, visually inspect the unit including hoses, collection jar and power cable. Replace any damaged parts immediately. No other regular maintenance work is required. -
Page 39: Trouble-Shooting
8.0 Trouble-shooting Please clean your ATMOS S 351 Natal before This section describes how to remove functional faults. sending it for servicing. Remedies Fault Possible cause Unit does not start up – Mains plug not inserted properly – Check mains plug (indicator light in switch not illuminated) –... - Page 40 Chapter 5.3.6 – An equipment fault has occurred Spanner displayed on graphics – If the display clears, the ATMOS S 351 display Natal was able to remove the fault. However, a service engineer should check the suction unit –...
- Page 41 (bottom of unit). They must not be Natal has overheated) – Excessive ambient temperature blocked – Fan faulty – Only use the ATMOS S 351 Natal within the temperature range stated. Try and use Auto Standby (less heat is generated) – Call the service department –...
-
Page 42: Spare Parts And Accessories
9.0 Spare Parts and Accessories Spare Parts Description Art.No. Safety jar, standard (without fi lter, without lid) .......000.0504.0 Safety jar + DDS fi lter ........444.0646.1 . Bacterial fi lter cover ........444.0056.0 Bacterial fi lter lid ..........444.0058.0 Bottle..............000.0504.0 DDS bacterial fi lter / overfl ow safety ....340.0054.0 Filter adapter..........340.0031.0 O-Ring ............055.0055.0 ... - Page 43 9.0 Spare Parts and Accessories Description Art. No. Double socket nipple, compl......444.0012.0 O-ring 6 mm dia. (at least 5 pcs.) ....055.0069.0 Hose reducer ..........444.0013.0 O-ring 23 mm dia. (at least 5 pcs.) ....055.0073.0 O-ring 14 mm dia. (at least 5 pcs.) ....055.0072.0 Contact spring washer ........444.0079.0 Spare parts (not shown) Fuse 230 V T 1 A/H ..........008.0471.0...
-
Page 44: Accessories
9.0 Spare Parts and Accessories Accessories 9.2.1 Jars Description Art. No. Collection jar, glass, with graduation, 1.5 l* ..........444.0032.0 Jar lid*......................444.0015.0 Double connecting nipple for jar lid (incl. distal hose reduction Ø 10 / Ø 6)* ............444.0012.0 Inline bacterial fi... -
Page 45: Gynaecology
9.0 Spare Parts and Accessories 9.2.4 Gynaecology Description Art. No. Suction curette with auxiliary air vent, external dia. 6 mm ......401.0529.0 Suction curette with auxiliary air vent, external dia. 8 mm......401.0530.0 Suction curette with auxiliary air vent, external dia. 10 mm......401.0531.0 Suction curette with auxiliary air vent, external dia. -
Page 46: Technical Specifi Cations
10.0 Technical specifi cations Air fl ow rate 36 ± 2 l/min. Max. vacuum -90 kPa** Vacuum readout digital numeric, resolution 10 mbar / 10 mmHg / 1 kPa and quasi analog via bar graph; accuracy ± 2% Auxiliary air control electronically controlled magnetic valve Collection jars 1.5 l / 3 l / 5 l glass or polysulphone or 1.5 l / 2 l / 3 l Receptal®... -
Page 47: Disposal
11.0 Disposal Please clean the equipment before disposing of it. The ATMOS S 351 Natal does not contain any hazardous materials. The components of the ATMOS S 351 Natal must be disposed of properly, including careful separation of the... -
Page 48: Notes On Emc
12.1 Guidelines and Manufacturer´s Declaration - Emissions The ATMOS S 351 Natal is intended for use in the electromagnetic environment specifi ed below. The customer or user of the ATMOS S 351 Natal should ensure that it is used in such an environment. - Page 49 12.3 Guidelines and Manufacturer´s Declaration - Immunity The ATMOS S 351 Natal is intended for use in the electromagnetic environment specifi ed below. The customer or user of the ATMOS S 351 Natal should ensure that it is used in such an environment.
- Page 50 To determine the electromagnetic environment in regard to stationary transmitters, a study of the location is to be considered. If the measured fi eld strength at the location where the ATMOS S 351 Natal is used exceeds the above compliance level, the ATMOS S 351 Natal is to be observed to verify the intended use.
- Page 52 ATMOS MedizinTechnik GmbH & Co. KG in accepting such goods or payment arrears. Acts of God or stoppages upon in writing by us.
Need help?
Do you have a question about the S 351 and is the answer not in the manual?
Questions and answers