Atmos S 351 Service Manual
Hide thumbs
Also See for S 351:
- Operating instructions manual (48 pages) ,
- Operating instructions manual (52 pages)
Table of Contents
Advertisement
Quick Links
Advertisement
Table of Contents

Related Manuals for Atmos S 351


Summary of Contents for Atmos S 351
- Page 1 MedizinTechnik ... for a better life English ATMOS S 351 ATMOS S 351 Natal FO.04 ATMOS MedizinTechnik Ludwig-Kegel-Str. 16 Tel. +49 (0) 7653 / 6 89-0 atmos@atmosmed.de GmbH & Co. KG 79853 Lenzkirch / Germany Fax +49 (0) 7653 / 6 89-190 www.atmosmed.de...
-
Page 2: Table Of Contents
Visual inspection ........17 6.1.1a Suction device-setting-locking ....17 6.1.2 Electrical testing ........18 - 19 6.1.3 Functional test of ATMOS S 351 ..20 - 23 6.1.4 Functional test of ATMOS S 351 Natal: ..Vacuum extraction ....... 24 - 26 6.1.5 Functional test of ATMOS S 351 Natal: Suction .......... -
Page 3: General Description
Operating instructions: Maintenance and/ or opening and repair of the ATMOS ATMOS S 351 444.0405.A S 351 may be carried out only by an expert authorised by ATMOS S 351 Natal 444.0401.A the manufacturer. When doing this, technical and hygienic protective measures are to be taken. -
Page 4: Installation
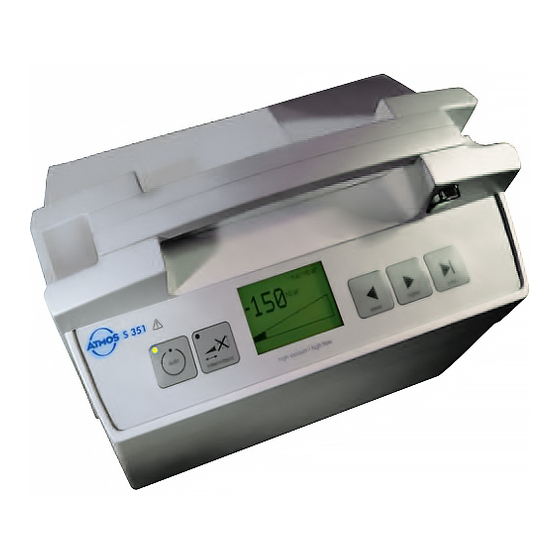
Installation See chapter 4.0 "Installation and commissioning" in the operating instructions. Unit function and unit construction ATMOS S 351 Housing Starting valve Exhaust air valve Pump Silencer Connecting (in the housing) nipple Buzzer Display and key- Pressure board sensor Mains input... -
Page 5: Functional Description
If the resistance changes (by the increasing liquid level in the collection jar) the pump (4) is The housing of the ATMOS S 351 or its variant is made shut down and an acoustic signal is given by the buzzer of plastics (ABS UL).The main switch, the operating and... -
Page 6: Internal Components
The processor board serves to control and monitor the connection nipple (1), the exhaust air valve (3), the ATMOS S 351. It forms the central unit. On the processor pressure transducer (15) on the processor board (14) board there is the processor, the power supply for the elec- to the pump (4, vacuum connection). -
Page 7: Electronics
Unit function and unit construction 3.2.4 Electronics The description is done by means of function blocks. • Block 8 Motor rotation monitoring: • Block 1 Potential separation and production of A refl ex light barrier is used to check whether the motor 12V dc: is started in the switched on condition. - Page 8 A PTC temperature transducer is used to monitor the tempe- wires (A0-A7). First the addresses are given over the rature in the ATMOS S 351 or its variant. This temperature combined data/address bus and intermediately stored transducer is read by the internal AD converter of the con- troller.
-
Page 9: Allocation Of Wires To The Plug
Unit function and unit construction Allocation of wires to the plug Foot controller Designation Type of signal Low voltage Schleifer potentiometer Low voltage Supply potentiometer Low voltage Housing Screening Earth Allocation of wires to the pins of the foot controller Test and measuring points The following measuring points are available on the control board: Designation... -
Page 10: Service Mode
This level is described in the Operating Instructions. • Service Level 2: Serves to support the service. 3.5.1 Service Level 1 With the ATMOS S 351 you reach Service Level 1 if you With the ATMOS S 351 Natal you get into the hold the "Standby"... - Page 11 Test air tightness of system This can test to what extent the total system is tight. Connect all hoses/containers on the ATMOS S 351 or its variant to be tested. Close the suction hose and start Fig: 4. Tightness test - Start diagram the test with the ”max”...
- Page 12 Unit function and unit construction The ATMOS S 351 or its variant begin to create vacuum (Phase 1, as shown). Then there is a waiting time (Phase 2, ”wait”). Fig. 5. Tightness test - Test The test result is shown with a box. Then start a new test run with the ”Max”...
-
Page 13: Changing Parts
4.0 Changing parts Membrane and valve change Clean the ATMOS S 351 or its variant before you carry out repairs. Take suitable precautions (to prevent con- tamination). Remove the pipework from the pump. Remove the four socket headed screws (1a or 1b) of the pump head (2a or 2b) (Figure 8, Page 14). -
Page 14: View Of Pump
4.0 Changing parts View of pump Fig. 8. View of the complete pump from the front Fixing screws pump head right Fixing screws pump head left Pump head right ..........069.0065.0 Pump head left ..........069.0064.0 Connection for motor transducer Starting valve Exhaust air valve Vacuum side Pressure side... - Page 15 4.0 Changing parts Fig. 10. Pump without pump head Diaphragm disk ........069.0036.0 Membrane ...........069.0025.0 Fixing screw for diaphragm disk Fig. 11. Pump head left (internal view) Fig. 12. Pump head right (internal view) Fixing screws for valve plate Fixing screws for valve plate O-ring ..........69.0024.0 Valve plates .........
-
Page 16: Trouble-Shooting
5.0 Trouble-shooting General errors of the ATMOS S 351 and its variant Please look also under the corresponding Chapter of the Operating Instructions. Error Possible causes Remedy The indication ”Emergency See Chapter 3.5.2 (Service Look in error memory, see Chapter operation”... -
Page 17: Maintenance And Repair
- Voltage equalisation sign beside the earthing point. - ”Take note of Operating Instructions” beside the foot controller bush of the ATMOS S 351. - Front foil (operating foil) must sit correctly. There must be no fouling between the graphic display and the front foil. -
Page 18: Electrical Testing
6.0 Maintenance and repair 6.1.2 Electrical testing Protective earth conductor: Measurement: See User’s Handbook of the respective safety tester (protective earth conductor measurement, protective earth conductor testing). Carry out the corresponding operating instructions with the safety tester on the unit. NOTE: The resistance of the mains cable should not be included in the measurements. The resistance should, however, be measured and subtracted from the measurements on the device. - Page 19 6.0 Maintenance and repair Patient leakage current test Measurement: See User’s Handbook of the respective safety tester (patient leakage current test). Adapt a mains cable for the device and the safety tester and take the device into service. The patient leakage current is measured on all patient connections/signal inputs and signal outlets that are connected together (users parts).
-
Page 20: Functional Test Of Atmos S 351
10%) on the type plate and with the given mains frequency. The following functions must be checked: The accessories of the ATMOS S 351 must be attached to the unit for the following functional test. Intermit function (increase vacuum, hold vacuum, reduce vacuum, pause) The following intermittent settings shall be chosen in Service Menu 1 (Press the Standby key during starting): •... - Page 21 6.0 Maintenance and repair Function of foot controller • Switch on unit with foot controller connected: The foot controller is recognised. Start the Intermit-mode by pressing the intermittent key. • Move the foot controller: The function of the unit is not affected by the foot controller. Leave the Intermit-mode by pressing the intermittent key.
- Page 22 Operate the unit in suction mode: Set any chosen vacuum value. Switch off the unit and switch it on again after about 5 seconds. When it is switched on again the ATMOS S 351 changes automatically into suction mode and retains the vacuum value set before it was shut down.
- Page 23 6.0 Maintenance and repair Performance test The performance test of the unit shall be carried out with the supply voltage given in the operating contract and the given mains frequency. The unit is operated in the suction mode for this. The following performance must be checked: •...
-
Page 24: Vacuum Extraction
6.0 Maintenance and repair 6.1.4 Functional test of ATMOS S 351 Natal: Vacuum extraction The functional test of the unit shall be done with the supply voltage (± 10%) given on the description plate and with the given mains frequency: • for 230 V ac 207 V ac should be set •... - Page 25 6.0 Maintenance and repair Supplementary fan recognition • Connect end of the suction hose to the supplementary air valve. Press extraction cup key, in order to start automatic vacuum creation. By pressing the ‘>’ key accelerate the creation of vacuum up until about 500 mbar is reached. •...
- Page 26 6.0 Maintenance and repair Overfl ow/short circuit function • Close the end of the suction hose so that it is airtight. • Press extraction cup key, in order to start the automatic creation of vacuum. • Connect the test equipment to the unit to be tested (on the overfl ow contact left or right). The terminal marked with (+) should be connected to the upper contact element, the terminal marked with (-) should be connected to the lower contact element.
-
Page 27: Functional Test Of Atmos S 351 Natal: Suction
Functional test of ATMOS S 351 Natal: Suction The following functions must be checked: For the following functional test the accessories of the ATMOS S 351 shall be attached to the unit. The end of the suction hose must be attached to the vacuum meter. - Page 28 6.0 Maintenance and repair Trolley overfl ows contact: • Connect the test equipment to the unit to be tested: The two terminals of the test equipment should be connected to the contacts of the trolley connection. The terminal marked with (-) is connected to the contact element which is in the vicinity of the round fan opening. •...
- Page 29 6.0 Maintenance and repair Set to the delivery condition The delivery condition must be set as follows: In the Service Mode 1: The Service 1 Menu can be reached by pressing the "extraction cup" key when starting. • Adjust units: Delivery in Germany: kPa Delivery outside Germany: kPa •...
-
Page 30: Spare Parts
7.0 Spare Parts 2.0 ATMOS S 351 Subunit Spare Part Article-No. (if no fig.) COLLECTION JAR RECEPTALBEUTEL 1500ML W. OVERFLOW VALVE FILTER, 50 PCS. 310.0222.1 COLLECTION JAR RECEPTAL BAG 1500ML W/O OVERFLOW VALVE FILTER, 50 PCS. 310.0222.2 COLLECTION JAR MEDI-VAC EXTERNAL JAR 1 L 312.0473.0... - Page 31 7.0 Spare Parts (contin.) 2.0 ATMOS S 351 Subunit Spare Part Article-No. (if no fig.) LID SYSTEM PRESSURE SPRING 3.6X0.40S1,7X9.6 000.0522.0 LID SYSTEM LID SYSTEM FOR COLLECTION JAR 444.0015.0 LID SYSTEM COLLECTION JAR, BODY 444.0050.0 LID SYSTEM COLLECTION JAR INSERT COMPLETE 444.0052.1...
-
Page 32: Technical Specifi Cations
EN 60601-1-4:07/1997 10-217 UMDNS Code REF (basic unit without accessories) 444.0405.0 ATMOS S 351 444.0401.0 ATMOS S 351 Natal All values are quoted with a tolerance of ± 5 %, ** 1 bar ≅ 750,06 mm Hg ≅ 1000 hPa / dependent on daily air pressure unless separately specifi... -
Page 33: Conversion Instructions
From series 20414701 / 2000-05 no longer necessary (17.05.2000 modifi cation 5085/00). After the conversion the trolley can be used for Atmoforte 350, Record 500, ATMOS S 351 and Atmoforte 350 A. Modifi cation: Insertion of a 1 MΩ resistance (011.0042.0) on the over- fl... -
Page 34: Annex (Plans)
10.0 Annex (Plans) on socket Fig: 14. Components of control board ATMOS S 351, ATMOS S Natal; Issue: 11 September, 2002... - Page 35 10.0 Annex (Plans) Strip without middle contact Fig. 15. Display board ATMOS S 351, ATMOS S Natal Issue: 1 August, 2000...
- Page 36 10.0 Annex (Plans)
- Page 37 10.0 Annex (Plans)
- Page 38 10.0 Annex (Plans)
Need help?
Do you have a question about the S 351 and is the answer not in the manual?
Questions and answers