Table of Contents
Advertisement
Mounting instruction
Ferrotec GmbH
Postfach 33
Seerosenstrasse 1
72669 Unterensingen
Telefon:
+49 7022 9270-0
Telefax:
+49 7022 9270-10
Internet:
http://www.ferrotec-europe.de
E-Mail:
mailto:ebgun@de.ferrotec.com
Version 2.0.6
Translation of the original mounting instruction
Evaporation Controller Type Genius
Advertisement
Table of Contents

Summary of Contents for ferrotec genius
- Page 1 Mounting instruction Evaporation Controller Type Genius Ferrotec GmbH Postfach 33 Seerosenstrasse 1 72669 Unterensingen Telefon: +49 7022 9270-0 Telefax: +49 7022 9270-10 Internet: http://www.ferrotec-europe.de E-Mail: mailto:ebgun@de.ferrotec.com Version 2.0.6 Translation of the original mounting instruction...
- Page 2 Where not stated otherwise, the technical state at the time of joint delivery of product and mounting instruction by Ferrotec GmbH is definitive. We reserve the right to make technical changes without prior notice. All previous instruction manuals then lose their validity.
- Page 3 Mounting instruction Genius Publisher Do you have any questions? Or problems installing or starting your device? Please call us! We will be glad to help you! Ferrotec GmbH Seerosenstrasse 1 72669 Unterensingen phone +49 7022 9270-0 +49 7022 9270-10 3/78 Ferrotec GmbH Version 2.0.6...
-
Page 4: Table Of Contents
Gun rotation card GRC (Option) Safety (Interlock) Card X102, X 103, X105 Appendix 10.1 Pin assignment X110 10.2 Pin assignment X119 10.3 RS - 232 Interface (X112/X113) 10.4 IO-Control 10.5 Factory settings 10.6 Genius Pro, Features and Operation 4/78 Ferrotec GmbH Version 2.0.6... - Page 5 Mounting instruction Genius Fault, Cause, Remedy Emergency Dismantling / Disposal 13.1 Dismantling 13.2 Disposal Index 5/78 Ferrotec GmbH Version 2.0.6...
-
Page 6: Declaration Of Conformity
Mounting instruction Genius Declaration of Conformity Authorized person for the technical documentation: Mr. Alfred Mutscheller Product manager EB Evaporator Ferrotec GmbH Seerosenstrasse 1 72669 Unterensingen 6/78 Ferrotec GmbH Version 2.0.6... -
Page 7: Overview And Intended Use
Mounting instruction Genius Overview and Intended Use Overview of a vacuum evaporation system Fig. 1: Overview of a vacuum evaporation system A complete evaporation system consists of the following components: 7/78 Ferrotec GmbH Version 2.0.6... -
Page 8: Intended Use
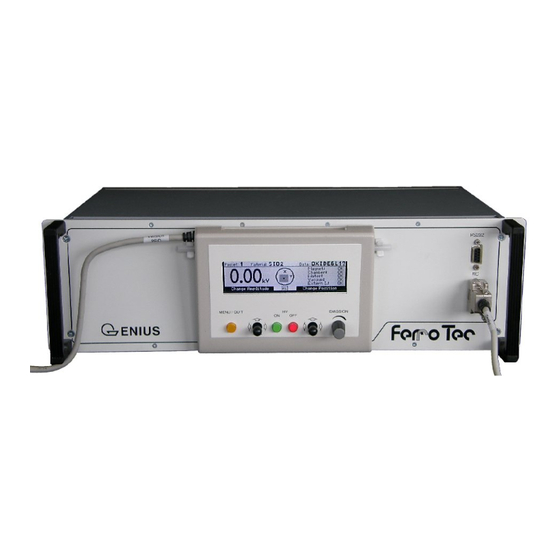
Mounting instruction Genius 1. High voltage power supply HVP 2. Evaporation controller including hand remote control ENIUS 3. Filament power supply (FPS) 4. Electron beam evaporator 5. Vacuum chamber 6. Grounding rod 7. Deposition controller including sensor Intended Use The evaporation controller is part of a group of devices for the operation of an elec... -
Page 9: Explanation Of Terms
Mounting instruction Genius Explanation of terms /HVP device designation for the high voltage power supply (High ARRERA Voltage Power Supply) device designation for the evaporation controller ENIUS ENIUS device designation for the filament power supply (Filament Power Supply) Technical specifications 2.4.1... -
Page 10: Safety
Mounting instruction Genius 2.4.4 General specifications Ambient temperature -10 up to 35 °C Air humidity max.: 65 % Noise level LpA < 70 dB (A) Safety Notes / Explanations D A N G E R warns of dangerous situations. Avoid these dangerous situations ! Otherwise they could result in severe injury or death. - Page 11 Mounting instruction Genius Danger of burns are framed and marked with the symbol shown adjacent. Danger of your hands being crushed or injured are framed and marked with the symbol shown adjacent. Danger from magnetism are framed and marked with the symbol shown adjacent.
-
Page 12: Integrated Safety Systems
Warranty from the manufacturer 3.1.3.1 Conditions of the warranty FerroTec products are produced and inspected in accordance with our quality management system. Warranty must be claimed immediately after the notice of the failure including the serial number of the deposition controller. The manufacturer guarantees warranty of the product of 12 months to be free on defects caused by material failure or failures caused by the manufacturing process. - Page 13 The operating and maintenance personnel are trained in the use of the machine at its point of installation by personnel from Ferrotec GmbH. Should you have any questions or be uncertain about anything, please contact Ferrotec GmbH N O T I C E ! It is strictly forbidden to render any of the safety systems inoperative or to modify their action.
-
Page 14: Interfaces
Mounting instruction Genius Interfaces I/O-INTERFACE (X110) Digital inputs Level »1« 10 V ...30 V Level »0« 0 V ...5 V Input current (I max. 10 mA Digital outputs Max. current 500 mA Max. voltage 60 V Version Plug type PHOENIX-Combicon 2 x 8 pin-connector... -
Page 15: Responsabilities Of The Operator
Mounting instruction Genius instruct his operating and maintenance personnel in the use of safeguards of the • electron beam evaporator and the evaporation controller ensure the safety precautions are being observed including the use of personal pro • tective equipment. -
Page 16: Safety Inspections And Tests
Mounting instruction Genius A constant hazard evaluation of the workplaces (danger of hands being crushed, • danger of stumbling) is to be carried out. The measures are to be defined in work instructions and the working personnel are to be instructed accordingly. -
Page 17: General Warnings
Mounting instruction Genius General Warnings Danger in the operating area The safety systems and safety instructions described in this handbook must be heeded accordingly. The machine is operated from the control unit in combination with the electron beam evaporator, the –... -
Page 18: Spare And Wearing Parts
Spare parts and accessories that have not been supplied by us have also not been tested and approved by us. The fitting and/or use of such products could therefore negatively affect the design characteristics of your machine. Ferrotec GmbH accepts no liability for damages arising from the use of non-original parts and non-original accessories. -
Page 19: Installation
9. Mounting parts for hand remote Transport and packaging Machines, devices and other equipment from Ferrotec GmbH are carefully inspected and packed before shipment. In case the delivered goods are damaged or defective upon receipt a proper notice of defects must be initiated to assure proper protection of your interests. -
Page 20: Intermediate Storage
Use the original packaging material as far as possible. If it is no longer available Use the services of a packaging company with suitably competent personnel. • If you have any questions on packing and transport, please contact Ferrotec GmbH • N O T I C E ! -
Page 21: Assembly, Installation, Initial Start Up
Mounting instruction Genius Assembly, Installation, Initial start up. Assembly and initial start-up must be carried out by skilled personnel from Ferrotec GmbH or the customer's skilled personnel who have been especially trained for this work. Consult the Mounting instruction and technical reference material supplied for assembly and install... - Page 22 Mounting instruction Genius Fig. 4: Wiring diagram of the evaporation controller Genius 5.5.2.2 Overview of electrical connections (back side) Fig. 5: Rear view of evaporation controller On the back side of the evaporation controller -housing are the following connections: ENIUS...
- Page 23 Mounting instruction Genius X103 RS-232 interface (patched to front side connector) 2. Safety interlock for crucible rotation X105 3. Connection for remote control X102 (patched to front side connector) 4. SUB-D connector X115 for connection to HVP 5. Connection for remote control X114 6.
- Page 24 Mounting instruction Genius 1. Grounding to X100 2. Safety interlocks to X110 3. Control cable to magnet feed through to X117 4. Hand remote to X114 5. Emission set point input X111 6. Mains to X101 X105 in combination with a GRC card 5.5.3...
-
Page 25: Functional Description, Variants
Page 22) and the connection plan -System (Fig. 4: Wir ARRERA ing diagram of the evaporation controller Genius Page 22). D A N G E R ! If the evaporation controller is being connected to the... -
Page 26: Variants, Optional Extras
Mounting instruction Genius Variants, Optional extras 6.2.1 Variants The evaporation controller is available in the variants . The variants only ENIUS ENIUS differ in their internal control programs (firmware). The -Version has additional ENIUS menu functions. Standard version of the evaporation controller. -
Page 27: General Operation
Mounting instruction Genius 1. Check the ground connections the power supply cable, the control cables and the high voltage cable for correct cabling and firm connection. 2. Check the safety circuit. 3. Check the emergency-stop system. D A N G E R ! - Page 28 Mounting instruction Genius LCD-Display: The LCD display serves to display all the information for operation of an electron beam evaporator. The different display modes are explained on the basis of photos in chapter 7.9. HV OFF button (red illuminated): Switches off the high voltage when pressed. The button then lights up.
-
Page 29: Setup
Mounting instruction Genius The work data set is a working copy of the selected data set. Pocket number Material name Work data set High voltage Emission current Data section Menu section Sweep display Function of the right Joystick Function of left Joystick Fig. -
Page 30: Switching Off
Mounting instruction Genius 1. Switch on the on/off switch on the back of the evaporation controller. 2. Switch on the on/off switch MAIN on the HVP. 3. Check that the green LED INTERLOCK (Safety switch) on the high voltage power supply is on. - Page 31 Mounting instruction Genius Process Pocket1 <= Data set A Position High voltage Amplitude Emission limit Frequency Emission sensitivity Waveform Limits Pocket1A <= Data set A Position High voltage Amplitude Emission limit Frequency Emission sensitivity Waveform Limits Fig. 11 Data structure 7.6.1...
-
Page 32: Main Screen Operation
Mounting instruction Genius high voltage system (type of device, additional cards, etc.). Besides this, the system constants like water off times allow adjustment of the evaporation controller to the overall system. Work data set The work data set is a working copy of the selected data set. A... -
Page 33: Menu Operation
Mounting instruction Genius N O T I C E ! The magnet current regulator limits the deflection of the electron beam to the permissible sweep area defined by the magnet current LIMITS. The amplitude and position can therefore only be changed within the given limits. - Page 34 Mounting instruction Genius N O T I C E ! Apart of functions in the „SAVE/LOAD“ menu all data of the working data set is immediately set without further request. Any change of the working data set versus the stored parameters is displayed by a »?«...
-
Page 35: Menu Structure
Mounting instruction Genius Menu structure Fig. 15: Menu structure Genius (1 of 2) 35/78 Ferrotec GmbH Version 2.0.6... - Page 36 Mounting instruction Genius Fig. 16: Menu structure Genius (2 of 2) Operation of the evaporation controller by remote control is menu driven. The menu struc ture for manual operation is shown in figure Fig. 15. Depending on the mode of operation and the active user level, some sub menus are not available.
- Page 37 Mounting instruction Genius The description of the menu functions which are only accessible in the user level Service in version (gray shaded sub menus) is continued in the appendix. ENIUS 7.9.1 Set pocket The main menu Set pocket is used to select the evaporator pocket. The active pocket (No.1;...
- Page 38 Mounting instruction Genius Depending of the Mode of Opera tion access to the menu items is limited. Starting from Firmware Version 1.2 three user levels are available: 7.9.2.1 Operator (lowest Level) Access only to menus Auto/Manual pocket. This user level is to be set for stand...
- Page 39 Mounting instruction Genius N O T I C E ! The magnet current regulator limits the deflection of the electron beam to the permissible sweep area defined by the magnet current LIMITS. The amplitude and position can therefore only be changed so far that the electron beam is always inside the limits.
- Page 40 Mounting instruction Genius Square, • Sine, • Delta • Rectified sine • The functions can be selected with the right joystick. A wave symbol indicates the waveform that has been selected. In addi tion to the pre-set functions, the deflection forms can also be...
- Page 41 Mounting instruction Genius D A N G E R ! The sweep amplitude is zeroed in the limits menu. This leads to increased energy density of the beam. When selecting the limits in the limits menu the emission is reset to 0 mA. The adjustments of the limits must be done at very low emission current to avoid any damage to the system.
- Page 42 Mounting instruction Genius 7.9.3.9 Global / Local – Setting of scope of validity The sub menu Global / Local is used to define the scope of validity of the high voltage and the limits. The variable simplifies programming for complex multi pocket configura...
- Page 43 Mounting instruction Genius 7.9.4 Auto Emission – Setting of control sensitivity The sub menu Auto Emission is used to calibrate the emission current in automatic mode. Genius The setting defines the emission current value that should be processed as emission current...
- Page 44 Mounting instruction Genius N O T I C E ! A data set name may consist of a maximum of eight characters to guarantee compatibility to older computer operating systems. A maximum number of 99 data sets can be stored.
- Page 45 Mounting instruction Genius 7.9.5.6 New process, Open process, Delete process The sub menu process, Open process Delete process can be used to create, load or delete processes. The name is entered in the same way as described or the sub...
- Page 46 Mounting instruction Genius Water defines the duration in which a loss of the water flow on the evap orator results in a warning rather than an error. (the error would stop the process). 7.9.6.3 Step – Setting of emission increments...
- Page 47 Mounting instruction Genius Pocket By setting the pocket-parameter the pocket can be rotated in manual mode. By pressing the joystick to left or right the pocket stops. After exiting the menu the pocket will automatically index into the selected position.
-
Page 48: Troubleshooting,Corrective Actions
Mounting instruction Genius FPS/HVP The service menu FPS/HVP is used to monitor the status of the HVP and the FPS. The FPS can be switched on and off independ ently of the high voltage. Languange The menu Language is used to change the language of the menu structure. - Page 49 N O T I C E ! In the event of faults in the devices high voltage power supply HVP, evaporation controller or the filament power supply ENIUS FPS call the customer service of Ferrotec GmbH phone +49 7022 9270-0 49/78 Ferrotec GmbH Version 2.0.6...
-
Page 50: Cleaning / Maintenance
Mounting instruction Genius D A N G E R ! It is strictly forbidden to open the devices. Cleaning / Maintenance D A N G E R ! This chapter on maintenance is intended for qualified technicians only. Maintenance, cleaning and repair work may only be carried out by such qualified technicians. - Page 51 Mounting instruction Genius 9.1.1 I/O Interface X110 The I/O-Interface is designed as 16-pin Phoenix-plug with screw ter minals. Both outputs and four of the six inputs are freely program mable. The functions are allocated on the basis of codes described in the appendix.
-
Page 52: Magnetcurrent Card
Gun rotation card GRC (Option) X118 is used to drive the motor of the multi pocket evaporator. The pin assignment is pre defined for the operation with an Ferrotec multi pocket evaporator. To adapt a different model of evaporator using menu Options... -
Page 53: Safety (Interlock) Card X102, X 103, X105
Mounting instruction Genius 4 Relayoutpts 24 V/500 mA (momentarily 2 A) short circuit proof. Output K1: B1 - B5 • Output K2: B2 - B5 • Output K3: B3 - B5 • Output K4: B4 - B5 • 2 digital transistor outputs 24 V/500 mA (temporarily 2 A) short circuit proof. -
Page 54: Pin Assignment X119
Mounting instruction Genius HV switched on* (1=HV on) relaycontact with B8; A8 - B8 Output K2 Error message* (1=Error) +24 V, 80 mA Control voltage *Factory default setting Fig. 22: Circuit diagram X110 10.2 Pin assignment X119 Pin assignment X119 X119 PIN NO. - Page 55 Mounting instruction Genius Common counter pole of the outputs * Factory default setting Fig. 10-23 Circuit diagram X118/X119 55/78 Ferrotec GmbH Version 2.0.6...
- Page 56 Mounting instruction Genius The factory settings for the jumper J1...J6, J9...J14 is open. On jumper J15 the factory setting is closed. By closing the jumper J9...J14 the inputs input1...input 6 on X119 can be activated with 5 V instead of 24 V. By closing the jumper J1...J6 the inputs input7...input 12 on X119 can be activated with 5 V instead of 24 V.
-
Page 57: Rs - 232 Interface (X112/X113)
Mounting instruction Genius 10.2.3 Pin assignment for disc crucible assignment X119 Input Pocket 10.3 RS-232 Interface ( X112/X113) 10.3.1 Hardware All the control signals of the control module can be read and written through the RS-232 interface. Every - evaporation controller is equipped with two RS-232 interfaces. -
Page 58: Io-Control
Mounting instruction Genius 10.3.2 Protocol The protocol of the RS-232 interface is described in a separate document. It is not neces sary for the operation and initial start up. 10.4 IO-Control The IO-Control logically assigns the digital inputs and outputs to the status of the . - Page 59 Mounting instruction Genius HV ON The high voltage is switched ON The high voltage is OFF Emission The emission is enabled The emission is not enabled, e.g. the pocket is not in position. 10.4.2.2 Output Output signal Function HV ON...
- Page 60 Mounting instruction Genius Magnet The status of the magnet is The status of the magnet was not OK the last time it was checked The status of the FPS is OK The status of the FPS was not OK the...
- Page 61 Mounting instruction Genius 10.4.5.2 Output Output signal Function Error Quit A positive slope (0 --> 1) confirms the displayed error or warning message Example The relay output 2 of the CPUCard shall be switched if an error has occurred. Output Logic Input CPU I/O K2 Error 10.4.6 Emission Control 10.4.6.1 Input Input signal Function Function if „NOT“...
- Page 62 Mounting instruction Genius Example See Example to Chapter 10.4.6 „Emission Control " Page 61, and to Chapter. 10.4.12 „First crucible rota tion card (1st GRC Card) X118 / 119".page 68 10.4.8 Pocketcontrol / Datacontrol To switch the pocket or the data set the signals are coded from the control unit. The way of coding depends on the value of the variable Pocket Set ting. Depending of the value (0, 1 or 2) the output is defined according to the following table.
- Page 63 Mounting instruction Genius 10.4.8.1 Decoder Only at Decoder for Pocket Output at Mode: IN12 IN11 IN10 IN9 ble. x = Value has no influence on result * = Multi selection possible, 10.4.8.2 Output Output signal Function Pocket set 0 = pocketselection by RS-232 or hand remote...
- Page 64 Mounting instruction Genius 10.4.8.3 Input Input Input signal Function Function if „NOT“ is set Pocket1 Pos Feedback of current pocket. Signal inverting Pocket2 Pos Depending on »Pocket Set ting« one signal per pocket binary coded Pocket6 Pos Example 1: A evaporator with 4 pockets In total 8 pockets should be selectable. Pocket 1 to 4 (real pockets) pocket 1A to 4A (virtual pocket). In ...
- Page 65 Mounting instruction Genius Pocket set7 Pocket set8 Pocket set9 Pocket set10 Pocket set11 Pocket set12 Example 3: A evaporator with 4 pockets. Without affecting the pocket between two data sets shall be switched if the CPU Input 5 = 0: The pocketselection and the selection of the data set is done by the hand remote under the condition that the CPU Input 5 = 1: The pocketselection is done by using 4 inputs. The selection of the data set is done by using 2 inputs. Settings: IIn Menu Edit Process: Data and pockets are disconnected In Menu Service I/O: Pocket Setting = 0 Output Logic Input Pocket set IN5 CPU Pocket set1 IN1 Card1 Pocket set2...
- Page 66 Mounting instruction Genius Tog. Switch1 Change from 0 to 1 => change the status of Switch1 (from 0 to 1 or from 1 to 0) Set Switch2 1 = set Switch2 to 1 Res. Switch2 1 = set Switch2 to 0 Tog.
- Page 67 Mounting instruction Genius MUX1 I. High Signal is used if »MUX1 Funk« = 1 MUX2 Funk 0 = »MUX2 IN Low« used and routed to »Logic MUX2« gegeben. 1 = »MUX2 I. High« used and routed to f »Logic MUX2« gegeben.
- Page 68 Mounting instruction Genius 10.4.12 First crucible rotation card (1st GRC Card) X118 / 119 10.4.12.1 Input Input signal Function Function if „NOT“ is set IN1 Card1 On Input 1 voltage is applied On Input 1 no voltage is applied IN2 Card1...
- Page 69 Mounting instruction Genius 10.4.13 2nd … 5th pocket rotation card X118 / 119 In general it is possible to integrate up to 5 pocket rotation cards (GRC) into the . The ENIUS function is the same like described in the chapter10.4.12 First crucible rotation card (1st GRC Card) X118 / 119 page 68.
-
Page 70: Factory Settings
Mounting instruction Genius 10.5 Factory settings 10.5.1 Codes for user level s The following four digit codes are preset for access to the different user level: User level Code OPERATOR No code necessary STANDARD 1111 SERVICE 2031 The preset codes can be changed via the RS-232 interface. -
Page 71: Genius Pro, Features And Operation
Mounting instruction Genius 10.6 , Features and Operation ENIUS evaporation controller features extended sweep functionality beyond the ENIUS standard version of the ENIUS standard can be upgraded ENIUS by exchanging the remote control into a version that grants access to the additional functions In the following all additional fea... - Page 72 Mounting instruction Genius ted with the left joystick. A wave symbol indicates the waveform that has been selected. If »??« is displayed instead of a predefined waveform then a user defined waveform is active. The sub menus Edit X Edit Y are used to define the waveform of the magnetic current deflection with a graphic display.
- Page 73 Mounting instruction Genius In this graph the circulation frequency f ) equals 16Hz and both channels operate in sine mode. Triangular or rectangular waveforms lead to a distortion of the circle according to the fol lowing pictures: 10.6.1.4.2. Spiral / Star: parameter 1 – 15 Setting the sweep parameter can vary between 1-15 for the spiral.
- Page 74 Mounting instruction Genius The example shows a circle with superimposed deflection frequency f >> f . The beam is dynamically defocused. At reduced circle amplitude the beam contracts while keeping the defocus amplitude at same level. A spiral with a superimposed high frequency deflection (f >>...
-
Page 75: Fault, Cause, Remedy
Mounting instruction Genius 10.6.1.4.5. Dwell Matrix Dwell-Matrix mode is special mode that supports different beam dwell time patterns which determine the energy distribution of the electron beam on the pocket surface und thus the depletion of the evaporation material. Every desired material can be treated with its own evaporation characteristics to achieve uniform material depletion and optimum res... -
Page 76: Emergency
Mounting instruction Genius Fault Cause Remedy Connect the mains plug Power supply cannot be Disconnected mains plug Plug switched ON Connect and lock the high- voltage connector The high-voltage connector is Check safety interlock cir not connected and locked cuit... -
Page 77: Index
Mounting instruction Genius Index Amplitude..........31, 32, 33, 38, 39, 40, 41, 46, 52, 71, 72, 73, 74 Carrera......................9, 17, 25, 50 Change limits....................... 49 Cleaning................4, 12, 15, 16, 17, 18, 50, 76 Coding.................14, 38, 47, 51, 56, 62, 63, 64, 70 Constant.................... - Page 78 Mounting instruction Genius Processparameter......................AFC Ramp............................... 45 Delete Data.............................. 44 New process............................45 Pocket control............................ 61, 62 Save data............................43, 45 Save data as............................45 Protective equipment....................15 Relais....................... 54, 67, 68 Remote control........8, 9, 21, 23, 25, 27, 29, 30, 36, 37, 49, 59, 71 Safety..........................
Need help?
Do you have a question about the genius and is the answer not in the manual?
Questions and answers